Peppermint Bark Cookies for Christmas Cookie Trays
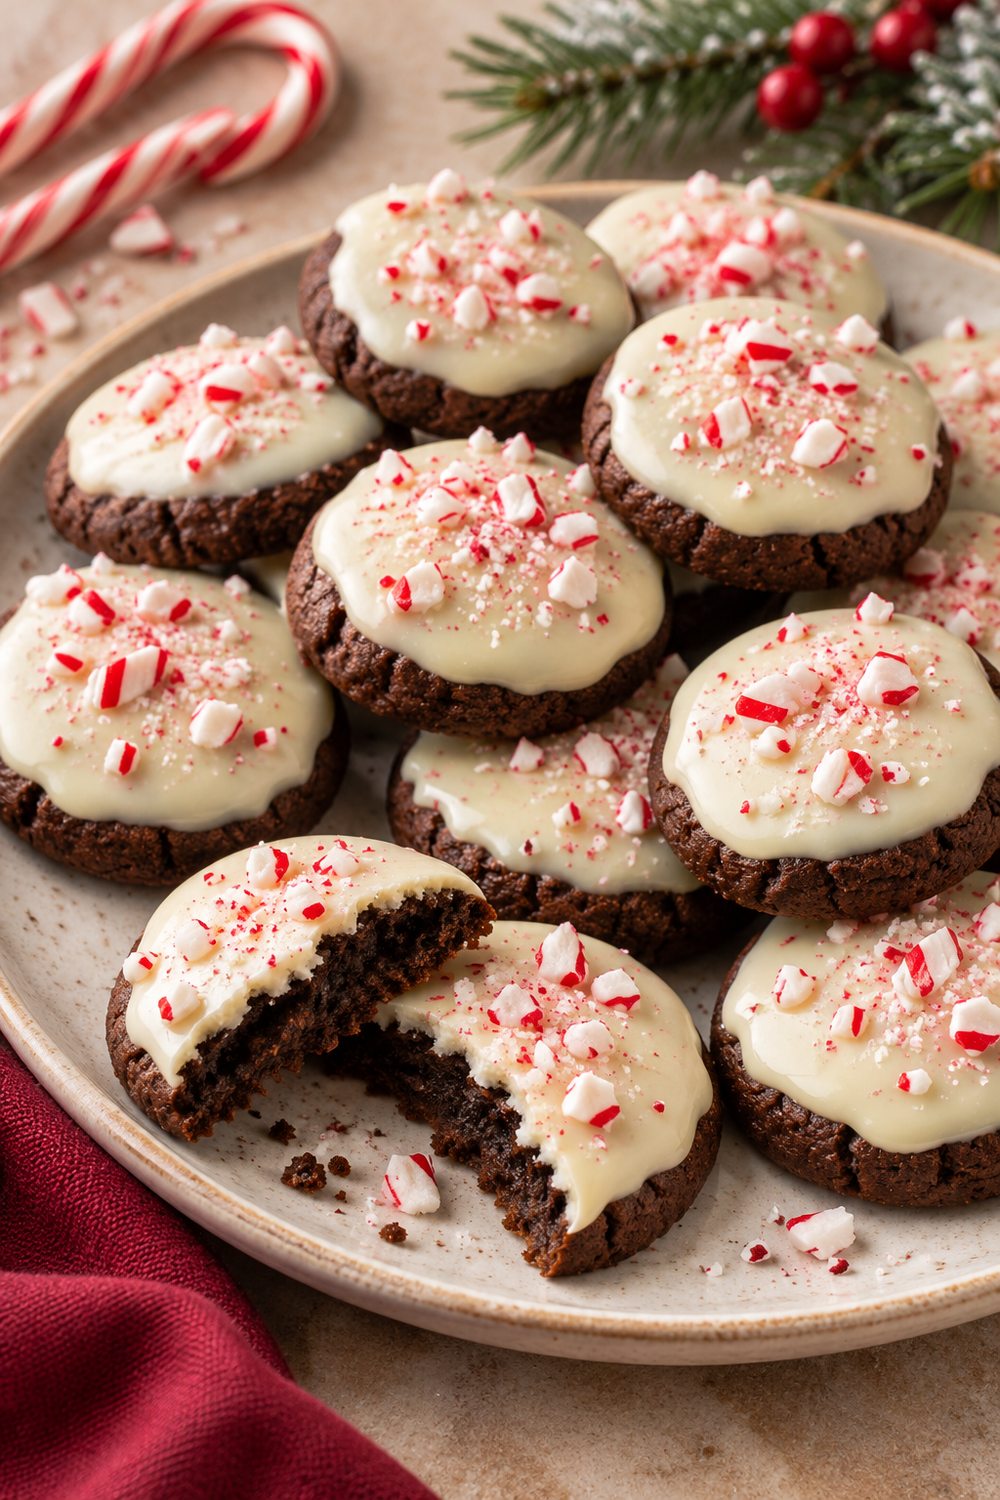
Chocolate cookies, a creamy white chocolate topping, and a scattering of crushed candy canes—these peppermint bark cookies bring three Christmas favorites into one pretty little treat.
They have the chocolate-and-mint combination you expect from peppermint bark, with a cookie underneath that makes them easy to tuck into a dessert platter or package for a neighbor. The decorating is simple: spread on melted white chocolate, sprinkle with peppermint, and let everything set.
If elaborate Christmas cookies aren’t on your December schedule, this is a manageable way to add something festive to the baking list.
This post may contain affiliate links which helps me keep this blog alive, questions? View the privacy policy.
What Makes These Cookies Worth Baking
- Simple decorating: A spoonful of chocolate and a sprinkle of candy do the work.
- A pretty Christmas finish: The white topping and red peppermint pieces stand out against the chocolate cookies.
- Easy to portion: A small cookie scoop helps each batch bake evenly.
- Flexible prep: Bake the cookies first and decorate them closer to serving.
Peppermint Bark Cookies Recipe
Yield: Approximately 24 small cookies
Prep: 20 minutes
Chill: 30 minutes
Bake: 9–11 minutes per tray
Cooling and setting: Approximately 50–60 minutes
Total: Approximately 2 hours, depending on the number of trays
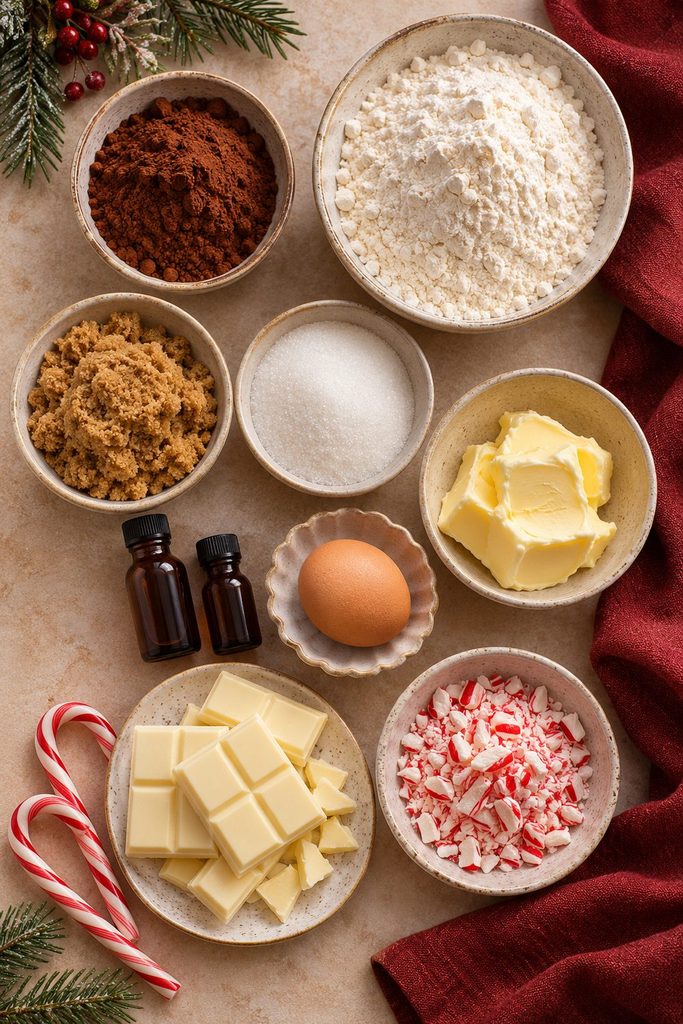
Ingredients
For the Chocolate Cookies
- ½ cup (113 g) unsalted butter, softened but not melted
- ¾ cup (150 g) packed light brown sugar
- ¼ cup (50 g) granulated sugar
- 1 large egg, at room temperature
- 1 teaspoon vanilla extract
- ¼ teaspoon peppermint extract
- 1¼ cups (150 g) all-purpose flour
- ⅓ cup (28 g) natural unsweetened cocoa powder
- ½ teaspoon baking soda
- ¼ teaspoon fine salt
For the Topping
- 8 ounces (227 g) white chocolate baking bars, finely chopped
- ⅓ cup crushed peppermint candy canes
A Few Ingredient Details
Use natural cocoa powder for this version, which is formulated with baking soda. Measure the flour by weight if possible; otherwise, spoon it into your measuring cup and level it without packing.
Choose peppermint extract rather than peppermint essential oil. Oils are much more concentrated and aren’t a direct substitute for baking extract.
For the topping, look for a white chocolate bar that lists cocoa butter among its ingredients. Candy coating can also work, but its flavor and melting directions will differ. If using coating wafers, follow the package instructions.
Crush whole candy canes inside a sturdy bag with a rolling pin, leaving small pieces rather than large shards. Keep the candy sealed until decorating so it stays dry.
Helpful Baking Tools
You can make these with everyday baking equipment. A hand mixer makes creaming the butter easier, while a small cookie scoop helps keep the portions consistent.
Have rimmed baking sheets, parchment paper, and a wire cooling rack ready before you start. A small spoon is all you need to spread the topping.
How to Make Peppermint Bark Cookies

1. Mix the Dry Ingredients
Whisk the flour, cocoa powder, baking soda, and salt together in a bowl. Break up any cocoa lumps so you don’t end up with dry pockets in the dough.
2. Cream the Butter and Sugars
In a separate bowl, beat the softened butter, brown sugar, and granulated sugar for about 2 minutes, until combined and slightly lighter. Scrape down the bowl, then beat in the egg, vanilla, and peppermint extract.
3. Finish and Chill the Dough
Add the dry ingredients and mix on low speed just until no flour streaks remain. Scrape the bottom of the bowl to incorporate any loose flour.
Cover and refrigerate for 30 minutes. The dough should be firm enough to scoop without smearing across your hands. If it still feels very soft, give it another 10–15 minutes.
4. Scoop and Bake
Heat the oven to 350°F (175°C). Line two baking sheets with parchment paper.
Portion the dough into approximately 1-tablespoon scoops, leaving about 2 inches between them. Bake one tray at a time on the middle rack for 9–11 minutes, until the edges look set and the centers have lost their wet shine.
The cookies will still feel delicate when hot. Leave them on the baking sheet for 5 minutes, then transfer to a rack. Let them cool completely before adding chocolate.
5. Melt the White Chocolate
Place the chopped white chocolate in a clean, completely dry microwave-safe bowl. Microwave at 50% power in 20-second intervals, stirring thoroughly each time.
Stop heating when a few small pieces remain and stir until they melt. White chocolate scorches easily, so avoid heating it until it looks fully liquid without stirring.
6. Decorate the Cookies
Spread approximately 1 teaspoon of melted white chocolate over each cookie, leaving a little chocolate cookie visible around the edge. Sprinkle on the crushed candy cane immediately, before the topping firms up.
Let the cookies sit on parchment until the chocolate is firm enough to handle. Set time depends on the chocolate and room temperature. If your kitchen is warm, refrigerate briefly to help the topping firm up.
Tips for Neat, Pretty Cookies
Start with one cookie. Bake a single portion first if you’re unsure how your dough will spread. A test cookie is especially useful after measuring flour by volume.
Cool the baking sheet between batches. Dough placed on a hot tray can spread before it reaches the oven.
Keep water away from the chocolate. Even a little moisture on a spoon or bowl can make melted chocolate seize.
Decorate a few at a time. Spread the topping on two or three cookies, add the peppermint, and repeat. This gives the candy something to stick to.
Save the peppermint dust for cocoa. Larger flecks look cleaner on the cookies. Shake out excess powder before sprinkling if you want a more defined red-and-white finish.
Making Them Ahead
For the freshest-looking topping, bake the cookies ahead and decorate them the day before serving. Once fully cool, keep the undecorated cookies in an airtight cookie container.
You can also refrigerate the covered dough for up to 2 days. If it becomes too firm to scoop, let it soften slightly at room temperature. Dough baked straight from the refrigerator may need an extra minute in the oven.
How to Store and Freeze Them
Store finished cookies in a cool spot in an airtight container for about 3–4 days for best texture. Separate layers with parchment and keep them away from heat, which can soften the chocolate.
The peppermint pieces may become sticky as they absorb moisture. That makes decorating closer to serving a better choice for gift boxes and cookie exchanges.
For longer storage, freeze the undecorated, fully cooled cookies in a sealed freezer container for up to 2 months. Thaw them while still covered, then decorate once they reach room temperature and their surfaces are dry.
Christmas Cookie Gift Ideas
Let the topping firm completely before packing. Arrange the cookies in a Christmas cookie tin with parchment between the layers, or place a few in food-safe cookie gift boxes.
For a mixed box, pair them with plain shortbread, gingerbread, or sugar cookies. Package strongly flavored peppermint cookies separately if you want to keep the other cookies from picking up the mint aroma.
Frequently Asked Questions
Can I Leave Out the Peppermint Extract?
Yes. The candy cane topping still adds peppermint flavor. Leaving the extract out gives you a milder chocolate cookie underneath.
Can I Use White Chocolate Chips?
Check the package for melting instructions. Some chips melt into a thicker mixture that is harder to spread. Chopped baking bars are a more straightforward choice for this topping.
Why Did My Cookies Spread So Much?
Butter that was too warm, dough that needed more chilling, or too little flour can all contribute. Chill the remaining dough and use a completely cool baking sheet for the next tray.
Can I Use Dark Chocolate on Top?
Yes. Swap the white chocolate for the same weight of dark or semisweet baking chocolate. You can add a little white chocolate drizzle afterward if you still want the contrasting finish.
Are These Good for a Cookie Exchange?
They can be, provided the topping is fully set before packing. Use a rigid container and parchment between layers to protect the decoration during transport.
Add Them to Your Christmas Baking List
These peppermint bark cookies fit right into a holiday afternoon: bake the chocolate cookies, let them cool while you tackle something else, and finish with a quick layer of white chocolate and peppermint. A small batch makes a festive addition to a cookie tray without an afternoon of piping or intricate decorating.