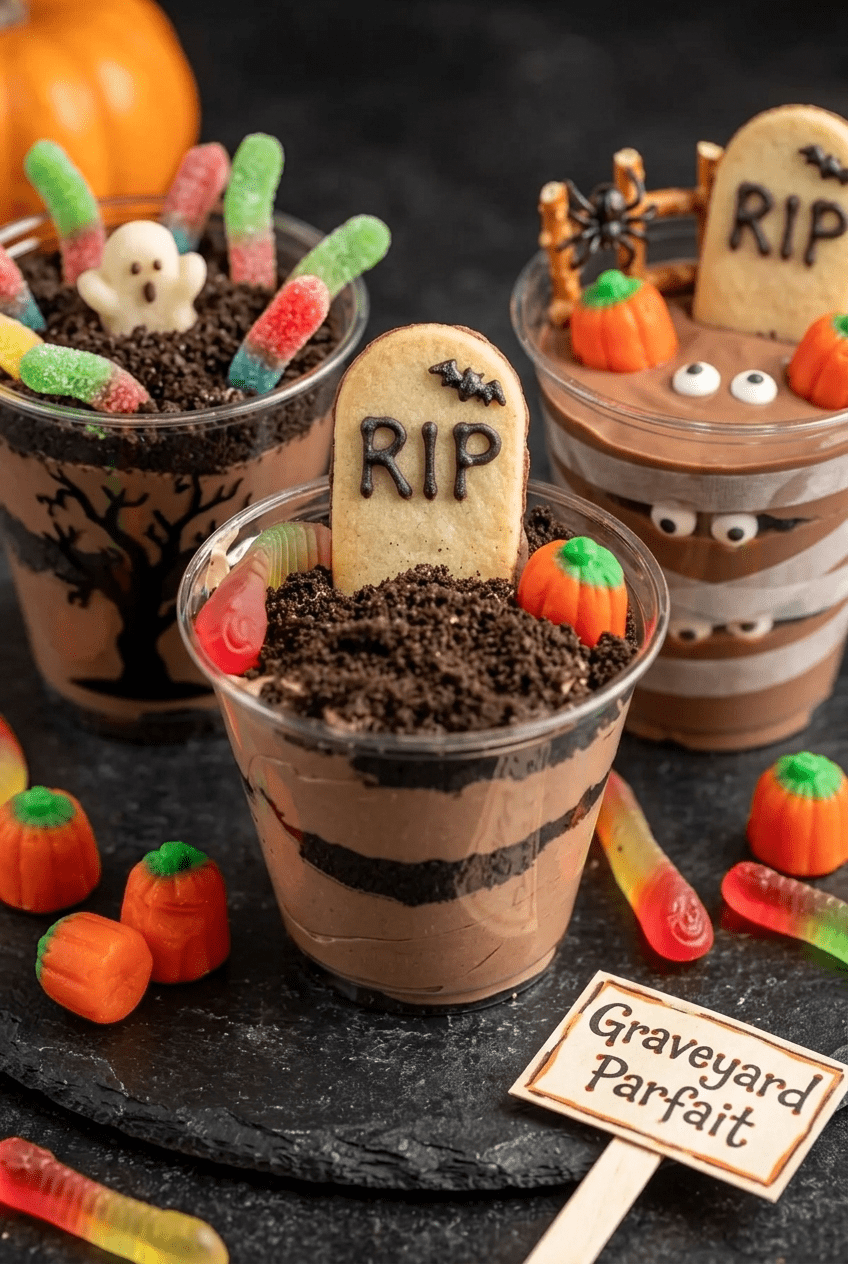
Worms in Dirt Pudding Cups
These Halloween Dirt Cups are the perfect no-bake treat for spooky season. Made with creamy chocolate pudding, crushed cookies, and festive Halloween toppings, they’re fun to make and even more fun to eat. Whether you’re hosting a party or looking for an easy dessert the kids can help decorate, these dirt cups are always a hit.
This post may contain affiliate links which helps me keep this blog alive, questions? View the privacy policy.
Why You’ll Love These
- No baking required – Perfect when you need a quick and easy Halloween dessert.
- Kid-friendly fun – Little helpers will love crushing cookies and adding spooky toppings.
- Great for parties – Individual cups make serving simple and mess-free.
- Easy to customize – Use gummy worms, candy pumpkins, candy eyes, or your favorite Halloween candies.
- Make-ahead friendly – Prepare them in advance and decorate just before serving.
- Rich and chocolatey – Layers of pudding and cookie crumbs create a dessert everyone loves.
Ingredients
Method
- In a large bowl, whisk together the chocolate pudding mix and cold milk until smooth and thickened, about 2 minutes.
- Fold the whipped topping into the pudding mixture until fully combined and creamy.
- Crush the chocolate sandwich cookies into fine crumbs using a food processor or by placing them in a sealed bag and crushing with a rolling pin.
- Add a spoonful of cookie crumbs to the bottom of each dessert cup.
- Spoon a layer of the chocolate pudding mixture over the cookie crumbs.
- Repeat the layers until the cups are filled, finishing with a layer of cookie crumbs on top.
- Decorate each dirt cup with gummy worms, candy pumpkins, candy eyes, or your favorite Halloween candies.
- Refrigerate for at least 30 minutes before serving to allow the flavors to meld.
- Serve chilled and enjoy.
How To Make These
Step 1: Prepare the Chocolate Pudding
In a large mixing bowl, prepare the chocolate pudding according to the package directions. Stir until smooth and creamy, then place it in the refrigerator to chill while you prepare the remaining ingredients.
Step 2: Crush the Chocolate Cookies
Place the chocolate sandwich cookies in a food processor and pulse until they resemble fine crumbs. If you don’t have a food processor, place the cookies in a sealed plastic bag and crush them with a rolling pin.
Step 3: Layer the Dessert Cups
Spoon a layer of chocolate cookie crumbs into the bottom of each clear dessert cup. Add a layer of chocolate pudding, then repeat the layers until the cups are nearly full.
Step 4: Add the Final Dirt Layer
Top each cup with an extra layer of cookie crumbs to create the classic dirt cup appearance. Spread the crumbs evenly for the best presentation.
Step 5: Decorate for Halloween
Add your favorite Halloween candies and decorations. Gummy worms, candy pumpkins, candy eyes, chocolate spiders, and festive sprinkles all work well for creating a spooky look.
Step 6: Chill and Serve
Place the decorated dirt cups in the refrigerator for at least 30 minutes before serving. Serve chilled and enjoy this fun Halloween treat.
The Bottom Line
These Halloween Dirt Cups are an easy, crowd-pleasing dessert that brings plenty of spooky fun to any celebration. Whether you’re planning a Halloween party, making treats with the kids, or simply craving a no-bake chocolate dessert, this recipe is sure to be a hit.