10 Back to School Cake Recipes Kids Will Beg You to Make Again
Quick Answer: The best back to school cakes range from a five-minute chalkboard-style sheet cake to a fully carved school bus cake, with options for every skill level and dietary need. This roundup includes 10 complete recipes — chocolate, vanilla, apple-spiced, funfetti, gluten-free, and dairy-free — each with real ingredients and step-by-step instructions.
That first-day-of-school photo deserves a cake behind it, even if you’re not the kind of mom who owns a turntable and six piping tips. Whether you’re celebrating a first day, marking the last day, or sending something sweet to a classroom party, there’s a version here that fits your afternoon.
These ten cakes cover the full range — no-bake and from-scratch, five ingredients and fifteen, gluten-free and dairy-free — so you can pick the one that matches your time, your skill level, and your kid’s excitement level (which, let’s be honest, is usually a 10 out of 10). If cake isn’t quite what you’re after, our back to school desserts collection has even more options to browse.
This post may contain affiliate links which helps me keep this blog alive, questions? View the privacy policy.
1. Chocolate Chalkboard Drip Cake
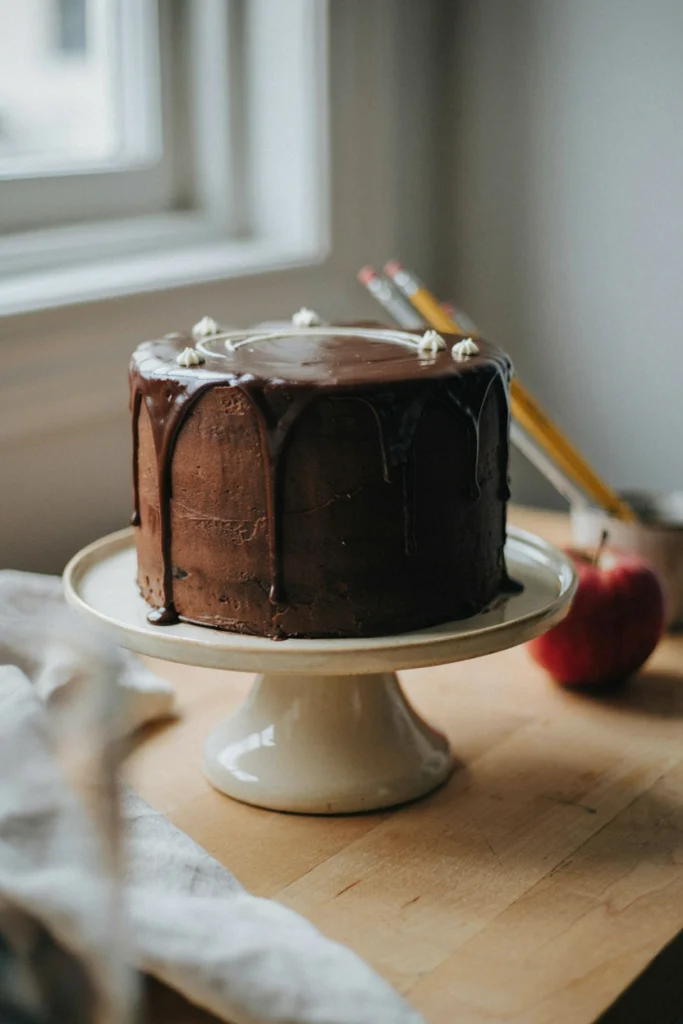
This is the cake that looks like it came from a bakery and tastes like the richest brownie you’ve ever eaten. The black ganache drip sets up glossy and smooth, and the hand-piped “chalk” lettering on top is the whole reason this one gets saved to every back-to-school board on Pinterest.
Prep Time: 30 min | Cook Time: 30 min | Total Time: 2 hr (includes cooling and setting) | Servings: 12 | Difficulty: Medium
Ingredients
- 1 3/4 cups all-purpose flour
- 3/4 cup unsweetened cocoa powder
- 1 1/2 tsp baking soda
- 1/2 tsp baking powder
- 1 tsp salt
- 2 cups granulated sugar
- 2 large eggs
- 1 cup buttermilk
- 1/2 cup vegetable oil
- 2 tsp vanilla extract
- 1 cup hot coffee (or hot water)
- 3 cups vanilla buttercream (for crumb coat and base layer)
- 1/2 cup heavy cream
- 4 oz dark chocolate, finely chopped
- Black gel food coloring
- White gel food coloring or white buttercream, for lettering
Instructions
- Preheat oven to 350°F. Grease and line two 8-inch round cake pans.
- Whisk together flour, cocoa powder, baking soda, baking powder, and salt in a large bowl.
- In a separate bowl, beat sugar, eggs, buttermilk, oil, and vanilla until combined. Add to the dry ingredients and mix until smooth.
- Stir in the hot coffee last — the batter will be thin, which is correct. Divide evenly between the two pans.
- Bake 28–30 minutes, until a toothpick inserted in the center comes out clean. Cool in pans 10 minutes, then turn out onto a wire rack to cool completely.
- Stack and fill the layers with vanilla buttercream. Apply a thin crumb coat and chill for 20 minutes.
- Frost the cake smooth with a thicker layer of buttercream and chill again for 15 minutes.
- Heat heavy cream until steaming (not boiling), pour over chopped dark chocolate, let sit 2 minutes, then stir until smooth. Tint black with gel food coloring and let cool to just above room temperature.
- Pour the black ganache over the chilled cake, letting it drip naturally down the sides. Chill 10 minutes to set.
- Pipe or write the message across the top in white buttercream using a small round piping tip.
Baker’s Tip
If your ganache drips run too fast down the sides, it’s too warm — let it cool a few more minutes before pouring. It should coat the back of a spoon before it’s ready.
Why You’ll Love It
It photographs like a professional bakery cake but is entirely doable with a stand mixer, a piping bag, and one afternoon.
2. Vanilla School Bus Sheet Cake
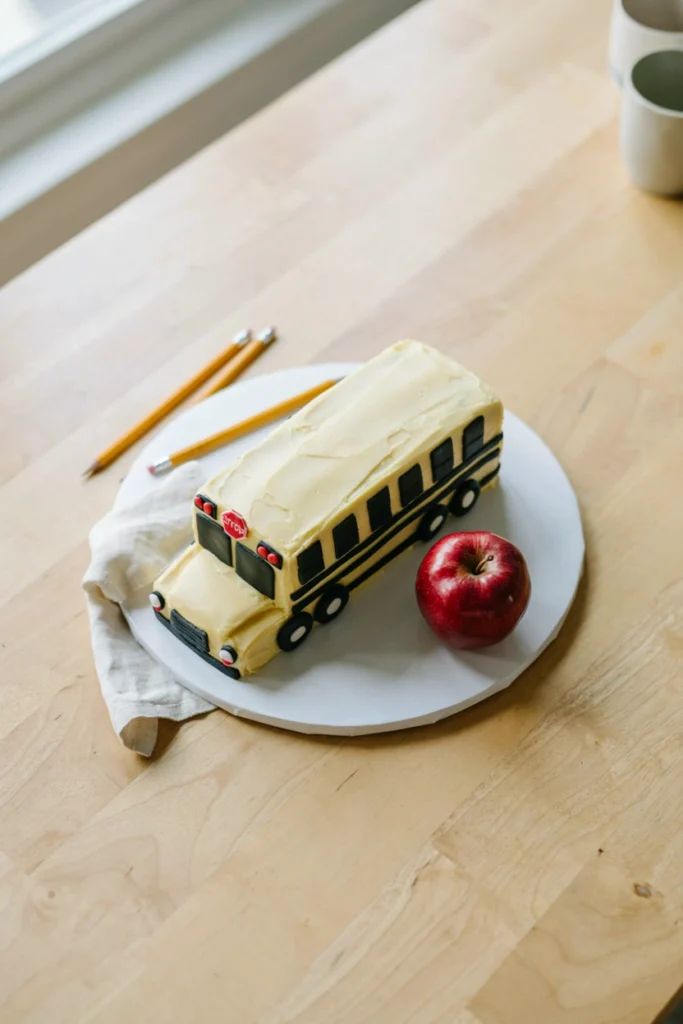
Kids lose their minds over this one. It’s a full sheet cake carved down into a simple bus silhouette, so the shaping is more forgiving than it looks — no advanced skills, just a sharp knife and confidence.
Prep Time: 40 min | Cook Time: 35 min | Total Time: 2 hr 30 min | Servings: 16 | Difficulty: Medium
Ingredients
- 2 1/2 cups all-purpose flour
- 2 1/2 tsp baking powder
- 1/2 tsp salt
- 1 cup unsalted butter, softened
- 2 cups granulated sugar
- 4 large eggs
- 1 tbsp vanilla extract
- 1 cup whole milk
- 4 cups vanilla buttercream
- Yellow gel food coloring
- Black and white fondant, about 8 oz total
- Red fondant, small amount, for the stop sign detail
Instructions
- Preheat oven to 350°F. Grease and flour a 9×13-inch baking pan.
- Whisk flour, baking powder, and salt together in a bowl.
- Cream butter and sugar until light and fluffy, about 3 minutes. Add eggs one at a time, then vanilla.
- Alternate adding the dry ingredients and milk in three additions, mixing just until combined.
- Pour into the prepared pan and bake 33–35 minutes, until a toothpick comes out clean. Cool completely in the pan.
- Once cool, use a sharp knife to trim the cake into a rounded rectangular bus shape, squaring off the front slightly.
- Tint the buttercream yellow and frost the entire cake in a smooth, even layer.
- Roll out black fondant and cut into rectangles for windows and circles for wheels; press gently onto the frosted cake.
- Cut a small red fondant octagon for a stop sign detail on the side, and add any white fondant lettering as desired.
Storage & Freezing
Store loosely covered at room temperature up to 2 days, or refrigerate up to 5 days — bring to room temperature before serving so the buttercream softens back up.
Best For
A first-day-of-school family breakfast or a big classroom celebration where kids will want to see the whole design before it’s cut.
3. No-Bake Crayon Box Icebox Cake
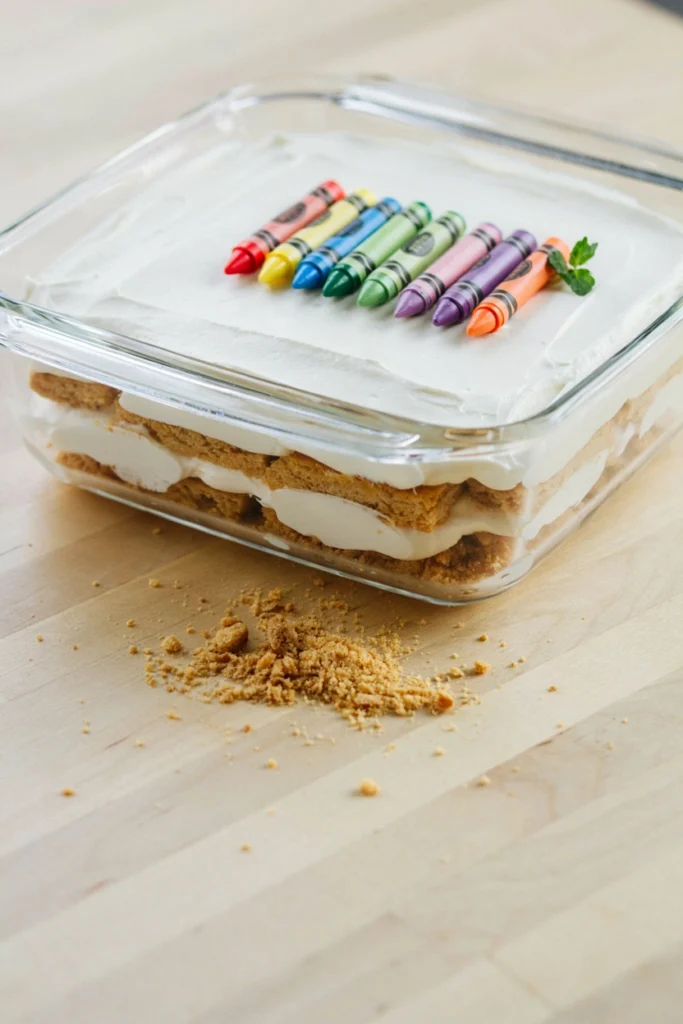
No oven, no stress. This icebox cake builds itself in layers while you do literally anything else, and the payoff is a cool, creamy dessert that slices clean after a night in the fridge — with a crayon box on top that kids will pick at before dinner is even served.
Prep Time: 25 min | Cook Time: None | Total Time: 8 hr (mostly chilling) | Servings: 12 | Difficulty: Easy
Ingredients
- 3 cups heavy cream, cold
- 1/2 cup powdered sugar
- 2 tsp vanilla extract
- 2 boxes (14.4 oz each) graham crackers
- 8 oz cream cheese, softened
- 1/4 cup granulated sugar
- Fondant in 6 assorted colors, for the crayon toppers (store-bought is fine)
Instructions
- Beat the cold heavy cream, powdered sugar, and vanilla together until stiff peaks form. Set aside 1 cup for the top layer.
- In a separate bowl, beat the cream cheese and granulated sugar until smooth, then fold in the remaining whipped cream.
- Spread a thin layer of the cream mixture on the bottom of a 9×13-inch dish, then arrange a single layer of graham crackers over it, breaking pieces to fit.
- Repeat layering cream mixture and graham crackers 4 more times, ending with a graham cracker layer.
- Spread the reserved 1 cup of whipped cream evenly over the top.
- Cover and refrigerate at least 8 hours, or overnight, until the crackers have softened into a cake-like texture.
- Roll small pieces of fondant into crayon shapes with pointed tips and arrange upright in rows across the top before serving.
Make-Ahead Tip
This cake actually needs the overnight rest to reach the right texture, so it’s the one recipe on this list you genuinely have to make the day before. If you’d rather skip the wait entirely, our back to school cake pops are ready the same day.
Why You’ll Love It
Zero oven time, zero cake-leveling anxiety, and a soft, creamy bite that tastes like a lighter tiramisu.
4. Spiced Apple Cinnamon Mini Bundt Cakes
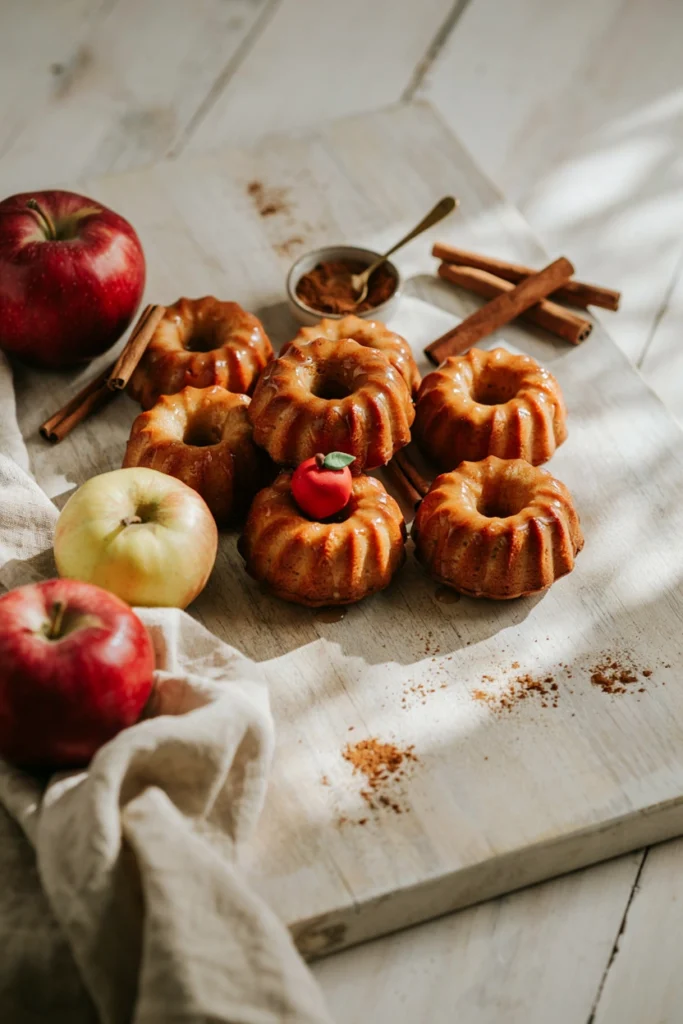
These are built for an “apple for the teacher” moment — warm cinnamon and real grated apple baked into a tender, individually portioned bundt that needs nothing more than a simple glaze to finish.
Prep Time: 20 min | Cook Time: 22 min | Total Time: 55 min | Servings: 6 mini bundts | Difficulty: Easy
Ingredients
- 1 3/4 cups all-purpose flour
- 1 1/2 tsp baking powder
- 1 tsp ground cinnamon
- 1/4 tsp ground nutmeg
- 1/2 tsp salt
- 1/2 cup unsalted butter, melted
- 3/4 cup packed brown sugar
- 2 large eggs
- 1/2 cup buttermilk
- 1 tsp vanilla extract
- 1 cup peeled, finely grated apple (about 1 medium apple)
- 1 cup powdered sugar
- 2–3 tbsp milk, for the glaze
- 1/4 tsp ground cinnamon, for the glaze
Instructions
- Preheat oven to 350°F. Grease a 6-cavity mini bundt pan thoroughly, including the center columns.
- Whisk flour, baking powder, cinnamon, nutmeg, and salt together in a bowl.
- In another bowl, whisk melted butter and brown sugar until smooth. Whisk in eggs, buttermilk, and vanilla.
- Fold the wet mixture into the dry ingredients until just combined, then fold in the grated apple.
- Divide batter evenly among the bundt cavities, filling each about 3/4 full.
- Bake 20–22 minutes, until a toothpick comes out clean and the tops spring back when touched.
- Cool in the pan 10 minutes, then invert onto a wire rack to cool completely.
- Whisk powdered sugar, milk, and cinnamon into a smooth glaze and drizzle over the cooled bundts.
Substitutions
Swap the buttermilk for 1/2 cup milk plus 1/2 tsp lemon juice, stirred and rested 5 minutes, if that’s what’s already in your fridge.
Best For
A teacher gift or a grab-and-go option when you want individual servings instead of slicing a full cake.
5. Funfetti Pencil Case Layer Cake
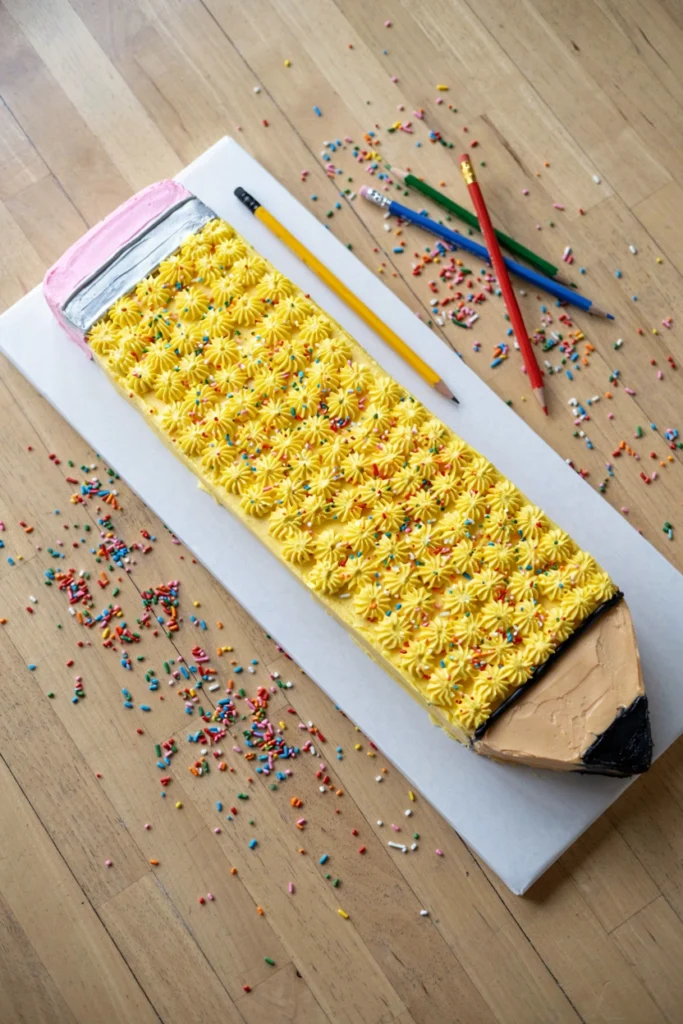
Cut into this one and the confetti crumb does all the talking — every slice is speckled with color, and the striped exterior turns a classic layer cake into something that looks like it’s actually zipped shut.
Prep Time: 45 min | Cook Time: 25 min | Total Time: 2 hr 30 min | Servings: 14 | Difficulty: Advanced
Ingredients
- 3 cups cake flour
- 1 tbsp baking powder
- 1/2 tsp salt
- 1 cup unsalted butter, softened
- 1 3/4 cups granulated sugar
- 4 large egg whites plus 1 whole egg
- 1 cup buttermilk
- 1 tbsp vanilla extract
- 2/3 cup rainbow sprinkles (jimmies, not nonpareils)
- 5 cups vanilla buttercream
- Assorted gel food colorings for the striped design
- Small amount of fondant, for pencil toppers
Instructions
- Preheat oven to 350°F. Grease and line three 8-inch round cake pans.
- Whisk cake flour, baking powder, and salt together.
- Cream butter and sugar until pale and fluffy, about 4 minutes. Add egg whites and whole egg one at a time, then vanilla.
- Alternate adding dry ingredients and buttermilk in three additions, mixing just until smooth. Fold in sprinkles by hand to keep the colors from bleeding.
- Divide batter evenly among the three pans and bake 22–25 minutes, until a toothpick comes out clean.
- Cool in pans 10 minutes, then turn out onto a wire rack to cool completely.
- Stack and fill layers with vanilla buttercream, then apply a crumb coat and chill 20 minutes.
- Divide remaining buttercream into 4–5 bowls and tint in bright, varied colors.
- Using a piping bag fitted with a flat tip, pipe vertical stripes of alternating colors around the sides of the cake, then smooth gently with a bench scraper for a clean striped finish.
- Arrange fondant pencil shapes standing upright along the top edge.
Baker’s Tip
Chill the crumb-coated cake fully before piping stripes — warm buttercream underneath will make the stripes blur into each other as you smooth them. A stainless-steel bench scraper makes the final smoothing pass much easier to keep straight.
Flavor Variation
Swap in almond extract for half the vanilla for a bakery-style funfetti flavor that’s slightly more complex.
6. Gluten-Free Lemon Lunchbox Snack Cake
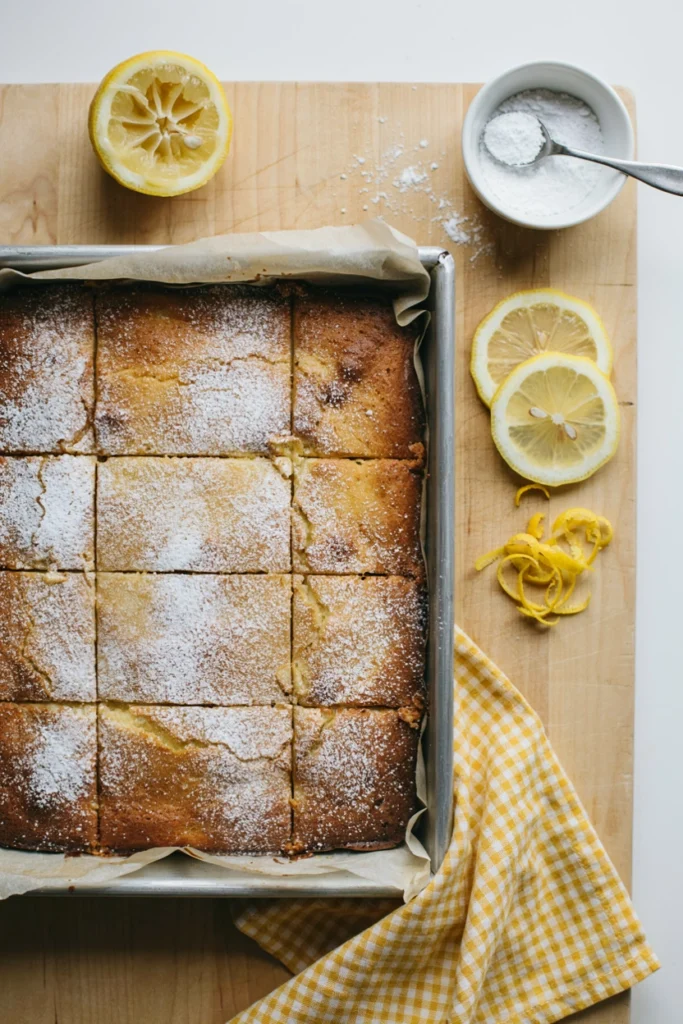
Bright, light, and genuinely simple — this one-bowl lemon cake bakes in a single square pan and skips the layering and frosting altogether, which makes it the easiest gluten-free option on this list without sacrificing flavor.
Prep Time: 15 min | Cook Time: 32 min | Total Time: 55 min | Servings: 9 | Difficulty: Easy
Ingredients
- 1 3/4 cups gluten-free 1:1 baking flour blend
- 1 1/2 tsp baking powder
- 1/4 tsp salt
- 1/2 cup unsalted butter, melted
- 3/4 cup granulated sugar
- 2 large eggs
- 1/3 cup plain Greek yogurt
- Zest of 2 lemons
- 1/4 cup fresh lemon juice
- 1/2 cup powdered sugar, for dusting
Instructions
- Preheat oven to 350°F. Grease an 8×8-inch baking dish.
- Whisk the gluten-free flour, baking powder, and salt together in a bowl.
- In another bowl, whisk melted butter and sugar, then whisk in eggs, yogurt, lemon zest, and lemon juice.
- Fold the wet ingredients into the dry ingredients just until no streaks of flour remain — gluten-free batter can turn gummy if overmixed.
- Pour into the prepared dish and smooth the top.
- Bake 30–32 minutes, until the top is golden and a toothpick comes out clean.
- Cool completely in the pan, then dust generously with powdered sugar before cutting into squares.
Good to Know
Check that your gluten-free flour blend already contains xanthan gum — if it doesn’t, add 1/2 tsp to the dry ingredients or the cake may crumble when sliced.
Best For
Sending into a classroom where you’re not sure what other treats will be around — it travels well cut into individual squares. Browse more options in our back to school treats collection if you need a few backups.
7. Banana ABC Alphabet Sheet Cake
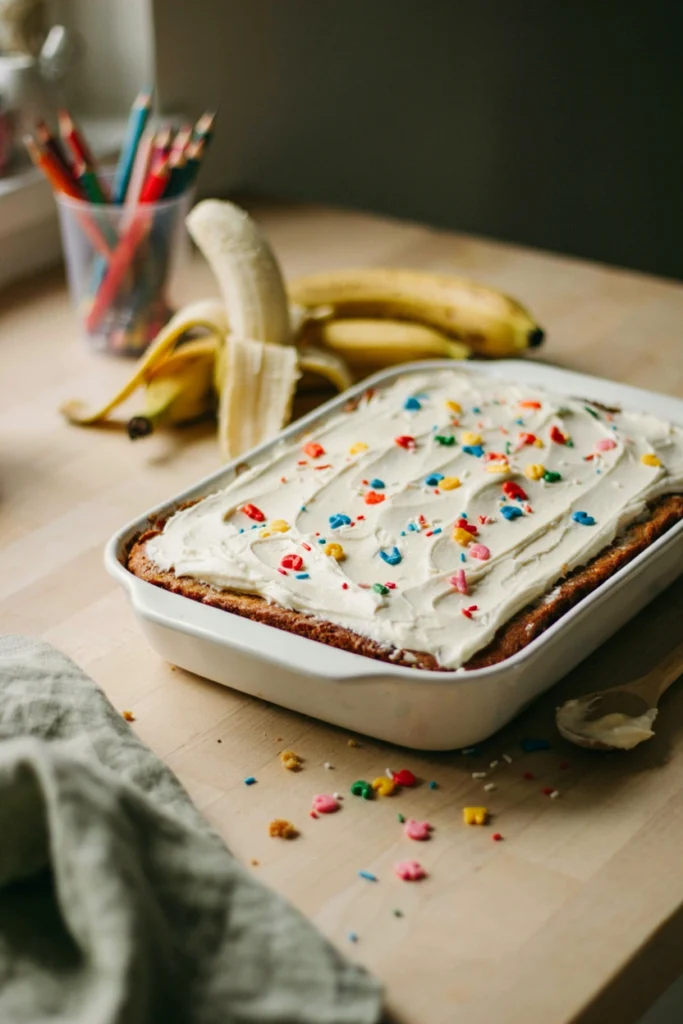
Overripe bananas turn into the moistest cake on this list, no mixer required beyond a fork and a whisk. Cream cheese frosting and a scattering of alphabet letters make it feel like a celebration without a single fussy technique.
Prep Time: 15 min | Cook Time: 30 min | Total Time: 1 hr 15 min | Servings: 15 | Difficulty: Easy
Ingredients
- 2 cups all-purpose flour
- 1 tsp baking soda
- 1/2 tsp salt
- 1 tsp ground cinnamon
- 1/2 cup unsalted butter, melted
- 3/4 cup packed brown sugar
- 2 large eggs
- 1 1/2 cups mashed ripe banana (about 3 large bananas)
- 1/2 cup sour cream
- 1 tsp vanilla extract
- 8 oz cream cheese, softened
- 1/2 cup unsalted butter, softened, for frosting
- 3 cups powdered sugar
- Alphabet-shaped sprinkles or small fondant letters
Instructions
- Preheat oven to 350°F. Grease a 9×13-inch rectangular cake pan.
- Whisk flour, baking soda, salt, and cinnamon together in a bowl.
- In another bowl, whisk melted butter and brown sugar, then whisk in eggs, mashed banana, sour cream, and vanilla.
- Fold the wet ingredients into the dry ingredients until just combined.
- Pour into the prepared pan and bake 28–30 minutes, until a toothpick comes out clean.
- Cool completely in the pan before frosting.
- Beat cream cheese and butter together until smooth, then gradually beat in powdered sugar until light and spreadable.
- Spread frosting over the cooled cake and arrange alphabet letters or sprinkles across the top.
Storage & Freezing
Because of the cream cheese frosting, this one needs to live in the refrigerator — it keeps well covered for up to 5 days.
Why You’ll Love It
It uses up bananas that are already too far gone for anything else, and the crumb stays soft for days.
8. Peanut Butter Backpack Cupcake Cake
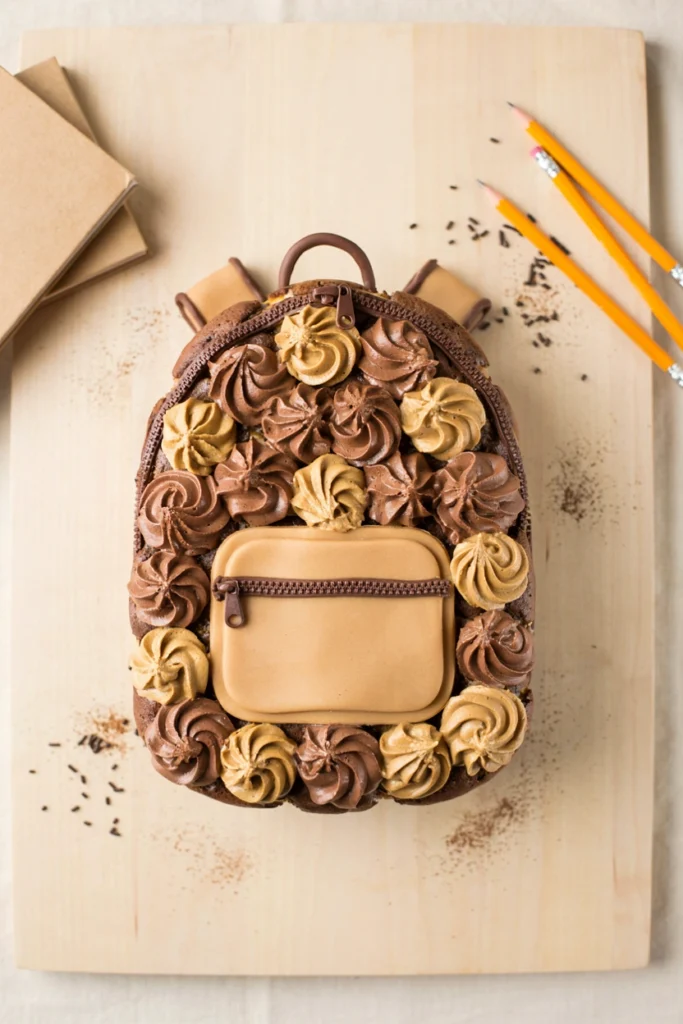
This is a “pull-apart” cake built from arranged cupcakes instead of a single sheet, which means no carving and a much shorter bake time — but the deep peanut butter and chocolate flavor still makes it feel like a showstopper. If you’d rather keep the cupcakes separate, our back to school cupcakes roundup has more individual designs to choose from.
Prep Time: 35 min | Cook Time: 20 min | Total Time: 1 hr 30 min | Servings: 24 cupcakes | Difficulty: Advanced
Ingredients
- 2 cups all-purpose flour
- 3/4 cup unsweetened cocoa powder
- 1 1/2 tsp baking soda
- 1/2 tsp salt
- 1 1/2 cups granulated sugar
- 2 large eggs
- 1 cup buttermilk
- 1/2 cup vegetable oil
- 1 tsp vanilla extract
- 1 cup hot water
- 1 cup creamy peanut butter
- 1/2 cup unsalted butter, softened
- 3 cups powdered sugar
- 3–4 tbsp heavy cream
- Chocolate melting wafers, for zipper detail
- Small amount of tan or light brown fondant, for the front pocket
Instructions
- Preheat oven to 350°F. Line two muffin tins with 24 reusable silicone cupcake baking cups or paper liners.
- Whisk flour, cocoa powder, baking soda, and salt together.
- In another bowl, whisk sugar, eggs, buttermilk, oil, and vanilla, then whisk into the dry ingredients until smooth. Stir in hot water last — batter will be thin.
- Divide batter among the liners, filling each about 2/3 full.
- Bake 18–20 minutes, until a toothpick comes out clean. Cool completely.
- Beat peanut butter and softened butter together until smooth, then gradually beat in powdered sugar and heavy cream until fluffy and pipeable.
- Arrange the cupcakes on a large board in a backpack outline (a wide rectangle with two smaller top corners for straps), leaving small gaps between them.
- Frost across the entire arrangement in one connected swirl using an offset spatula, blending the tops together so it reads as one shape rather than individual cupcakes.
- Melt chocolate wafers and pipe zipper lines down the center and around the edges; press a piece of tan fondant on as the front pocket detail.
Good to Know
Check with the classroom or event host about nut allergies before bringing this one — peanut butter can be a hard no in many schools, so this is best kept for home celebrations.
Baker’s Tip
Frosting cupcakes into one connected shape works much better when the cupcakes are fully cooled and domed slightly — trim any wildly uneven tops flat first so the surface reads smooth. A good offset icing spatula makes that blending pass go much faster.
9. Vanilla Bean Notebook Paper Cake
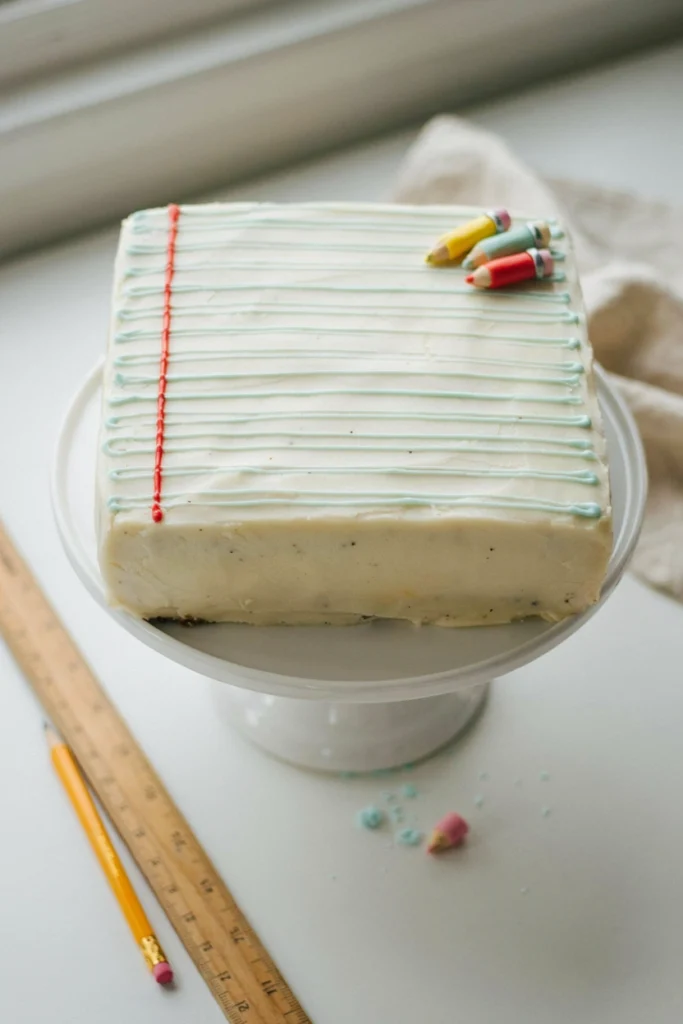
This is the quiet showstopper of the group — a fine-crumbed vanilla bean cake under a crisp fondant top that’s been turned into a piece of notebook paper, right down to the red margin line. It reads as effortless but it’s the most detail-oriented recipe here.
Prep Time: 40 min | Cook Time: 28 min | Total Time: 2 hr 45 min | Servings: 12 | Difficulty: Advanced
Ingredients
- 2 1/4 cups cake flour
- 2 1/2 tsp baking powder
- 1/2 tsp salt
- 3/4 cup unsalted butter, softened
- 1 1/2 cups granulated sugar
- 4 large egg whites
- 1 cup whole milk
- Seeds scraped from 1 vanilla bean (or 2 tsp vanilla bean paste)
- 3 cups vanilla buttercream
- 1 lb white fondant, rolled to 1/8-inch thickness
- Blue and red gel food coloring, for piping the lines
Instructions
- Preheat oven to 350°F. Grease and line an 8-inch square baking pan.
- Whisk cake flour, baking powder, and salt together.
- Cream butter and sugar until pale and fluffy, about 3 minutes. Add egg whites gradually, beating well after each addition.
- Alternate adding dry ingredients and milk in three additions, mixing just until smooth. Stir in vanilla bean seeds.
- Pour into the prepared pan and bake 26–28 minutes, until a toothpick comes out clean. Cool completely in the pan.
- Level the cooled cake, then cover the top and sides in a smooth, thin layer of vanilla buttercream and chill 20 minutes.
- Drape the rolled fondant over the top of the cake, smoothing down the sides with your hands and trimming excess at the base.
- Tint a small amount of buttercream or royal icing thin with blue food coloring and pipe evenly spaced horizontal lines across the top using a fine round tip.
- Pipe one vertical red line down the left side to complete the margin, then pipe a message across the “lines” in a darker color.
Baker’s Tip
Use a ruler pressed lightly into the fondant to score straight guide lines before piping — freehand lines on a large surface almost always drift.
Best For
A special-occasion first day of kindergarten or a milestone school year where you want the cake itself to be the centerpiece of the photos.
10. Dairy-Free Chocolate Chip Cookie Skillet Cake
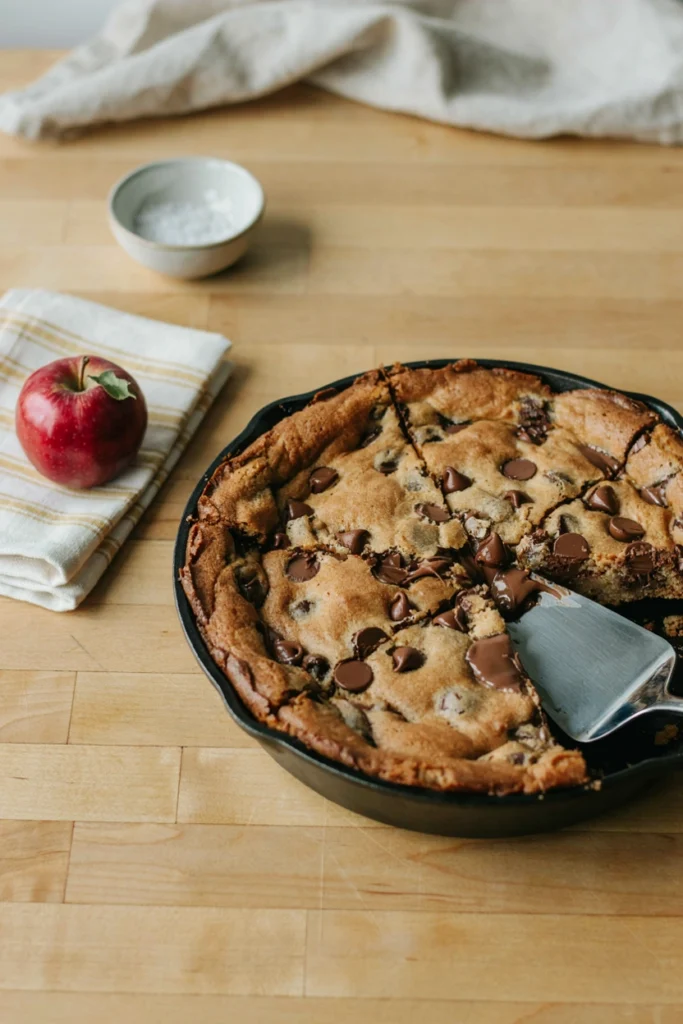
Half cookie, half cake, entirely dairy-free — this one bakes in a single skillet and comes out with crisp edges and a soft, almost molten center. It’s the fastest cleanup on this list and the one kids will ask for by name all year, not just in September. For more of this style, browse our skillet cookie recipes.
Prep Time: 10 min | Cook Time: 22 min | Total Time: 40 min | Servings: 10 | Difficulty: Easy
Ingredients
- 1/2 cup dairy-free butter (such as a plant-based stick butter), softened
- 1/2 cup packed brown sugar
- 1/4 cup granulated sugar
- 1 large egg
- 1 tsp vanilla extract
- 1 1/2 cups all-purpose flour
- 1/2 tsp baking soda
- 1/2 tsp salt
- 1 cup dairy-free chocolate chips
Instructions
- Preheat oven to 350°F. Lightly grease a 9-inch cast iron skillet.
- Beat dairy-free butter, brown sugar, and granulated sugar together until creamy, about 2 minutes.
- Beat in the egg and vanilla until combined.
- Whisk flour, baking soda, and salt together in a separate bowl, then mix into the wet ingredients until just combined. Fold in the chocolate chips.
- Press the dough evenly into the skillet.
- Bake 20–22 minutes, until the edges are golden and set but the center still looks slightly underdone.
- Let cool in the skillet 10 minutes before slicing into wedges — it will continue to set as it cools.
Substitutions
This recipe is naturally easy to make egg-free too — replace the egg with 1 tbsp ground flaxseed mixed with 3 tbsp water, rested 5 minutes before adding.
Why You’ll Love It
One bowl, one pan, twenty minutes — and it still feels like a proper celebration dessert instead of a shortcut.
Which Cake Should You Make?
If you’re weighing time against occasion, this breaks down the fastest options against the most impressive ones.
| Recipe | Best For | Difficulty | Total Time |
|---|---|---|---|
| Chocolate Chalkboard Drip Cake | Photo-ready family celebration | Medium | 2 hr |
| Vanilla School Bus Sheet Cake | Classroom or big group party | Medium | 2 hr 30 min |
| No-Bake Crayon Box Icebox Cake | Hot days, zero oven time | Easy | 8 hr (mostly chilling) |
| Spiced Apple Cinnamon Mini Bundts | Teacher gifts, individual portions | Easy | 55 min |
| Funfetti Pencil Case Layer Cake | A milestone birthday-style celebration | Advanced | 2 hr 30 min |
| Gluten-Free Lemon Lunchbox Cake | Sending into a classroom safely | Easy | 55 min |
| Banana ABC Alphabet Sheet Cake | Using up ripe bananas, low effort | Easy | 1 hr 15 min |
| Peanut Butter Backpack Cupcake Cake | Home celebrations (not nut-free settings) | Advanced | 1 hr 30 min |
| Vanilla Bean Notebook Paper Cake | A milestone first day (kindergarten, etc.) | Advanced | 2 hr 45 min |
| Dairy-Free Chocolate Chip Cookie Cake | Fastest, most dietary-friendly option | Easy | 40 min |
Tools and Pans You’ll Need
None of these recipes require a professional setup, but the right pan or tool genuinely makes the difference between a stressful hour and a smooth one.
- 8-inch round cake pans, set of two: What you need for the Chalkboard Drip Cake (and a third round pan for the Funfetti Pencil Case Cake).
- 9×13-inch rectangular cake pan: The workhorse pan for the School Bus Cake and Banana ABC Sheet Cake.
- 6-cavity mini bundt cake pan: Needed specifically for the Spiced Apple Cinnamon Mini Bundts, and useful well beyond back-to-school season.
- 9-inch cast-iron skillet: Built for the Chocolate Chip Cookie Skillet Cake, and doubles as a great everyday baking pan.
- Reusable silicone muffin/cupcake baking cups: Makes the 24-cupcake Backpack Cake far less wasteful than disposable liners.
- Offset icing spatula set: The single most useful tool for smooth buttercream and clean cupcake-cake blending.
- Stainless-steel cake bench scraper: Makes striped and smooth finishes, like the Pencil Case Cake, far easier to get straight.
- Large piping-tip set with disposable bags: Covers the chalkboard lettering, funfetti stripes, and notebook paper lines across the roundup.
- Gel food-coloring set (black, yellow, red, blue): Every tinted element in this roundup — from the black ganache to the yellow bus and blue notebook lines — comes from this same set.
- White, black, and assorted-color ready-to-use fondant multipack: Covers the bus windows and wheels, crayon toppers, pencil case toppers, and notebook paper cover.
Common Mistakes to Avoid
- Frosting a warm cake: Buttercream will slide right off a cake that hasn’t fully cooled — give layers a full hour minimum, longer for dense cakes like the banana sheet cake.
- Skipping the crumb coat on darker cakes: Chocolate crumbs bleeding into white or pastel frosting is the most common reason a home cake looks messy — always chill a thin crumb coat first.
- Not checking allergy policies before a classroom cake: Peanut butter and tree nut ingredients are common no-gos — lean toward the gluten-free lemon cake or dairy-free cookie cake for shared settings.
- Overmixing gluten-free batter: It turns gummy fast — stop as soon as the flour streaks disappear.
Frequently Asked Questions
What is the easiest back to school cake to make?
The Dairy-Free Chocolate Chip Cookie Skillet Cake and the Gluten-Free Lemon Lunchbox Cake are the fastest and most forgiving, both ready in under an hour with a single mixing bowl.
Can I make a back to school cake ahead of time?
Most of these cakes can be baked 1–2 days ahead and frosted the day of, except the Crayon Box Icebox Cake, which actually needs an overnight rest to set properly.
What’s a good back to school cake for a classroom party?
The Vanilla School Bus Sheet Cake and Gluten-Free Lemon Lunchbox Cake both travel and slice well for a group, and the lemon version is easier to make allergy-friendly.
How do I make a chalkboard effect on a cake without special tools?
Black-tinted ganache or buttercream smoothed with an offset spatula creates the base, and a simple round piping tip filled with white buttercream handles the “chalk” lettering.
Are any of these recipes nut-free?
All of them are nut-free except the Peanut Butter Backpack Cupcake Cake — for shared or classroom settings, choose any of the other nine.