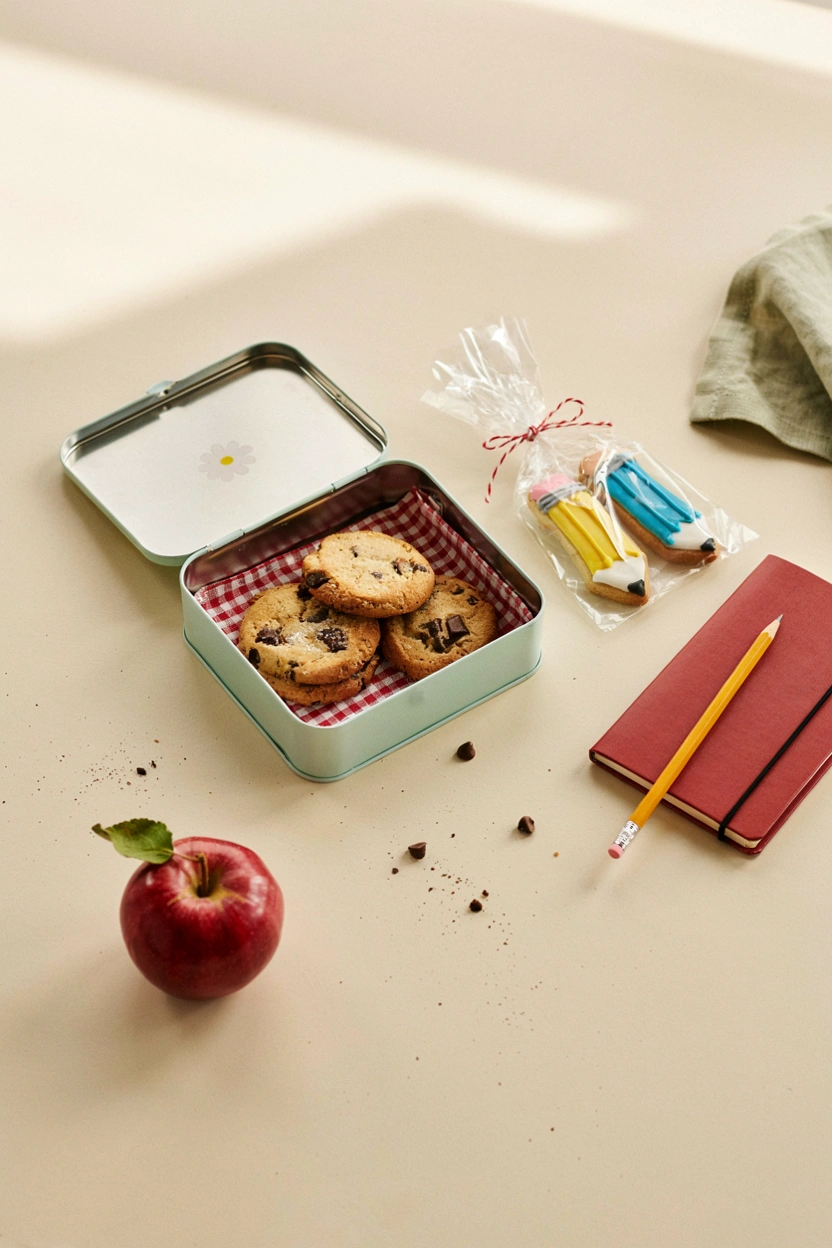
10 Back to School Cookies for Lunchboxes, First Days, and Teacher Gifts
Quick Answer: The best back to school cookies mix everyday lunchbox staples like chocolate chip and oatmeal with a couple of celebratory options for the first day and teacher gifts. This roundup has 10 complete recipes, from a 25-minute nut-free chocolate chip cookie to decorated sugar cookie pencils, so you have something for every morning of the first month.
That first week back is a lot — new backpacks, new teachers, new schedules — and somewhere in the chaos, someone’s got to keep the lunchboxes stocked. A good cookie recipe shouldn’t be one more thing to stress over.
This collection covers the full range: fast, no-fuss cookies you can bake on a Tuesday night with your eyes half closed, a couple of cute options for the first-day-of-school photo, and a few that are sturdy enough to freeze so you’re never starting from scratch on a school morning. For even more ideas once these become a regular in the rotation, browse our full lineup of back to school treats.
This post may contain affiliate links which helps me keep this blog alive, questions? View the privacy policy.
1. Classic Chocolate Chip Lunchbox Cookies
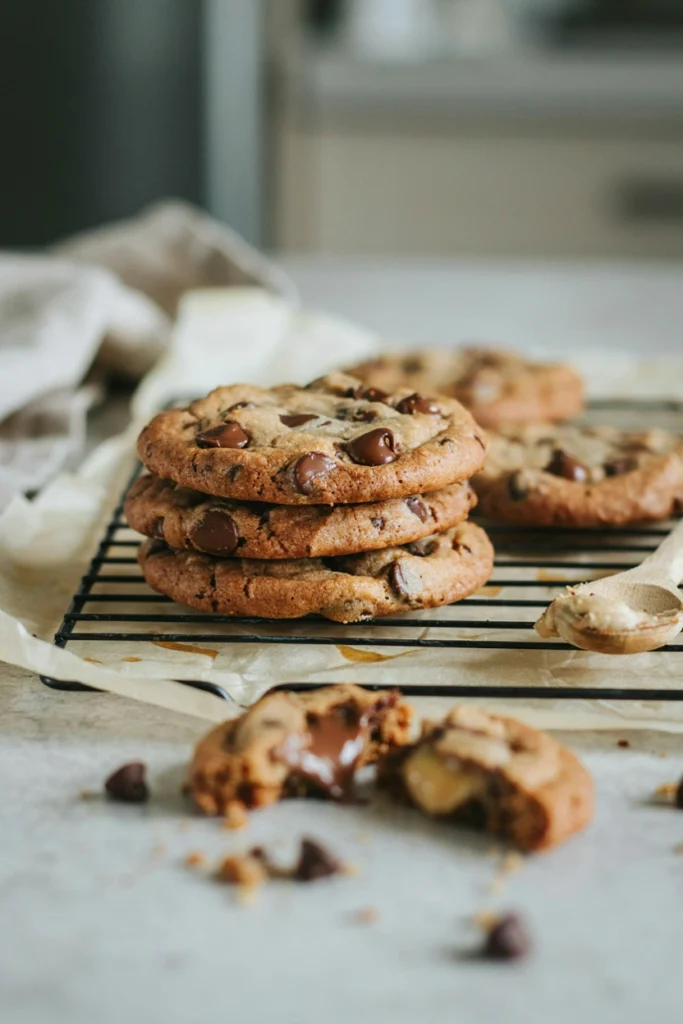
These are the cookie every kid asks for by name. The edges turn deep gold and slightly crisp while the middle stays soft enough to pull apart in two warm halves, and there’s a chocolate chip in practically every bite. It’s the recipe you make when you want zero surprises and total approval.
Prep Time: 15 min | Cook Time: 10 min | Total Time: 25 min | Servings: 24 cookies | Difficulty: Easy
Ingredients
- 1 cup unsalted butter, softened
- 3/4 cup granulated sugar
- 3/4 cup packed light brown sugar
- 2 large eggs
- 2 tsp vanilla extract
- 2 1/4 cups all-purpose flour
- 1 tsp baking soda
- 1 tsp salt
- 2 cups semisweet chocolate chips
Instructions
- Preheat the oven to 375°F and line two baking sheets with parchment paper.
- In a large bowl, beat the butter, granulated sugar, and brown sugar together until light and fluffy, about 2 minutes.
- Beat in the eggs one at a time, then mix in the vanilla extract.
- In a separate bowl, whisk together the flour, baking soda, and salt, then add to the wet ingredients and mix just until combined.
- Fold in the chocolate chips.
- Scoop 1.5-tablespoon portions of dough onto the prepared baking sheets, spacing them 2 inches apart.
- Bake for 9–10 minutes, until the edges are golden but the centers still look slightly underdone.
- Let the cookies cool on the baking sheet for 5 minutes before transferring to a wire rack.
Baker’s Tip
If your dough feels warm or soft after mixing, chill it for 15 minutes before scooping — the cookies will hold their shape better and won’t spread thin.
Why You’ll Love It
It’s the recipe that never needs an introduction. One bowl, no special equipment, and a cookie that tastes like it came from a bakery.
2. Brown Butter Oatmeal Cookies
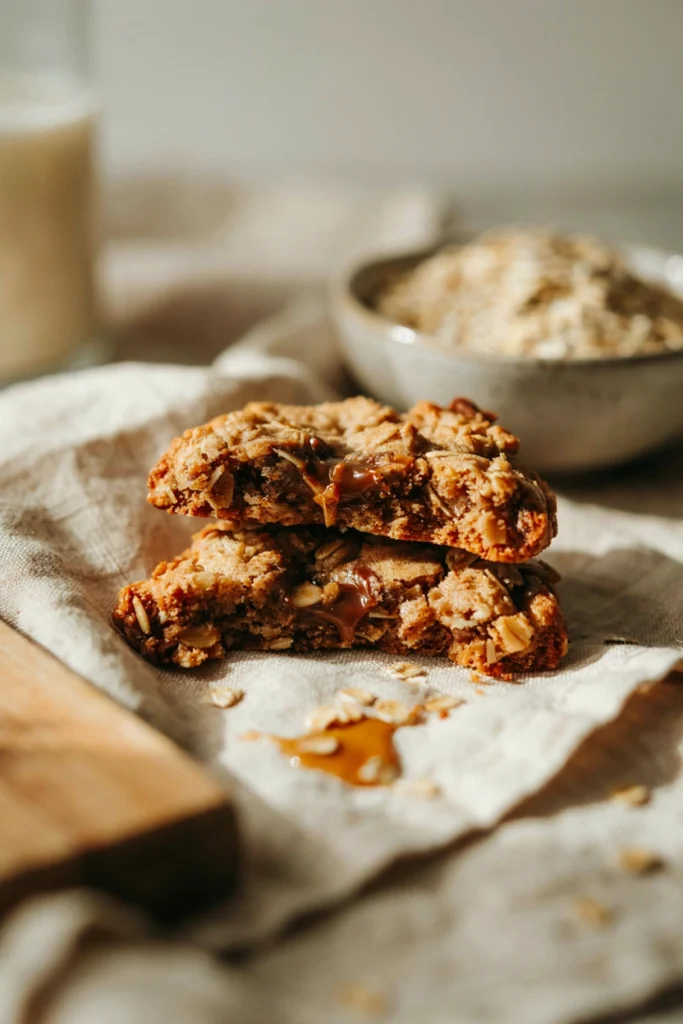
Browning the butter first is what separates this from a plain oatmeal cookie — it adds a deep, toasty, almost caramel note that plays against the chewy oats. The edges crisp up while the center stays dense and chewy, the kind of cookie that tastes like it took more effort than it did.
Prep Time: 20 min | Cook Time: 12 min | Total Time: 32 min | Servings: 20 cookies | Difficulty: Medium
Ingredients
- 3/4 cup unsalted butter
- 1/2 cup granulated sugar
- 3/4 cup packed brown sugar
- 1 large egg
- 1 egg yolk
- 1 1/2 tsp vanilla extract
- 1 1/4 cups all-purpose flour
- 1 tsp baking soda
- 1/2 tsp ground cinnamon
- 1/2 tsp salt
- 2 1/2 cups old-fashioned rolled oats
Instructions
- In a light-colored saucepan, melt the butter over medium heat, swirling often, until it turns amber and smells nutty, about 5–6 minutes. Pour into a heatproof bowl and let cool for 10 minutes.
- Whisk the granulated sugar and brown sugar into the browned butter until combined.
- Whisk in the egg, egg yolk, and vanilla extract until glossy.
- In a separate bowl, combine the flour, baking soda, cinnamon, and salt, then stir into the wet mixture.
- Fold in the oats until evenly distributed. Cover and chill the dough for 30 minutes.
- Preheat the oven to 350°F and line baking sheets with parchment paper.
- Scoop 2-tablespoon portions of dough onto the sheets, spacing 2 inches apart, and flatten slightly with your palm.
- Bake for 11–13 minutes, until the edges are set and golden but the centers still look soft.
- Cool on the pan for 10 minutes before moving to a wire rack.
Baker’s Tip
Watch the butter closely once it starts foaming — it goes from browned to burnt in under a minute. Pull it off the heat as soon as you see brown flecks and smell that nutty aroma. A stand mixer makes quick work of getting the sugars and browned butter fully glossy before the eggs go in.
Flavor Variation
Once the weather turns, stir in 1/3 cup of pumpkin puree and an extra 1/4 teaspoon of cinnamon for a pumpkin oatmeal spin — for more ideas in that direction, see our fall desserts made with canned pumpkin.
Best For
Kids who like a heartier, less-sweet cookie, and mornings when you want something that feels a little more substantial in the lunchbox. If you’re already thinking ahead to cozier flavors, our fall dessert recipes round-up has plenty more where this came from.
3. Peanut Butter and Jam Thumbprint Cookies
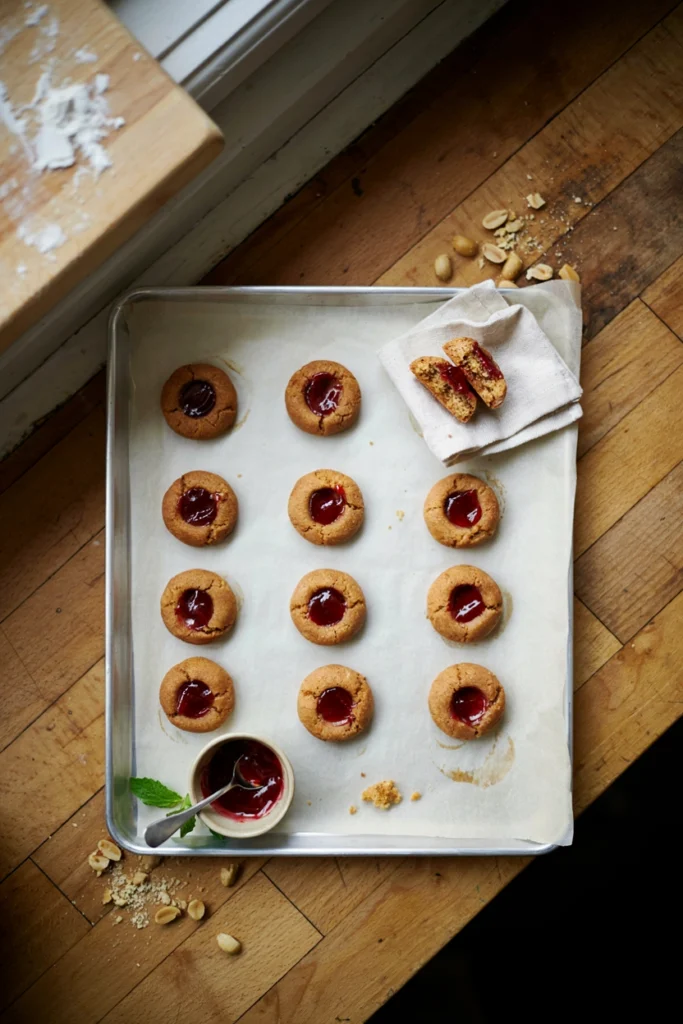
Think of this as PB&J in cookie form. The peanut butter dough bakes up soft and slightly sandy, and the pocket of jam in the center stays glossy and jammy even after cooling, so every bite has that familiar sweet-and-nutty combo kids already love.
Prep Time: 15 min | Cook Time: 12 min | Total Time: 27 min | Servings: 22 cookies | Difficulty: Easy
Ingredients
- 1 cup creamy peanut butter
- 1/2 cup unsalted butter, softened
- 1/2 cup granulated sugar
- 1/2 cup packed brown sugar
- 1 large egg
- 1 tsp vanilla extract
- 1 1/2 cups all-purpose flour
- 1 tsp baking soda
- 1/2 tsp salt
- 1/3 cup strawberry or raspberry jam
Instructions
- Preheat the oven to 350°F and line two baking sheets with parchment paper.
- Beat the peanut butter, butter, granulated sugar, and brown sugar together until smooth and creamy.
- Beat in the egg and vanilla extract.
- Whisk together the flour, baking soda, and salt, then mix into the wet ingredients until a soft dough forms.
- Roll the dough into 1-tablespoon balls and place on the baking sheets, spacing 2 inches apart.
- Press your thumb (or the back of a rounded teaspoon) into the center of each ball to make an indent.
- Fill each indent with about 1/2 teaspoon of jam.
- Bake for 10–12 minutes, until the edges are just golden.
- Cool on the pan for 5 minutes, then transfer to a wire rack — the jam will be very hot straight out of the oven.
Substitutions
For classrooms with peanut restrictions, sunflower seed butter works as a 1:1 swap and keeps the same texture and richness.
Why You’ll Love It
It’s a nostalgic flavor combo in a cookie that’s easy enough for kids to help shape and fill themselves.
4. No-Bake Apple Cinnamon Oat Cookies
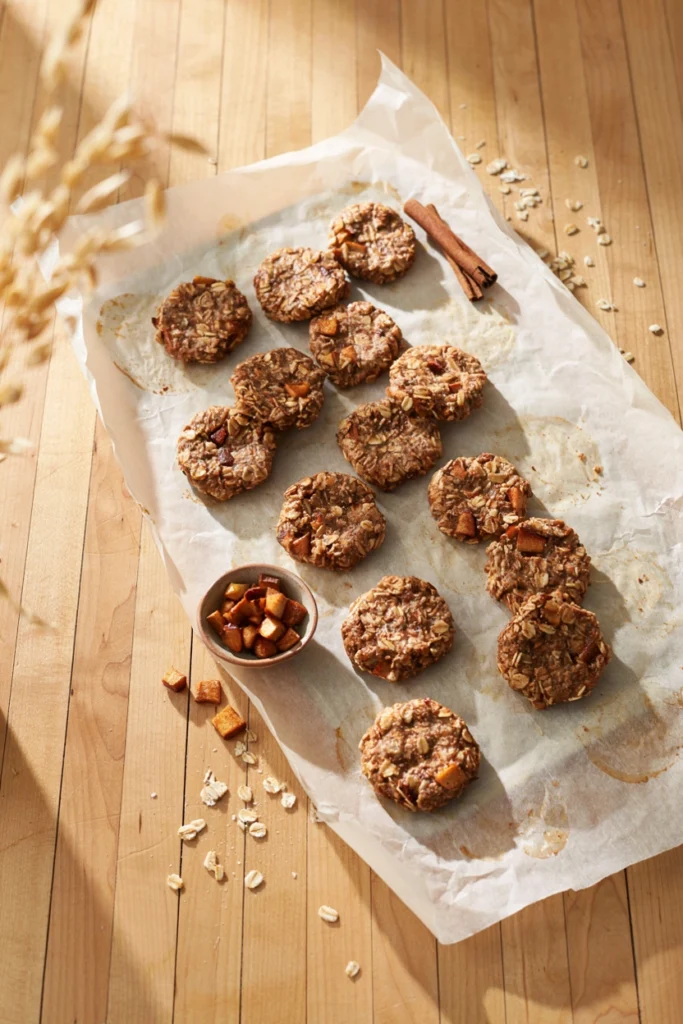
No oven, no waiting, no mess — just a warm mixture stirred together on the stovetop and dropped into rounds. These have a chewy, slightly sticky bite with real diced dried apple and a good hit of cinnamon, and they set up in the fridge in under an hour.
Prep Time: 15 min | Cook Time: 5 min | Total Time: 50 min (includes chilling) | Servings: 18 cookies | Difficulty: Easy
Ingredients
- 1/2 cup unsalted butter
- 1/2 cup packed brown sugar
- 1/4 cup honey
- 1 tsp ground cinnamon
- 1/4 tsp salt
- 2 1/2 cups old-fashioned rolled oats
- 3/4 cup finely diced dried apple
- 1/2 cup chopped pecans or walnuts (optional)
Instructions
- Line a baking sheet with parchment paper.
- In a medium saucepan over medium heat, melt the butter, brown sugar, and honey together, stirring until smooth, about 3 minutes.
- Stir in the cinnamon and salt, then remove from heat.
- Fold in the oats, dried apple, and nuts (if using) until fully coated.
- Drop rounded tablespoons of the mixture onto the prepared baking sheet, pressing each into a firm round with the back of a spoon.
- Refrigerate for at least 30 minutes, until firm to the touch.
- Store in the refrigerator until ready to pack.
Good to Know
These stay soft and slightly sticky at room temperature, so they travel best in a small container rather than loose in a lunch bag.
Flavor Variation
Swap the dried apple for dried cranberries and add a pinch of nutmeg for a fall-leaning twist later in the season, or drizzle with a little caramel for something closer to our caramel apple desserts.
5. Decorated Sugar Cookie Pencils
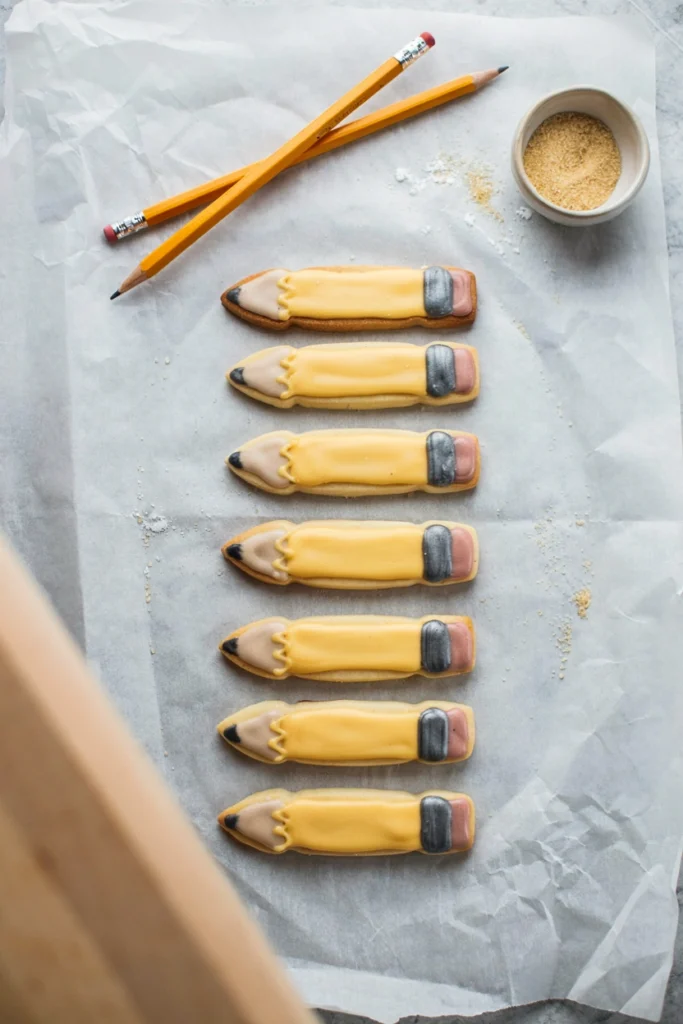
These are the cookie for the first-day photo. Rolled thin, cut into long pencil shapes, and flooded with simple icing in yellow, pink, and gray, they’re sturdy enough to hand out at school and cute enough to stop a hallway conversation. No airbrush required — just a butter knife and a steady hand.
Prep Time: 45 min (plus 1 hour chilling and icing drying time) | Cook Time: 10 min | Total Time: About 2 hours | Servings: 16 cookies | Difficulty: Advanced
Ingredients
- 1 cup unsalted butter, softened
- 1 cup granulated sugar
- 1 large egg
- 1 tsp vanilla extract
- 1/2 tsp almond extract
- 3 cups all-purpose flour
- 1 tsp baking powder
- 1/2 tsp salt
- 2 cups powdered sugar (for icing)
- 3–4 tbsp milk (for icing)
- Yellow, pink, and black gel food coloring
Instructions
- Beat the butter and granulated sugar together until fluffy, then beat in the egg, vanilla extract, and almond extract.
- Whisk together the flour, baking powder, and salt, then mix into the wet ingredients until a smooth dough forms.
- Divide the dough in half, flatten into disks, wrap, and chill for at least 1 hour.
- Preheat the oven to 350°F and line baking sheets with parchment paper.
- Roll the dough to 1/4-inch thickness on a floured surface and cut into long rectangles, about 4.5 inches by 1 inch, then trim one end into a point to form a pencil shape.
- Bake for 9–10 minutes, until the edges are just set but not browned. Cool completely on a wire rack.
- For the icing, whisk the powdered sugar with milk, 1 tablespoon at a time, until you reach a thick but pourable consistency. Divide into three bowls and tint yellow, pink, and gray/black.
- Ice the middle section of each cookie yellow, the pointed tip pink, and a thin band gray to mimic a pencil, letting each color set for 15 minutes before adding the next.
- Let the cookies dry fully, at least 1 hour, before stacking or packaging.
Baker’s Tip
No piping bag on hand? Spoon the icing on and spread it with the back of a butter knife or a small offset spatula — it still gives a clean, flooded look. A light dusting of edible glitter over the wet icing adds a fun sparkle kids notice right away.
Best For
First-day-of-school celebrations, classroom treats, or a fun back-to-school baking afternoon with the kids. Want to round out the celebration? Our back to school cake recipes and back to school cupcakes make great additions to the table.
Which Back to School Cookie Should You Bake?
Not sure where to start? Here’s how the recipes stack up by occasion and effort so you can pick the right one for tonight.
| Recipe | Best For | Difficulty | Total Time |
|---|---|---|---|
| Classic Chocolate Chip Lunchbox Cookies | Everyday lunchbox | Easy | 25 min |
| Brown Butter Oatmeal Cookies | Heartier everyday snack | Medium | 32 min |
| Peanut Butter and Jam Thumbprint Cookies | Kid-helper baking day | Easy | 27 min |
| No-Bake Apple Cinnamon Oat Cookies | No-oven quick fix | Easy | 50 min (mostly chilling) |
| Decorated Sugar Cookie Pencils | First day of school | Advanced | ~2 hours |
6. Sunflower Seed Butter Chocolate Chip Cookies (Nut-Free)
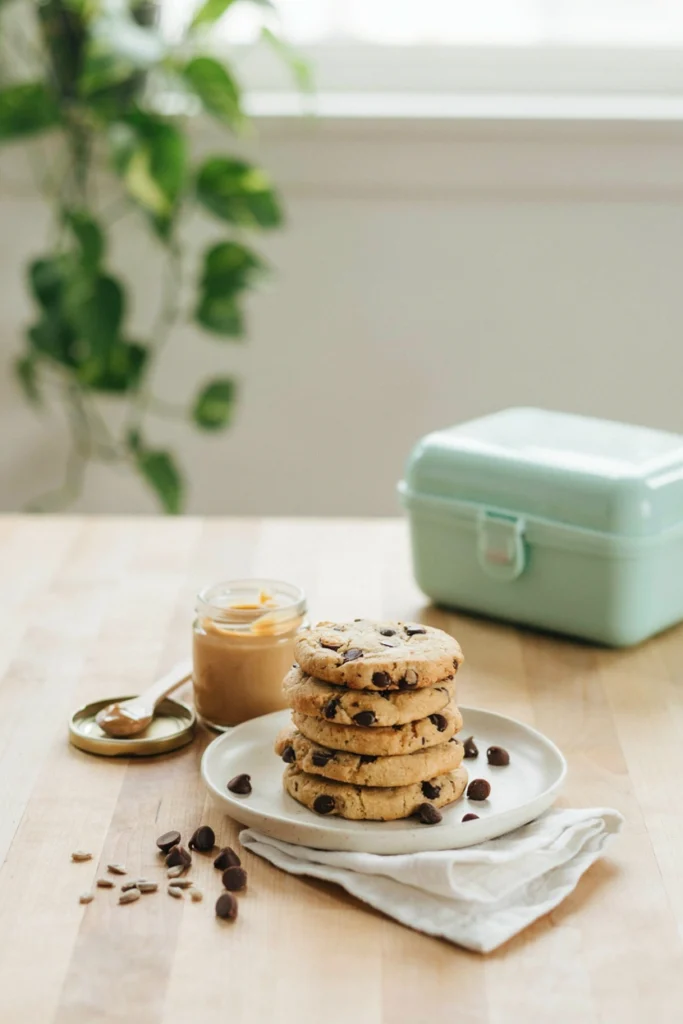
Built for classrooms with nut restrictions, but nobody will guess it from the taste. Sunflower seed butter adds a subtle earthy richness that pairs beautifully with dark chocolate, and the texture stays soft and chewy for days — no compromise, just a cookie every kid can actually share.
Prep Time: 15 min | Cook Time: 10 min | Total Time: 25 min | Servings: 22 cookies | Difficulty: Easy
Ingredients
- 1/2 cup sunflower seed butter
- 1/2 cup unsalted butter, softened
- 1/2 cup granulated sugar
- 1/2 cup packed brown sugar
- 1 large egg
- 1 tsp vanilla extract
- 1 3/4 cups all-purpose flour
- 1 tsp baking soda
- 1/2 tsp salt
- 1 1/2 cups dark chocolate chips
Instructions
- Preheat the oven to 350°F and line two baking sheets with parchment paper, or use a silicone baking mat if you have one.
- Beat the sunflower seed butter, butter, granulated sugar, and brown sugar together until creamy.
- Beat in the egg and vanilla extract.
- Whisk together the flour, baking soda, and salt, then mix into the wet ingredients until just combined.
- Fold in the chocolate chips.
- Scoop 1.5-tablespoon portions onto the baking sheets, spacing 2 inches apart.
- Bake for 10–11 minutes, until the edges are set and lightly golden.
- Cool on the pan for 5 minutes before transferring to a wire rack.
Good to Know
Sunflower seed butter can turn baked goods slightly green over time due to a natural reaction with baking soda — it’s harmless, but pair it with parchment-lined storage and don’t worry if you see it.
Best For
Nut-free classrooms, bake sales, and any lunchbox headed somewhere with allergy restrictions.
7. Notebook Paper Icebox Cookies
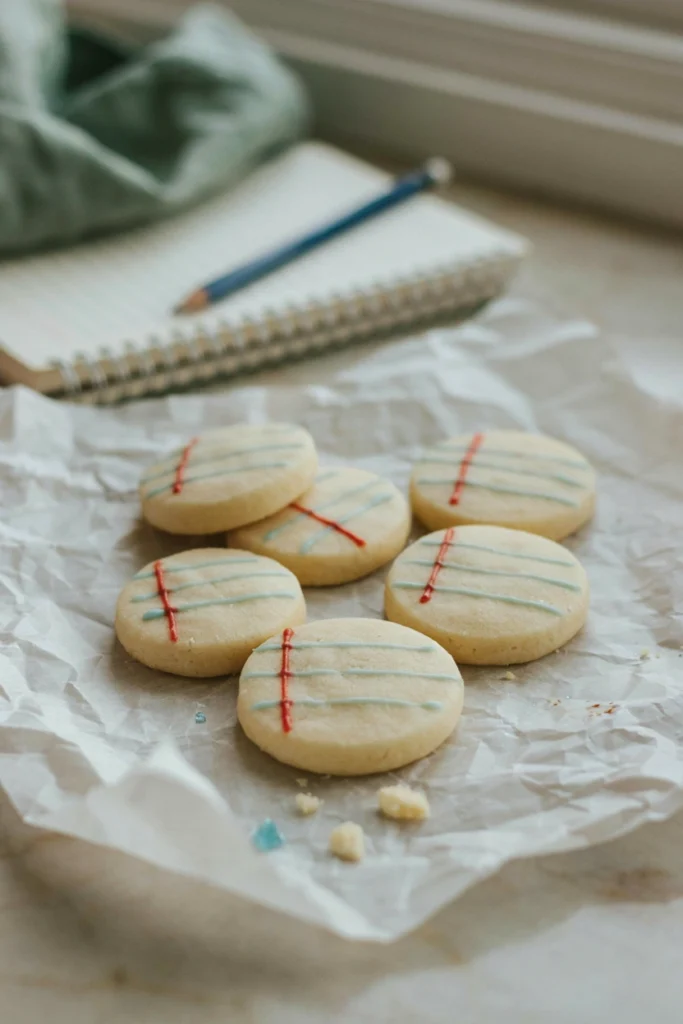
Slice-and-bake makes these almost embarrassingly easy for how clever they look. Thin ribbons of tinted dough get layered and rolled into a log, then sliced into rounds that reveal a mini notebook page pattern in cross-section — a fun surprise for kids who love a good “how did they do that” treat.
Prep Time: 30 min (plus 2 hours chilling) | Cook Time: 10 min | Total Time: About 2 hours 40 min | Servings: 24 cookies | Difficulty: Advanced
Ingredients
- 1 cup unsalted butter, softened
- 3/4 cup granulated sugar
- 1 large egg
- 1 1/2 tsp vanilla extract
- 2 3/4 cups all-purpose flour
- 1/2 tsp baking powder
- 1/4 tsp salt
- Blue and red gel food coloring
Instructions
- Beat the butter and granulated sugar together until fluffy, then beat in the egg and vanilla extract.
- Whisk together the flour, baking powder, and salt, then mix into the wet ingredients until a smooth dough forms.
- Remove 3 tablespoons of dough and tint it blue; remove 2 tablespoons and tint it red. Leave the rest plain.
- Roll the plain dough between two sheets of parchment into a 9-by-6-inch rectangle, about 1/4 inch thick.
- Roll the blue dough into three thin ropes and lay them horizontally across the rectangle to mimic ruled lines; roll the red dough into one thin rope and lay it vertically near one edge as the margin line.
- Gently roll the whole rectangle up tightly from the long side into a log, pressing to seal the seam. Wrap and chill for at least 2 hours, or until firm.
- Preheat the oven to 350°F and line baking sheets with parchment paper.
- Slice the log into 1/4-inch rounds and place on the baking sheets, spacing 1.5 inches apart.
- Bake for 9–10 minutes, until the edges are just set and not browned. Cool on the pan for 5 minutes before moving to a wire rack.
Make-Ahead Tip
The unbaked dough log freezes beautifully for up to 2 months in a freezer-safe container — wrap it tightly in plastic first, then slice and bake straight from frozen, adding 1–2 extra minutes to the bake time.
Why You’ll Love It
Each cookie looks handmade and clever without requiring any decorating after baking — the design is baked right in.
8. Freezer-Friendly Double Chocolate Cookies
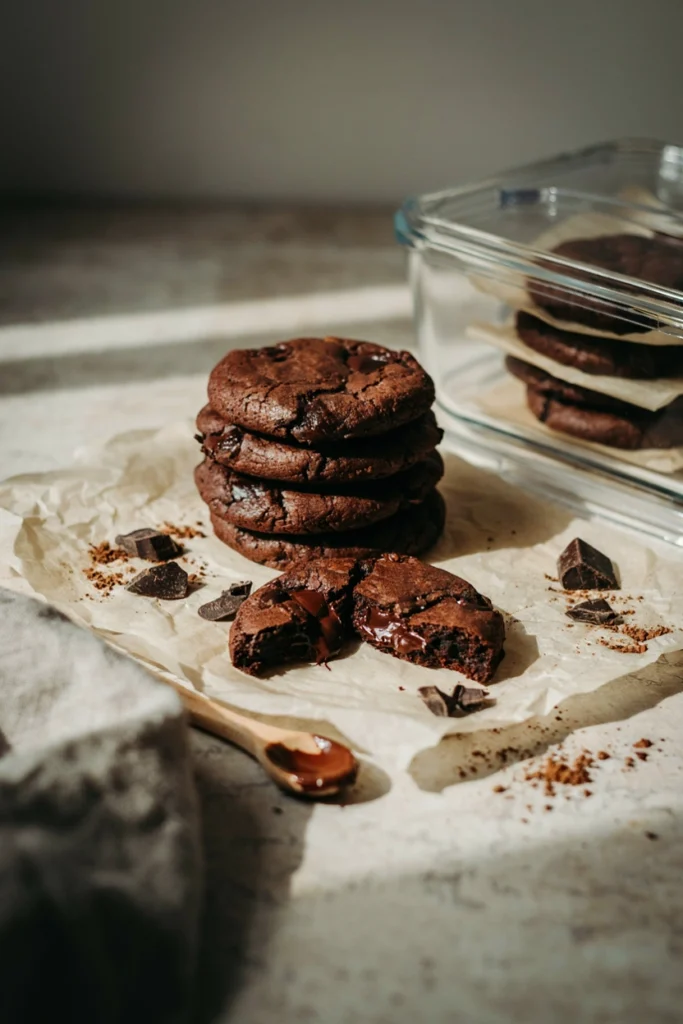
These are the cookie to double up and stash away. Rich with cocoa and studded with chunks of chocolate, they bake up dense and fudgy in the middle with just enough structure to hold together in a lunchbox — and the dough freezes into pucks you can bake straight from frozen on the busiest mornings.
Prep Time: 15 min | Cook Time: 11 min | Total Time: 26 min | Servings: 20 cookies | Difficulty: Medium
Ingredients
- 3/4 cup unsalted butter, softened
- 3/4 cup granulated sugar
- 1/2 cup packed brown sugar
- 2 large eggs
- 1 tsp vanilla extract
- 1 3/4 cups all-purpose flour
- 2/3 cup unsweetened cocoa powder
- 1 tsp baking soda
- 1/2 tsp salt
- 1 1/2 cups roughly chopped semisweet chocolate
Instructions
- Beat the butter, granulated sugar, and brown sugar together until light and fluffy.
- Beat in the eggs one at a time, then mix in the vanilla extract.
- Whisk together the flour, cocoa powder, baking soda, and salt, then mix into the wet ingredients until just combined.
- Fold in the chopped chocolate.
- Scoop 2-tablespoon portions of dough onto a parchment-lined tray and freeze for at least 1 hour, or bake immediately.
- To bake fresh, preheat the oven to 350°F, space the dough balls 2 inches apart on a lined baking sheet, and bake for 10–12 minutes, until the tops look just set.
- To bake from frozen, bake at 350°F for 13–14 minutes without thawing.
- Cool on the pan for 5 minutes before transferring to a wire rack.
Storage & Freezing
Freeze portioned dough balls in a single layer on a tray, then transfer to a freezer-safe baking pan or bag for up to 3 months — labeling it with the bake time and temperature saves you from digging up the recipe on a rushed morning.
Best For
Teacher gifts and any week where you know you won’t have time to bake from scratch.
9. Honey Oat Breakfast Cookies
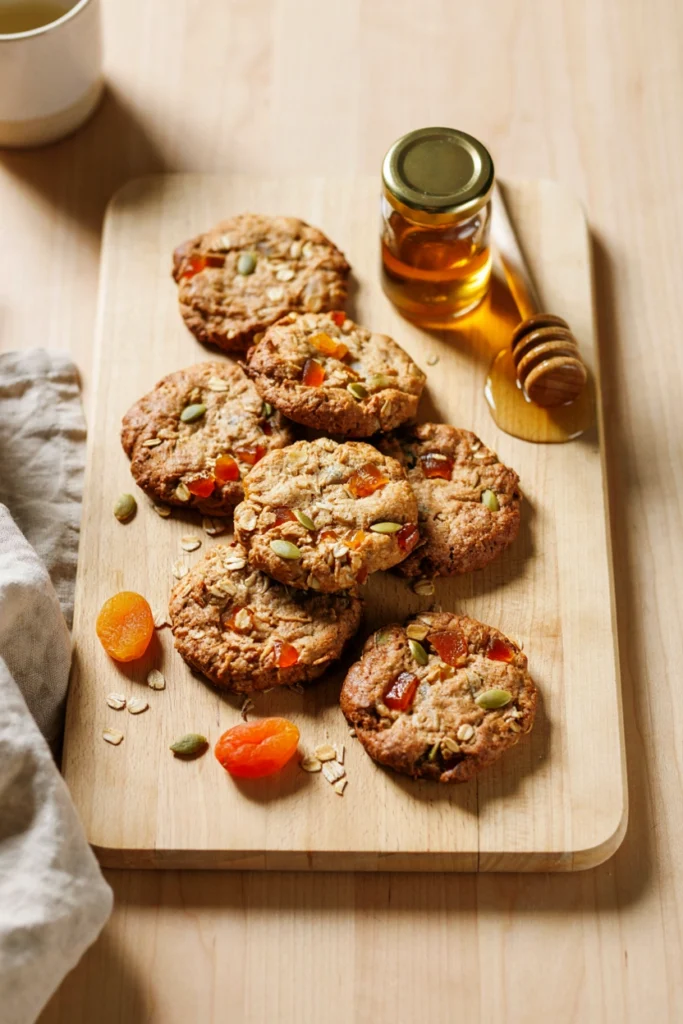
Dense, hearty, and just sweet enough, these lean more toward breakfast than dessert — a good option for the kid who needs something filling before the first bell. Honey keeps them moist for days, and the mix of oats and dried fruit gives every bite a little texture.
Prep Time: 15 min | Cook Time: 13 min | Total Time: 28 min | Servings: 18 cookies | Difficulty: Easy
Ingredients
- 1/2 cup unsalted butter, softened
- 1/3 cup honey
- 1/4 cup packed brown sugar
- 1 large egg
- 1 tsp vanilla extract
- 1 cup all-purpose flour
- 1/2 tsp baking soda
- 1/2 tsp ground cinnamon
- 1/4 tsp salt
- 2 cups old-fashioned rolled oats
- 1/2 cup chopped dried apricots or raisins
- 1/4 cup pumpkin seeds
Instructions
- Preheat the oven to 350°F and line two baking sheets with parchment paper.
- Beat the butter, honey, and brown sugar together until well combined.
- Beat in the egg and vanilla extract.
- Whisk together the flour, baking soda, cinnamon, and salt, then mix into the wet ingredients.
- Fold in the oats, dried fruit, and pumpkin seeds until evenly distributed.
- Scoop 2-tablespoon portions onto the baking sheets, flattening each slightly with damp fingers.
- Bake for 12–13 minutes, until the edges are golden brown.
- Cool on the pan for 5 minutes before transferring to a wire rack.
Substitutions
Swap the pumpkin seeds for sunflower seeds or mini chocolate chips depending on what your kids will actually eat — both work in equal amounts.
Best For
Early morning drop-offs and kids who need something more substantial than a sugar cookie before class.
How to Keep Back to School Cookies Fresh (and Freezer-Friendly)
Most of these cookies stay good at room temperature in an airtight storage container for 4–5 days. For longer storage, baked cookies freeze well for up to 2 months — layer them between sheets of parchment paper in a freezer-safe container so they don’t stick together, and let them thaw at room temperature for about 15 minutes before packing. Iced sugar cookies like the notebook pencils should be fully dry before stacking or freezing, or the icing can smudge.
10. Teacher Appreciation Latte Cookies
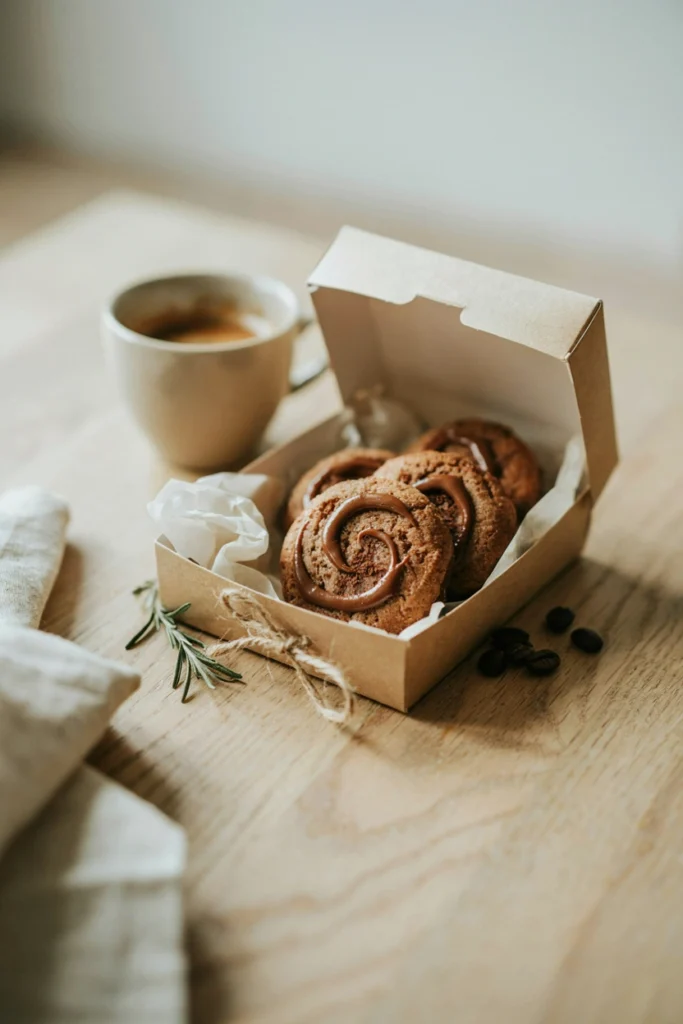
A cookie for the grown-ups. Real espresso powder deepens the brown sugar dough, and a simple coffee glaze on top gives it a bakery-case finish that looks far more impressive than the effort it actually takes — exactly what you want for a teacher who’s just gotten through the first week too.
Prep Time: 20 min | Cook Time: 11 min | Total Time: 31 min | Servings: 20 cookies | Difficulty: Medium
Ingredients
- 3/4 cup unsalted butter, softened
- 1 cup packed brown sugar
- 1 large egg
- 2 tsp instant espresso powder, divided
- 1 tsp vanilla extract
- 2 cups all-purpose flour
- 1/2 tsp baking soda
- 1/4 tsp salt
- 1 cup powdered sugar
- 2–3 tbsp milk
Instructions
- Preheat the oven to 350°F and line two baking sheets with parchment paper.
- Beat the butter and brown sugar together until fluffy.
- Beat in the egg, 1 teaspoon of the espresso powder, and the vanilla extract.
- Whisk together the flour, baking soda, and salt, then mix into the wet ingredients until a soft dough forms.
- Scoop 1.5-tablespoon portions onto the baking sheets, spacing 2 inches apart.
- Bake for 10–11 minutes, until the edges are set and the tops look matte.
- Cool completely on a wire rack before glazing.
- Whisk the powdered sugar, remaining 1 teaspoon espresso powder, and milk together until smooth and pourable.
- Drizzle or dip the top of each cooled cookie in the glaze using a set of chocolate dipping tools for a clean edge, then let set for 20 minutes before packaging.
Baker’s Tip
Dissolve the espresso powder in the wet ingredients rather than adding it dry — it distributes more evenly and avoids gritty pockets in the finished cookie.
Best For
Teacher gifts, back-to-school open house treats, or any grown-up in your life who deserves something a little fancier than a lunchbox cookie. A bakery gift box with a window makes these look store-bought in about ten seconds.
Frequently Asked Questions
Can I freeze cookie dough for back to school?
Yes. Most drop-cookie doughs, like the chocolate chip and double chocolate recipes here, freeze well as pre-portioned balls for up to 3 months. Bake straight from frozen, adding 2–3 extra minutes to the bake time.
What’s the easiest back to school cookie for beginners?
The Classic Chocolate Chip Lunchbox Cookies and Sunflower Seed Butter Chocolate Chip Cookies are both one-bowl, no-chill recipes that come together in about 25 minutes with no special equipment.
How do I keep cookies fresh in a lunchbox all day?
Pack cookies in a small airtight container rather than loose in the bag, and avoid pairing them with warm or moist foods that can soften them. Most cookies in this list stay fresh at room temperature for 4–5 days.
Can decorated sugar cookies go in a lunchbox without smudging?
Yes, as long as the icing has fully dried, which usually takes at least an hour. Pack them in a single layer or with parchment between layers to protect the design.
What cookies are best for a classroom of 20-plus kids?
Simple drop cookies like the Classic Chocolate Chip or Sunflower Seed Butter Chocolate Chip cookies scale up easily and don’t require individual decorating, making them the most practical choice for large batches.
Do I need a stand mixer for these recipes?
No. A hand mixer or even a sturdy whisk and some elbow grease will work for every recipe in this roundup.
Can I make these cookies nut-free for school rules?
Yes. The Sunflower Seed Butter Chocolate Chip Cookies are nut-free as written, and the Peanut Butter and Jam Thumbprint Cookies can be made nut-free by substituting sunflower seed butter for the peanut butter.
How long do homemade cookies stay fresh at room temperature?
Most cookies in this collection stay fresh for 4–5 days in an airtight container. Iced or filled cookies are best eaten within 3–4 days for the best texture.