15 Freezer-Friendly Christmas Desserts You Can Make Ahead

Quick Answer: These 15 freezer-friendly Christmas desserts — from peppermint bark fudge to a chocolate yule log — can be made weeks ahead and frozen without losing flavor or texture. Each recipe includes exact freezing and thawing instructions, so your holiday baking is done long before guests arrive.

December has a way of filling up fast, and the last thing you want is to be elbow-deep in cookie dough on December 23rd while wrapping presents at midnight. The good news: some of the best Christmas desserts actually get better after a stint in the freezer, as flavors like gingerbread, peppermint, and molasses deepen and settle.

This collection is built entirely around that idea. Every recipe below freezes beautifully, whether that means baking now and freezing the finished treat, or mixing a dough today and baking it fresh the week of your party.

Grab your mixing bowls and a stack of freezer bags — here are 15 desserts worth making ahead this year.

This post may contain affiliate links which helps me keep this blog alive, questions? View the privacy policy.

No-Bake & Frozen Treats

1. Peppermint Bark Fudge

Peppermint bark fudge squares swirled with white chocolate and topped with crushed candy cane

The white chocolate swirls through the dark layer in loose ribbons rather than a clean line, so every square looks a little different — the crushed candy cane on top catches the light like sugared frost. One bite and the fudge gives way soft and dense, with a cool snap of peppermint right behind the chocolate.

Prep Time: 20 min  |  Cook Time: 5 min  |  Total Time: 2 hr 25 min (includes chilling)  |  Servings: 24 pieces  |  Difficulty: Easy

Ingredients

  • 2 cups semisweet chocolate chips
  • 1 (14 oz) can sweetened condensed milk, divided
  • 1 tsp vanilla extract, divided
  • 1½ cups white chocolate chips
  • ½ tsp peppermint extract
  • ⅓ cup crushed candy canes

Instructions

  1. Line an 8×8-inch pan with parchment paper, leaving overhang on two sides.
  2. In a microwave-safe bowl, combine the semisweet chocolate chips with ⅔ cup of the condensed milk. Microwave in 30-second bursts, stirring between each, until smooth (about 90 seconds total). Stir in ½ tsp vanilla.
  3. Pour the chocolate mixture into the pan and spread into an even layer. Freeze for 10 minutes to set slightly.
  4. In a separate microwave-safe bowl, combine the white chocolate chips with the remaining condensed milk. Microwave in 30-second bursts until smooth (about 60–90 seconds). Stir in the remaining ½ tsp vanilla and the peppermint extract.
  5. Drop spoonfuls of the white chocolate mixture over the dark layer, then swirl gently with a knife to create a marbled pattern.
  6. Sprinkle crushed candy canes evenly over the top, pressing lightly so they adhere.
  7. Refrigerate for at least 2 hours, until fully set, before lifting out and cutting into 24 squares.

Baker’s Tip

Crush the candy canes in a zip-top bag with a rolling pin rather than a food processor — you’ll get a mix of fine dust and small shards, which looks far more appealing on top than uniform powder.

Storage & Freezing

Freeze the cut squares in a single layer on a tray until solid, then transfer to a freezer bag with parchment between layers. Freeze up to 3 months; thaw in the refrigerator for 2 hours before serving.

2. Salted Caramel Chocolate Truffles

Salted caramel chocolate truffles dusted with cocoa powder, one truffle cut in half to show the caramel center

The outside shatters just slightly under a light dusting of cocoa, giving way to a center that’s dense and almost fudgy from the caramel folded through it. A pinch of flaky salt on top means the first flavor you taste is sweet, and the last one lingering is savory.

Prep Time: 30 min  |  Cook Time: 5 min  |  Total Time: 2 hr 35 min (includes chilling)  |  Servings: 20 truffles  |  Difficulty: Medium

Ingredients

  • 8 oz bittersweet chocolate, finely chopped
  • ½ cup heavy cream
  • 3 tbsp store-bought soft caramel sauce
  • 1 tbsp unsalted butter, softened
  • ¼ cup unsweetened cocoa powder, for dusting
  • 1 tsp flaky sea salt

Instructions

  1. Place the chopped chocolate in a heatproof bowl.
  2. Heat the heavy cream in a small saucepan over medium heat until it just begins to simmer (about 3 minutes). Pour over the chocolate and let sit for 2 minutes.
  3. Stir the cream and chocolate together until fully smooth, then stir in the caramel sauce and butter until glossy.
  4. Cover and refrigerate for 2 hours, until firm enough to scoop.
  5. Using a small cookie scoop, portion the mixture into 20 balls and roll briefly between your palms.
  6. Roll each truffle in cocoa powder to coat, then sprinkle with a few flakes of sea salt.
  7. Return to the refrigerator for 15 minutes to firm up before serving.

Baker’s Tip

If the ganache gets too soft to roll while you’re working, pop the bowl back in the fridge for 10 minutes — warm hands are the main reason truffles turn messy.

Make-Ahead Tip

Truffles can be rolled and frozen up to 6 weeks ahead. Freeze on a tray until solid, then store in an airtight container; add the cocoa dusting fresh after thawing for the cleanest look.

3. Frozen Eggnog Ice Cream Pie

Slice of frozen eggnog ice cream pie in a gingersnap crust, topped with whipped cream and nutmeg

The filling is dense and creamy rather than icy, holding a clean slice even straight from the freezer, with flecks of nutmeg visible throughout. The gingersnap crust underneath adds a spiced crunch that plays off the eggnog’s richness instead of competing with it.

Prep Time: 25 min  |  Cook Time: 10 min  |  Total Time: 6 hr 35 min (includes freezing)  |  Servings: 8 slices  |  Difficulty: Easy

Ingredients

  • 2 cups crushed gingersnap cookies (about 32 cookies)
  • 6 tbsp unsalted butter, melted
  • 2 cups heavy cream, cold
  • 1 cup prepared eggnog
  • ½ cup powdered sugar
  • 1 tsp ground nutmeg, plus extra for garnish
  • 1 tsp vanilla extract
  • Whipped cream, for topping

Instructions

  1. Preheat the oven to 350°F. Combine the crushed gingersnaps and melted butter in a bowl and mix until evenly moistened.
  2. Press the mixture firmly into a 9-inch pie dish, going up the sides. Bake for 10 minutes, then cool completely on a wire rack (about 20 minutes).
  3. In a large bowl, beat the cold heavy cream with an electric mixer on medium-high speed until soft peaks form, about 3 minutes.
  4. Add the eggnog, powdered sugar, nutmeg, and vanilla. Continue beating until the mixture holds firm peaks, about 2 more minutes.
  5. Pour the filling into the cooled crust and smooth the top with a spatula.
  6. Freeze uncovered for 1 hour, then cover tightly with plastic wrap and freeze for at least 5 more hours, until firm.
  7. Let sit at room temperature for 10 minutes before slicing. Top with whipped cream and a dusting of nutmeg.

Good to Know

Use full-fat, store-bought eggnog rather than a light version — the extra fat is what keeps the filling scoopable instead of icy once frozen.

4. Chocolate Peppermint Freezer Pie

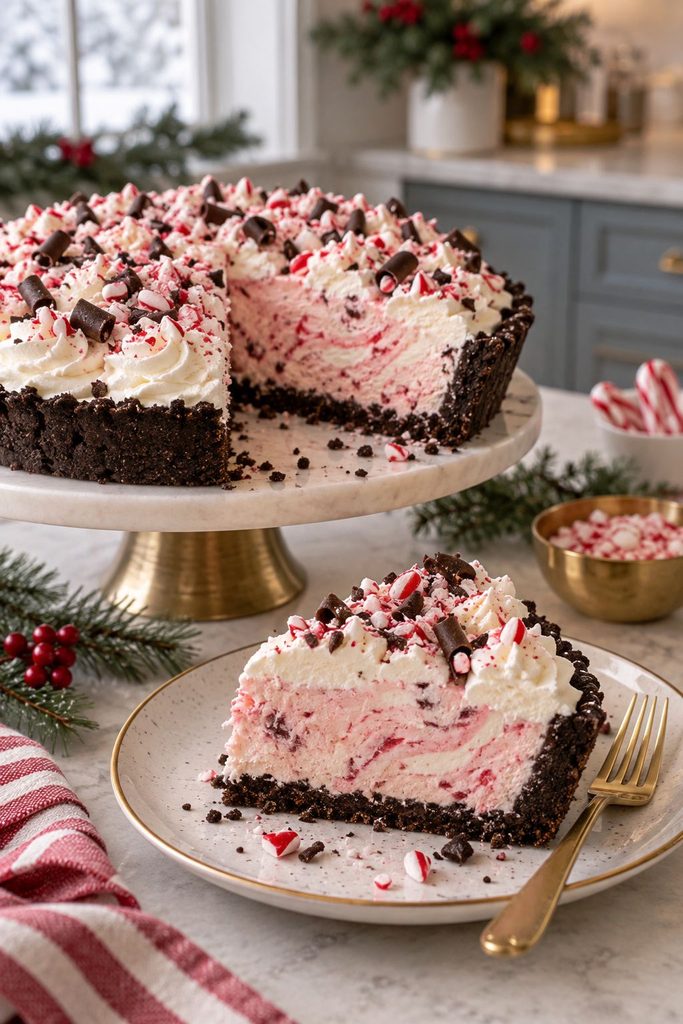
Chocolate peppermint freezer pie in a chocolate cookie crust, topped with chocolate curls and crushed peppermint

The filling sets dense and almost mousse-like, dark enough that the pink flecks of crushed peppermint on top stand out immediately. Each bite starts cold and rich before the peppermint cuts through right at the finish.

Prep Time: 20 min  |  Cook Time: 0 min  |  Total Time: 4 hr 20 min (includes freezing)  |  Servings: 8 slices  |  Difficulty: Easy

Ingredients

  • 1 (9-inch) prepared chocolate cookie crust
  • 10 oz semisweet chocolate chips
  • 1 (8 oz) package cream cheese, softened
  • 1 cup powdered sugar
  • 1½ cups heavy cream, cold
  • ¾ tsp peppermint extract
  • ¼ cup crushed peppermint candies, for topping

Instructions

  1. Melt the chocolate chips in a microwave-safe bowl in 30-second bursts, stirring between each, until smooth (about 90 seconds). Let cool for 5 minutes.
  2. In a large bowl, beat the cream cheese and powdered sugar together until smooth and fluffy, about 2 minutes.
  3. Beat in the melted chocolate until fully combined.
  4. In a separate bowl, whip the heavy cream and peppermint extract to stiff peaks, about 3 minutes.
  5. Fold the whipped cream into the chocolate mixture in two additions, being careful not to deflate it.
  6. Spread the filling into the crust and smooth the top.
  7. Freeze uncovered for 1 hour, then cover and freeze at least 3 more hours, until firm.
  8. Top with crushed peppermint candies just before slicing.

Flavor Variation

Swap the peppermint extract for orange extract and the topping for candied orange peel for a chocolate-orange version of the same base recipe.

5. Gingerbread Cookie Dough Truffles

Gingerbread cookie dough truffles coated in white chocolate and drizzled with dark chocolate

These taste unmistakably like raw gingerbread dough — deep with molasses and warm spice — but the egg-free base means there’s nothing to worry about biting straight in. The white chocolate shell cracks cleanly against the soft, dense center.

Prep Time: 35 min  |  Cook Time: 0 min  |  Total Time: 1 hr 35 min (includes chilling)  |  Servings: 24 truffles  |  Difficulty: Easy

Ingredients

  • ½ cup unsalted butter, softened
  • ½ cup packed brown sugar
  • ¼ cup molasses
  • 1 tsp vanilla extract
  • 1¼ cups all-purpose flour, heat-treated (see tip)
  • 1½ tsp ground ginger
  • 1 tsp ground cinnamon
  • ¼ tsp ground cloves
  • ¼ tsp salt
  • 2 tbsp milk
  • 16 oz white chocolate melting wafers

Instructions

  1. Beat the softened butter and brown sugar together until light and fluffy, about 2 minutes. Beat in the molasses and vanilla.
  2. Add the heat-treated flour, ginger, cinnamon, cloves, and salt. Mix on low speed until just combined.
  3. Add the milk one tablespoon at a time, mixing until the dough is soft and holds together when pressed.
  4. Scoop into 24 balls (about 1 tablespoon each) and roll smooth between your palms. Chill on a parchment-lined tray for 1 hour.
  5. Melt the white chocolate wafers in a microwave-safe bowl in 30-second bursts, stirring between each, until smooth.
  6. Using a fork, dip each chilled ball into the melted chocolate, tapping off the excess, and return to the parchment.
  7. Let set at room temperature for about 20 minutes, or refrigerate for 10 minutes to speed things up.

Good to Know

Raw flour can carry bacteria, so heat-treat it first: spread it on a baking sheet and bake at 300°F for 5 minutes, then cool completely before using.

Freezer-Friendly Cookies

6. Chewy Molasses Spice Cookies

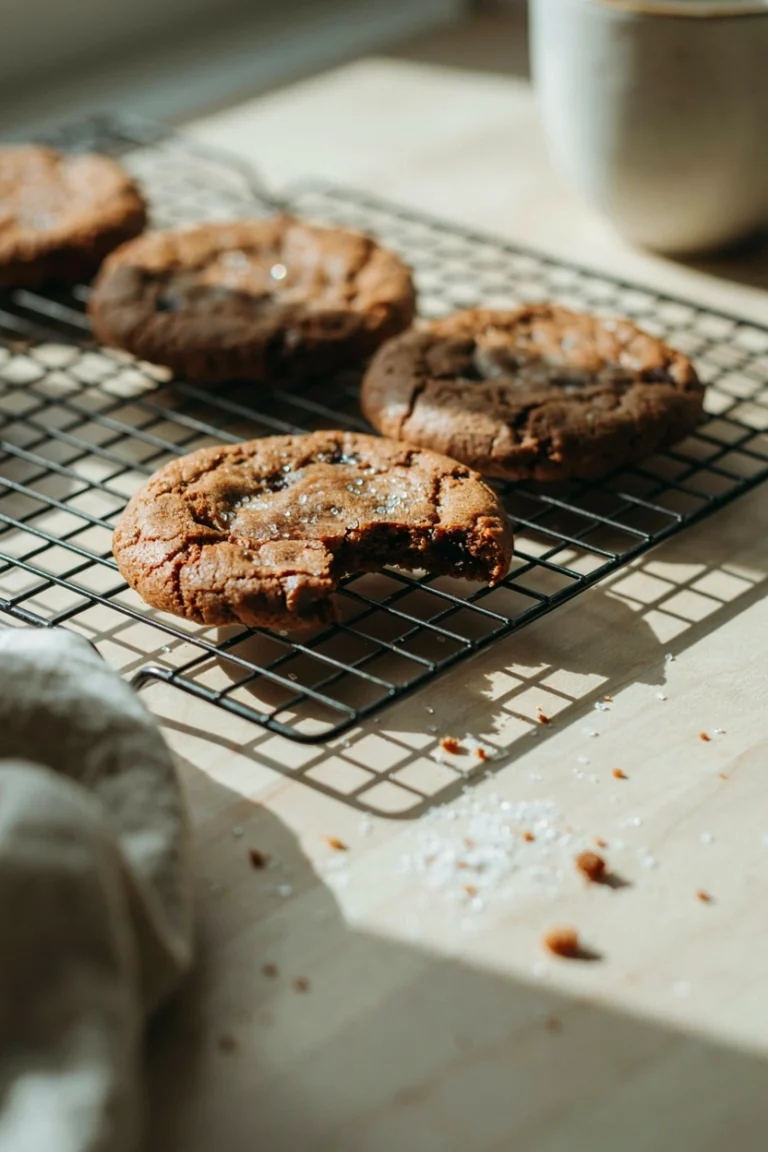
Chewy molasses spice cookies with a crackled sugar top, cooling on a wire rack

The tops crack into deep fissures as they bake, catching the coarse sugar in every crevice, while the inside stays soft and chewy well past the first day. Molasses and clove hit first, with a warm cinnamon finish.

Prep Time: 15 min  |  Cook Time: 10 min  |  Total Time: 1 hr 25 min (includes chilling)  |  Servings: 28 cookies  |  Difficulty: Easy

Ingredients

  • 2¼ cups all-purpose flour
  • 2 tsp baking soda
  • 2 tsp ground ginger
  • 1 tsp ground cinnamon
  • ½ tsp ground cloves
  • ¼ tsp salt
  • ¾ cup unsalted butter, softened
  • 1 cup packed brown sugar
  • ¼ cup molasses
  • 1 large egg
  • ⅓ cup granulated sugar, for rolling

Instructions

  1. Whisk together the flour, baking soda, ginger, cinnamon, cloves, and salt in a bowl. Set aside.
  2. Beat the butter and brown sugar together until fluffy, about 2 minutes. Beat in the molasses and egg until combined.
  3. Add the dry ingredients and mix on low speed until just combined.
  4. Cover the dough and chill for 1 hour, until firm enough to scoop.
  5. Preheat the oven to 350°F and line two baking sheets with parchment.
  6. Scoop the dough into 1½-tablespoon balls, roll in granulated sugar, and place 2 inches apart on the sheets.
  7. Bake for 9–10 minutes, until the edges are set but the centers still look slightly underdone.
  8. Cool on the pan for 5 minutes before transferring to a wire rack.

Baker’s Tip

Pull the cookies while the centers still look soft — they’ll finish setting on the hot pan, and this is what keeps them chewy instead of crisp once cooled.

Storage & Freezing

Freeze the raw dough balls (unrolled in sugar) on a tray until solid, then bag them. Roll in sugar straight from frozen and add 1–2 minutes to the bake time. Baked cookies also freeze well for up to 3 months.

7. Cranberry Pistachio Biscotti

Cranberry pistachio biscotti slices stacked in a glass jar

The red and green flecks running through each slice make this one look festive before you even taste it, and the twice-baked texture gives a real snap against the teeth rather than a soft crumble. The sweetness stays restrained, leaning on tart cranberry more than sugar.

Prep Time: 20 min  |  Cook Time: 45 min  |  Total Time: 1 hr 20 min  |  Servings: 24 slices  |  Difficulty: Medium

Ingredients

  • 2¾ cups all-purpose flour
  • 1½ tsp baking powder
  • ¼ tsp salt
  • ¾ cup granulated sugar
  • ½ cup unsalted butter, softened
  • 2 large eggs
  • 1 tsp vanilla extract
  • ½ tsp almond extract
  • ¾ cup dried cranberries
  • ¾ cup shelled pistachios, roughly chopped

Instructions

  1. Preheat the oven to 325°F and line a baking sheet with parchment.
  2. Whisk together the flour, baking powder, and salt in a bowl.
  3. Beat the sugar and butter together until fluffy, about 2 minutes. Beat in the eggs one at a time, then the vanilla and almond extracts.
  4. Add the dry ingredients and mix on low speed until just combined. Fold in the cranberries and pistachios.
  5. Divide the dough in half and shape each half into a log about 10 inches long and 2 inches wide directly on the baking sheet.
  6. Bake for 28–30 minutes, until firm and lightly golden. Cool on the pan for 15 minutes.
  7. Reduce the oven to 300°F. Using a serrated knife, slice each log into ½-inch pieces on a slight diagonal.
  8. Lay the slices cut-side down on the baking sheet and bake for 9 minutes per side, until dry and crisp.
  9. Cool completely on a wire rack before storing.

Substitutions

No pistachios on hand? Toasted sliced almonds work just as well and give a similar visual contrast against the cranberries.

8. Gluten-Free Almond Snowball Cookies

Gluten-free almond snowball cookies coated in powdered sugar, one broken in half

Rolled twice in powdered sugar, these look like they’ve been caught mid-snowfall, and the almond flour keeps the inside sandy and tender rather than dry. There’s no gluten hiding here, but no one at the table will notice.

Prep Time: 20 min  |  Cook Time: 14 min  |  Total Time: 34 min  |  Servings: 24 cookies  |  Difficulty: Easy

Ingredients

  • 1 cup almond flour
  • 1 cup gluten-free all-purpose flour blend
  • ¼ tsp salt
  • ¾ cup unsalted butter, softened
  • ½ cup powdered sugar, plus 1 cup for rolling
  • 1 tsp vanilla extract
  • ¾ cup finely chopped toasted almonds

Instructions

  1. Preheat the oven to 350°F and line a baking sheet with parchment.
  2. Whisk together the almond flour, gluten-free flour blend, and salt in a bowl.
  3. Beat the butter and ½ cup powdered sugar together until light, about 2 minutes. Beat in the vanilla.
  4. Add the dry ingredients and mix on low speed until a soft dough forms. Fold in the chopped almonds.
  5. Roll the dough into 24 balls, about 1 tablespoon each, and place 1½ inches apart on the sheet.
  6. Bake for 13–14 minutes, until the bottoms are lightly golden but the tops stay pale.
  7. Cool for 5 minutes, then roll each warm cookie in the remaining powdered sugar. Let cool completely, then roll a second time.

Why You’ll Love It

Because the dough comes together with almond flour instead of gluten, there’s no risk of overworking it — these stay tender even if you’re a little heavy-handed while mixing.

9. Peanut Butter Blossom Cookies

Peanut butter blossom cookies topped with a chocolate kiss, cooling on parchment paper

The crosshatched sugar coating gives way to a cookie that’s dense and slightly crumbly, built to hold up a chocolate kiss pressed in while it’s still warm from the oven. Salty peanut butter and sweet chocolate hit in the same bite every time.

Prep Time: 15 min  |  Cook Time: 9 min  |  Total Time: 24 min  |  Servings: 36 cookies  |  Difficulty: Easy

Ingredients

  • 1¾ cups all-purpose flour
  • 1 tsp baking soda
  • ½ tsp salt
  • ½ cup unsalted butter, softened
  • ½ cup creamy peanut butter
  • ½ cup granulated sugar, plus extra for rolling
  • ½ cup packed brown sugar
  • 1 large egg
  • 1 tsp vanilla extract
  • 36 chocolate kiss candies, unwrapped

Instructions

  1. Preheat the oven to 350°F and line two baking sheets with parchment.
  2. Whisk together the flour, baking soda, and salt in a bowl.
  3. Beat the butter and peanut butter together until smooth, about 2 minutes. Add the granulated and brown sugars and beat until fluffy.
  4. Beat in the egg and vanilla until combined.
  5. Add the dry ingredients and mix on low speed until just combined.
  6. Roll the dough into 36 balls, about 1 tablespoon each, then roll each in granulated sugar.
  7. Place 2 inches apart on the sheets and bake for 8–9 minutes, until the edges are just set.
  8. Immediately press a chocolate kiss into the center of each cookie. Cool on the pan for 5 minutes before transferring to a wire rack.

Storage & Freezing

Freeze the rolled, sugared dough balls without the chocolate kiss for up to 3 months. Bake from frozen, adding 1–2 minutes, and press the kiss in right after baking.

10. Classic Cut-Out Sugar Cookies

Star and tree-shaped cut-out sugar cookies decorated with royal icing and sprinkles

A clean edge and a flat top mean these hold their shape through baking, giving you a real canvas for icing instead of a puffed, uneven blob. The texture lands right in the middle — a slight bite at the edge, soft through the center.

Prep Time: 20 min  |  Cook Time: 10 min  |  Total Time: 1 hr 30 min (includes chilling)  |  Servings: 24 cookies  |  Difficulty: Easy

Ingredients

  • 3 cups all-purpose flour
  • 1 tsp baking powder
  • ½ tsp salt
  • 1 cup unsalted butter, softened
  • 1 cup granulated sugar
  • 1 large egg
  • 1 tsp vanilla extract
  • ½ tsp almond extract

Instructions

  1. Whisk together the flour, baking powder, and salt in a bowl.
  2. Beat the butter and sugar together until fluffy, about 3 minutes. Beat in the egg, vanilla, and almond extract.
  3. Add the dry ingredients and mix on low speed until a smooth dough forms.
  4. Divide the dough in half, flatten into disks, wrap, and chill for 1 hour.
  5. Preheat the oven to 350°F and line two baking sheets with parchment.
  6. Roll one disk at a time to ¼-inch thickness on a lightly floured surface and cut into shapes.
  7. Place 2 inches apart on the sheets and bake for 9–10 minutes, until the edges are just barely golden.
  8. Cool on the pan for 5 minutes before transferring to a wire rack to cool completely before decorating.

Make-Ahead Tip

The dough disks freeze beautifully for up to 3 months — thaw overnight in the refrigerator until pliable enough to roll, about 30 minutes before you plan to bake.

Which Recipe Should You Make?

With 15 options on the table, here’s a quick side-by-side to help you narrow things down based on how much time and effort you actually have this week.

RecipeBest ForDifficultyTotal Time
Peppermint Bark FudgeLast-minute giftingEasy2 hr 25 min
Salted Caramel Chocolate TrufflesElegant hostess giftMedium2 hr 35 min
Chewy Molasses Spice CookiesCookie exchangesEasy1 hr 25 min
Gluten-Free Almond SnowballsGuests with dietary needsEasy34 min
Chocolate Yule LogA showstopper centerpieceAdvanced1 hr 50 min

Bars & Quick Breads

11. Toffee Pecan Bars

Toffee pecan bars cut into squares showing the shortbread base and toasted pecan top

The shortbread base stays firm enough to hold a clean square, while the toffee layer running through the middle turns sticky and rich against a scattering of toasted pecans on top. It eats more like a candy bar than a cookie.

Prep Time: 20 min  |  Cook Time: 35 min  |  Total Time: 1 hr 15 min (includes cooling)  |  Servings: 20 bars  |  Difficulty: Medium

Ingredients

  • 2 cups all-purpose flour
  • ½ cup packed brown sugar
  • ¾ cup unsalted butter, cold and cubed, plus ½ cup for topping
  • ¼ tsp salt
  • ½ cup granulated sugar
  • 3 tbsp honey
  • 2 cups pecan halves, roughly chopped

Instructions

  1. Preheat the oven to 350°F and line a 9×13-inch pan with parchment.
  2. Pulse the flour, brown sugar, ¾ cup cold butter, and salt in a food processor until it resembles coarse crumbs.
  3. Press the mixture firmly into the pan and bake for 15 minutes, until pale golden. Set aside.
  4. In a saucepan, combine the remaining ½ cup butter, granulated sugar, and honey over medium heat. Bring to a boil, stirring constantly, and cook for 3 minutes.
  5. Remove from heat and stir in the chopped pecans until evenly coated.
  6. Pour the pecan mixture over the baked crust, spreading to the edges.
  7. Bake for 18–20 minutes, until bubbling and deep amber at the edges.
  8. Cool completely in the pan, about 40 minutes, before lifting out and slicing into 20 bars.

Baker’s Tip

Let the topping cool fully before slicing — cutting too early causes the toffee layer to pull apart from the crust instead of holding a clean edge.

12. Cranberry Orange Quick Bread

Sliced loaf of cranberry orange quick bread with orange glaze drizzled on top

Fresh cranberries burst against the crumb as it bakes, staining pockets of the loaf a deep pink, while an orange glaze soaks in just enough to leave the top glossy rather than wet. It’s tender enough to eat plain, straight off the cutting board.

Prep Time: 15 min  |  Cook Time: 55 min  |  Total Time: 1 hr 30 min (includes cooling)  |  Servings: 10 slices  |  Difficulty: Easy

Ingredients

  • 2 cups all-purpose flour
  • 1 tsp baking powder
  • ½ tsp baking soda
  • ½ tsp salt
  • ½ cup unsalted butter, softened
  • ¾ cup granulated sugar
  • 2 large eggs
  • Zest and juice of 1 large orange
  • ½ cup buttermilk
  • 1½ cups fresh cranberries, roughly chopped
  • 1 cup powdered sugar, for glaze

Instructions

  1. Preheat the oven to 350°F. Grease a 9×5-inch loaf pan.
  2. Whisk together the flour, baking powder, baking soda, and salt in a bowl.
  3. Beat the butter and granulated sugar together until fluffy, about 2 minutes. Beat in the eggs one at a time, then the orange zest.
  4. Add the dry ingredients in three additions, alternating with the buttermilk, mixing just until combined after each.
  5. Fold in the chopped cranberries.
  6. Pour the batter into the pan and smooth the top. Bake for 50–55 minutes, until a toothpick inserted in the center comes out clean.
  7. Cool in the pan for 15 minutes, then transfer to a wire rack to cool completely, about 30 minutes.
  8. Whisk the powdered sugar with 2–3 tablespoons of the orange juice until pourable, then drizzle over the cooled loaf.

Storage & Freezing

Freeze the unglazed loaf, wrapped tightly in plastic and foil, for up to 3 months. Thaw overnight at room temperature and glaze just before serving.

13. Eggnog Cheesecake Bars

Eggnog cheesecake bars with a graham cracker crust, dusted with nutmeg

The filling bakes to a smooth, dense set with just a slight jiggle in the center, carrying eggnog’s warmth without tasting overtly boozy. A dusting of fresh nutmeg on top is the only garnish it needs.

Prep Time: 20 min  |  Cook Time: 40 min  |  Total Time: 5 hr (includes chilling)  |  Servings: 16 bars  |  Difficulty: Medium

Ingredients

  • 1½ cups graham cracker crumbs
  • 6 tbsp unsalted butter, melted
  • 3 tbsp granulated sugar
  • 16 oz cream cheese, softened
  • ¾ cup granulated sugar
  • 2 large eggs
  • ½ cup prepared eggnog
  • 1 tsp vanilla extract
  • ½ tsp ground nutmeg, plus extra for topping

Instructions

  1. Preheat the oven to 325°F and line a 9×9-inch pan with parchment, leaving overhang on two sides.
  2. Combine the graham cracker crumbs, melted butter, and 3 tablespoons sugar. Press firmly into the pan and bake for 8 minutes. Set aside.
  3. Beat the cream cheese and ¾ cup sugar together until smooth, about 2 minutes.
  4. Beat in the eggs one at a time, then the eggnog, vanilla, and nutmeg, mixing just until smooth.
  5. Pour the filling over the crust and smooth the top.
  6. Bake for 32–35 minutes, until the edges are set and the center has a slight jiggle.
  7. Cool in the pan for 30 minutes, then refrigerate for at least 4 hours before lifting out and slicing into 16 bars.
  8. Dust with a little extra nutmeg just before serving.

Good to Know

Overbaking is the most common mistake here — pull the pan while the center still jiggles slightly, since it will continue to set as it cools.

Showstopper Make-Ahead Bakes

14. Chocolate Yule Log

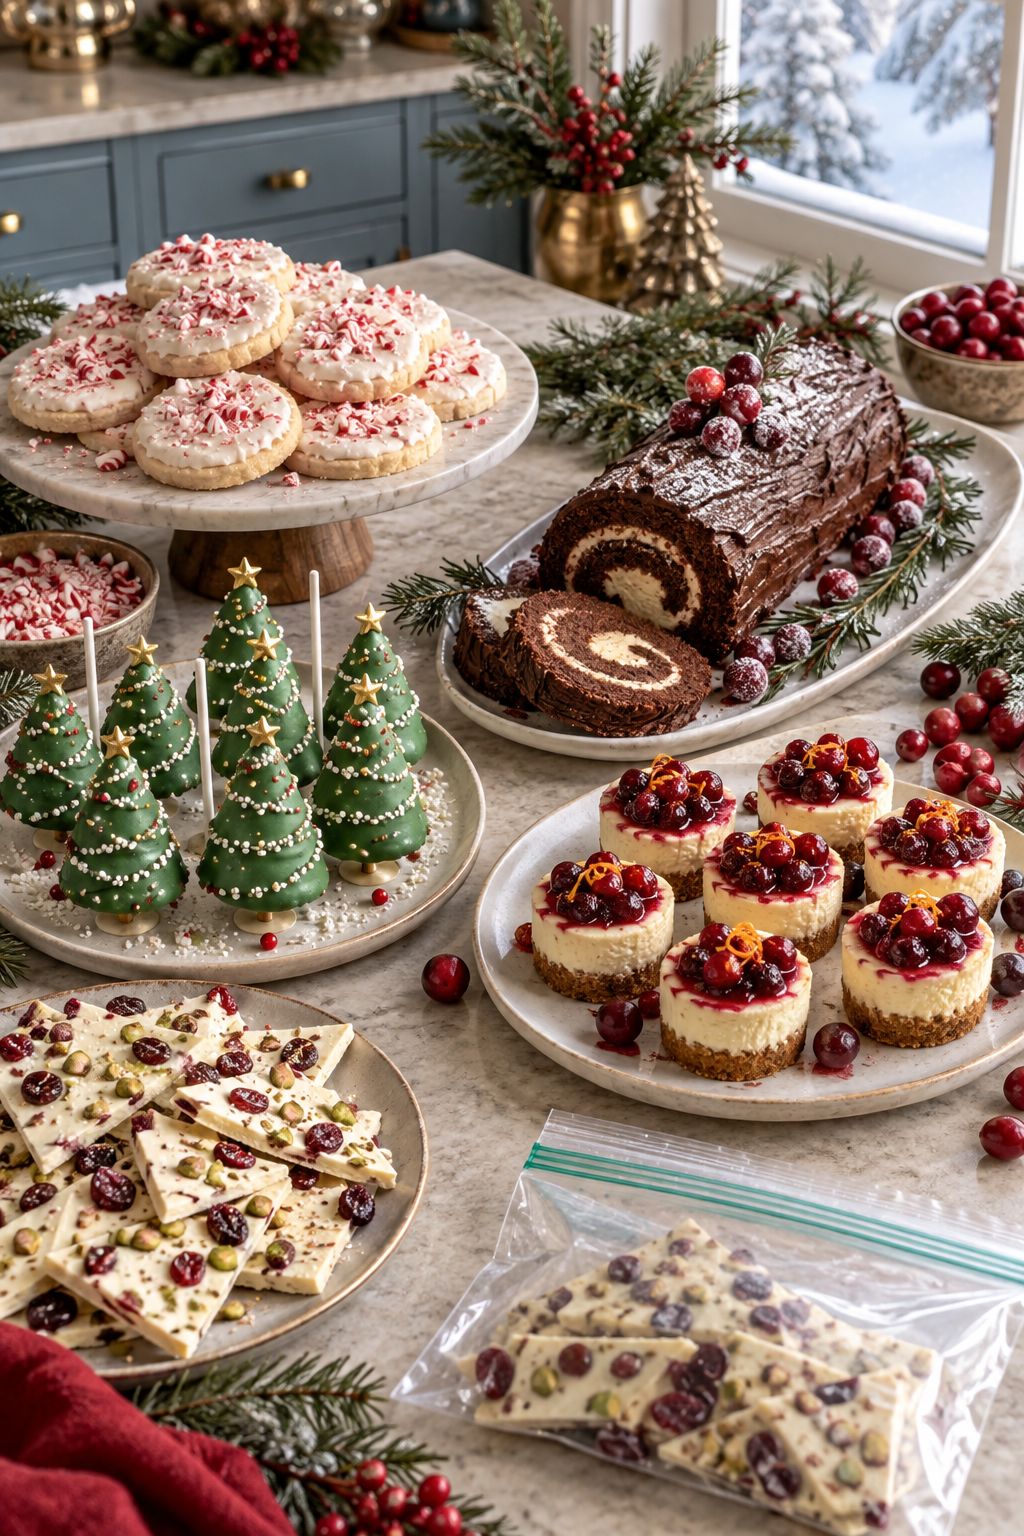
Chocolate yule log with bark-textured buttercream, dusted with powdered sugar and garnished with sugared cranberries

The bark texture combed into the frosting is convincing enough to fool a glance from across the table, and slicing into it reveals a tight spiral of chocolate sponge around a coffee-tinged whipped cream filling. It’s the centerpiece of the whole dessert table.

Prep Time: 40 min  |  Cook Time: 12 min  |  Total Time: 1 hr 50 min (includes cooling)  |  Servings: 12 slices  |  Difficulty: Advanced

Ingredients

  • ¾ cup all-purpose flour
  • ⅓ cup unsweetened cocoa powder
  • 1 tsp baking powder
  • ¼ tsp salt
  • 4 large eggs, room temperature
  • ¾ cup granulated sugar, divided
  • ⅓ cup vegetable oil
  • 1 tsp vanilla extract, divided
  • 1 cup heavy cream, cold
  • 2 tbsp powdered sugar
  • 1 cup unsalted butter, softened
  • 3 cups powdered sugar, for frosting
  • 4 oz melted semisweet chocolate, cooled

Instructions

  1. Preheat the oven to 350°F. Grease a 10×15-inch jelly roll pan and line with parchment.
  2. Whisk together the flour, cocoa powder, baking powder, and salt in a bowl.
  3. Beat the eggs and ½ cup sugar together on high speed until pale and tripled in volume, about 4 minutes. Beat in the oil and ½ tsp vanilla.
  4. Fold the dry ingredients into the egg mixture in three additions until just combined.
  5. Spread the batter evenly in the pan and bake for 10–12 minutes, until the top springs back when touched.
  6. Immediately invert the warm cake onto a clean kitchen towel dusted with the remaining ¼ cup sugar. Peel off the parchment and roll the cake up in the towel from the short end. Cool completely, about 30 minutes.
  7. Whip the cold heavy cream, 2 tbsp powdered sugar, and remaining ½ tsp vanilla to stiff peaks. Unroll the cooled cake, spread with the whipped cream, and re-roll without the towel.
  8. Beat the softened butter, 3 cups powdered sugar, and melted chocolate together until fluffy to make the frosting. Frost the log and drag a fork along the length to create bark texture.

Baker’s Tip

Rolling the cake in the towel while it’s still warm is what prevents cracking later — skipping this step is the number one reason yule logs split when unrolled.

Storage & Freezing

Freeze the frosted, unsliced log on a tray until firm, then wrap tightly in plastic. Freeze up to 1 month; thaw overnight in the refrigerator before serving.

15. Vegan Gingerbread Blondies

Vegan gingerbread blondies studded with molasses, cut into squares

These bake up thick and chewy at the edges with a slightly underbaked center, dark with molasses rather than brown sugar alone. No one reaching for a second square would guess there’s no butter or egg anywhere in the pan.

Prep Time: 15 min  |  Cook Time: 28 min  |  Total Time: 55 min (includes cooling)  |  Servings: 16 blondies  |  Difficulty: Easy

Ingredients

  • 1¾ cups all-purpose flour
  • 1 tsp baking powder
  • ½ tsp baking soda
  • 2 tsp ground ginger
  • 1 tsp ground cinnamon
  • ¼ tsp ground cloves
  • ½ tsp salt
  • ½ cup coconut oil, melted and cooled
  • ¾ cup packed brown sugar
  • ⅓ cup molasses
  • ¼ cup unsweetened applesauce
  • 1 tsp vanilla extract

Instructions

  1. Preheat the oven to 350°F and line an 8×8-inch pan with parchment, leaving overhang on two sides.
  2. Whisk together the flour, baking powder, baking soda, ginger, cinnamon, cloves, and salt in a bowl.
  3. In a separate bowl, whisk the coconut oil and brown sugar together until smooth. Whisk in the molasses, applesauce, and vanilla.
  4. Add the dry ingredients to the wet ingredients and stir with a spatula until just combined and no dry streaks remain.
  5. Spread the batter into the pan and smooth the top.
  6. Bake for 25–28 minutes, until the edges pull slightly from the pan and the center is set but still soft.
  7. Cool completely in the pan, about 30 minutes, before lifting out and slicing into 16 squares.

Substitutions

The applesauce replaces egg here and keeps things binding without changing the flavor. Any neutral oil can stand in for the coconut oil if that’s what you have on hand.

How to Store and Freeze These Desserts

Freezing well comes down to two things: cooling completely before wrapping, and keeping air away from the surface. Wrap bars, loaves, and logs tightly in plastic wrap followed by a layer of foil, or use a freezer-safe airtight container. For cookies and truffles, freeze in a single layer on a tray first, then transfer to a bag once solid — this keeps them from clumping into one frozen mass.

Most baked goods here hold up well for up to 3 months in the freezer. Cream-based desserts like the eggnog pie and cheesecake bars are best used within 1 month for the cleanest texture. Always thaw in the refrigerator rather than on the counter to avoid condensation forming on the surface.

Common Mistakes to Avoid

  • Wrapping while still warm: This traps steam, which turns to ice crystals and leaves baked goods soggy once thawed. Always cool completely — usually 30 minutes to an hour — before wrapping.
  • Skipping the double wrap: A single layer of plastic wrap isn’t enough to block freezer odors. Follow it with foil or a second layer of plastic for anything staying frozen longer than 2 weeks.
  • Frosting before freezing delicate designs: Buttercream and glaze can smudge against plastic wrap. Freeze frosted items uncovered on a tray until firm, then wrap.
  • Thawing on the counter: Rapid temperature changes cause condensation, which makes cookies soggy and cakes gummy. A slow thaw in the refrigerator preserves texture far better.

Frequently Asked Questions

Can I freeze cookie dough instead of baked cookies?

Yes, and for most of the cookies in this collection it’s the better option. Freeze portioned dough balls on a tray until solid, then store in a bag for up to 3 months, and bake straight from frozen with a couple of extra minutes added to the bake time.

How long do frozen desserts last before they lose quality?

Most cookies, bars, and cakes hold their texture well for up to 3 months. Cream and custard-based desserts, like cheesecake bars and ice cream pie, taste best when used within 1 month.

Do I need to thaw desserts before serving?

Baked goods like cookies, bars, and bread should thaw in the refrigerator or at room temperature before serving. Frozen pies like the eggnog ice cream pie and chocolate peppermint pie are meant to be sliced cold, straight from the freezer or after a short 10-minute rest.

Can I decorate cookies before freezing them?

Royal icing freezes reasonably well once fully hardened, but buttercream and glaze are more prone to smudging. It’s usually safest to freeze cookies undecorated and add icing after thawing.

What’s the best container for freezing bars and cakes?

A rigid airtight container prevents crushing better than a bag alone, especially for delicate items like the yule log or cheesecake bars. Wrap the item in plastic first, then place it in the container for double protection.

Related Articles

Tools That Make This Easier

A few tools make freezer baking noticeably smoother. A stand mixer speeds up creaming butter and whipping cream across nearly every recipe here, while freezer-safe baking pans and a good cooling rack keep bars and loaves intact from oven to freezer. Parchment paper and a silicone baking mat make cookies easy to lift and freeze in a single layer, and dipping tools take the mess out of coating truffles. Once everything’s baked, airtight tins keep cookies fresh in the freezer, and a windowed bakery box turns any of these into a gift.

Similar Posts

3 Comments

Leave a Reply

Your email address will not be published. Required fields are marked *