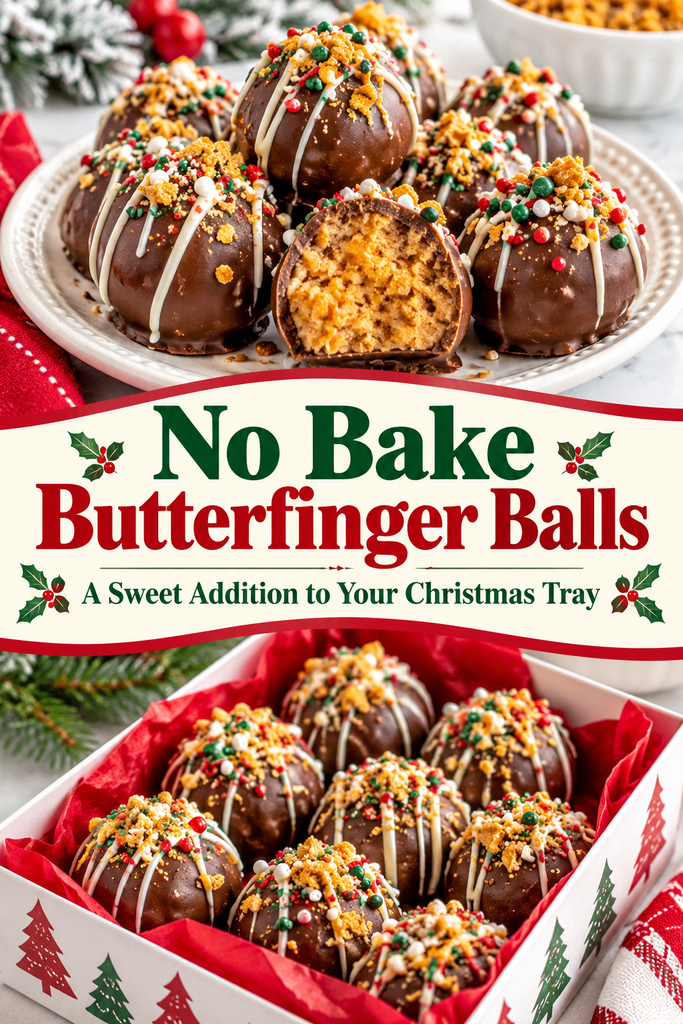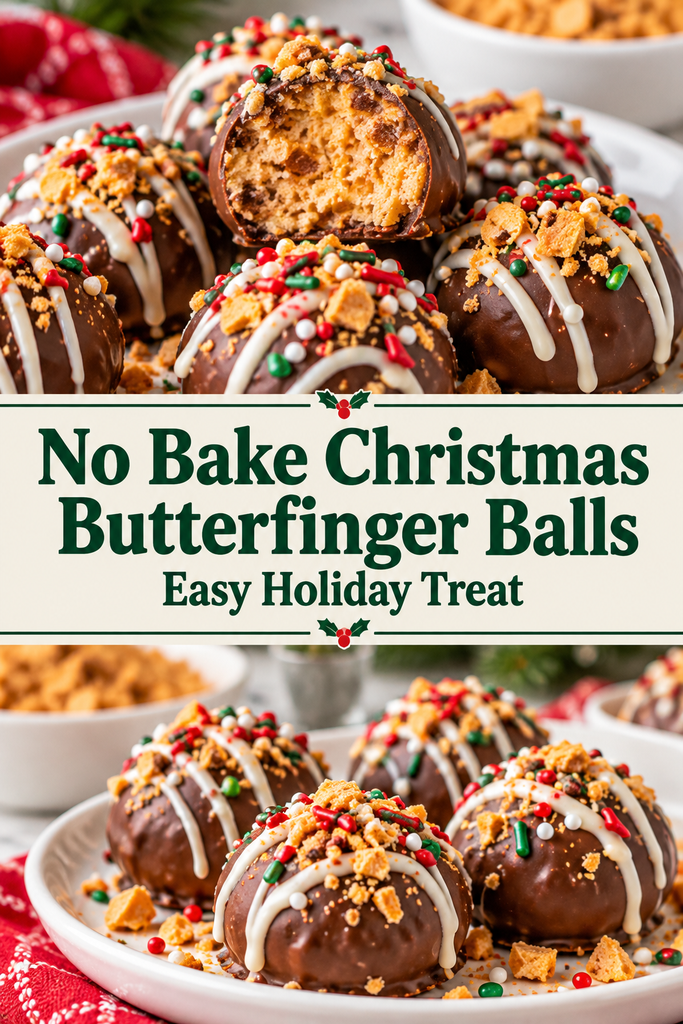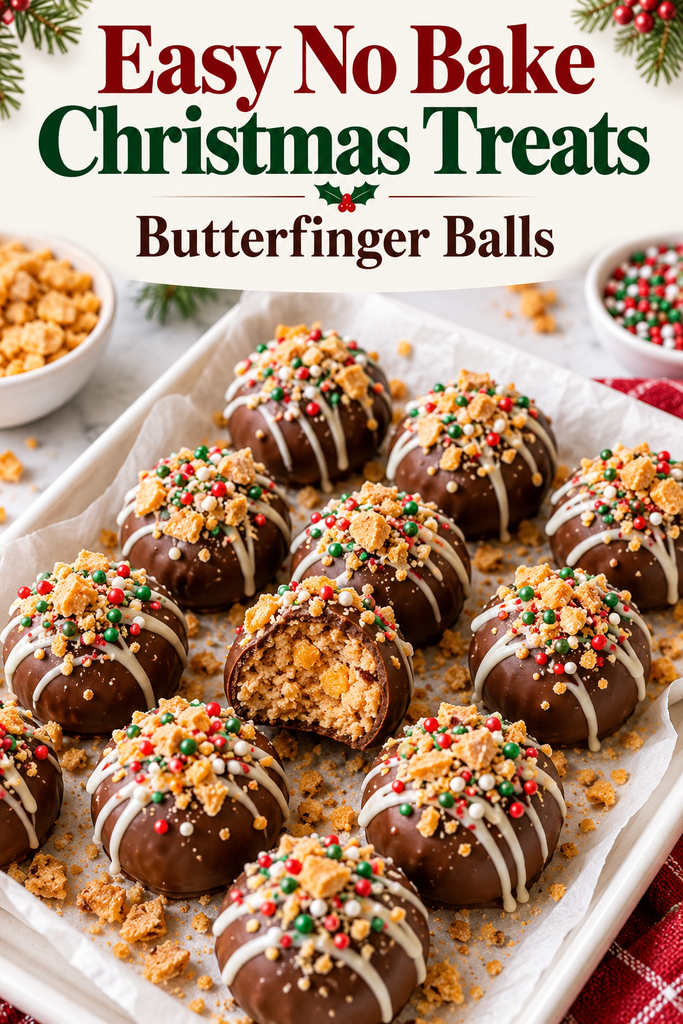
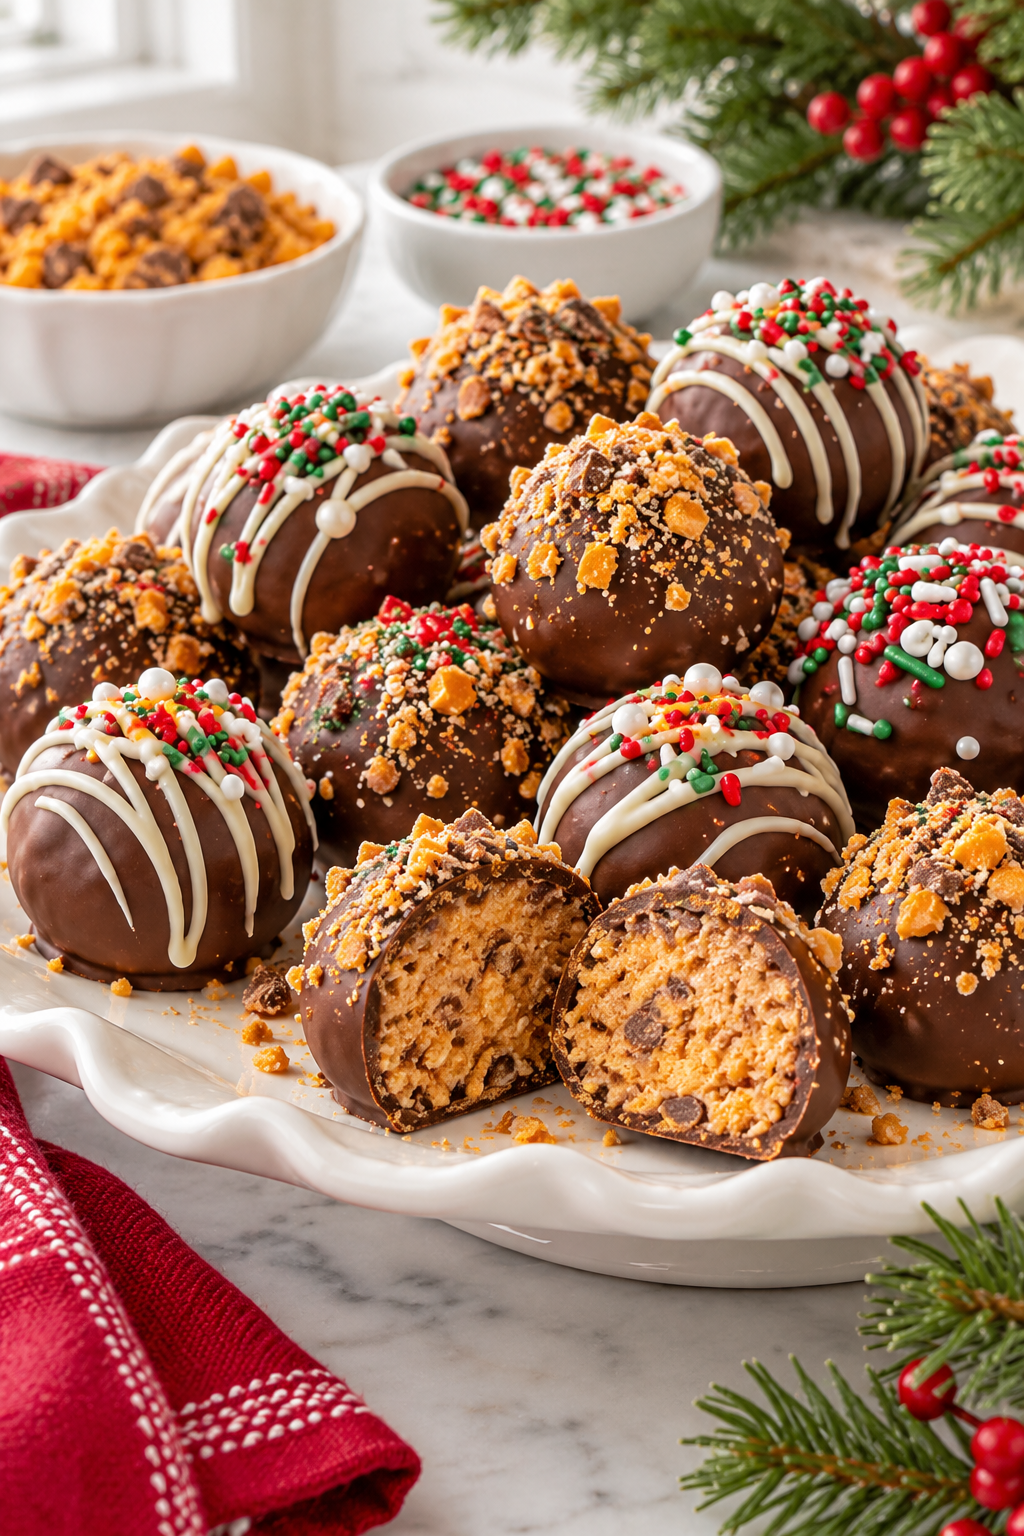
No Bake Christmas Butterfinger Balls
Christmas baking is fun until the oven is full, the counters are covered, and you still need one more treat for the dessert tray. These no bake Christmas Butterfinger balls keep things simple: a creamy peanut butter filling, crunchy pieces of Butterfinger candy, and a chocolate coating dressed up with holiday sprinkles.
They’re rich, sweet, and small enough to tuck between cookies on a Christmas platter. Make a batch ahead for a holiday party, package a few in treat boxes, or keep them chilled for a little something sweet while you wrap presents.
Why You’ll Love These Christmas Butterfinger Balls
- No oven needed. Just mix, roll, chill, and dip.
- A little crunch in every bite. Crushed Butterfinger candy adds texture to the peanut butter center.
- Easy to decorate. Red and green sprinkles or a white chocolate drizzle make them Christmas ready.
- Great for making ahead. Prepare them before the holiday rush and keep them chilled until serving.
Recipe at a Glance
- Yield: About 30 balls
- Prep time: About 30 minutes
- Chilling and setting time: About 1 hour 15 minutes
- Total time: About 1 hour 45 minutes
- Method: No bake
Yield and timing will vary slightly with the size of the balls and the coating you use.
Ingredients
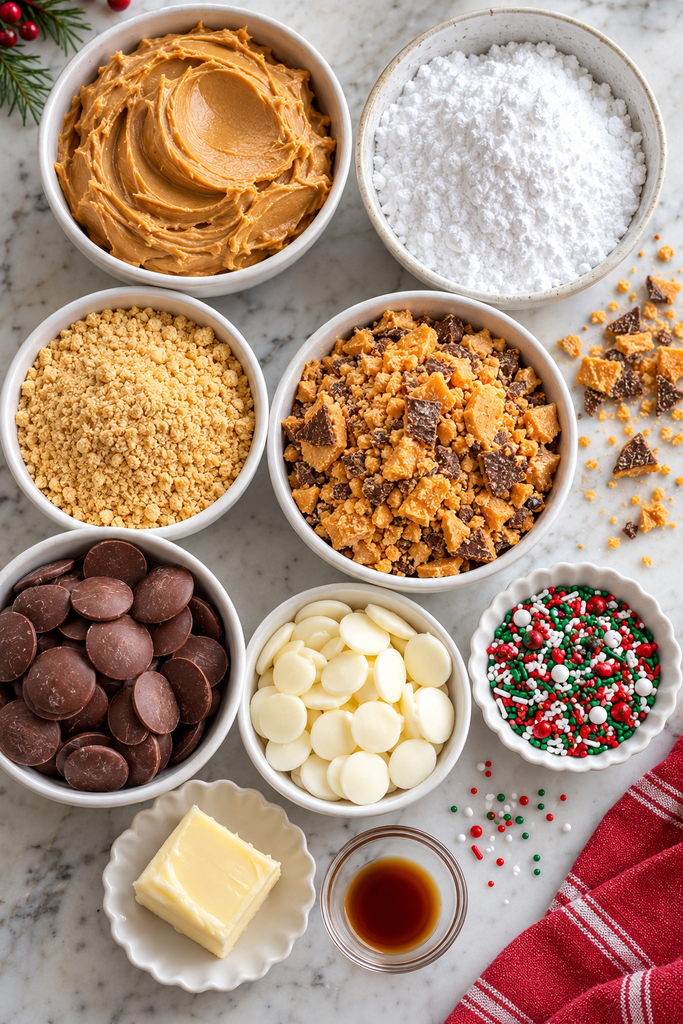
For the Butterfinger Filling
- ½ cup unsalted butter, softened but not melted
- 1 cup creamy peanut butter, preferably a conventional no-stir variety
- 1 teaspoon vanilla extract
- 1½ cups powdered sugar, plus a little more if needed
- 1 cup finely crushed graham crackers
- 1½ cups crushed Butterfinger candy, measured after crushing
For the Chocolate Coating
- 16 ounces chocolate melting wafers or chocolate almond bark
- Red, green, and white sprinkles
- 2 ounces white melting wafers, optional, for drizzling
- Additional crushed Butterfinger candy, optional, for topping
Ingredient note: Chocolate almond bark is a candy coating; use a product intended for melting and dipping. Check the package labels if you’re preparing treats for someone with allergies.
Ingredient Tips
Use thick, creamy peanut butter. Conventional no-stir peanut butter gives the filling a more predictable texture. Natural peanut butter that separates can make the mixture oily or too soft.
Crush the candy into small pieces. Place the unwrapped Butterfinger bars in a zip-top bag and crush them with a rolling pin. Aim for mostly small crumbs with a few tiny crunchy pieces. Large chunks make the balls harder to roll and coat.
Measure after crushing. Candy bar sizes vary, so measuring the crushed candy is more reliable than counting bars.
Choose a coating made for dipping. Melting wafers and almond bark are convenient because they set without tempering. Use milk chocolate flavored coating for a sweeter finish or dark chocolate flavored coating to balance the filling.
How to Make No Bake Christmas Butterfinger Balls

1. Prepare Your Baking Sheet
Line a baking sheet or large tray with parchment paper. Make room in the refrigerator for the tray before you start mixing.
2. Mix the Butter and Peanut Butter
In a large bowl, beat the softened butter and peanut butter until smooth. Mix in the vanilla extract.
The butter should be soft enough to blend easily but still hold its shape. Melted butter can leave the filling greasy and difficult to roll.
3. Add the Dry Ingredients
Mix in the powdered sugar a little at a time. Stir in the graham cracker crumbs and crushed Butterfinger candy until evenly combined.
The mixture should resemble a soft dough that holds together when squeezed. If it seems crumbly, work it gently with a spatula before adding anything else.
4. Chill the Filling
Refrigerate the mixture for about 20–30 minutes, or until firm enough to scoop and roll.
If it still feels sticky after chilling, mix in additional powdered sugar, 1 tablespoon at a time. Add only enough to make it manageable so the centers stay creamy.
5. Roll Into Balls
Scoop about 1 tablespoon of filling per ball and roll between your palms. Arrange on the lined tray.
Refrigerate the rolled balls for another 30 minutes, or until firm. Work in batches if your kitchen is warm.
6. Melt the Chocolate Coating
Place the melting wafers or chopped almond bark in a microwave-safe bowl. Heat according to the package directions, stirring frequently until smooth.
Keep the bowl and utensils dry. Even a little water can cause the coating to seize.
7. Dip the Butterfinger Balls
Lower a chilled ball into the melted coating with a fork or dipping tool. Lift it out, let the excess drip back into the bowl, and gently slide it onto the parchment.
Dip a few balls at a time, leaving the rest in the refrigerator so they stay firm.
8. Decorate for Christmas
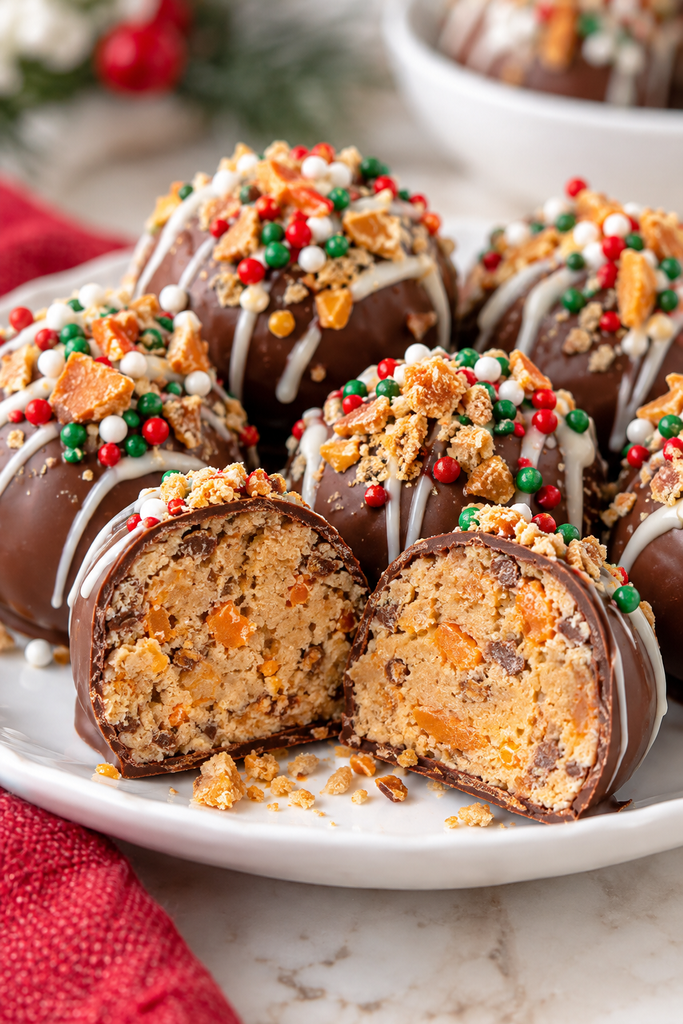
Add sprinkles or crushed candy while the chocolate is still wet.
For a white drizzle, let the first coating set, then melt the white wafers according to the package directions. Drizzle over the tops and add a few sprinkles before the drizzle hardens.
9. Let Them Set
Allow the coating to firm up completely. If needed, refrigerate the tray for about 15 minutes, or until the balls lift cleanly from the parchment.
Transfer to an airtight container and keep refrigerated.
Easy Christmas Decorating Ideas
Classic Red and Green
Dip the balls in chocolate and finish with red, green, and white sprinkles. This is the easiest option when you’re making a full batch.
Snowy White Drizzle
Add thin white chocolate flavored stripes over the dark coating. A few white nonpareils give them a snowy finish.
Butterfinger Crunch
Sprinkle a little crushed Butterfinger over each freshly dipped ball. It adds extra crunch and helps guests recognize the flavor.
Mixed Holiday Treat Box
Decorate a third with sprinkles, a third with white drizzle, and the rest with candy crumbs. You get a varied treat box from one recipe.
Tips for Smooth Dipping
- Chill the centers until firm. Soft balls can lose their shape in the warm coating.
- Use a small, deep bowl. It makes dipping easier than a wide, shallow dish.
- Let very hot coating cool slightly. It should be fluid and warm, without melting the filling.
- Tap off excess gently. A light tap against the bowl helps prevent a thick puddle around the base.
- Decorate as you go. The coating may set before you finish dipping the whole tray.
- Avoid dipping frozen centers. Very cold centers can contribute to cracks as they warm and expand.
Make-Ahead and Storage
Refrigerator
Store the finished Butterfinger balls in an airtight container in the refrigerator for up to 1 week. Separate layers with parchment paper.
For a softer bite, let a small serving sit at room temperature for about 10 minutes before enjoying.
Freezer
Freeze the fully set balls in a single layer, then transfer to a freezer-safe airtight container with parchment between layers. Freeze for up to 2 months for best quality.
Thaw overnight in the refrigerator with the container closed to help limit condensation. Candy crumbs and sprinkles may soften after freezing.
Preparing the Centers Ahead
You can roll the uncoated centers a day ahead. Keep them covered in the refrigerator, then dip and decorate the following day.
Ways to Serve Them
These Christmas Butterfinger balls fit easily into a cookie exchange or holiday dessert spread. Serve them in mini paper candy cups to keep the chocolate coating tidy.
Pair them with sugar cookies, chocolate pretzels, gingerbread cookies, or peppermint bark for a tray with different flavors and textures.
For gifting, arrange the chilled balls in a food-safe container and include a note to keep refrigerated.
Frequently Asked Questions
Can I use crunchy peanut butter?
Yes, although the filling will be chunkier and may be harder to roll smoothly. Creamy peanut butter lets the Butterfinger pieces provide the crunch.
Can I use chocolate chips instead of melting wafers?
You can, but ordinary melted chocolate chips may set softer or develop streaks without tempering. Melting wafers or almond bark are the easiest choice for a firm coating.
Why is my filling too soft?
The butter may have been too warm, the peanut butter may have been runny, or the mixture may need more chilling time. Chill first, then add powdered sugar a tablespoon at a time only if needed.
Why is my filling crumbly?
The dry ingredients may have been packed into the measuring cups, or the mixture may need more mixing. Press a small portion together first. If it still won’t hold, mix in peanut butter 1 teaspoon at a time until it comes together.
Can I leave out the graham cracker crumbs?
They help give the filling structure, so leaving them out will change the texture. For the most predictable result, keep them in this version of the recipe.
Are these gluten-free?
This version uses regular graham crackers and is not gluten-free. If adapting it, use gluten-free graham crackers and verify the labels on the candy, coating, sprinkles, and other ingredients.
No Bake Christmas Butterfinger Balls Recipe
Yield: About 30 balls
Prep: 30 minutes
Chill and set: Approximately 1 hour 15 minutes
Total: Approximately 1 hour 45 minutes
Ingredients
Filling
- ½ cup unsalted butter, softened
- 1 cup creamy no-stir peanut butter
- 1 teaspoon vanilla extract
- 1½ cups powdered sugar, plus more only if needed
- 1 cup finely crushed graham crackers
- 1½ cups crushed Butterfinger candy
Coating
- 16 ounces chocolate melting wafers or chocolate almond bark
- Christmas sprinkles
- 2 ounces white melting wafers, optional
- Extra crushed Butterfinger candy, optional
Instructions
- Line a baking sheet with parchment paper.
- Beat the butter and peanut butter until smooth. Mix in vanilla.
- Gradually mix in powdered sugar, then stir in graham cracker crumbs and crushed Butterfinger candy.
- Chill for 20–30 minutes, until the mixture is easy to handle.
- Roll tablespoon-sized portions into balls. Refrigerate for another 30 minutes, until firm.
- Melt the chocolate coating according to the package directions.
- Dip each chilled ball, let excess coating drip off, and return to the parchment.
- Add sprinkles or candy crumbs immediately. For white drizzle, let the base coating set first, then drizzle and decorate.
- Let the coating firm up, refrigerating for about 15 minutes if needed. Store in an airtight container in the refrigerator.
Notes
- Measure the graham crackers and Butterfinger candy after crushing.
- Chill sticky filling before adding more powdered sugar.
- Keep refrigerated for up to 1 week or freeze for up to 2 months for best quality.
- Contains peanuts and dairy; check all ingredient labels for other allergens.