16 Christmas Cupcake Ideas: Easy Designs and Full Recipes for Every Skill Level
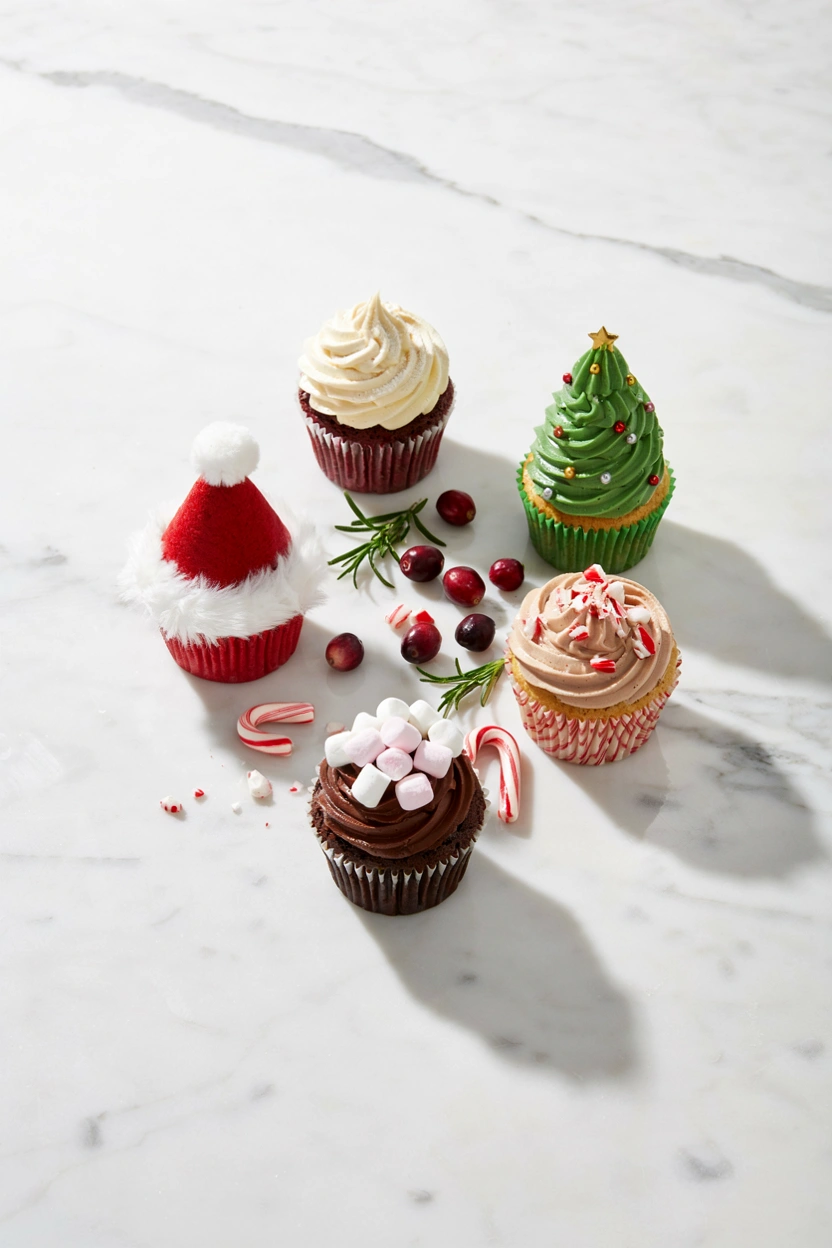
Quick Answer: The easiest Christmas cupcake ideas start with red and white buttercream swirls, crushed candy cane on top, or a simple piped Christmas tree — no special tools needed. For more impact, try Santa hat toppers, reindeer faces, a Grinch cupcake, or a melting snowman. Below you’ll find 17 complete recipes, sorted by skill level.
There’s a very specific kind of panic that hits the night before a classroom party or cookie exchange, when you realize plain cupcakes just won’t cut it this year. You want something that looks like you spent hours on it, even if you only have twenty minutes and a piping bag from last Christmas.
That’s exactly what this collection is for. It’s a mix of five-minute doctor-ups, genuinely showstopping designs, and a few unexpected flavors that go far beyond vanilla and chocolate — gingerbread, chai, salted caramel, cranberry orange, pistachio. Every recipe here is complete and tested for the home oven, not just a pretty photo with no instructions behind it.
Before you scroll, take a second to check the quick-reference guide below so you pick a recipe that actually matches the time and energy you have tonight. For more ideas beyond cupcakes, our full Christmas desserts roundup rounds up cookies, bars, and pies too.
This post may contain affiliate links which helps me keep this blog alive, questions? View the privacy policy.
Which Christmas Cupcake Should You Make?
Use this table to match a recipe to your actual bandwidth before you commit to piping fondant snowflakes at 10pm.
| Recipe | Skill Level | Time Needed | Best For |
|---|---|---|---|
| Classic Red Velvet with Cream Cheese Frosting | Beginner | Quick (45 min) | Last-minute parties |
| Peppermint Mocha Cupcakes | Beginner | Quick (45 min) | Coffee lovers, office potlucks |
| Eggnog Spice Cupcakes | Beginner | Standard (1 hr) | Holiday dinner dessert table |
| Gingerbread Cupcakes with Molasses Buttercream | Beginner | Standard (1 hr) | Traditional flavor fans |
| White Chocolate Snowball Cupcakes | Beginner | Standard (1 hr) | Coconut lovers |
| Christmas Tree Cupcakes | Intermediate | Standard (1 hr 15 min) | Family baking night |
| Santa Hat Cupcakes | Intermediate | Standard (1 hr) | Kid-friendly decorating activity |
| Reindeer Face Cupcakes | Intermediate | Standard (1 hr) | Classroom parties |
| Grinch Cupcakes | Intermediate | Standard (1 hr) | Grinch movie night |
| Melted Snowman Cupcakes | Intermediate | Standard (1 hr) | Playful, low-pressure decorating |
| Pistachio Wreath Cupcakes | Intermediate | Standard (1 hr) | Something different from the usual flavors |
| Hot Chocolate Cupcakes | Intermediate | Standard (1 hr) | Cozy winter gatherings |
| Cranberry Orange Cupcakes | Intermediate | Standard (1 hr) | Balancing out a rich dessert table |
| Salted Caramel Chocolate Cupcakes | Intermediate | Standard (1 hr 15 min) | Adult holiday parties |
| Chai Spice Cupcakes with Cinnamon Buttercream | Intermediate | Standard (1 hr) | Something different from the usual flavors |
| Snow Globe Cupcakes | Showstopper | Weekend Project | Impressing at a cookie exchange |
| Gingerbread House Cupcakes | Showstopper | Weekend Project | Special-occasion centerpiece dessert |
Tools That Make These Easier
A handful of tools cover almost every recipe in this roundup. If you’re missing any of these, they’re worth having on hand before you start.
- Stand mixer, for creaming butter and whipping frostings fast
- Standard 12-cup muffin tin, sized for every recipe below
- Wilton 1M piping tip, the exact tip used for the Christmas Tree and Santa Hat swirls
- Wire cooling rack, so cupcakes cool fully before frosting
- Gel food coloring set, for true holiday reds and greens without watering down buttercream
1. Classic Red Velvet Christmas Cupcakes with Cream Cheese Frosting
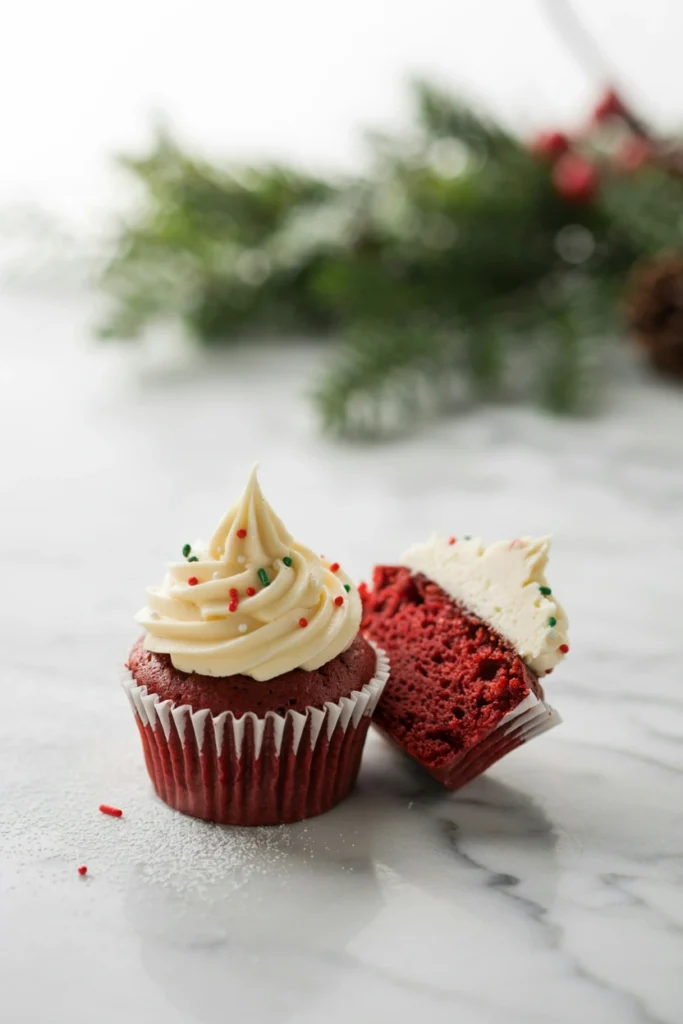
This is the cupcake that never has to try too hard. The crumb is deep red and faintly cocoa-scented, tender enough to compress slightly under a fork, and the tang of the cream cheese frosting keeps it from ever feeling too sweet. Pipe it tall, dust it with a few sprinkles, and it looks finished in under a minute.
Prep Time: 20 min | Cook Time: 20 min | Total Time: 45 min | Servings: 12 | Difficulty: Easy
Ingredients
- 1 1/4 cups all-purpose flour
- 1 tbsp unsweetened cocoa powder
- 1/2 tsp baking soda
- 1/4 tsp salt
- 1/2 cup vegetable oil
- 3/4 cup granulated sugar
- 1 large egg, room temperature
- 1 tbsp red food coloring gel
- 1/2 tsp vanilla extract
- 1/2 cup buttermilk, room temperature
- 1/2 tsp white vinegar
- 8 oz cream cheese, softened
- 1/2 cup unsalted butter, softened
- 3 cups powdered sugar
- 1 tsp vanilla extract (for frosting)
- Red and green sprinkles, for topping
Instructions
- Preheat oven to 350°F and line a 12-cup muffin tin with paper liners.
- Whisk together flour, cocoa powder, baking soda, and salt in a medium bowl.
- In a large bowl, whisk oil and sugar together until combined, then whisk in the egg, red food coloring, and vanilla.
- Alternate adding the flour mixture and buttermilk to the wet ingredients in two additions, mixing just until no streaks remain. Stir in the vinegar.
- Divide batter evenly among liners, filling each about two-thirds full. Bake 18–20 minutes, until a toothpick inserted in the center comes out clean.
- Cool cupcakes in the pan 5 minutes, then transfer to a wire rack to cool completely, about 30 minutes, before frosting.
- For the frosting, beat cream cheese and butter together until smooth and no lumps remain, about 2 minutes. Add powdered sugar 1 cup at a time, beating on low, then add vanilla and beat on medium-high 1 minute until light and fluffy.
- Pipe frosting onto cooled cupcakes using a large open star tip, top with sprinkles, and serve.
Baker’s Tip
Use gel food coloring, not liquid — liquid coloring waters down the batter and gives a duller, more brownish red. For the frosting, our cream cheese buttercream guide covers ratios and troubleshooting in more depth if you want it extra silky.
Why You’ll Love It
It’s the one recipe on this list you already know by heart, made just festive enough without needing a single special tool.
2. Peppermint Mocha Cupcakes
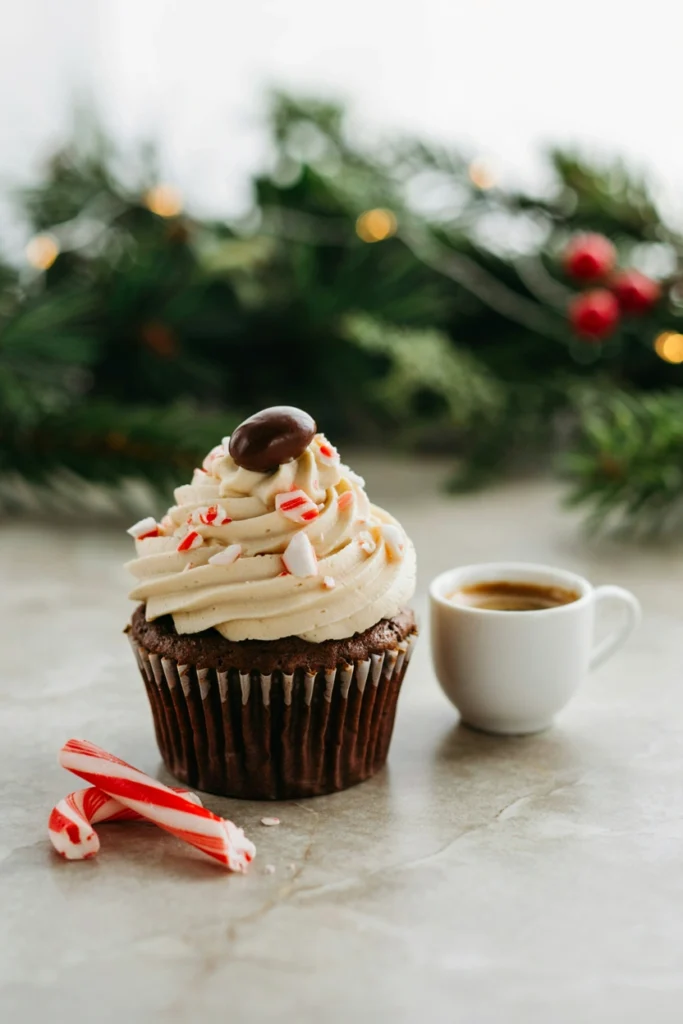
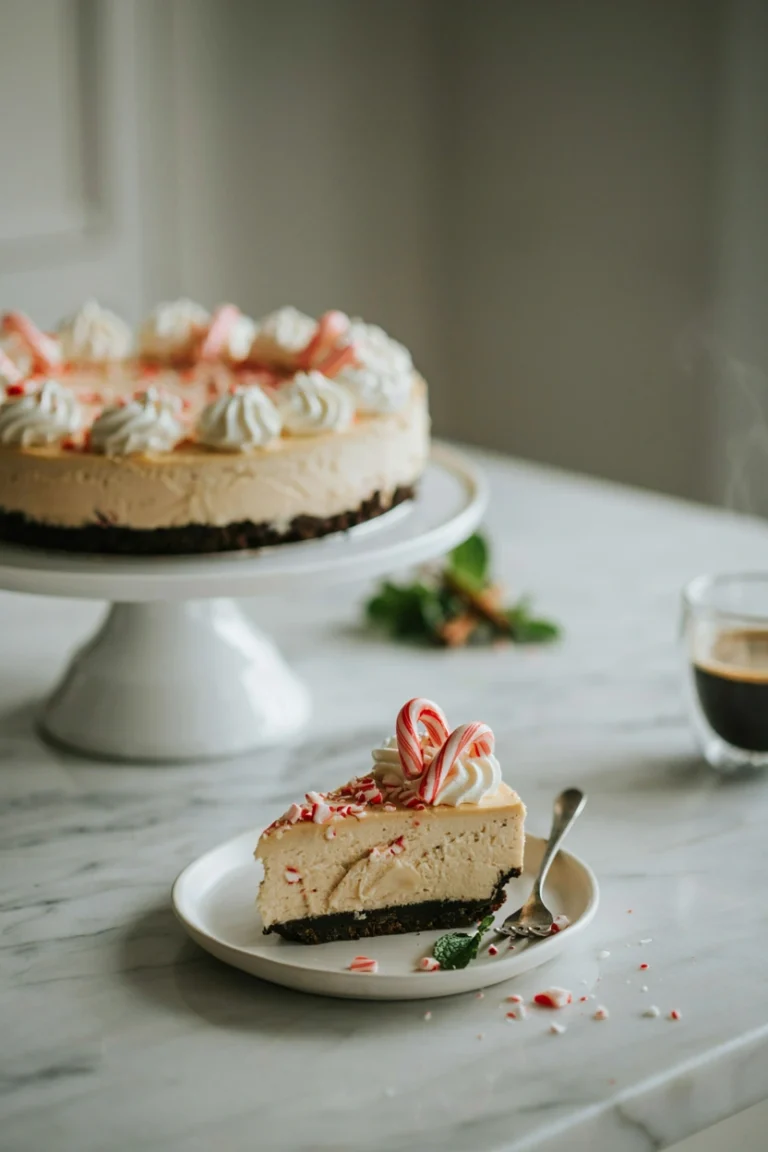
Deep coffee flavor runs straight through the crumb of this one, not just the frosting, so every bite carries that mocha warmth. A crushed candy cane topping adds sharp mint crunch against the soft, slightly dense cake underneath — this is the cupcake for anyone who reaches for the office coffee pot before the cookie tray. If you love this flavor combination, our peppermint mocha cheesecake is worth bookmarking too.
Prep Time: 20 min | Cook Time: 20 min | Total Time: 45 min | Servings: 12 | Difficulty: Easy
Ingredients
- 1 1/4 cups all-purpose flour
- 1/4 cup unsweetened cocoa powder
- 1 tsp baking powder
- 1/4 tsp salt
- 1/2 cup unsalted butter, softened
- 3/4 cup granulated sugar
- 2 large eggs, room temperature
- 1/2 cup strong brewed coffee, cooled
- 1/4 cup whole milk
- 1/2 tsp peppermint extract
- 3/4 cup unsalted butter, softened (for frosting)
- 2 1/2 cups powdered sugar
- 2 tbsp strong brewed coffee, cooled (for frosting)
- 1/4 tsp peppermint extract (for frosting)
- 3 crushed candy canes, for topping
Instructions
- Preheat oven to 350°F and line a 12-cup muffin tin with paper liners.
- Whisk together flour, cocoa powder, baking powder, and salt.
- Beat butter and sugar together until light and fluffy, about 2 minutes. Add eggs one at a time, beating well after each.
- Combine coffee and milk. Alternate adding the flour mixture and coffee mixture to the batter in two additions, mixing until just combined. Stir in peppermint extract.
- Divide batter among liners and bake 18–20 minutes, until a toothpick comes out clean. Cool completely, about 30 minutes.
- For the frosting, beat butter until smooth, then add powdered sugar 1 cup at a time, alternating with coffee. Beat in peppermint extract and whip 1 minute until fluffy.
- Pipe frosting onto cupcakes and immediately sprinkle with crushed candy cane before it sets.
Baker’s Tip
Crush candy canes in a zip-top bag with a rolling pin rather than a food processor — you want uneven, crunchy shards, not fine dust.
Good to Know
Brew the coffee first thing so it has time to cool before you need it in the batter and frosting.
3. Eggnog Spice Cupcakes
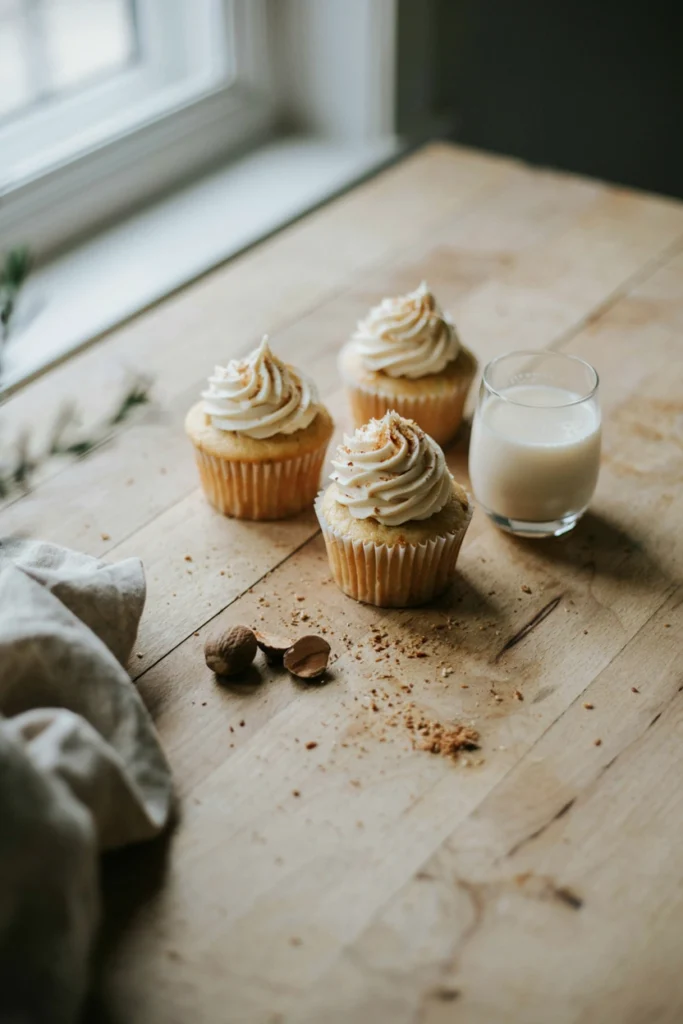
Real eggnog goes into both the batter and the frosting here, giving the crumb a custardy softness and a warm hit of nutmeg you won’t find in a standard vanilla cupcake. It’s the grown-up flavor on this list — the one to bring when the dessert table already has three chocolate options. For a make-ahead eggnog option, our eggnog cheesecake bars slice ahead and travel well too.
Prep Time: 20 min | Cook Time: 20 min | Total Time: 1 hour | Servings: 12 | Difficulty: Easy
Ingredients
- 1 1/2 cups all-purpose flour
- 1 1/2 tsp baking powder
- 1/2 tsp ground nutmeg
- 1/4 tsp ground cinnamon
- 1/4 tsp salt
- 1/2 cup unsalted butter, softened
- 3/4 cup granulated sugar
- 2 large eggs, room temperature
- 3/4 cup eggnog, room temperature
- 1 tsp vanilla extract
- 1/2 cup unsalted butter, softened (for frosting)
- 2 1/2 cups powdered sugar
- 3 tbsp eggnog (for frosting)
- 1/4 tsp ground nutmeg, plus more for garnish
Instructions
- Preheat oven to 350°F and line a 12-cup muffin tin with paper liners.
- Whisk together flour, baking powder, nutmeg, cinnamon, and salt.
- Beat butter and sugar until light and fluffy, about 2 minutes. Add eggs one at a time, beating well after each.
- Combine eggnog and vanilla. Alternate adding the flour mixture and eggnog mixture into the batter in two additions, mixing until just combined.
- Divide batter among liners and bake 18–20 minutes, until a toothpick inserted comes out clean. Cool completely, about 30 minutes.
- For the frosting, beat butter until smooth, then add powdered sugar alternately with eggnog, 1 cup and 1 tbsp at a time. Beat in nutmeg and whip 1 minute until fluffy.
- Pipe onto cooled cupcakes and finish with a fresh grating of nutmeg on top.
Flavor Variation
Add a pinch of ground cardamom to the frosting for a slightly more complex, bakery-style spice note.
Best For
Christmas Eve or Christmas Day dessert tables, where guests want something festive but not chocolate-heavy.
4. Gingerbread Cupcakes with Molasses Buttercream
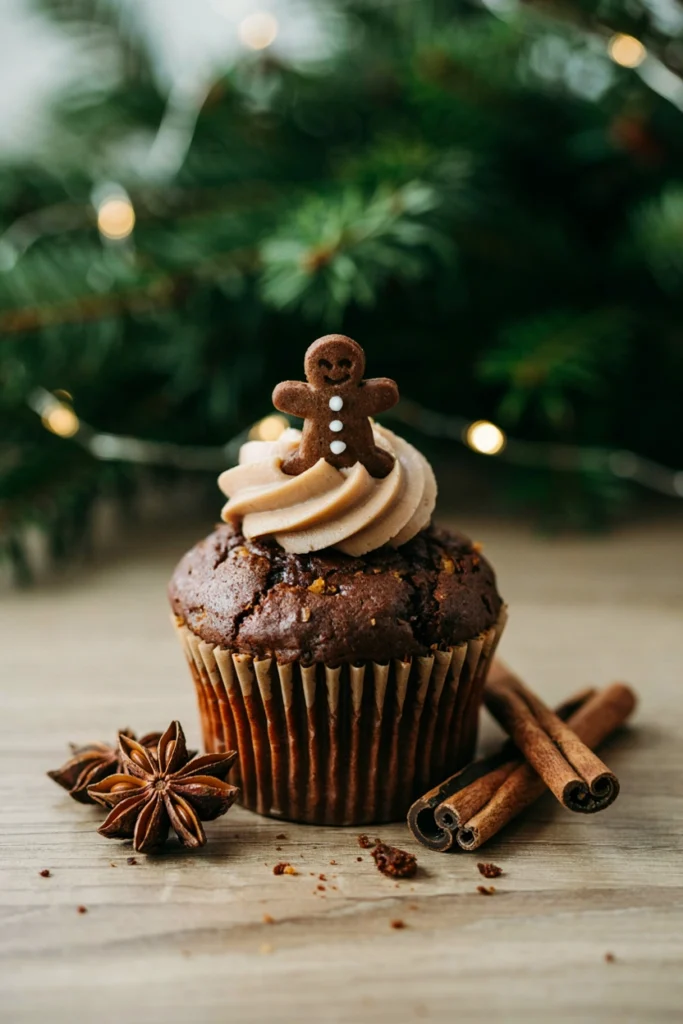
Blackstrap molasses gives this crumb its deep amber color and sticky-sweet backbone, while ginger, cinnamon, and cloves stack on top of each other for real warmth rather than a faint spice suggestion. The buttercream carries a splash of molasses too, so the flavor doesn’t stop at the cake. For the little cookie topper, our gingerbread men cookies recipe makes perfectly sized minis if you’d rather bake your own than buy them.
Prep Time: 20 min | Cook Time: 20 min | Total Time: 1 hour | Servings: 12 | Difficulty: Easy
Ingredients
- 1 1/2 cups all-purpose flour
- 1 tsp baking soda
- 2 tsp ground ginger
- 1 tsp ground cinnamon
- 1/4 tsp ground cloves
- 1/4 tsp salt
- 1/2 cup vegetable oil
- 1/2 cup packed brown sugar
- 1/3 cup molasses
- 1 large egg, room temperature
- 1/2 cup hot water
- 3/4 cup unsalted butter, softened (for frosting)
- 3 cups powdered sugar
- 1 tbsp molasses (for frosting)
- 1 tbsp heavy cream
- 12 mini gingerbread cookies, for topping (optional)
Instructions
- Preheat oven to 350°F and line a 12-cup muffin tin with paper liners.
- Whisk together flour, baking soda, ginger, cinnamon, cloves, and salt.
- In a separate bowl, whisk oil, brown sugar, molasses, and egg until smooth.
- Add the dry ingredients to the wet ingredients and mix until just combined, then whisk in the hot water until the batter is smooth and slightly thin.
- Divide batter among liners and bake 18–20 minutes, until a toothpick comes out clean. Cool completely, about 30 minutes.
- For the frosting, beat butter until smooth. Add powdered sugar 1 cup at a time, then beat in molasses and heavy cream, whipping 1 minute until fluffy and pale tan.
- Pipe onto cooled cupcakes and top each with a mini gingerbread cookie, if using.
Baker’s Tip
Don’t skip the hot water — it blooms the spices and keeps this particular batter from baking up dense.
Storage & Freezing
Unfrosted cupcakes freeze well for up to 2 months, wrapped tightly in plastic; thaw at room temperature before frosting. See our freezer-friendly Christmas treats guide for more make-ahead holiday baking.
5. White Chocolate Snowball Cupcakes
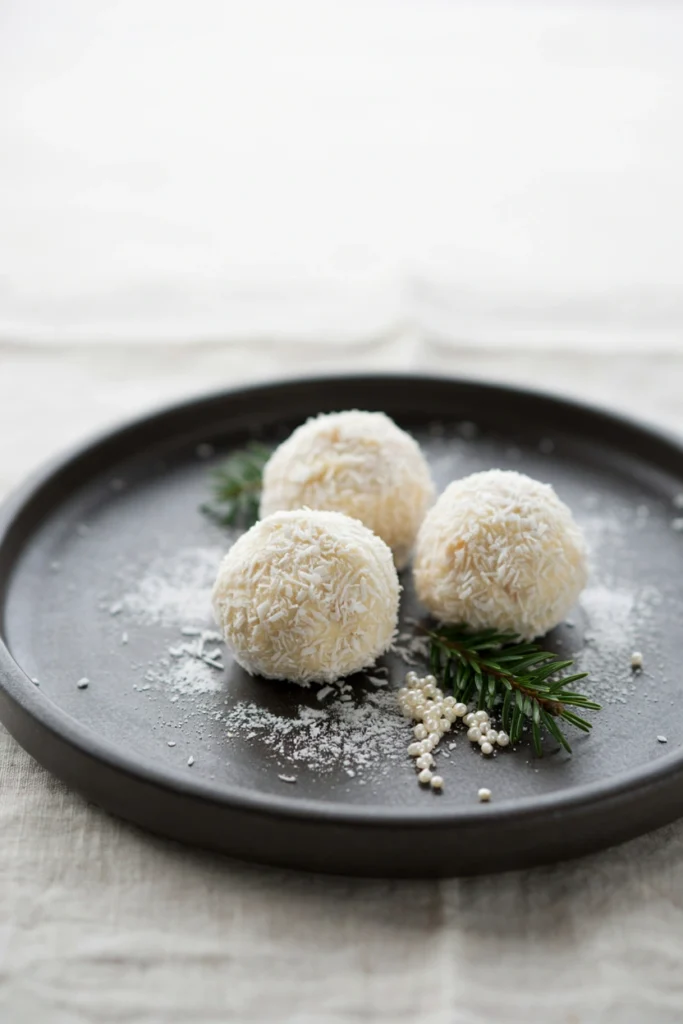
White chocolate melted right into the batter keeps this cupcake soft and slightly dense, almost like a blondie in cake form, and the whole thing gets rolled in shredded coconut until it genuinely looks like a snowball you could throw. It’s the prettiest cupcake on this list that requires zero piping skill at all.
Prep Time: 25 min | Cook Time: 20 min | Total Time: 1 hour | Servings: 12 | Difficulty: Easy
Ingredients
- 4 oz white chocolate, chopped
- 1 1/2 cups all-purpose flour
- 1 1/2 tsp baking powder
- 1/4 tsp salt
- 1/2 cup unsalted butter, softened
- 3/4 cup granulated sugar
- 2 large eggs, room temperature
- 1/2 cup whole milk
- 1 tsp vanilla extract
- 1/2 cup unsalted butter, softened (for frosting)
- 3 cups powdered sugar
- 3 tbsp heavy cream
- 1 1/2 cups sweetened shredded coconut
Instructions
- Preheat oven to 350°F and line a 12-cup muffin tin with paper liners. Melt white chocolate in 20-second microwave bursts, stirring between each, until smooth; set aside to cool slightly.
- Whisk together flour, baking powder, and salt.
- Beat butter and sugar until light and fluffy, about 2 minutes. Add eggs one at a time, then beat in the melted white chocolate.
- Alternate adding the flour mixture and milk into the batter in two additions, mixing until just combined. Stir in vanilla.
- Divide batter among liners and bake 18–20 minutes, until a toothpick comes out clean. Cool completely, about 30 minutes.
- For the frosting, beat butter until smooth, add powdered sugar and cream alternately, then whip 1 minute until light.
- Spread a thick, even layer of frosting over the top and sides of each cupcake using a small offset spatula, then roll the frosted top in shredded coconut until fully coated.
Substitutions
Swap sweetened coconut for unsweetened shredded coconut if you’d like a less sugary finish — the texture holds up the same either way. Melting white chocolate this way is the same technique used in our white chocolate peppermint bark, if you want to practice on something lower-stakes first.
Why You’ll Love It
No piping tip required — just a spatula and a bowl of coconut, making it the easiest genuinely impressive cupcake here.
6. Christmas Tree Cupcakes
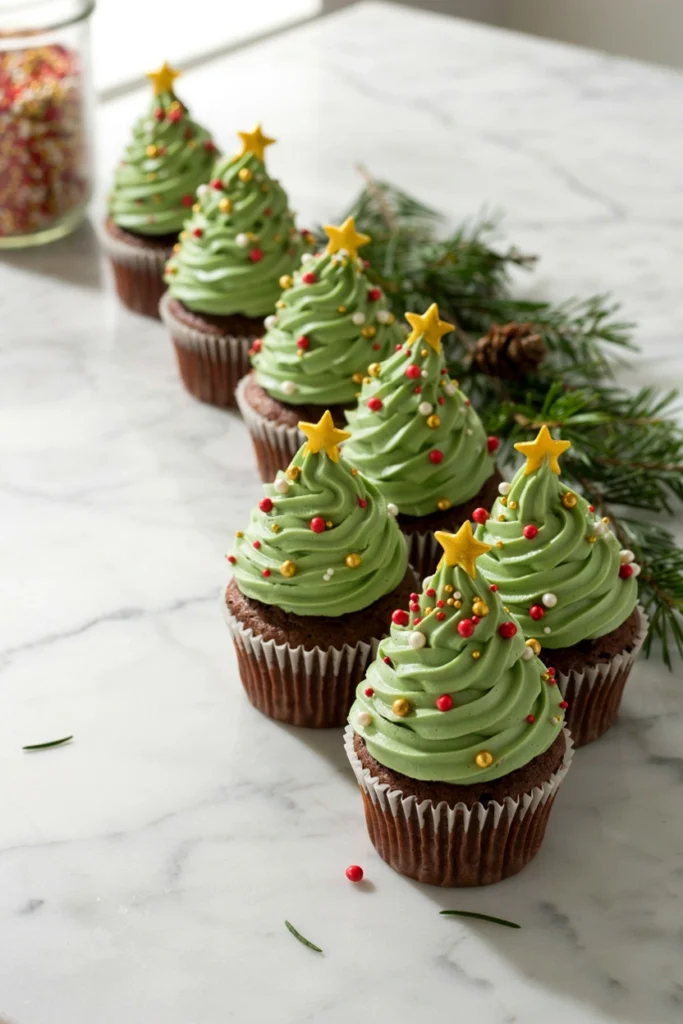
This is the design everyone pictures when they think “Christmas cupcake,” and it’s far more forgiving than it looks. A tall swirl of green buttercream, piped with a star tip, naturally forms tree-shaped ridges — you’re not sculpting anything, just piping in a spiral and letting the tip do the work. For a no-bake version of the same idea, try our Christmas tree cheesecake pops.
Prep Time: 25 min | Cook Time: 20 min | Total Time: 1 hour 15 min | Servings: 12 | Difficulty: Medium
Ingredients
- 1 1/2 cups all-purpose flour
- 1 1/2 tsp baking powder
- 1/4 tsp salt
- 1/2 cup unsalted butter, softened
- 3/4 cup granulated sugar
- 2 large eggs, room temperature
- 1/2 cup whole milk
- 1 1/2 tsp vanilla extract
- 1 cup unsalted butter, softened (for frosting)
- 4 cups powdered sugar
- 3 tbsp heavy cream
- Green gel food coloring
- Small round or star-shaped sprinkles, for “ornaments”
- 12 small yellow star sprinkles or star-shaped candy, for tree toppers
Instructions
- Preheat oven to 350°F and line a 12-cup muffin tin with paper liners.
- Whisk together flour, baking powder, and salt.
- Beat butter and sugar until light and fluffy, about 2 minutes. Add eggs one at a time, beating well after each.
- Alternate adding the flour mixture and milk into the batter in two additions, mixing until just combined. Stir in vanilla.
- Divide batter among liners and bake 18–20 minutes, until a toothpick comes out clean. Cool completely, about 30 minutes.
- For the frosting, beat butter until smooth, add powdered sugar and cream alternately, then whip 1 minute until fluffy. Tint green with gel coloring, adding a little at a time until you reach a solid evergreen shade.
- Fit a piping bag with an open star tip. Starting from the outer edge of the cupcake, pipe in a tight spiral, narrowing and building upward to form a cone-shaped “tree.”
- While the frosting is still soft, press small sprinkles into the sides as ornaments and place a star sprinkle on top.
Baker’s Tip
Chill piped cupcakes in the fridge for 10 minutes before adding sprinkles if your kitchen is warm — it helps the frosting hold its shape while you decorate. A Wilton 1M piping tip gives you this exact tree-swirl ridge with almost no practice, and a bowl of holiday sprinkle mix covers the ornaments in one step.
Best For
A hands-on family baking night — kids can take over the sprinkle-ornament step once the piping is done.
7. Santa Hat Cupcakes
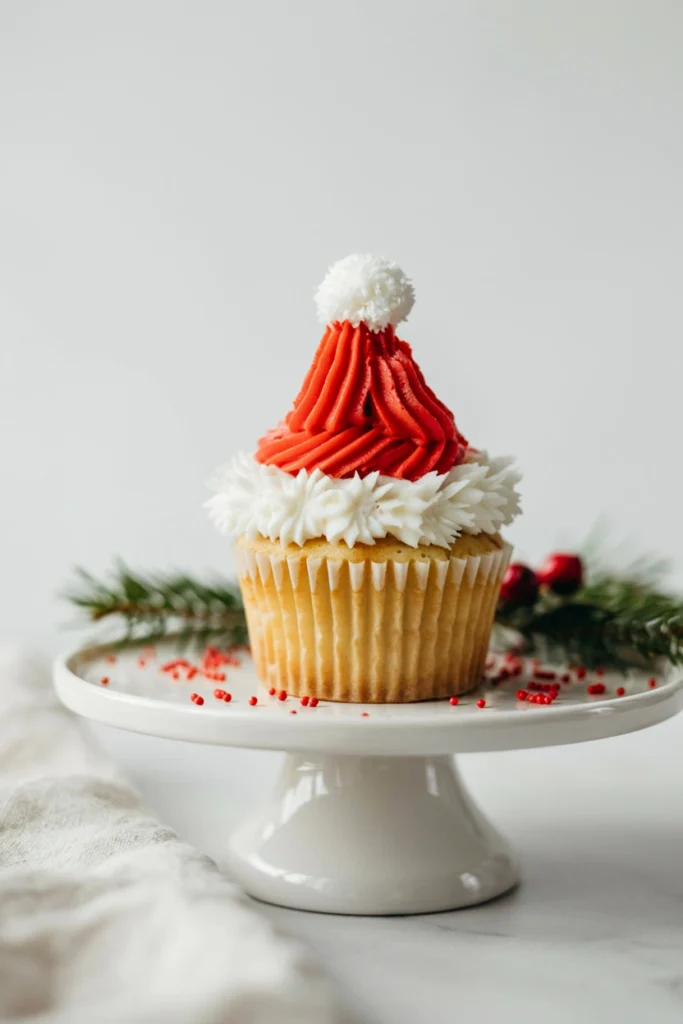
Two colors of frosting and a strawberry are the entire trick here. The white brim goes on first, a red cone gets piped or shaped on top, and a tiny dab of white frosting finishes it off as the pom-pom — from across a party table, it reads instantly as a Santa hat. If you’d rather work with brownies than cake, our Santa hat brownies use the same strawberry-and-frosting trick.
Prep Time: 25 min | Cook Time: 20 min | Total Time: 1 hour | Servings: 12 | Difficulty: Medium
Ingredients
- 1 1/2 cups all-purpose flour
- 1 1/2 tsp baking powder
- 1/4 tsp salt
- 1/2 cup unsalted butter, softened
- 3/4 cup granulated sugar
- 2 large eggs, room temperature
- 1/2 cup whole milk
- 1 1/2 tsp vanilla extract
- 1 cup unsalted butter, softened (for frosting)
- 4 cups powdered sugar
- 3 tbsp heavy cream
- Red gel food coloring
- 12 fresh strawberries, hulled and halved
Instructions
- Preheat oven to 350°F and line a 12-cup muffin tin with paper liners.
- Whisk together flour, baking powder, and salt.
- Beat butter and sugar until light and fluffy, about 2 minutes. Add eggs one at a time.
- Alternate adding the flour mixture and milk into the batter in two additions. Stir in vanilla.
- Divide batter among liners and bake 18–20 minutes, until a toothpick comes out clean. Cool completely, about 30 minutes.
- For the frosting, beat butter until smooth, add powdered sugar and cream alternately, then whip 1 minute until fluffy. Set aside one-third of the frosting as white; tint the remainder red with gel coloring.
- Pipe a flat white ring of frosting around the outer edge of each cupcake to form the hat’s brim.
- Place a strawberry half, cut-side down, in the center to form the red cone of the hat, then pipe a small dot of white frosting on the strawberry’s tip as the pom-pom.
Good to Know
Pat strawberries dry with a paper towel before placing them — excess moisture can make the frosting brim slide.
Make-Ahead Tip
Bake and frost the white brim up to a day ahead, then add the strawberry and red pom-pom the morning of serving so the fruit stays fresh.
8. Reindeer Face Cupcakes
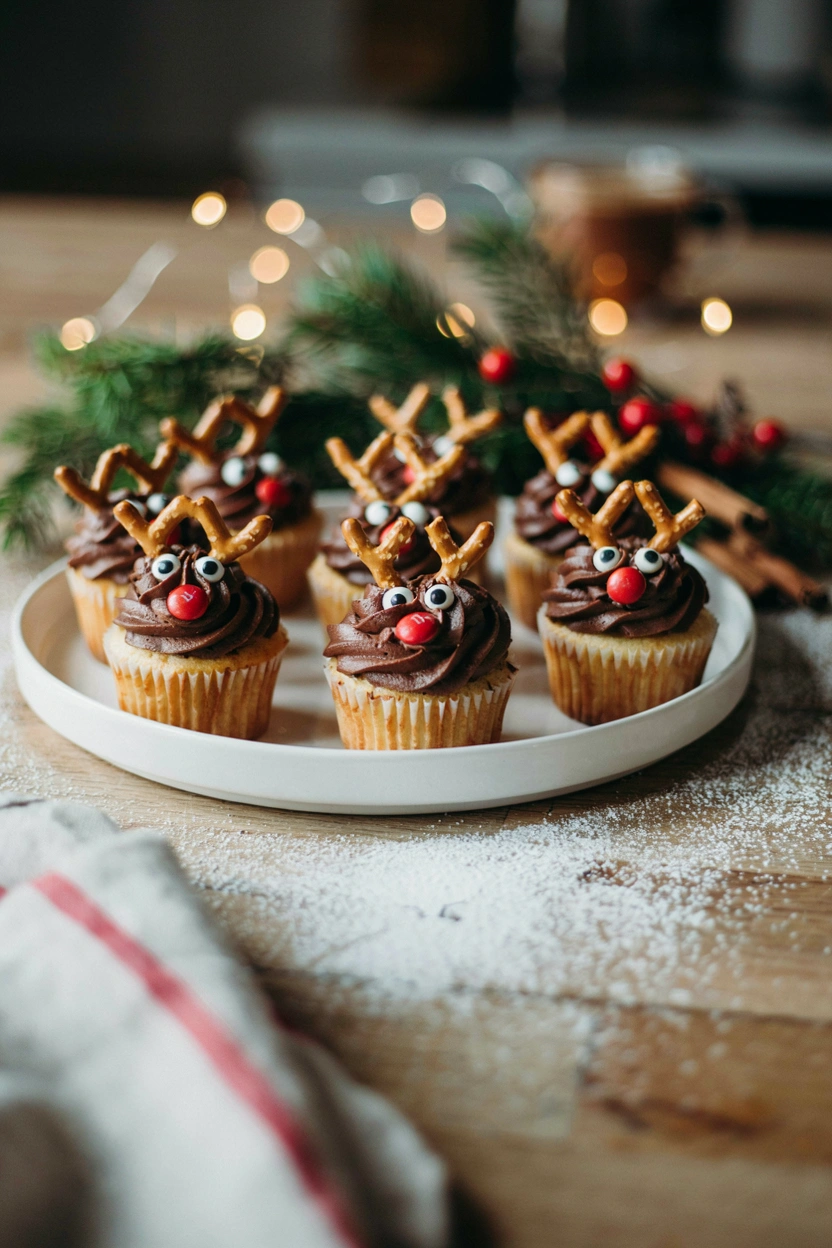
Rich chocolate frosting becomes the reindeer’s fur, two mini pretzels become antlers, and candy eyes and a red nose finish the face — this is the design kids ask to make again every single year, and it comes together with pantry staples instead of specialty tools. If this face style is a hit at your party, our dedicated reindeer cupcakes tutorial walks through a few more antler and face variations, and our Rolo pretzel reindeer use the same pretzel-antler trick on a no-bake treat.
Prep Time: 20 min | Cook Time: 20 min | Total Time: 1 hour | Servings: 12 | Difficulty: Medium
Ingredients
- 1 1/4 cups all-purpose flour
- 1/2 cup unsweetened cocoa powder
- 1 tsp baking soda
- 1/4 tsp salt
- 1/2 cup vegetable oil
- 3/4 cup granulated sugar
- 1 large egg, room temperature
- 1/2 cup buttermilk, room temperature
- 1/2 cup hot water
- 1/2 tsp vanilla extract
- 3/4 cup unsalted butter, softened (for frosting)
- 1/3 cup unsweetened cocoa powder (for frosting)
- 2 1/2 cups powdered sugar
- 3 tbsp heavy cream
- 24 small pretzel twists, for antlers
- 24 candy eyes
- 12 red candy-coated chocolates, for noses
Instructions
- Preheat oven to 350°F and line a 12-cup muffin tin with paper liners.
- Whisk together flour, cocoa powder, baking soda, and salt.
- Whisk oil, sugar, egg, buttermilk, and vanilla together until smooth. Add the dry ingredients and mix until just combined, then whisk in the hot water until smooth and thin.
- Divide batter among liners and bake 18–20 minutes, until a toothpick comes out clean. Cool completely, about 30 minutes.
- For the frosting, beat butter and cocoa powder together until combined, then add powdered sugar and cream alternately, whipping 1 minute until fluffy.
- Spread or pipe a rounded mound of frosting onto each cupcake.
- Break pretzel twists in half and press two halves into the top of each cupcake as antlers, then add two candy eyes and one red candy as the nose.
Baker’s Tip
Snap the pretzels carefully with your fingers rather than a knife — an uneven break looks more like a natural antler branch.
Best For
Classroom parties and any gathering with kids old enough to help place the candy pieces themselves.
9. Grinch Cupcakes
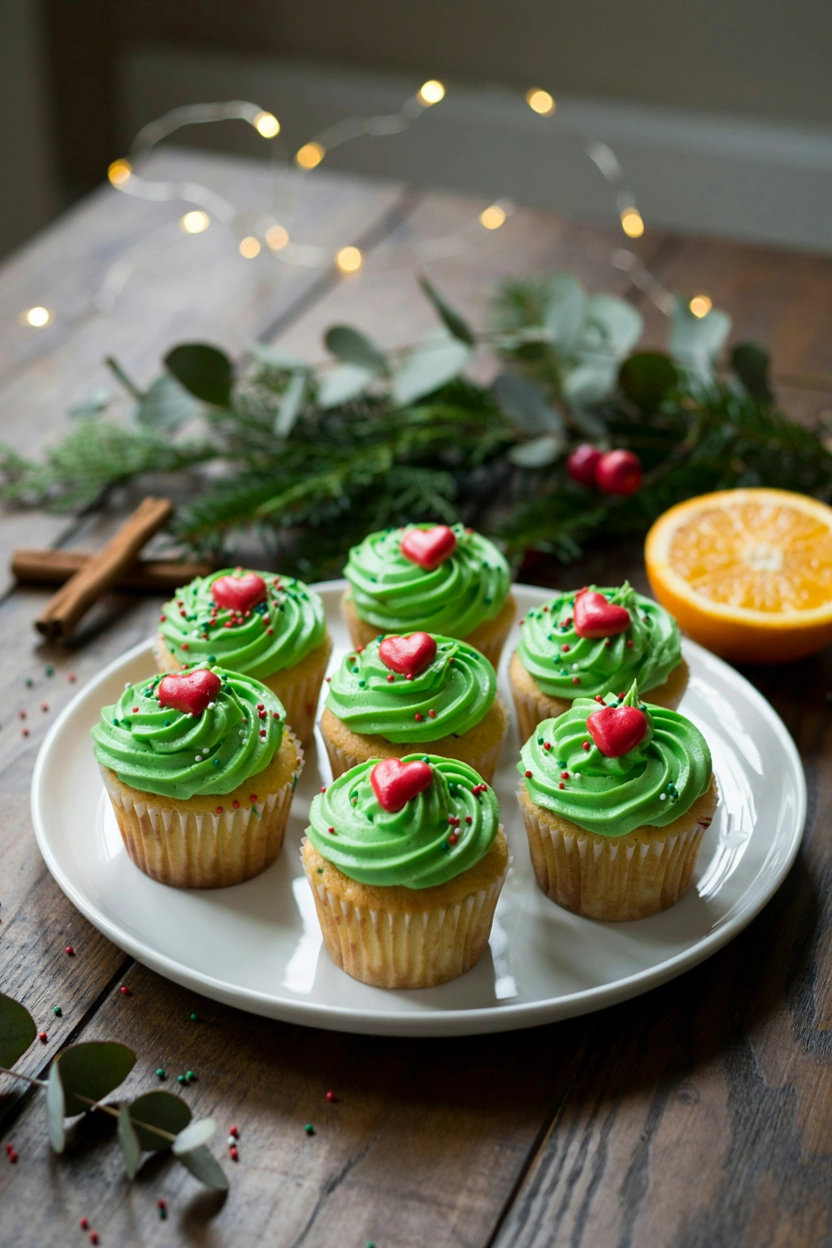
Green food coloring goes straight into a simple vanilla cake here, so the crumb itself is Grinch-green under the frosting, not just the topping. A red heart candy pressed into the swirl nods to the Whoville heart-growing moment, and a mini Santa hat topper finishes the joke. It’s the cupcake that gets the most comments at a Grinch movie night.
Prep Time: 20 min | Cook Time: 20 min | Total Time: 1 hour | Servings: 12 | Difficulty: Medium
Ingredients
- 1 1/2 cups all-purpose flour
- 1 1/2 tsp baking powder
- 1/4 tsp salt
- 1/2 cup unsalted butter, softened
- 3/4 cup granulated sugar
- 2 large eggs, room temperature
- 1/2 cup whole milk
- 1 1/2 tsp vanilla extract
- Green gel food coloring
- 1 cup unsalted butter, softened (for frosting)
- 4 cups powdered sugar
- 3 tbsp heavy cream
- Green gel food coloring (for frosting)
- 12 small red heart-shaped candies
- 12 mini Santa hat cupcake toppers (candy, fondant, or edible wafer)
Instructions
- Preheat oven to 350°F and line a 12-cup muffin tin with paper liners.
- Whisk together flour, baking powder, and salt.
- Beat butter and sugar until light and fluffy, about 2 minutes. Add eggs one at a time, beating well after each.
- Alternate adding the flour mixture and milk into the batter in two additions, mixing until just combined. Stir in vanilla, then mix in green gel coloring a little at a time until the batter is a solid bright green.
- Divide batter among liners and bake 18–20 minutes, until a toothpick comes out clean. Cool completely, about 30 minutes.
- For the frosting, beat butter until smooth, add powdered sugar and cream alternately, then whip 1 minute until fluffy. Tint a deep Grinch-green with gel coloring.
- Pipe a tall swirl of green frosting onto each cupcake using a large star tip.
- Press a red heart candy into the center of the swirl while the frosting is still soft, then top with a mini Santa hat.
Baker’s Tip
Tint the cake batter a shade lighter than you think you want — it darkens slightly as it bakes. If you love the character theme, our full Grinch cupcakes post shows a face-and-eyebrow variation on this same base recipe, and our Grinch crinkle cookies make a good matching treat for the same dessert table.
Best For
A Grinch movie night or any party leaning into fun, less-traditional Christmas character themes.
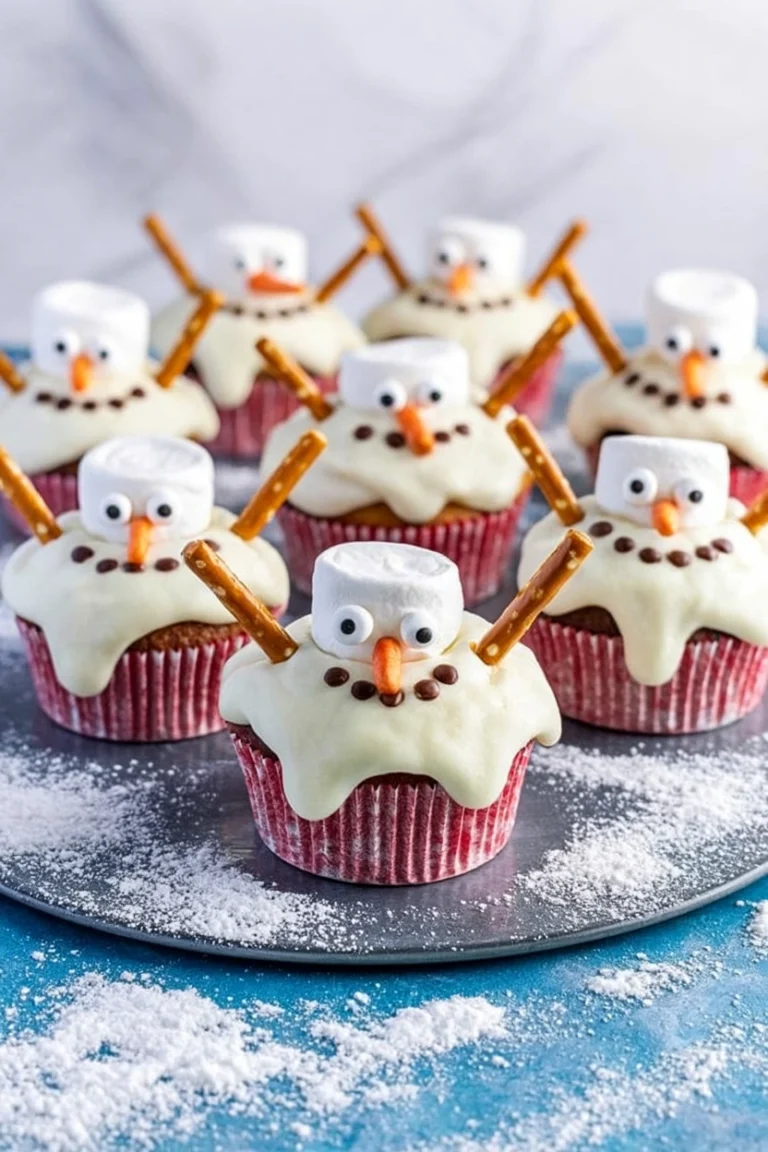
10. Melted Snowman Cupcakes
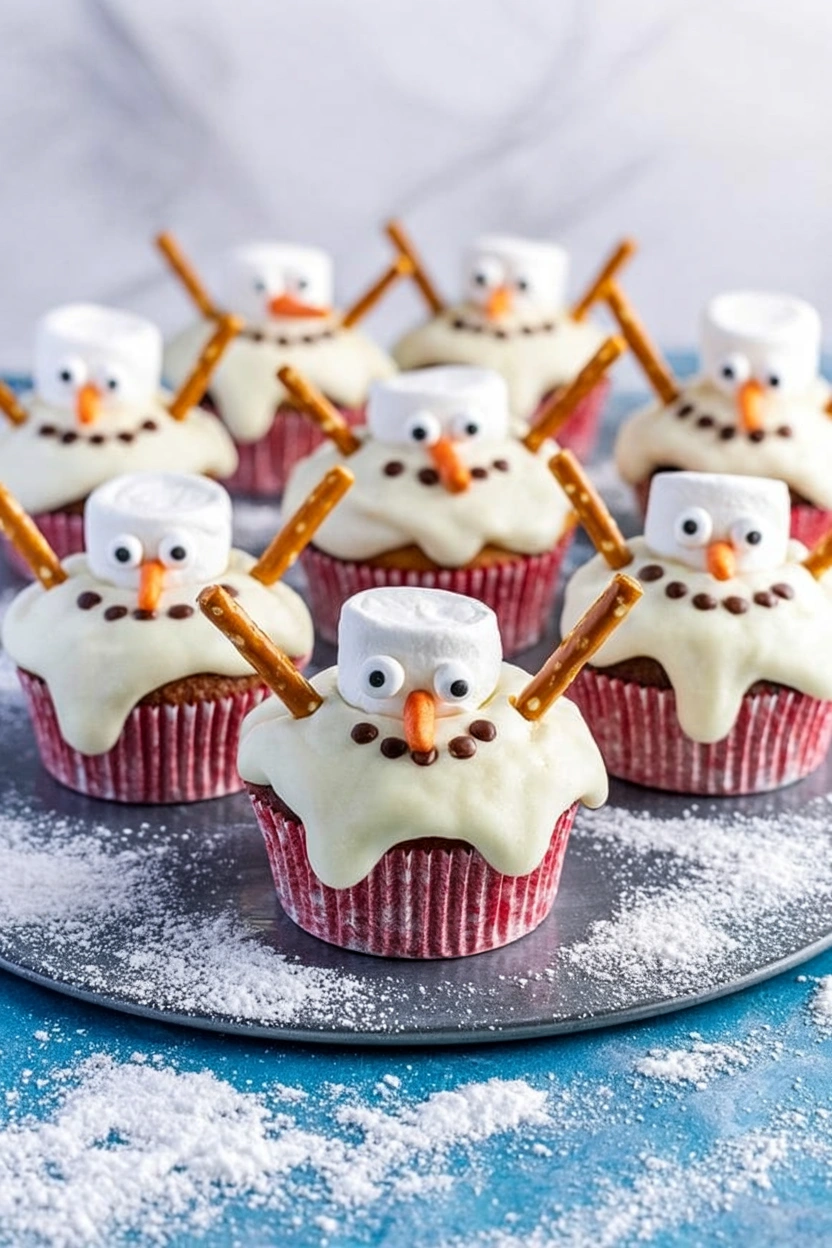
This one leans into imperfection on purpose. The white frosting is piped as an irregular, slightly slumped mound rather than a neat swirl, so it genuinely reads as a snowman caught mid-melt — a crooked hat, drooping candy eyes, and buttons sliding partway down the side finish the joke. It’s forgiving in a way most decorated cupcakes aren’t, since “messy” is the whole point.
Prep Time: 25 min | Cook Time: 20 min | Total Time: 1 hour | Servings: 12 | Difficulty: Medium
Ingredients
- 1 1/2 cups all-purpose flour
- 1 1/2 tsp baking powder
- 1/4 tsp salt
- 1/2 cup unsalted butter, softened
- 3/4 cup granulated sugar
- 2 large eggs, room temperature
- 1/2 cup whole milk
- 1 1/2 tsp vanilla extract
- 1 cup unsalted butter, softened (for frosting)
- 4 cups powdered sugar
- 3 tbsp heavy cream
- 12 candy eyes
- 12 orange candy corn pieces, for noses
- 36 mini chocolate chips, for buttons
- 12 small pretzel-and-fruit-leather top hats (or store-bought candy hat toppers)
- Black decorating gel, for a scarf line (optional)
Instructions
- Preheat oven to 350°F and line a 12-cup muffin tin with paper liners.
- Whisk together flour, baking powder, and salt.
- Beat butter and sugar until light and fluffy, about 2 minutes. Add eggs one at a time, beating well after each.
- Alternate adding the flour mixture and milk into the batter in two additions, mixing until just combined. Stir in vanilla.
- Divide batter among liners and bake 18–20 minutes, until a toothpick comes out clean. Cool completely, about 30 minutes.
- For the frosting, beat butter until smooth, add powdered sugar and cream alternately, then whip 1 minute until fluffy.
- Spoon a loose, uneven mound of frosting onto each cupcake with the back of a spoon, letting it slump slightly to one side rather than smoothing it into a neat dome.
- Press candy eyes slightly off-center and low, add the candy corn nose, and press mini chocolate chip buttons in a slightly crooked line down the front. Perch a small hat off-kilter on top and pipe a black decorating-gel scarf line if using.
Baker’s Tip
Work the frosting mound with the back of a spoon rather than a piping bag — the slight texture and lopsided shape are what sell the “melting” look. Our melted snowman cupcakes post has a step-by-step photo guide to the face placement, and our Oreo snowman balls are a good no-bake pairing for the same table.
Best For
Playful, low-pressure decorating with kids — there’s no “wrong” way to make a snowman look like it’s melting.
11. Pistachio Wreath Cupcakes
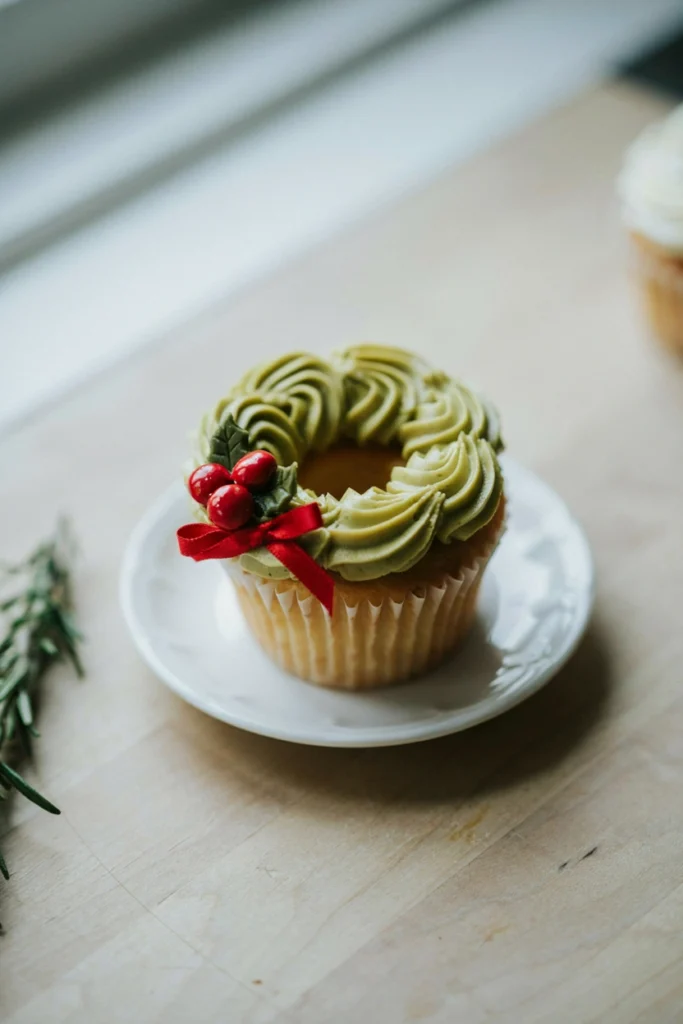
Real ground pistachios go into the batter, giving this one a light nutty flavor and a naturally pale green crumb that most cupcakes on this list don’t have. The frosting is piped in an open ring rather than a solid swirl, so it reads instantly as a wreath, with a few red cinnamon candies standing in for holly berries and a small bow finishing the base.
Prep Time: 25 min | Cook Time: 20 min | Total Time: 1 hour | Servings: 12 | Difficulty: Medium
Ingredients
- 1 1/2 cups all-purpose flour
- 1 1/2 tsp baking powder
- 1/4 tsp salt
- 1/2 cup shelled pistachios, finely ground
- 1/2 cup unsalted butter, softened
- 3/4 cup granulated sugar
- 2 large eggs, room temperature
- 1/2 cup whole milk
- 1 tsp vanilla extract
- 1/4 tsp almond extract
- 1 cup unsalted butter, softened (for frosting)
- 4 cups powdered sugar
- 3 tbsp heavy cream
- Green gel food coloring
- 24 small red cinnamon candies, for “berries”
- 12 small red ribbon candy bows (or a dot of red frosting), for the base
Instructions
- Preheat oven to 350°F and line a 12-cup muffin tin with paper liners.
- Whisk together flour, baking powder, salt, and ground pistachios.
- Beat butter and sugar until light and fluffy, about 2 minutes. Add eggs one at a time, beating well after each.
- Alternate adding the flour mixture and milk into the batter in two additions, mixing until just combined. Stir in vanilla and almond extract.
- Divide batter among liners and bake 18–20 minutes, until a toothpick comes out clean. Cool completely, about 30 minutes.
- For the frosting, beat butter until smooth, add powdered sugar and cream alternately, then whip 1 minute until fluffy. Tint green with gel coloring.
- Fit a piping bag with a small star tip. Pipe a ring of small connected stars around the outer edge of each cupcake, leaving the center open, to form a wreath shape.
- Press red cinnamon candies into the ring as berries, spaced evenly, and add a small red bow at the base of the wreath.
Baker’s Tip
Grind the pistachios in short pulses in a food processor rather than continuously — over-processing turns them into paste instead of fine crumbs. For more of this design idea in cookie form, see our wreath cookies.
Flavor Variation
Leave out the pistachios and use a plain vanilla base if you’d rather keep the wreath design without the nutty flavor.
12. Hot Chocolate Cupcakes
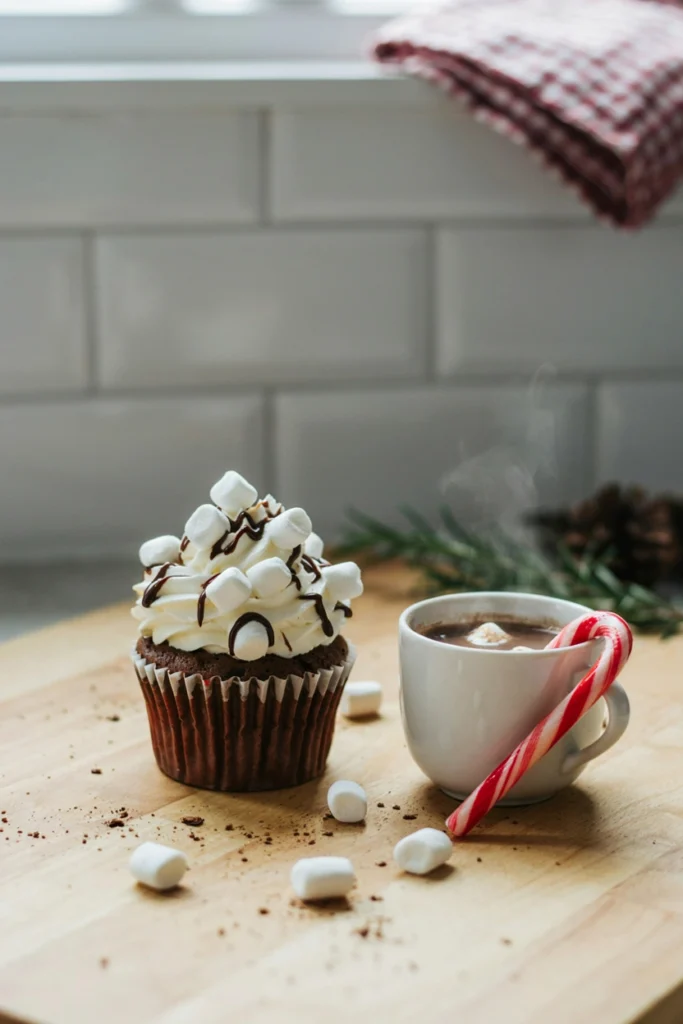
Think of this as a mug of hot cocoa reimagined as cake. The frosting is deliberately fluffy and cloud-like rather than tightly piped, mini marshmallows get pressed in while it’s still soft, and a thin drizzle of chocolate syrup runs down the sides the way it would down the inside of an actual mug. For more of this flavor, our hot chocolate snack mix is a good gift-bag pairing.
Prep Time: 20 min | Cook Time: 20 min | Total Time: 1 hour | Servings: 12 | Difficulty: Medium
Ingredients
- 1 1/4 cups all-purpose flour
- 1/2 cup unsweetened cocoa powder
- 1 tsp baking soda
- 1/4 tsp salt
- 1/2 cup vegetable oil
- 3/4 cup granulated sugar
- 1 large egg, room temperature
- 1/2 cup buttermilk, room temperature
- 1/2 cup hot water
- 1/2 tsp vanilla extract
- 1 cup unsalted butter, softened (for frosting)
- 4 cups marshmallow fluff
- 1 tsp vanilla extract (for frosting)
- 1 1/2 cups mini marshmallows
- 1/4 cup chocolate syrup, for drizzling
Instructions
- Preheat oven to 350°F and line a 12-cup muffin tin with paper liners.
- Whisk together flour, cocoa powder, baking soda, and salt.
- Whisk oil, sugar, egg, buttermilk, and vanilla together until smooth. Add the dry ingredients and mix until just combined, then whisk in the hot water until smooth and thin.
- Divide batter among liners and bake 18–20 minutes, until a toothpick comes out clean. Cool completely, about 30 minutes.
- For the frosting, beat butter until smooth, then add marshmallow fluff and vanilla and beat 2 minutes until light, airy, and cloud-like.
- Pipe or spoon frosting into a loose, billowy mound on each cupcake — don’t smooth it flat, the texture should look like whipped cream.
- Press mini marshmallows into the top while the frosting is still soft, then finish with a light drizzle of chocolate syrup.
Storage & Freezing
Frost and top with marshmallows the same day you plan to serve — marshmallow frosting softens if refrigerated too long, and the syrup drizzle is best added right before serving.
Why You’ll Love It
It tastes exactly like the drink it’s named for, right down to the marshmallow topping, which makes it an instant favorite with kids.
13. Cranberry Orange Cupcakes
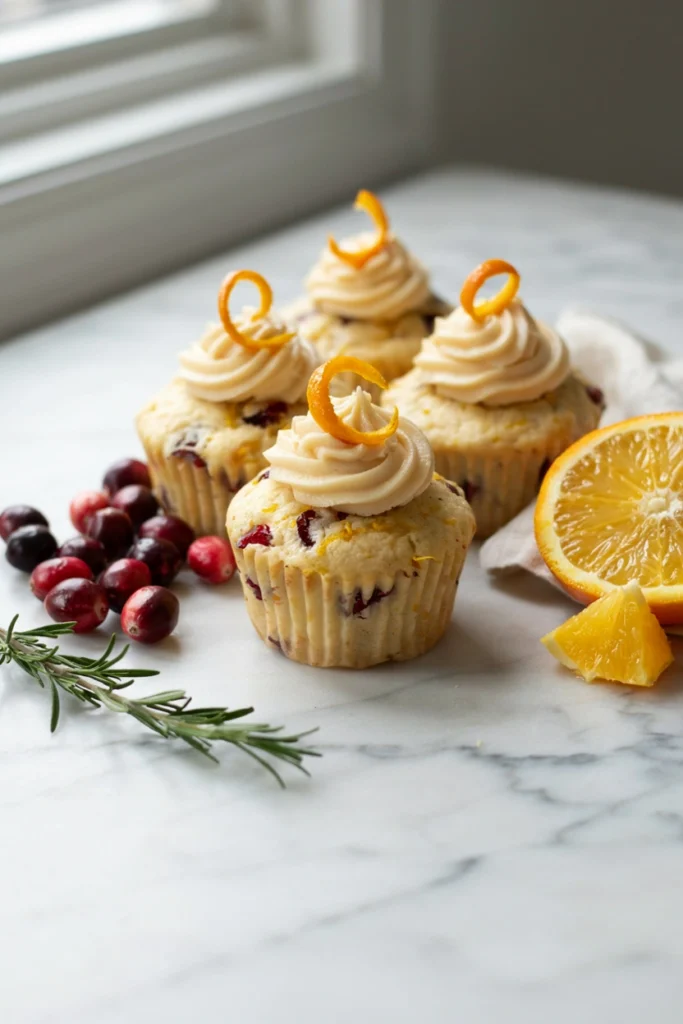
Fresh orange zest goes directly into the batter along with chopped dried cranberries, so the cake itself carries bright citrus and little pockets of tartness rather than relying on frosting alone for flavor. It’s the cupcake that keeps a heavy dessert table from tasting one-note. If you like this pairing, our cranberry orange quick bread is another good way to use up the same ingredients.
Prep Time: 20 min | Cook Time: 20 min | Total Time: 1 hour | Servings: 12 | Difficulty: Medium
Ingredients
- 1 1/2 cups all-purpose flour
- 1 1/2 tsp baking powder
- 1/4 tsp salt
- 1/2 cup unsalted butter, softened
- 3/4 cup granulated sugar
- Zest of 1 large orange
- 2 large eggs, room temperature
- 1/3 cup fresh orange juice
- 1/4 cup whole milk
- 3/4 cup dried cranberries, roughly chopped
- 1/2 cup unsalted butter, softened (for frosting)
- 2 1/2 cups powdered sugar
- 2 tbsp fresh orange juice (for frosting)
- 1/2 tsp orange zest (for frosting)
- Candied orange peel, for garnish (optional)
Instructions
- Preheat oven to 350°F and line a 12-cup muffin tin with paper liners.
- Whisk together flour, baking powder, and salt.
- Beat butter, sugar, and orange zest together until fragrant and fluffy, about 2 minutes. Add eggs one at a time, beating well after each.
- Combine orange juice and milk. Alternate adding the flour mixture and juice mixture into the batter in two additions, mixing until just combined. Fold in chopped cranberries.
- Divide batter among liners and bake 18–20 minutes, until a toothpick comes out clean. Cool completely, about 30 minutes.
- For the frosting, beat butter until smooth, then add powdered sugar alternately with orange juice. Beat in orange zest and whip 1 minute until fluffy.
- Pipe frosting onto cooled cupcakes and top with a small piece of candied orange peel, if using.
Substitutions
Fresh cranberries can replace dried if tossed with 1 tbsp sugar and roughly chopped first — they’ll be more tart, so taste and adjust the frosting’s sweetness if needed.
Best For
Balancing out a dessert table full of rich chocolate and gingerbread options.
14. Salted Caramel Chocolate Cupcakes
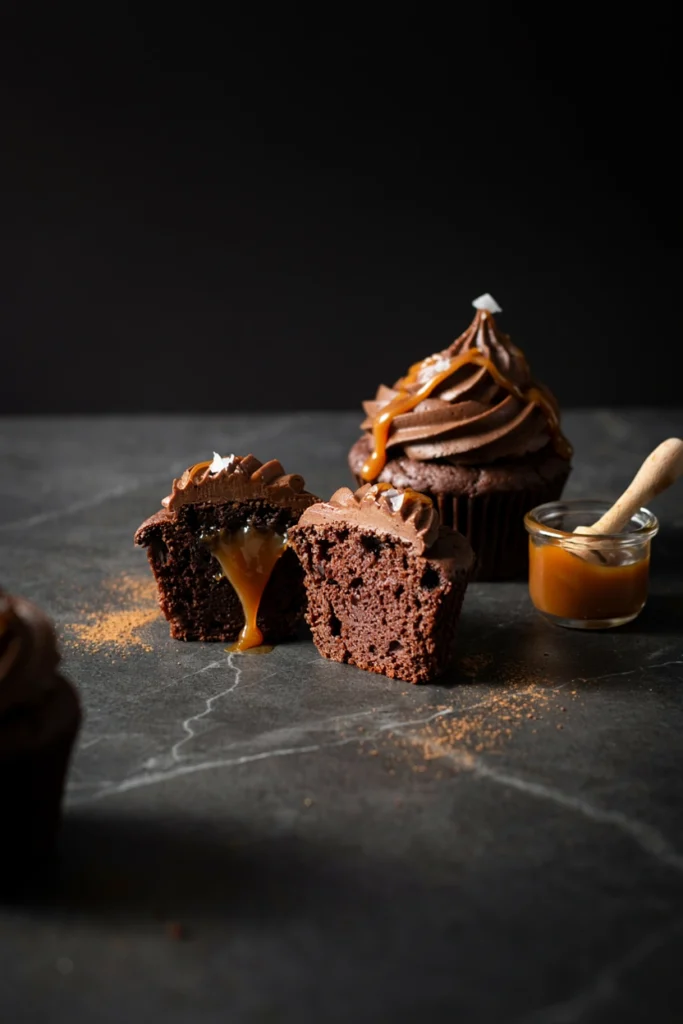
A pocket of caramel sits hidden in the center of this one, so the first bite of dark chocolate cake gives way to a warm, salty-sweet surprise. It’s richer and more indulgent than anything else on this list — the recipe to bring when the party is for adults, not the classroom. If you love this combination, our salted caramel chocolate truffles make a great matching gift-box addition.
Prep Time: 25 min | Cook Time: 20 min | Total Time: 1 hour 15 min | Servings: 12 | Difficulty: Medium
Ingredients
- 1 1/4 cups all-purpose flour
- 1/2 cup unsweetened cocoa powder
- 1 tsp baking soda
- 1/4 tsp salt
- 1/2 cup vegetable oil
- 3/4 cup granulated sugar
- 1 large egg, room temperature
- 1/2 cup buttermilk, room temperature
- 1/2 cup hot water
- 1/2 tsp vanilla extract
- 1/3 cup soft caramel candies, unwrapped (about 12 pieces)
- 3/4 cup unsalted butter, softened (for frosting)
- 1/3 cup unsweetened cocoa powder (for frosting)
- 2 1/2 cups powdered sugar
- 3 tbsp heavy cream
- 1/4 cup caramel sauce, for drizzling
- Flaky sea salt, for garnish
Instructions
- Preheat oven to 350°F and line a 12-cup muffin tin with paper liners.
- Whisk together flour, cocoa powder, baking soda, and salt.
- Whisk oil, sugar, egg, buttermilk, and vanilla together until smooth. Add the dry ingredients and mix until just combined, then whisk in the hot water until smooth and thin.
- Divide batter among liners, filling two-thirds full. Press one caramel candy into the center of each, pushing it just below the surface of the batter.
- Bake 19–21 minutes, until the cake around the caramel springs back to the touch. Cool completely, about 30 minutes.
- For the frosting, beat butter and cocoa powder together until combined, then add powdered sugar and cream alternately, whipping 1 minute until fluffy.
- Pipe frosting onto cooled cupcakes, drizzle with caramel sauce, and finish with a pinch of flaky sea salt.
Baker’s Tip
Freeze the caramel candies for 15 minutes before pressing them into the batter — they hold their shape better and are less likely to sink to the bottom while baking. A set of chocolate dipping tools makes the caramel drizzle and any extra chocolate garnish much cleaner to apply.
Good to Know
Let cupcakes cool fully before biting in — the caramel center stays molten longer than the rest of the cake.
15. Chai Spice Cupcakes with Cinnamon Buttercream
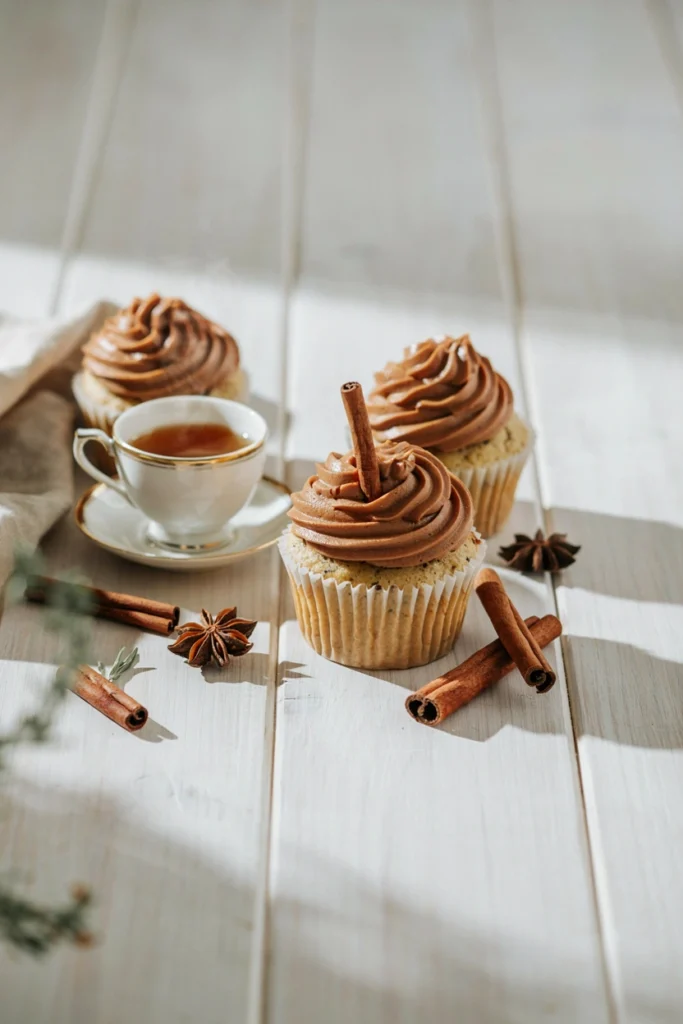
Steeped chai tea bags flavor the milk in this batter, layering cardamom, black pepper, and clove on top of the usual cinnamon and ginger — it tastes like a proper chai latte rather than a generic “spice cake.” If your dessert table already has gingerbread and eggnog, this is the third spiced option that still manages to taste distinct.
Prep Time: 25 min (plus steeping) | Cook Time: 20 min | Total Time: 1 hour | Servings: 12 | Difficulty: Medium
Ingredients
- 1/2 cup whole milk
- 2 chai tea bags
- 1 1/2 cups all-purpose flour
- 1 1/2 tsp baking powder
- 1/2 tsp ground cinnamon
- 1/4 tsp ground cardamom
- 1/8 tsp ground black pepper
- 1/4 tsp salt
- 1/2 cup unsalted butter, softened
- 3/4 cup granulated sugar
- 2 large eggs, room temperature
- 1 tsp vanilla extract
- 3/4 cup unsalted butter, softened (for frosting)
- 3 cups powdered sugar
- 2 tbsp heavy cream
- 1/2 tsp ground cinnamon (for frosting)
- 12 small cinnamon sticks, for garnish (optional)
Instructions
- Warm milk in a small saucepan until steaming, then remove from heat, add chai tea bags, and steep 10 minutes. Squeeze out and discard tea bags; let milk cool to room temperature.
- Preheat oven to 350°F and line a 12-cup muffin tin with paper liners.
- Whisk together flour, baking powder, cinnamon, cardamom, black pepper, and salt.
- Beat butter and sugar until light and fluffy, about 2 minutes. Add eggs one at a time, beating well after each.
- Alternate adding the flour mixture and steeped chai milk into the batter in two additions, mixing until just combined. Stir in vanilla.
- Divide batter among liners and bake 18–20 minutes, until a toothpick comes out clean. Cool completely, about 30 minutes.
- For the frosting, beat butter until smooth, add powdered sugar and cream alternately, then beat in cinnamon and whip 1 minute until fluffy.
- Pipe onto cooled cupcakes and garnish each with a small cinnamon stick, if using.
Good to Know
Steep the tea bags a full 10 minutes — a shorter steep leaves the chai flavor too faint to notice once baked.
Flavor Variation
Swap the cinnamon buttercream for a plain vanilla frosting if you’d rather let the chai spice in the cake stand on its own.
16. Snow Globe Cupcakes
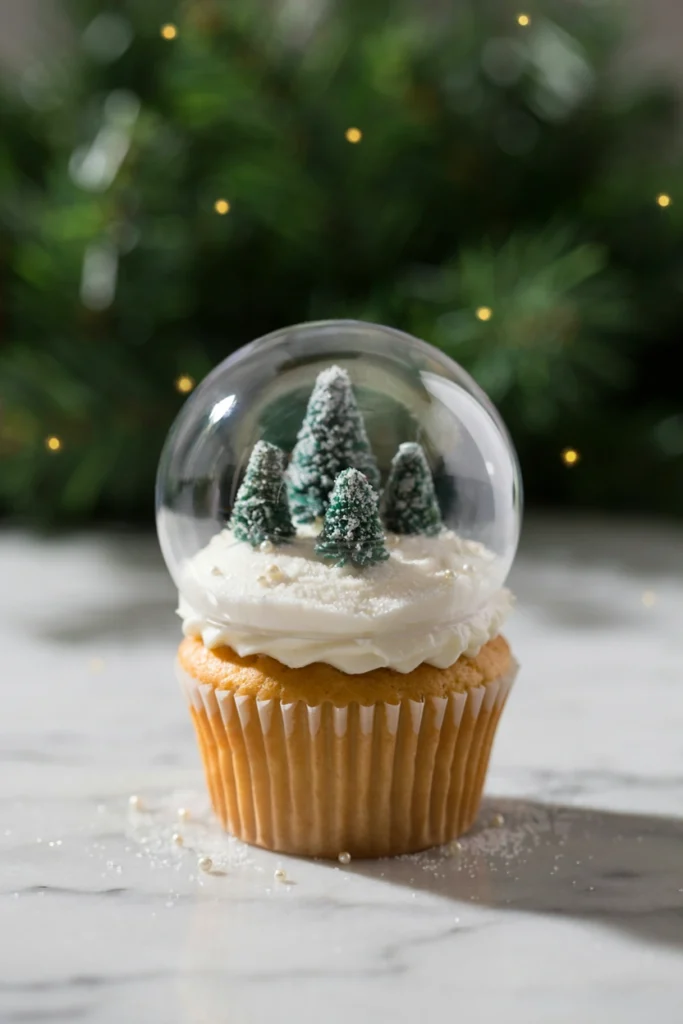
This is the one that gets photographed before anyone takes a bite. A clear edible dome sits over a mound of white frosting and a tiny cake topper figurine, so it genuinely reads as a miniature snow globe — the payoff is big, but so is the payoff on party guests asking how you made it.
Prep Time: 40 min | Cook Time: 20 min | Total Time: Weekend project (about 2 hours with setting time) | Servings: 12 | Difficulty: Advanced
Ingredients
- 1 1/2 cups all-purpose flour
- 1 1/2 tsp baking powder
- 1/4 tsp salt
- 1/2 cup unsalted butter, softened
- 3/4 cup granulated sugar
- 2 large eggs, room temperature
- 1/2 cup whole milk
- 1 1/2 tsp vanilla extract
- 1 cup unsalted butter, softened (for frosting)
- 4 cups powdered sugar
- 3 tbsp heavy cream
- 12 clear plastic or isomalt half-dome ornaments (food-safe, sized for cupcakes)
- 12 small food-safe holiday figurines or fondant trees, for the “scene”
- Coarse white sanding sugar, for the base
Instructions
- Preheat oven to 350°F and line a 12-cup muffin tin with paper liners.
- Whisk together flour, baking powder, and salt.
- Beat butter and sugar until light and fluffy, about 2 minutes. Add eggs one at a time, beating well after each.
- Alternate adding the flour mixture and milk into the batter in two additions, mixing until just combined. Stir in vanilla.
- Divide batter among liners and bake 18–20 minutes, until a toothpick comes out clean. Cool completely, about 30 minutes.
- For the frosting, beat butter until smooth, add powdered sugar and cream alternately, then whip 1 minute until fluffy.
- Spread frosting into a smooth, slightly domed mound on each cupcake, leaving a small flat area in the center for the figurine.
- Press a small figurine or fondant tree into the center of the frosting, then sprinkle sanding sugar around the base to look like fresh snow.
- Gently press the clear dome down over the figurine into the frosting, sealing the edges to enclose the scene. Chill 15 minutes to set the dome in place before serving.
Baker’s Tip
Food-safe clear domes are sold in the cake-decorating section of most craft stores or online — don’t substitute regular plastic ornaments, which aren’t rated for food contact. A little edible glitter mixed into the sanding sugar gives the “snow” a nice shimmer under photos.
Make-Ahead Tip
Bake and frost the base a day ahead, then add the figurine, sugar, and dome just before your event so the “snow” stays crisp and dry.
17. Gingerbread House Cupcakes
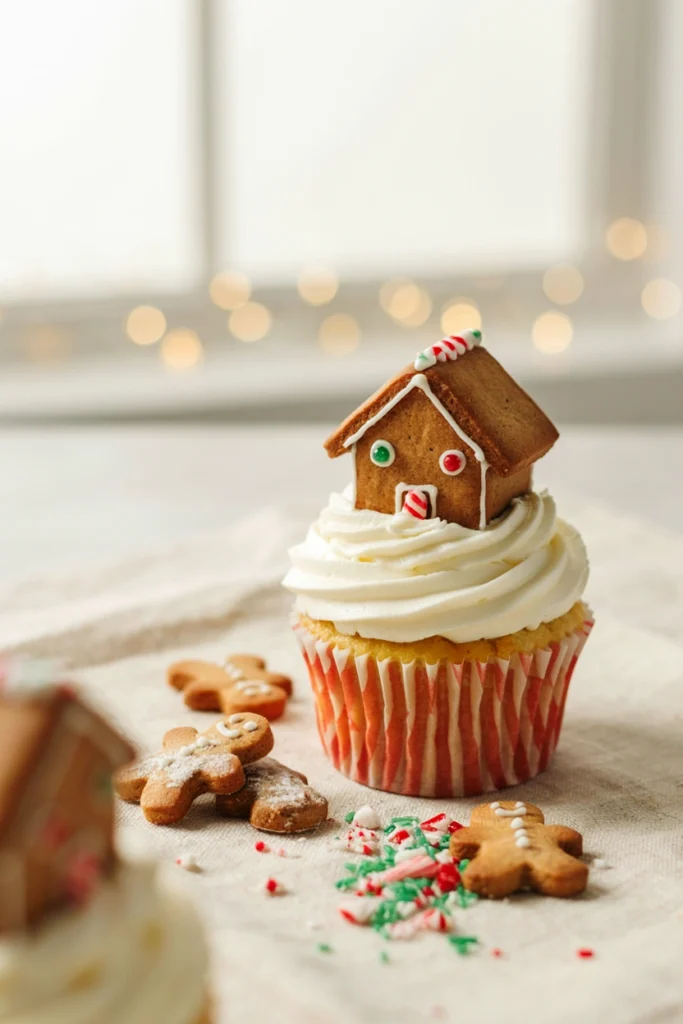
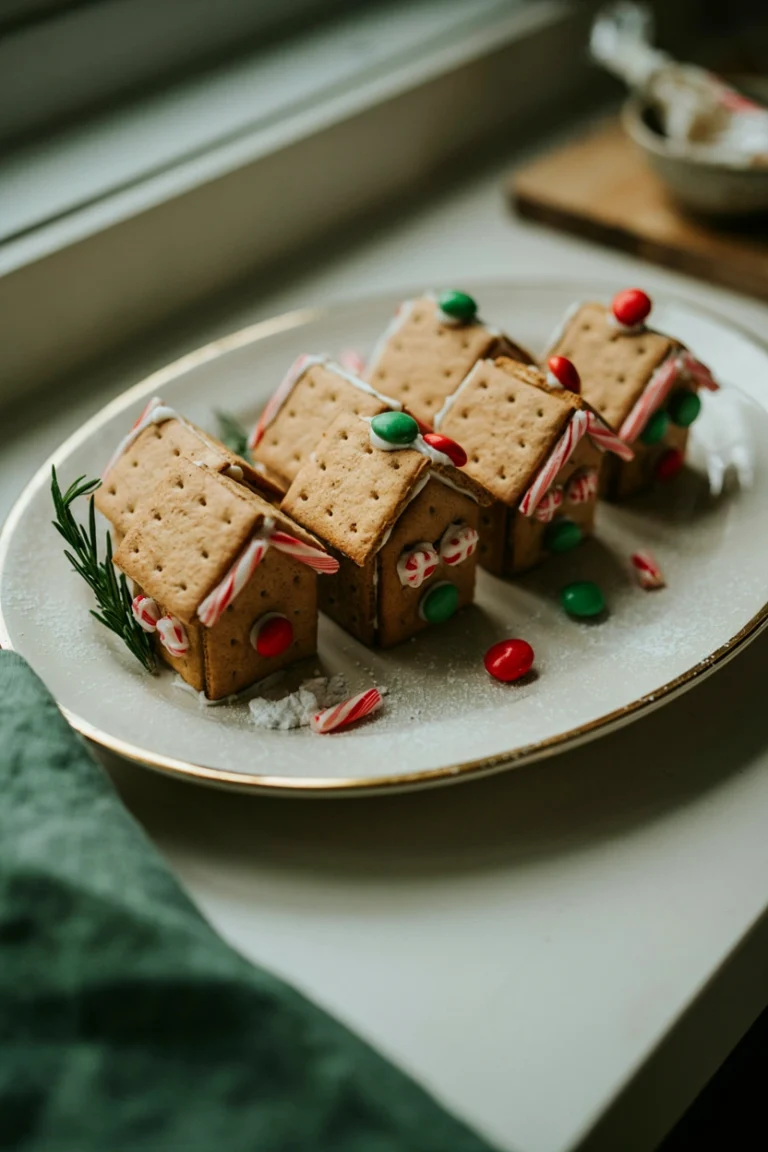
Miniature graham cracker panels, glued together with royal icing, turn a single cupcake into a tiny gingerbread house — roofline, icicles, and all. It takes real patience and a steady hand, but it’s the one cupcake on this list that could stand alone as a centerpiece. For a full-sized version of the same technique, see our mini gingerbread houses.
Prep Time: 45 min | Cook Time: 20 min | Total Time: Weekend project (about 2 hours with drying time) | Servings: 12 | Difficulty: Advanced
Ingredients
- 1 1/2 cups all-purpose flour
- 1 tsp baking soda
- 2 tsp ground ginger
- 1 tsp ground cinnamon
- 1/4 tsp ground cloves
- 1/4 tsp salt
- 1/2 cup vegetable oil
- 1/2 cup packed brown sugar
- 1/3 cup molasses
- 1 large egg, room temperature
- 1/2 cup hot water
- 1 cup unsalted butter, softened (for frosting)
- 4 cups powdered sugar
- 3 tbsp heavy cream
- 24 whole graham crackers, for house panels
- 2 large egg whites (for royal icing)
- 3 cups powdered sugar (for royal icing)
- 1/2 tsp cream of tartar
- 12 small square candies, for roof shingles
Instructions
- Preheat oven to 350°F and line a 12-cup muffin tin with paper liners.
- Whisk together flour, baking soda, ginger, cinnamon, cloves, and salt.
- Whisk oil, brown sugar, molasses, and egg until smooth. Add the dry ingredients and mix until just combined, then whisk in the hot water until smooth.
- Divide batter among liners and bake 18–20 minutes, until a toothpick comes out clean. Cool completely, about 30 minutes.
- Cut graham crackers into small rectangles (roughly 1.5 x 2 inches) for walls and triangles for roof gables using a serrated knife, following the cracker’s natural grid lines as a guide. A silicone baking mat gives you a clean, non-stick surface to cut and assemble the panels on.
- Make royal icing by whipping egg whites and cream of tartar until foamy, then gradually beating in powdered sugar until stiff, glossy peaks form. Transfer to a piping bag fitted with a small round tip.
- Frost each cupcake with a thick base layer of buttercream, then use royal icing as “glue” to stand two wall panels and two roof panels upright in the frosting, forming a small house shape. Hold each panel in place for 20–30 seconds until it sets.
- Pipe royal icing along the roofline to look like dripping icicles, and press small square candies onto the roof as shingles. Let sit at room temperature at least 30 minutes to fully set before moving.
Baker’s Tip
Build the houses on a tray you don’t need to move for at least 30 minutes — the royal icing needs to set undisturbed or the panels will slide.
Best For
A dedicated baking afternoon rather than a last-minute treat — this one rewards patience over speed.
Frosting and Food Coloring Tips for These Recipes
A few small technique choices make the difference between frosting that looks bakery-bought and frosting that looks slightly off, no matter which recipe you pick.
Always reach for gel food coloring instead of liquid drops when tinting red or green buttercream. Liquid coloring adds extra moisture, which can thin the frosting and mute the color into a dusty, grayish shade rather than a true holiday red or green. Add gel color a small amount at a time, mixing fully between additions — you can always deepen the shade, but you can’t take color back out.
If a red frosting still tastes slightly bitter or metallic once you’ve reached the shade you want, let it rest at room temperature for 15–20 minutes before piping; the flavor mellows as the color fully develops. For the smoothest pipeable texture across every recipe in this collection, make sure butter is genuinely softened before beating — a stand mixer makes quick work of this — and bring cream cheese to full room temperature to avoid lumps. Our cream cheese buttercream guide covers this in more detail if you’re using that frosting.
How to Store and Freeze Christmas Cupcakes
Unfrosted cupcakes keep at room temperature in an airtight container for up to 2 days, or in the refrigerator for up to 5 days. For longer storage, wrap cooled, unfrosted cupcakes individually in plastic wrap and freeze up to 2 months; thaw at room temperature for about an hour before frosting. Parchment paper sheets make it easy to line a tray for flash-freezing cupcakes before wrapping them individually.
Frosted cupcakes are best kept in the refrigerator if they contain cream cheese frosting, marshmallow topping, or fresh fruit — store loosely covered for up to 3 days and bring to room temperature about 20 minutes before serving so the frosting softens. Buttercream-only cupcakes can sit at room temperature, covered, for up to 2 days. Avoid freezing fully decorated cupcakes with fondant, candy pieces, or fresh fruit toppers, since thawing tends to soften decorations and create condensation on the surface. For more on this, see our freezer-friendly Christmas treats guide.
Common Mistakes to Avoid
- Frosting warm cupcakes: Even a slightly warm cupcake will melt buttercream into a greasy puddle. Cool completely on a wire rack, about 30 minutes, before frosting anything.
- Using liquid food coloring for red or green: It thins the frosting and dulls the color. Stick to gel coloring for true holiday shades.
- Overfilling the liners: Filling past two-thirds full causes cupcakes to overflow and dome unevenly, which makes decorating harder. Stick to two-thirds full for a flat, even top.
- Skipping the crumb coat on layered designs: For anything with multiple decorating steps, like the gingerbread house or snow globe cupcakes, a thin base layer of frosting first keeps crumbs from showing through the final layer.
- Building decorations too far in advance: Fresh fruit, marshmallow toppings, and royal icing structures don’t hold up well if assembled more than a day ahead. Build decorated details as close to serving time as your schedule allows.
- Not labeling for allergies at shared events: With pretzels, candy eyes, coconut, pistachios, and nuts appearing across this list, a small note card at classroom or potluck parties helps other parents make safe choices for their kids.
Frequently Asked Questions
What’s the easiest way to decorate Christmas cupcakes?
A simple two-tone buttercream swirl — red and white, or green with a few sprinkles pressed in — is the fastest way to make plain cupcakes look festive. It requires no special tools beyond a piping bag and takes under a minute per cupcake.
Can I use a box mix and still make these designs look homemade?
Yes. Every decorating technique in this article, from the Christmas tree swirl to the Santa hat, works just as well on a baked box mix cupcake as it does on a from-scratch one — the frosting and decorating are what create the festive look.
How far in advance can I make Christmas cupcakes?
Bake cupcakes up to 2 days ahead and store unfrosted at room temperature, or freeze unfrosted for up to 2 months. Frost and add final decorations within a day of serving for the best texture and appearance.
What’s the best frosting for piping detailed Christmas designs?
A classic American buttercream (butter, powdered sugar, and cream) holds its shape best for piped designs like the Christmas tree or Santa hat, since it firms up slightly at room temperature without becoming stiff.
How do I keep red or green buttercream from tasting bitter?
Use gel food coloring rather than liquid, add it gradually, and let the finished frosting rest 15–20 minutes at room temperature before using — the color settles and any faint bitterness from concentrated gel dye mellows out.
What are good nut-free options for a classroom party?
The Classic Red Velvet, Peppermint Mocha, Eggnog Spice, and Hot Chocolate cupcakes in this list are all naturally nut-free as written — just double-check that any store-bought candy garnishes, like sprinkles, don’t carry a cross-contamination warning, and skip the Pistachio Wreath Cupcakes for nut-free tables.
Can I freeze fully decorated cupcakes?
It’s not recommended for anything with fondant, candy, fresh fruit, or royal icing structures, since thawing softens these decorations and can create condensation. Freeze unfrosted cupcakes instead, and decorate after thawing.