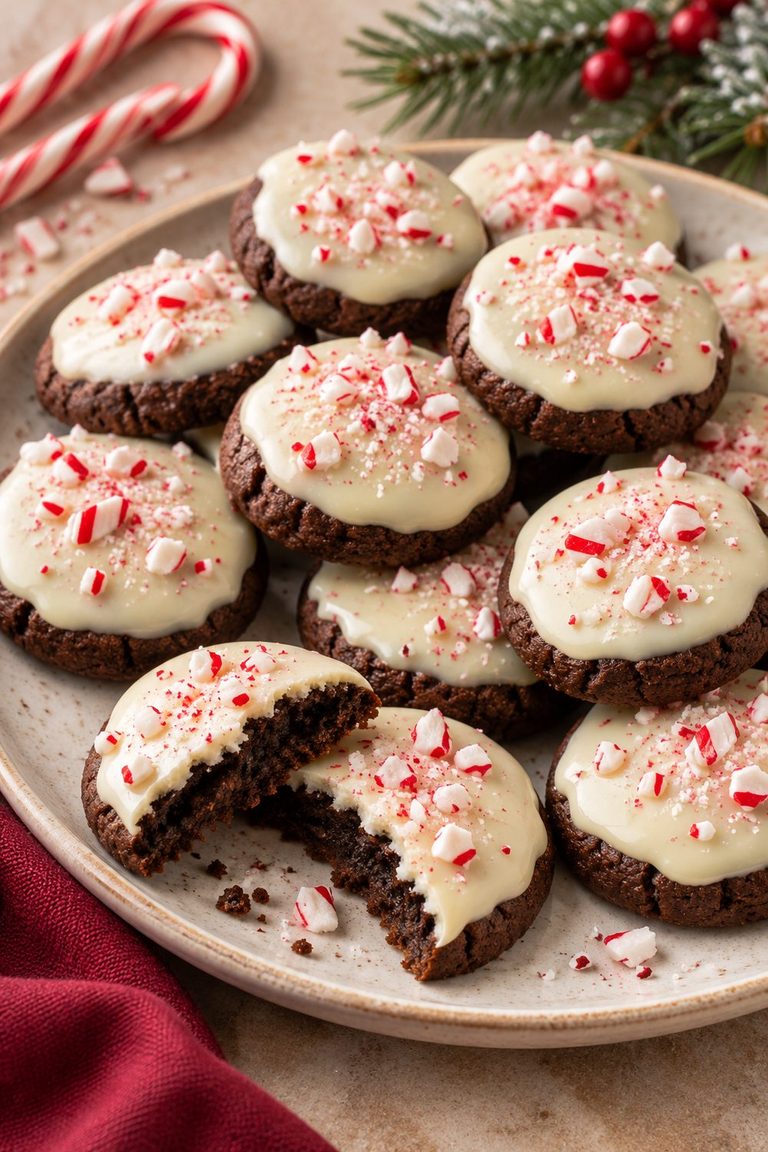

Soft Andes Mint Chocolate Cookies
Chocolate cookies are already a welcome addition to a holiday dessert tray, but a layer of melted Andes mint makes them feel a little more special. These cookies pair a cocoa-rich dough with chopped mint chocolate and a thin chocolate-mint topping that sets as the cookies cool.
There’s no piping bag to fill and no separate frosting to make. The topping starts with a piece of candy, and the heat from the cookie does most of the work. A quick sweep with a spoon gives each one its own chocolate swirl.
Make a batch for a Christmas cookie exchange, tuck a few into a lunchbox, or keep some in the freezer for the next time a chocolate craving strikes.
This post may contain affiliate links which helps me keep this blog alive, questions? View the privacy policy.
A Chocolate Cookie With an Easy Mint Finish
The mint flavor comes from the candy itself, so there’s no need to measure peppermint extract. Brown sugar gives the dough a softer texture, while natural cocoa adds chocolate flavor without requiring melted baking chocolate.
The finishing touch is flexible, too. Leave the tops plain for an everyday cookie, or add a few sprinkles while the chocolate is still wet. Either way, let the coating firm up before packing them.
Ingredients
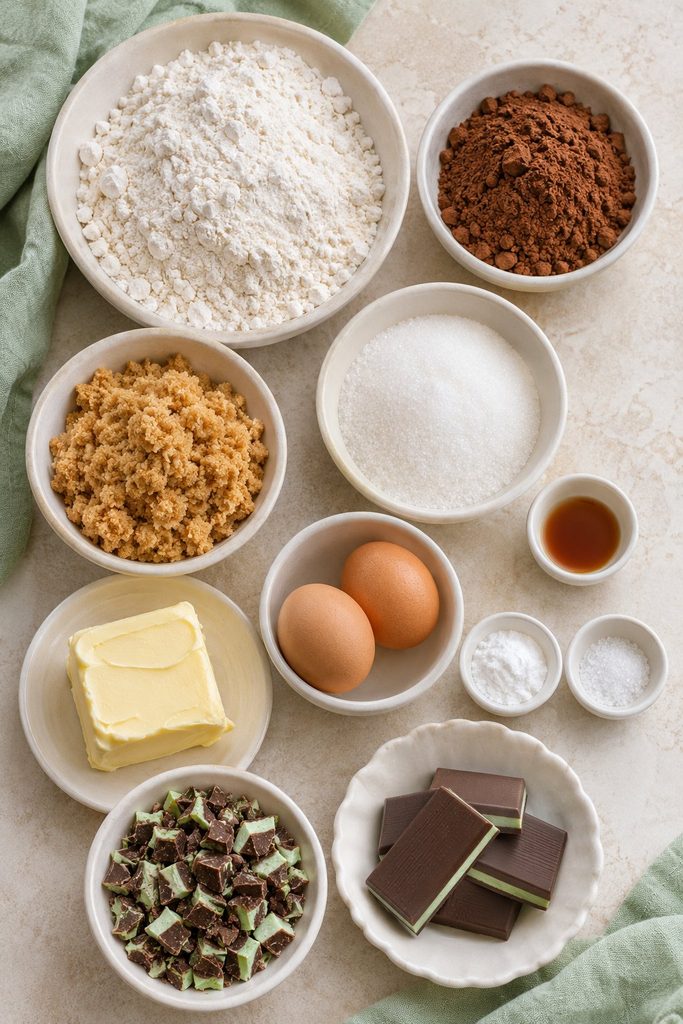
Makes: approximately 36 cookies
Prep: 20 minutes
Chill: 30 minutes
Bake: 10–12 minutes per tray
Cooling and setting: allow 45–60 minutes
Total: approximately 2 hours, depending on the number of trays baked
- ¾ cup (170 g) unsalted butter, softened but still cool
- 1 cup (200 g) packed light brown sugar
- ⅓ cup (67 g) granulated sugar
- 2 large eggs, at room temperature
- 2 teaspoons vanilla extract
- 2 cups (240 g) all-purpose flour
- ½ cup (42 g) natural unsweetened cocoa powder
- 1 teaspoon baking soda
- ½ teaspoon fine salt
- ¾ cup (about 125 g) Andes Crème de Menthe baking chips, or the same weight of finely chopped Andes mints
- Approximately 36 Andes Crème de Menthe thins, unwrapped, for topping
- Optional: Christmas sprinkles
A Few Ingredient Details
Use natural cocoa for this version. The dough is formulated with baking soda, so stick with natural unsweetened cocoa rather than substituting Dutch-process cocoa without adjusting the leavening.
Weigh the flour if possible. A digital kitchen scale makes this straightforward. If using cups, fluff the flour, spoon it into the cup, and level the top. Scooping directly from a packed bag can add too much flour.
Check how much candy you’re buying. The chopped candy in the dough is separate from the whole mints used on top. Package sizes vary, so count out the topping pieces before chopping any extras.
Helpful Baking Tools
A hand mixer is useful for creaming the butter and sugars. You’ll also need mixing bowls, a flexible spatula, and rimmed baking sheets.
Line the trays with parchment paper, and use a 1½-tablespoon cookie scoop for evenly sized portions. A wire cooling rack helps the cookies cool before packing.
How to Make Andes Mint Chocolate Cookies
1. Cream the Butter and Sugars
Beat the butter, brown sugar, and granulated sugar for about 2 minutes, until creamy and slightly lighter in color. Scrape the bottom and sides of the bowl so there are no hidden streaks of butter.
Beat in the eggs one at a time, followed by the vanilla.
2. Add the Dry Ingredients
In a separate bowl, whisk together the flour, cocoa powder, baking soda, and salt. Break up any cocoa lumps with the whisk.
Add the dry mixture to the butter mixture in two additions, mixing on low just until incorporated. Fold in the mint baking chips or chopped candy with a spatula.
3. Chill and Portion
Cover the bowl and refrigerate for 30 minutes. Meanwhile, heat the oven to 350°F (175°C) and line your baking sheets.
Scoop approximately 1½ tablespoons of dough per cookie, leaving about 2 inches between portions. Keep the remaining dough refrigerated while the first tray bakes.
4. Bake Until the Edges Set
Bake one tray at a time on the center rack for 10–12 minutes. Start checking at 10 minutes: the edges should look set and the centers should look soft, without appearing wet. Dark dough can hide browning, so watch the texture rather than the color.
Let each baking sheet cool before adding another batch of dough.
5. Add the Mint Topping
Immediately place one unwrapped mint on each hot cookie. Leave the cookies on the baking sheet for 2–3 minutes so the candy softens.
Gently spread the softened chocolate across the top with the back of a teaspoon. Add a few sprinkles, if using, before the coating sets. The melted candy will create its own pattern; it won’t look like thick green frosting.
If a mint remains firm, return the tray to the oven for about 20 seconds, then check again before spreading.
6. Cool Before Packing
Allow the cookies to rest on the tray for about 5 minutes total, then carefully transfer them to a rack. Leave them uncovered until completely cool and the toppings are firm. Setting time will depend on your kitchen temperature.

Small Details That Help
- Bake a sample cookie first. It’s an easy way to check your preferred baking time before committing a whole tray.
- Keep the butter soft, not melted. Very warm butter can encourage excessive spreading.
- Use the chill time. If your kitchen is warm and the dough still feels sticky after 30 minutes, refrigerate it a little longer.
- Handle warm cookies gently. Give them time to firm up on the tray before lifting them.
- Keep decoration light. A small pinch of sprinkles leaves room for the mint chocolate to shine.
Make Them Ahead
Refrigerate the covered dough for up to 2 days. If it becomes too firm to scoop, let it stand briefly at room temperature until workable.
For longer storage, freeze scooped dough on a lined tray until solid, then transfer the portions to a freezer-safe container for up to 2 months. Bake from frozen, allowing approximately 1–3 extra minutes and checking for the same set edges and soft centers. Add the topping mints after baking.
Storage and Cookie Gifts
Keep cooled cookies in an airtight container at room temperature for 3–4 days for best texture. Separate layers with parchment so the chocolate tops stay tidy.
Freeze finished cookies for up to 2 months. Let the toppings set first, freeze the cookies in a single layer, and then pack them with parchment between layers. Thaw in their closed container before serving.
For gifts, use a shallow cookie gift box and avoid overfilling it. Mint can flavor other baked goods stored alongside it, so package these separately from delicate vanilla or citrus cookies.
Frequently Asked Questions
Can I leave out the mint pieces in the dough?
Yes. Leave them out for a chocolate cookie with mint concentrated in the topping, or replace them with the same volume of semisweet chocolate chips.
Do I need peppermint extract?
No. The Andes candy supplies the mint flavor. Adding extract would change the balance and may make the cookies taste much stronger than intended.
Why are my cookies dry?
Too much flour or a long baking time are common causes. Weigh the flour and check the first tray early. Remember that the cookies continue to firm up while resting on the hot sheet.
Can I add a white chocolate drizzle?
Yes. Once the mint layer is firm, drizzle with a little melted white chocolate. Let it set completely before stacking.
Are these suitable for a Christmas cookie tray?
They’re a good choice for anyone who enjoys chocolate and mint. Pair them with buttery shortbread, jam-filled cookies, and something crunchy for a tray with a mix of flavors and textures.
Save a Few for Later
A thin mint-chocolate top gives these cookies a finished look with very little decorating. Pack some for friends, set a plate beside the coffee pot, and freeze a few individually so you can pull out just what you need.