15 Easy 5 Minute Desserts You Can Make Tonight (No Oven Required)
Quick Answer: These 15 5 minute desserts need no oven and almost no cleanup — think mug cakes, no-bake fudge, yogurt parfaits, and chocolate-dipped fruit. Each recipe uses simple pantry staples and comes together in about five minutes of active time, so you always have a sweet answer for last-minute guests or sudden cravings.
There’s a specific kind of panic that hits when you realize dessert has completely slipped your mind and company is already on the way. That’s exactly the moment these 5 minute desserts were built for — no oven to preheat, no complicated technique, just a handful of ingredients you probably already have.
What ties this whole list together is speed without sacrifice: a chocolate mug cake that tastes like a bakery brownie, a peanut butter fudge that disappears at every bake sale, a parfait that looks like it came from a café. None of it requires special skill, and all of it comes together in about five minutes flat.
Grab a mixing bowl and a spoon — here are 15 quick desserts organized by how you make them, so you can pick whatever fits your kitchen mood tonight.
No-Cook Assemblies
These five need zero heat at all — just layering, mixing, or spreading. Perfect for hot days or when you don’t want to touch the stove.
1. Yogurt & Berry Parfaits
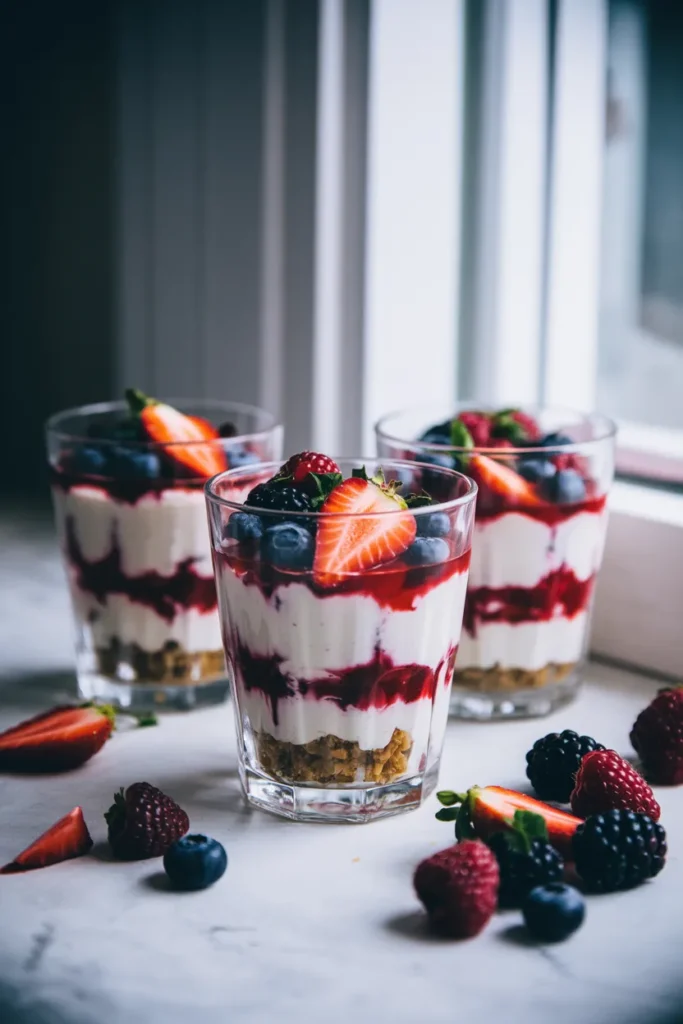
Layered in a clear glass, this parfait shows off every stripe — golden granola, thick yogurt, a ribbon of berry sauce, and a crown of fresh fruit. The crunch-to-cream ratio is what makes people go back for a second jar.
Prep Time: 5 min | Cook Time: 0 min | Total Time: 5 min | Servings: 4 | Difficulty: Easy
Ingredients
- 2 cups plain or vanilla Greek yogurt
- 1/3 cup mixed berry jam or berry sauce
- 1 cup granola
- 1 1/2 cups fresh mixed berries (strawberries, blueberries, raspberries)
- 1 tbsp honey, for drizzling
Instructions
- Spoon 2 tablespoons of granola into the bottom of each of 4 mason jars or glasses.
- Add a layer of yogurt (about 1/3 cup), then a thin ribbon of berry sauce.
- Repeat the granola, yogurt, and berry sauce layers once more in each jar.
- Top each jar with fresh berries and a light drizzle of honey.
- Serve immediately, or refrigerate up to 4 hours before serving.
Baker’s Tip
Add the granola right before serving if you’re prepping more than an hour ahead — it stays crunchy that way instead of going soft in the yogurt.
Best For
Brunches, quick breakfasts-as-dessert, and anyone who wants something that feels a little lighter than chocolate.
2. Banana Split Jars
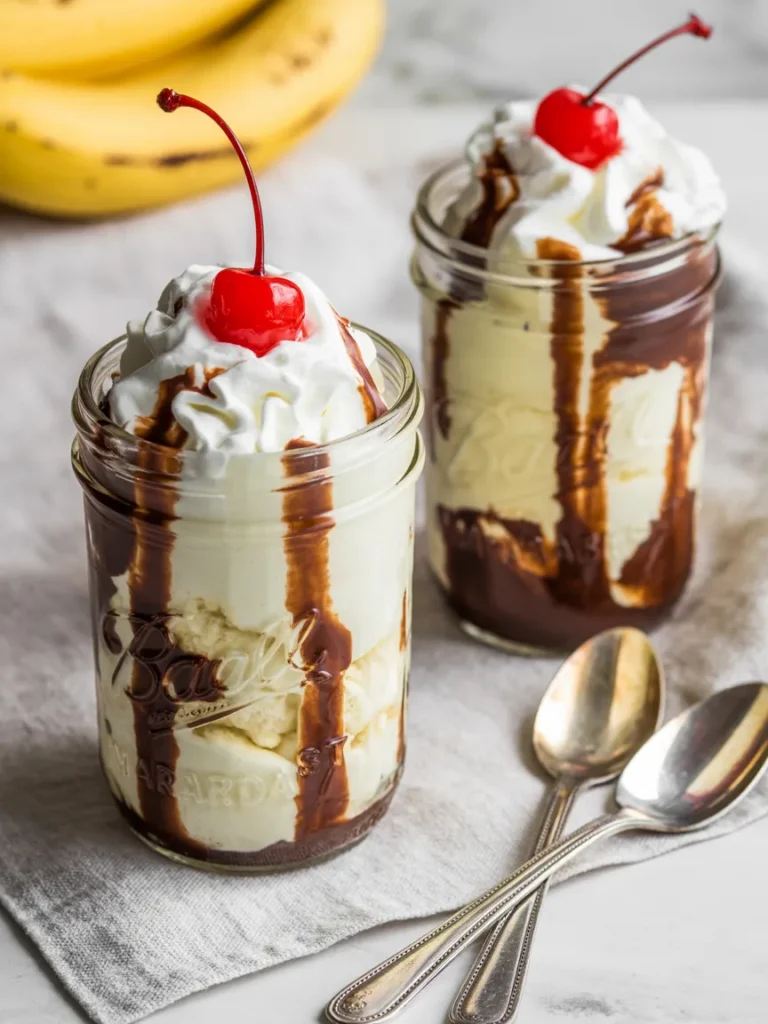
Everything you love about a classic banana split, just shrunk down into a single jar you can hand straight to a guest. The chocolate syrup striping down the inside of the glass is the detail that makes it look intentional instead of thrown together.
Prep Time: 5 min | Cook Time: 0 min | Total Time: 5 min | Servings: 2 | Difficulty: Easy
Ingredients
- 1 ripe banana, sliced
- 2 cups vanilla ice cream
- 1/4 cup chocolate syrup
- 1/2 cup whipped cream
- 2 maraschino cherries
- 2 tbsp chopped nuts (optional)
Instructions
- Drizzle chocolate syrup down the inside walls of 2 mason jars so it streaks as it settles.
- Layer half the banana slices into the bottom of each jar.
- Add a scoop of vanilla ice cream to each jar, then another drizzle of chocolate syrup.
- Top with whipped cream, a sprinkle of chopped nuts, and a cherry on top.
- Serve immediately with a long spoon.
Baker’s Tip
Slightly soften the ice cream for 2–3 minutes at room temperature before scooping — it makes it much easier to layer neatly in the jar.
Why You’ll Love It
It’s the nostalgic soda-fountain treat, minus the sundae bar and the mess, ready in the time it takes to slice one banana.
3. Cheesecake Fruit Dip
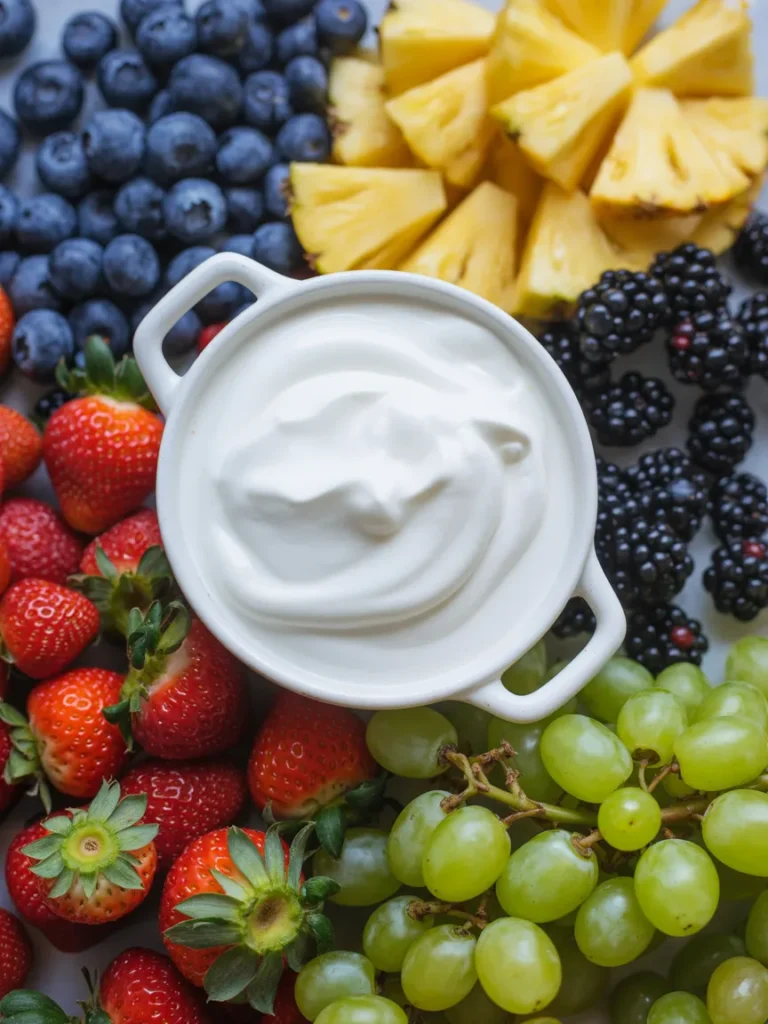
All the flavor of a cheesecake without turning on the oven or waiting for it to set. Whipped until silky and served in the middle of a fruit platter, it turns plain fruit into something people actually reach for first.
Prep Time: 5 min | Cook Time: 0 min | Total Time: 5 min | Servings: 6 | Difficulty: Easy
Ingredients
- 8 oz cream cheese, softened
- 1/2 cup powdered sugar
- 1 tsp vanilla extract
- 2 tbsp milk (as needed, to thin)
- Assorted fruit for dipping (strawberries, pineapple, grapes, blackberries, blueberries)
Instructions
- In a mixing bowl, beat the softened cream cheese with a hand mixer for 30 seconds until smooth.
- Add the powdered sugar and vanilla extract, and beat for another 60 seconds until fully combined and fluffy.
- Add milk, 1 tablespoon at a time, beating until the dip reaches a soft, spreadable consistency.
- Spoon into a serving bowl and arrange the fruit around it.
- Serve right away, or chill up to 2 days.
Baker’s Tip
Softened cream cheese is non-negotiable here — cold cream cheese straight from the fridge will leave lumps no matter how long you beat it.
Substitutions
Swap the powdered sugar for an equal amount of marshmallow fluff for an even fluffier, sweeter dip with almost no extra effort.
4. Mini Fruit Tarts
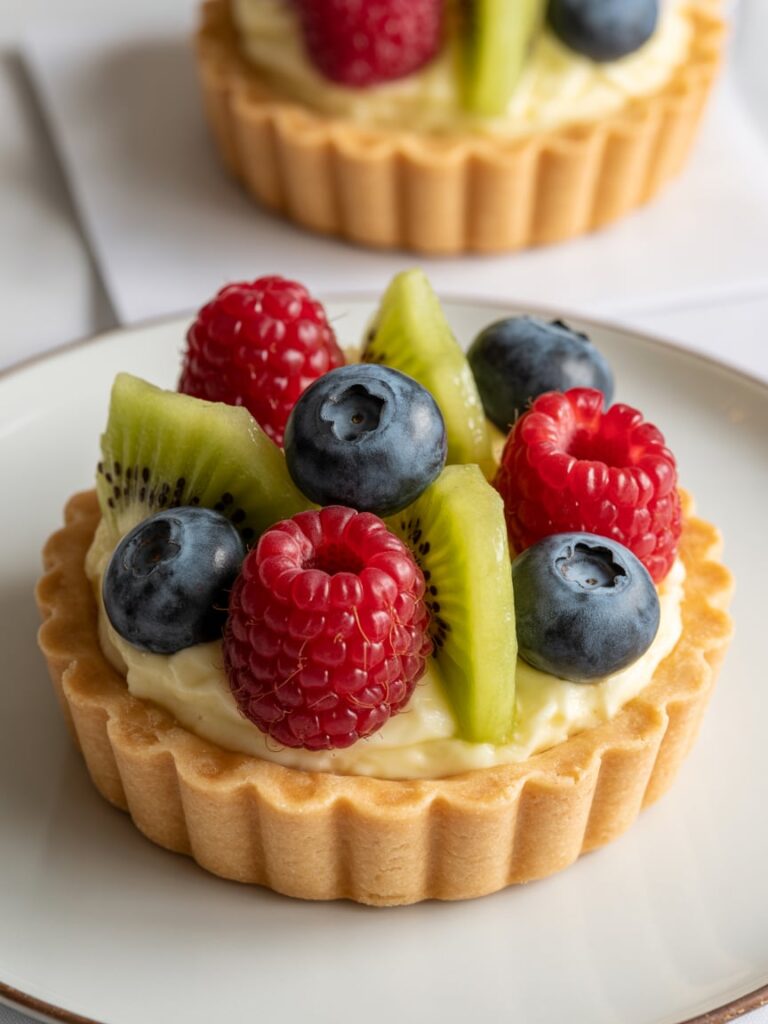
Buttery premade tart shells filled with silky pastry cream and topped with a rainbow of fresh fruit — this one looks like it came from a French bakery case, but it’s just three components you snap together.
Prep Time: 5 min | Cook Time: 0 min | Total Time: 5 min | Servings: 6 | Difficulty: Easy
Ingredients
- 6 premade mini tart shells
- 1 cup vanilla pudding or pastry cream
- 1 kiwi, sliced
- 1/2 cup fresh raspberries
- 1/2 cup fresh blueberries
- 2 tbsp apricot jam, warmed (for glaze, optional)
Instructions
- Spoon about 2–3 tablespoons of vanilla pudding into each tart shell.
- Arrange kiwi slices, raspberries, and blueberries on top of each tart in a circular pattern.
- If using, brush the warmed apricot jam lightly over the fruit for shine.
- Serve immediately, or refrigerate up to 3 hours before serving.
Baker’s Tip
Fill the shells as close to serving time as possible — the crust stays crisp for about 3 hours before it starts to soften from the pudding.
Best For
Tea parties, bridal showers, or any spread where you want something that photographs beautifully with almost no effort.
5. Pudding Pie Cups
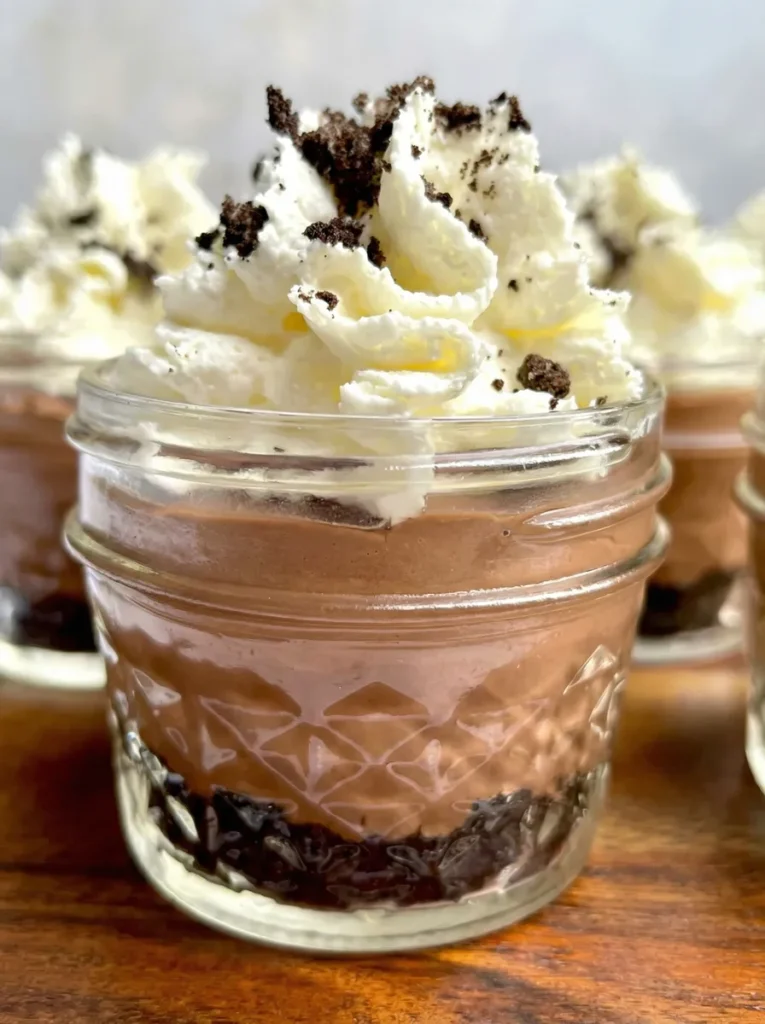
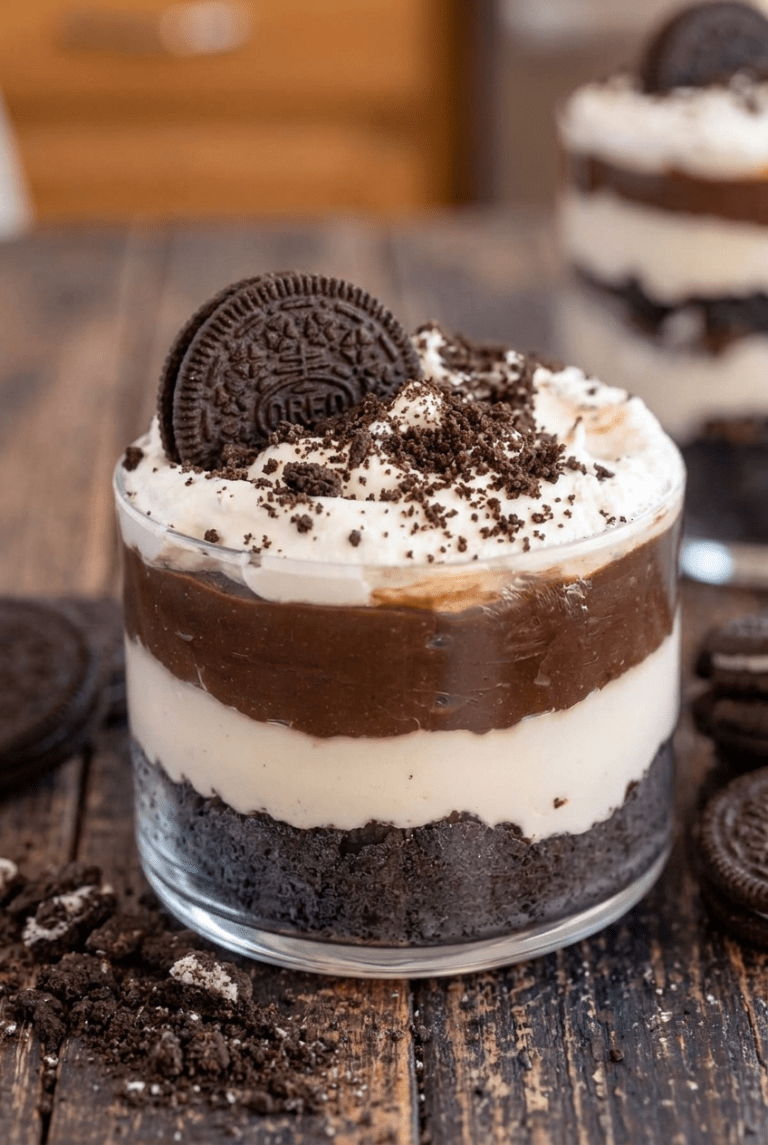
Instant pudding gets a glow-up in a mason jar, layered over crushed cookies and finished with a swirled crown of whipped cream. It reads like a mini icebox pie without any of the crust-making.
Prep Time: 5 min | Cook Time: 0 min | Total Time: 5 min | Servings: 4 | Difficulty: Easy
Ingredients
- 1 (3.9 oz) box instant chocolate pudding mix
- 2 cups cold milk
- 1 cup crushed chocolate sandwich cookies
- 1 cup whipped cream
- 1 tbsp shaved chocolate, for topping
Instructions
- Whisk the instant pudding mix with cold milk in a bowl for 2 minutes, until it starts to thicken.
- Spoon a layer of crushed cookies into the bottom of 4 small jars or cups.
- Pour the pudding over the cookie layer, filling each cup about three-quarters full.
- Top with a swirl of whipped cream and a sprinkle of shaved chocolate.
- Serve right away, or chill 5 minutes for a slightly firmer set.
Baker’s Tip
Instant pudding sets almost immediately, so pour it into the cups within a minute or two of whisking, before it firms up in the bowl.
Flavor Variation
Swap chocolate pudding for vanilla and crushed graham crackers for a banana-cream-pie feel — just add a layer of sliced banana before the pudding.
Melt-and-Mix Treats
These five use a quick trip to the microwave or stovetop to melt one key ingredient, then come together in a bowl. Nothing here needs longer than a minute or two of actual heat.
6. Chocolate Mug Cake
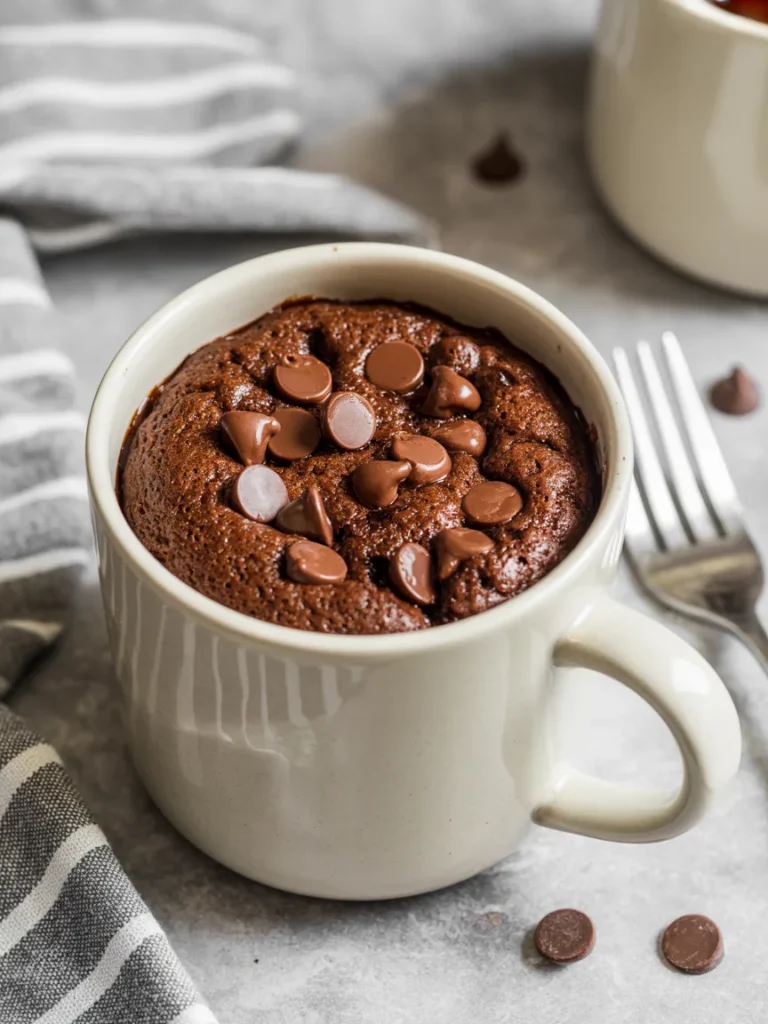
Dense, fudgy, and ready before your kettle would’ve even boiled — this is instant chocolate therapy in a single mug. The chips on top go soft and gooey the second the cake comes out of the microwave.
Prep Time: 2 min | Cook Time: 1–2 min | Total Time: 4 min | Servings: 1 | Difficulty: Easy
Ingredients
- 4 tbsp all-purpose flour
- 2 tbsp granulated sugar
- 2 tbsp unsweetened cocoa powder
- 1/4 tsp baking powder
- Pinch of salt
- 3 tbsp milk
- 2 tbsp vegetable oil
- 1/4 tsp vanilla extract
- 2 tbsp chocolate chips
Instructions
- In a microwave-safe mug, whisk together the flour, sugar, cocoa powder, baking powder, and salt with a fork.
- Add the milk, oil, and vanilla extract, and stir until no dry streaks remain.
- Sprinkle the chocolate chips over the top.
- Microwave on high for 60–90 seconds, until the cake has risen and the center springs back when touched.
- Let it cool for 1 minute before eating — the center will be hot.
Baker’s Tip
Stop the microwave at 60 seconds and check — mug cakes go from perfectly fudgy to dry and rubbery in about 20 extra seconds.
Good to Know
Microwave wattages vary a lot, so the first time you make this, check at 45 seconds and add time in 10-second bursts until it’s just set.
7. Peanut Butter Fudge
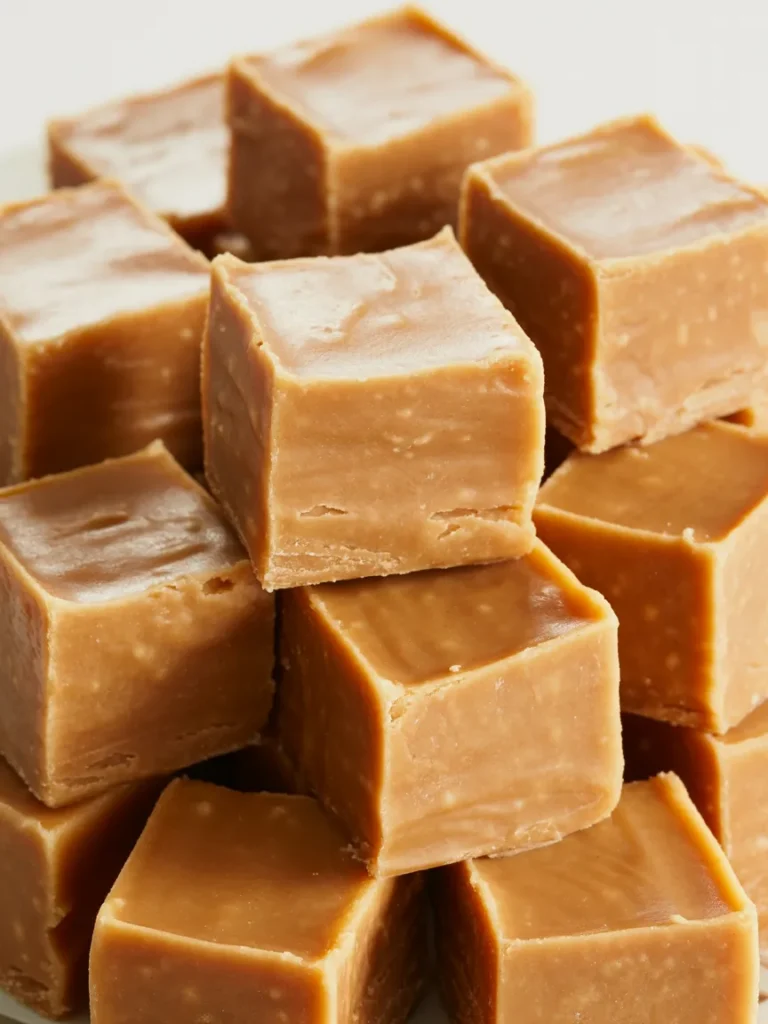
Two ingredients melted together, one bowl, zero candy thermometer — this is the fudge that tastes like it took real effort and actually took about as much work as making a sandwich.
Prep Time: 3 min | Cook Time: 2 min | Total Time: 5 min | Servings: 12 pieces | Difficulty: Easy
Ingredients
- 1 cup creamy peanut butter
- 1/4 cup unsalted butter
- 2 cups powdered sugar
- 1/2 tsp vanilla extract
- Pinch of salt
Instructions
- In a microwave-safe bowl, melt the peanut butter and butter together on high for 60–90 seconds, stirring halfway through, until smooth.
- Stir in the vanilla extract and salt.
- Add the powdered sugar and stir until fully combined and no streaks of sugar remain.
- Press the mixture firmly into an 8×8-inch pan lined with parchment paper.
- Cut into 12 squares. It’s ready to eat immediately while soft, or refrigerate 20–30 minutes for firmer, sliceable fudge.
Baker’s Tip
Line the pan with parchment paper first — this fudge is soft enough that it can stick stubbornly to bare metal.
Flavor Variation
Swirl in 2 tablespoons of Biscoff spread before pressing it into the pan, or fold in crushed pretzels for a salty crunch.
8. Rice Krispie Treat Remix
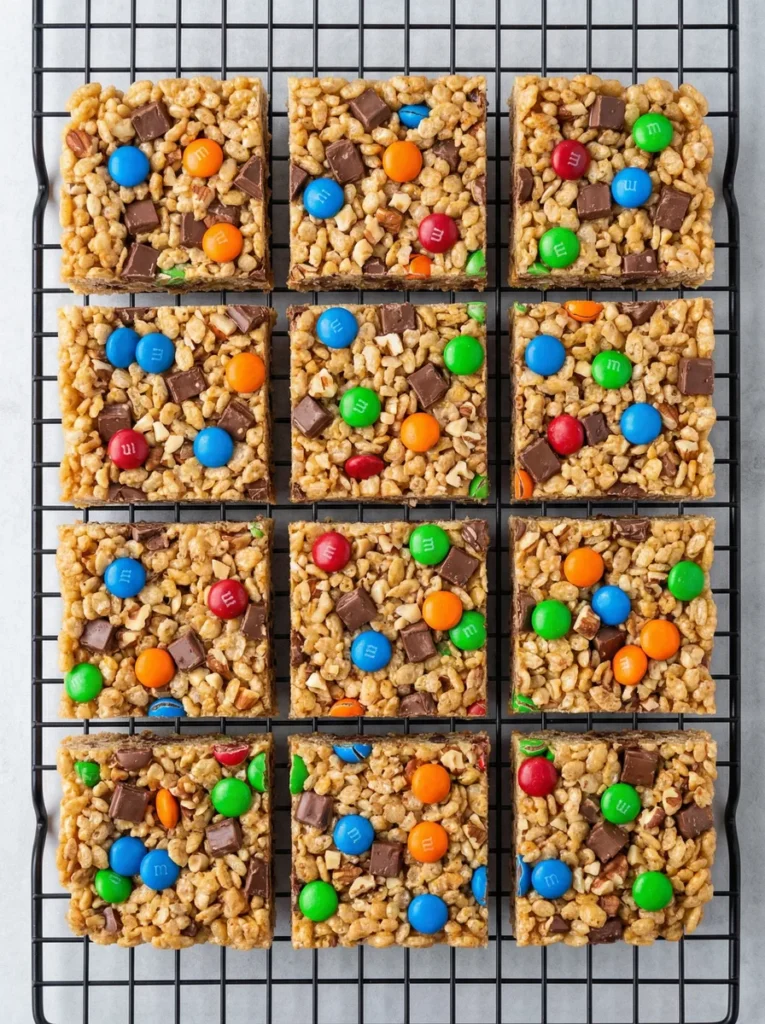
The classic gets a mix-in upgrade — chocolate chunks, chopped pecans, and a scatter of candy pieces turn a lunchbox staple into something worth setting out at a party.
Prep Time: 3 min | Cook Time: 2 min | Total Time: 5 min | Servings: 12 squares | Difficulty: Easy
Ingredients
- 3 tbsp unsalted butter
- 4 cups mini marshmallows
- 6 cups crisp rice cereal
- 1/2 cup chopped chocolate candies
- 1/4 cup chopped pecans
- 1/4 cup chocolate chunks
Instructions
- In a large microwave-safe bowl, melt the butter and marshmallows together on high for 90 seconds, stirring halfway through, until smooth.
- Stir in the rice cereal until it’s evenly coated.
- Fold in the chopped candies, pecans, and chocolate chunks while the mixture is still warm.
- Press firmly into a parchment-lined 9×9-inch pan using a greased spatula.
- Cut into squares right away for warm, gooey bars, or let cool 15 minutes for cleaner-cut squares.
Baker’s Tip
Press the mixture down while it’s still warm — once it cools, it firms up and becomes much harder to compact evenly.
Storage & Freezing
Store in an airtight container at room temperature for up to 3 days, or freeze individually wrapped squares for up to 1 month.
9. Chocolate Bark
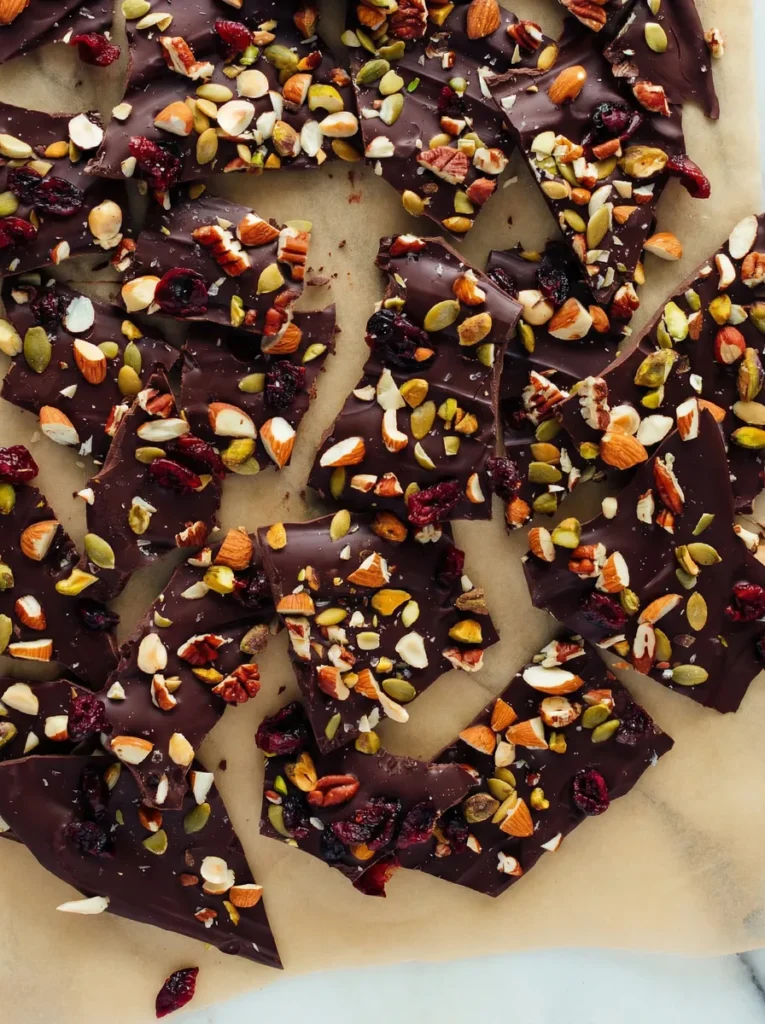
Melted chocolate spread thin and scattered with whatever’s in the pantry — nuts, seeds, dried fruit — then broken into rustic shards. It looks like it belongs in a specialty shop, and it’s really just one bowl and a spoon.
Prep Time: 3 min | Cook Time: 2 min | Total Time: 5 min | Servings: 8 | Difficulty: Easy
Ingredients
- 2 cups dark chocolate chips
- 1/4 cup chopped almonds
- 1/4 cup chopped pistachios
- 1/4 cup chopped pecans
- 2 tbsp pumpkin seeds
- 2 tbsp dried cranberries
Instructions
- Melt the chocolate chips in a microwave-safe bowl in 30-second bursts, stirring between each, until smooth (about 90 seconds total).
- Pour the melted chocolate onto a silicone baking mat or parchment paper and spread into an even, thin layer with a spatula.
- Immediately scatter the almonds, pistachios, pecans, pumpkin seeds, and cranberries evenly over the top.
- Let it set at room temperature for 10–15 minutes, or refrigerate for 5 minutes to speed it up.
- Break into rustic shards once firm.
Baker’s Tip
Work quickly once the chocolate is spread — the toppings need to go on while it’s still glossy and wet or they won’t stick.
Good to Know
It’s fully snappable after it sets, but honestly delicious eaten soft with a spoon straight off the tray while it’s still warm.
10. S’mores Cones

Campfire flavor without the campfire — mini marshmallows and chocolate chips go soft and gooey together inside a waffle cone, no skewer or fire pit required.
Prep Time: 2 min | Cook Time: 1 min | Total Time: 3 min | Servings: 4 | Difficulty: Easy
Ingredients
- 4 waffle cones
- 1 cup mini marshmallows
- 1/2 cup chocolate chips
- 1/2 cup crushed graham crackers
Instructions
- Fill each waffle cone with mini marshmallows, chocolate chips, and crushed graham crackers, packing loosely to the top.
- Wrap the top of each cone loosely in foil, leaving the very top open.
- Microwave one cone at a time for 20–30 seconds, until the marshmallows and chocolate look soft and melted.
- Serve immediately while warm and gooey.
Baker’s Tip
Stand the cones upright in a cone holder stand or a few tall glasses before microwaving so they don’t tip over and spill.
Best For
Backyard get-togethers, kids’ parties, or any night everyone wants to build their own dessert.
Dip, Dress & Impress
These five look the fanciest of the bunch but still take about five minutes — the trick is smart presentation, not extra work.
11. Chocolate-Dipped Fruit
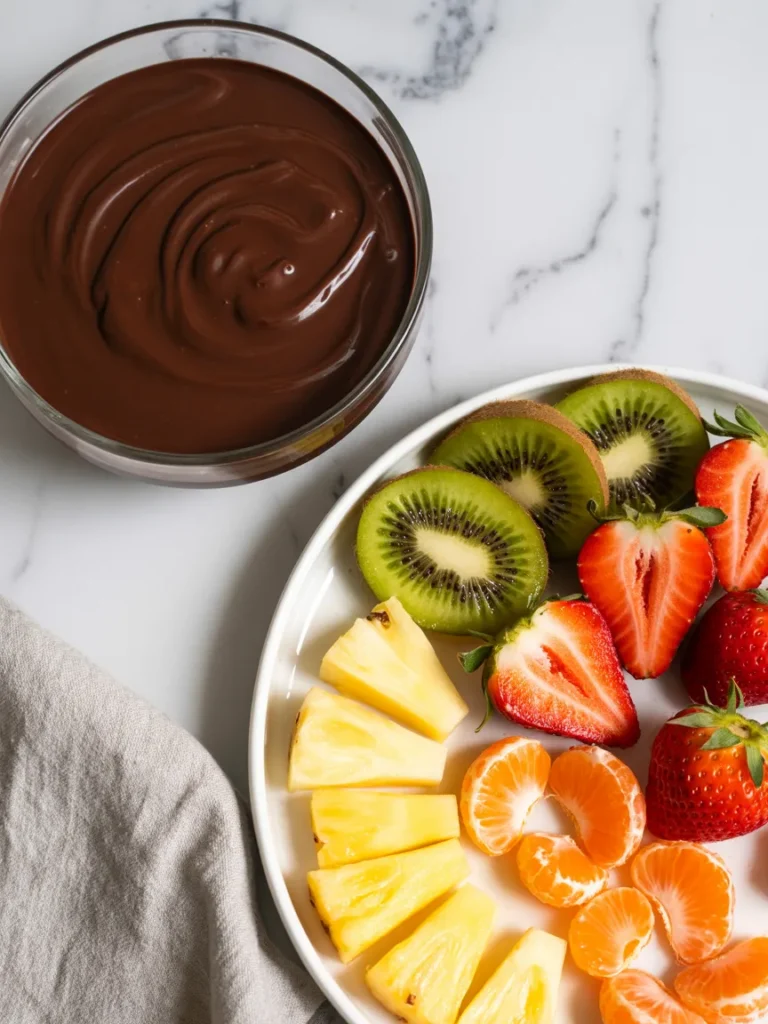
Melted chocolate and a plate of fresh fruit are all it takes here — kiwi, strawberries, pineapple, and mandarin segments each take on a glossy chocolate coating that makes the whole platter look catered.
Prep Time: 3 min | Cook Time: 2 min | Total Time: 5 min | Servings: 4 | Difficulty: Easy
Ingredients
- 1 cup chocolate chips
- 1 tsp coconut oil (optional, for a glossier finish)
- 8 strawberries
- 1 kiwi, sliced into half-moons
- 1 cup pineapple chunks
- 1 mandarin orange, segmented
Instructions
- Melt the chocolate chips with the coconut oil in a microwave-safe bowl in 30-second bursts, stirring between each, until smooth (about 90 seconds total).
- Dip each piece of fruit halfway into the melted chocolate, letting the excess drip off.
- Place dipped fruit on a parchment-lined baking sheet.
- Serve immediately while the chocolate is still soft and glossy, or refrigerate 5–10 minutes for a firmer shell.
Baker’s Tip
Pat the fruit completely dry with a paper towel before dipping — any surface moisture makes the chocolate seize and turn grainy.
Substitutions
Bananas and grapes both work beautifully here too, and hold their chocolate coating just as well as the fruit listed above.
12. Quick Chocolate Mousse
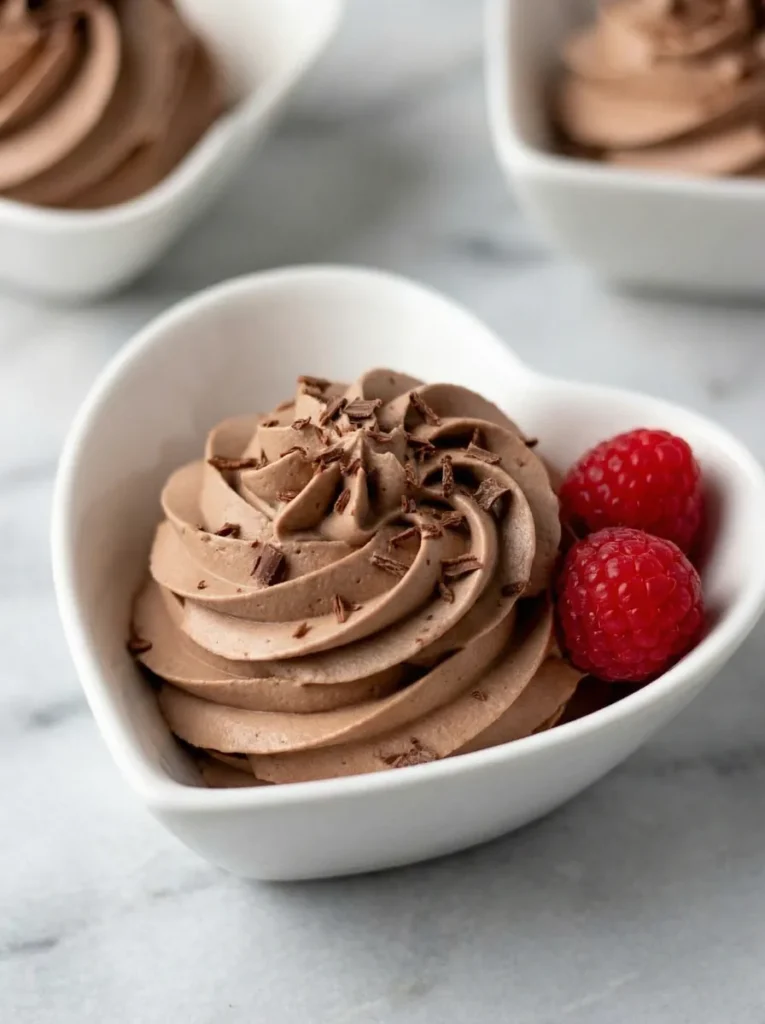
Whipped until it holds its shape in soft peaks, this mousse pipes up tall and airy, with a texture closer to whipped chocolate frosting than a pudding cup. The raspberries on top cut through the richness with every bite.
Prep Time: 5 min | Cook Time: 0 min | Total Time: 5 min | Servings: 4 | Difficulty: Easy
Ingredients
- 1 cup heavy cream, cold
- 1/4 cup unsweetened cocoa powder
- 1/4 cup powdered sugar
- 1/2 tsp vanilla extract
- 1/2 cup fresh raspberries
- 1 tbsp chocolate shavings, for garnish
Instructions
- In a chilled mixing bowl, whip the cold heavy cream with a hand mixer on medium-high for 1 minute, until it starts to thicken.
- Add the cocoa powder, powdered sugar, and vanilla extract, and continue whipping for 2–3 minutes, until stiff peaks form.
- Spoon or pipe the mousse into 4 small serving dishes.
- Top each with fresh raspberries and a sprinkle of chocolate shavings.
- Serve immediately, or chill up to 2 hours.
Baker’s Tip
Chill your mixing bowl and beaters in the freezer for a few minutes beforehand — cold cream whips to stiff peaks noticeably faster.
Why You’ll Love It
It’s rich enough to feel like a real dessert, but light enough that you won’t feel like you need a nap after finishing your bowl.
13. Cookie Butter Dip
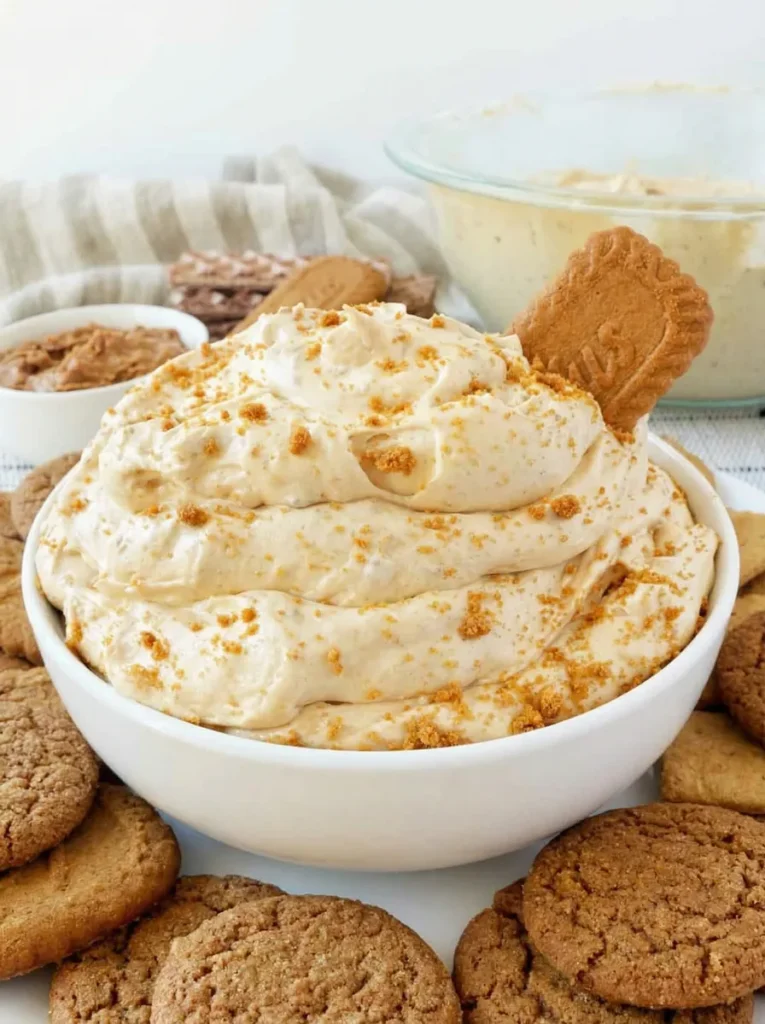
Cream cheese and cookie butter whip up into something that tastes like frosting but eats like a dip — sweet, faintly spiced, and just salty enough with a cookie for scooping.
Prep Time: 5 min | Cook Time: 0 min | Total Time: 5 min | Servings: 6 | Difficulty: Easy
Ingredients
- 8 oz cream cheese, softened
- 1/2 cup cookie butter (such as speculoos spread)
- 2 tbsp powdered sugar
- 1 tbsp milk (as needed, to thin)
- 2 tbsp crushed speculoos cookies, for topping
- Pretzels, apple slices, or graham crackers, for serving
Instructions
- Beat the softened cream cheese in a glass mixing bowl for 30 seconds until smooth.
- Add the cookie butter and powdered sugar, and beat for another minute until fully combined.
- Add milk, a teaspoon at a time, until the dip reaches a soft, spoonable consistency.
- Transfer to a serving bowl and sprinkle crushed cookies over the top.
- Serve immediately with pretzels, apple slices, or graham crackers alongside.
Baker’s Tip
Both the cream cheese and cookie butter should sit at room temperature for a few minutes first — cold ingredients leave a lumpy, uneven dip.
Best For
Movie nights, potlucks, and anyone who likes their dessert to double as a snack board.
14. Instant Tiramisu Cups
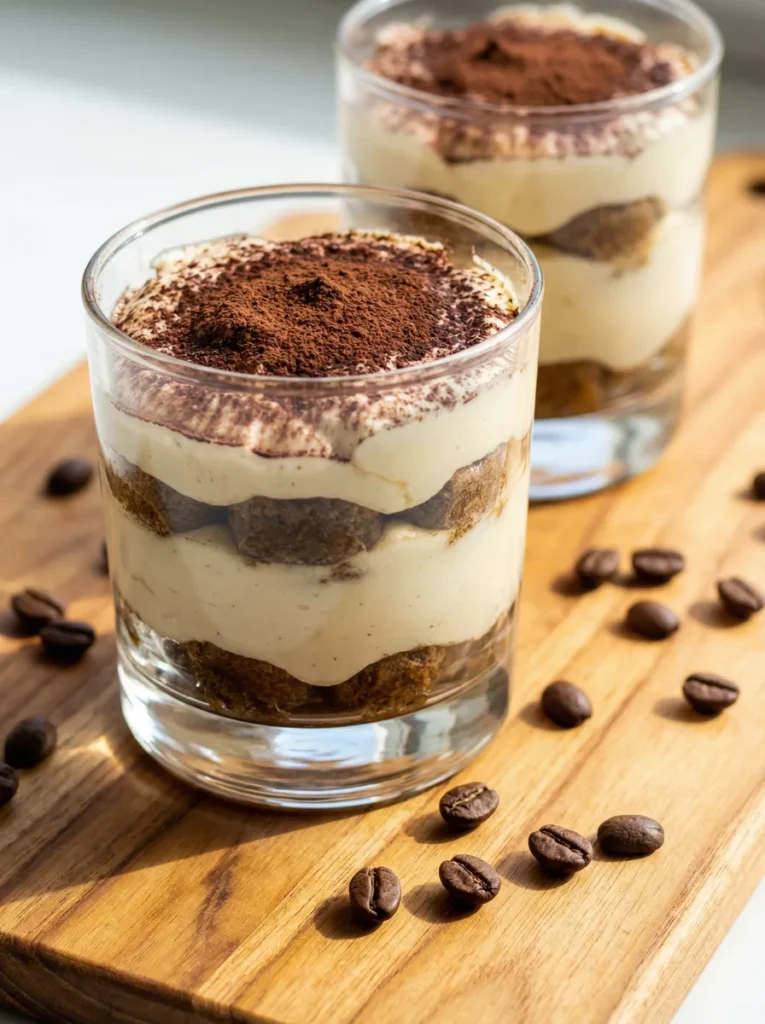
All the flavor of a classic tiramisu without the overnight wait — coffee-dipped ladyfingers layered with a quick mascarpone cream and finished with a generous dusting of cocoa.
Prep Time: 5 min | Cook Time: 0 min | Total Time: 5 min | Servings: 4 | Difficulty: Easy
Ingredients
- 8 ladyfinger cookies
- 3/4 cup strong brewed coffee, cooled
- 1 cup mascarpone cheese, softened
- 1/2 cup whipped cream
- 2 tbsp powdered sugar
- 2 tbsp unsweetened cocoa powder, for dusting
Instructions
- In a bowl, whisk the softened mascarpone with the powdered sugar until smooth, then fold in the whipped cream with a spatula until combined.
- Quickly dip each ladyfinger into the cooled coffee for 1 second per side — just enough to moisten, not soak — and break in half to fit 4 espresso cups.
- Layer dipped ladyfinger pieces in the bottom of each cup, then top with a generous spoonful of the mascarpone cream.
- Repeat with a second layer of dipped ladyfingers and cream in each cup.
- Dust the tops with cocoa powder and serve immediately, or chill up to 2 hours for a firmer set.
Baker’s Tip
Dip fast — ladyfingers are thin and absorb liquid quickly, so a full soak turns them mushy instead of pleasantly moist.
Make-Ahead Tip
These actually taste better after 30 minutes in the fridge if you have the time, but they’re completely ready to eat right away.
15. Oreo Truffles (Shortcut Version)
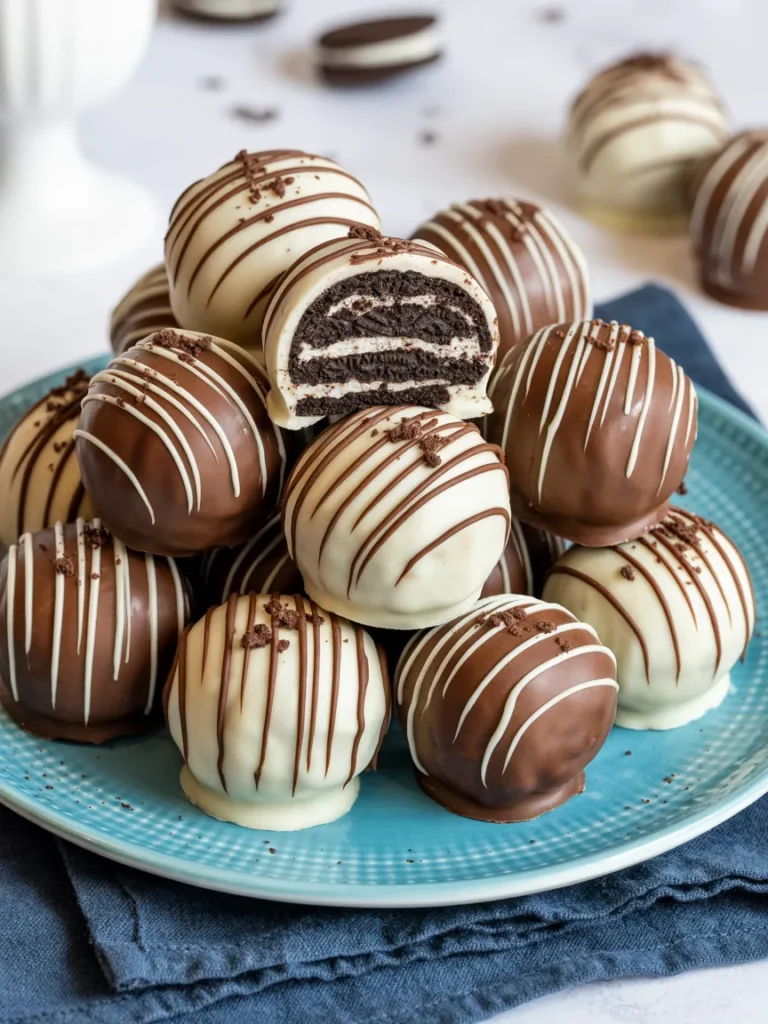
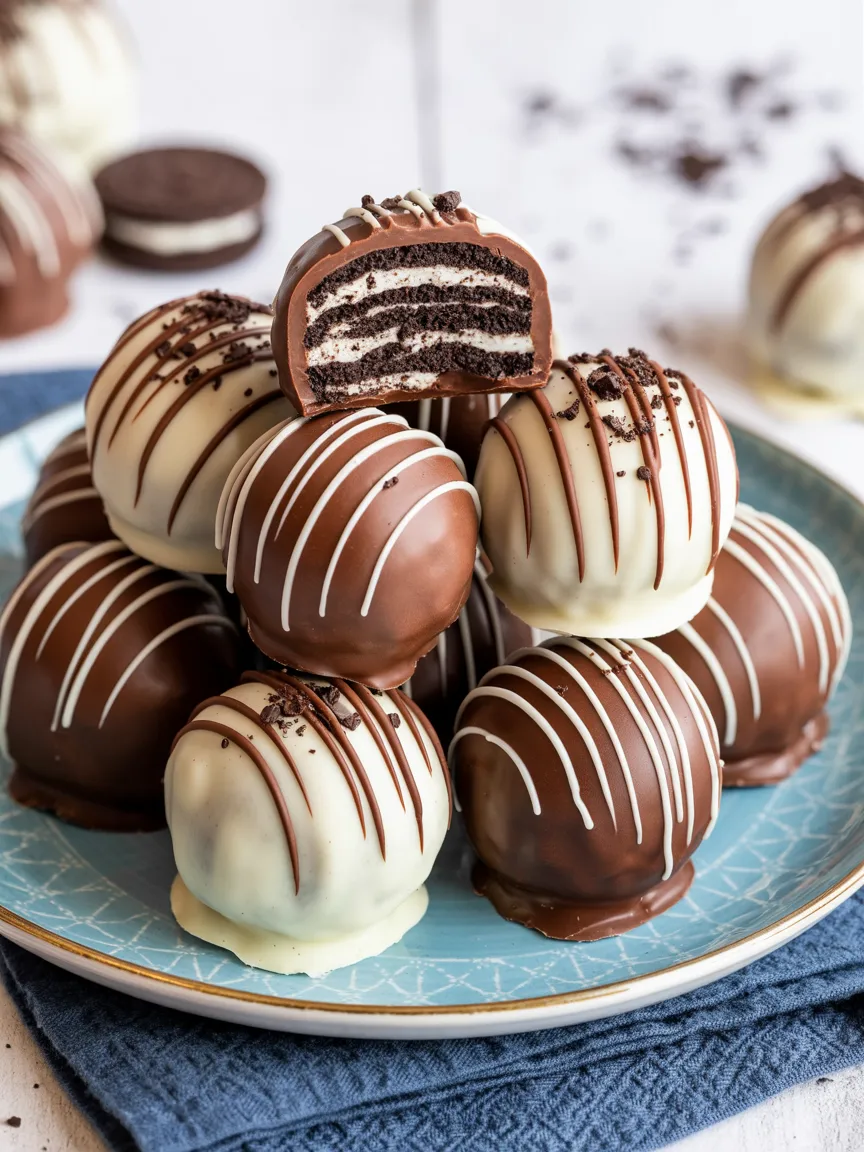
Crushed cookies and cream cheese roll into a filling that tastes like cheesecake fudge, then get dipped in a shell of dark and white chocolate. Cut one in half and you can see the cookie streaks running straight through the center.
Prep Time: 4 min | Cook Time: 1 min | Total Time: 5 min | Servings: 12 truffles | Difficulty: Easy
Ingredients
- 24 chocolate sandwich cookies, finely crushed
- 4 oz cream cheese, softened
- 1 cup chocolate chips, melted
- 1/4 cup white chocolate chips, melted (for drizzling)
Instructions
- In a bowl, mix the crushed cookies with the softened cream cheese until a thick, uniform dough forms.
- Roll the mixture into 12 evenly sized balls, about 1 inch each.
- Melt the chocolate chips in a microwave-safe bowl in 30-second bursts, stirring between each, until smooth.
- Dip each ball into the melted chocolate, letting the excess drip off, and place on a parchment-lined cookie sheet.
- Melt the white chocolate chips and drizzle over the tops in thin lines.
- Serve right away for a soft, fudgy center, or refrigerate 10–15 minutes to firm the shell for a cleaner bite.
Baker’s Tip
Slightly damp hands make rolling the filling into balls much easier and keep it from sticking to your palms.
Storage & Freezing
Store in an airtight container in the fridge for up to 5 days, or freeze for up to 1 month.
Which 5 Minute Dessert Should You Make?
Not sure where to start? Here’s how the fifteen stack up by mood, crowd, and whether you’ll need to touch the microwave.
| Recipe | Best For | Needs Melting? | Total Time |
|---|---|---|---|
| Yogurt & Berry Parfaits | Brunch or a lighter option | No | 5 min |
| Banana Split Jars | Nostalgic crowd-pleaser | No | 5 min |
| Cheesecake Fruit Dip | Fruit platters and parties | No | 5 min |
| Mini Fruit Tarts | Tea parties and showers | No | 5 min |
| Pudding Pie Cups | Kid-friendly, no fuss | No | 5 min |
| Chocolate Mug Cake | Solo late-night craving | Yes, microwave | 4 min |
| Peanut Butter Fudge | Bake sales and gifting | Yes, microwave | 5 min |
| Rice Krispie Treat Remix | School events and potlucks | Yes, microwave | 5 min |
| Chocolate Bark | Holiday trays and gifting | Yes, microwave | 5 min |
| S’mores Cones | Backyard hangouts and kids | Yes, microwave | 3 min |
| Chocolate-Dipped Fruit | Dressed-up fruit platters | Yes, microwave | 5 min |
| Quick Chocolate Mousse | Date night or dinner party | No | 5 min |
| Cookie Butter Dip | Movie nights and snack boards | No | 5 min |
| Instant Tiramisu Cups | Formal dinners | No | 5 min |
| Oreo Truffles | Gifting and cookie trays | Yes, microwave | 5 min |
How to Store These Desserts
Most of these keep well for a day or two in the fridge in an airtight container or covered jar — parfaits, fudge, mousse, and pudding cups all hold up nicely overnight. Chocolate-dipped fruit and s’mores cones are the exception: make those the same day you plan to serve them, since the fruit releases moisture and the cones go soft in storage. Fudge, bark, and Rice Krispie treats also freeze well for up to a month if wrapped tightly.
Frequently Asked Questions
Do 5 minute desserts actually taste good, or are they just quick fixes?
Yes — the trick is in small upgrades like a pinch of sea salt, fresh berries, or a drizzle of melted chocolate. A five-minute fudge or mug cake can taste bakery-level when you lean on smart pairings and fresh toppings.
How do I make 5 minute desserts look fancy for guests?
Presentation does most of the work. Layer parfaits in glass jars, serve fudge and bark on a tiered stand, or drizzle sauces from a squeeze bottle. Height, color, and texture make even the simplest dessert look intentional.
What’s the best kid-friendly 5 minute dessert?
S’mores cones and yogurt parfaits are both hits because kids can build their own from a set of toppings — it’s interactive and doubles as entertainment at parties or playdates.
Can I prep these desserts ahead of time?
Parfaits, fudge, and pudding cups all store well in the fridge for a day or two. Chocolate-dipped fruit is best made the same day so it stays glossy and doesn’t sweat in the fridge.
Are there healthier versions of 5 minute desserts?
Definitely — Greek yogurt with honey and berries, or dark chocolate-dipped fruit, both keep things lighter while still feeling like a treat. Quick doesn’t have to mean a sugar overload.
Do I need special tools or equipment?
Not really. A microwave-safe bowl, a few mason jars, and a baking sheet cover nearly everything on this list — most recipes only need a bowl, a spoon, and a microwave.
What’s the absolute fastest dessert on this list?
The chocolate mug cake, hands down — one mug, about 90 seconds in the microwave, and you’ve got warm, gooey chocolate cake ready to eat.
Final Thoughts
Keep a stash of chocolate chips, yogurt, cream cheese, and fresh fruit on hand, and you’ll always have a last-minute dessert covered. These 5 minute desserts prove the best sweet endings don’t need hours of effort — they need one bowl, five minutes, and something worth sharing.




5 Comments