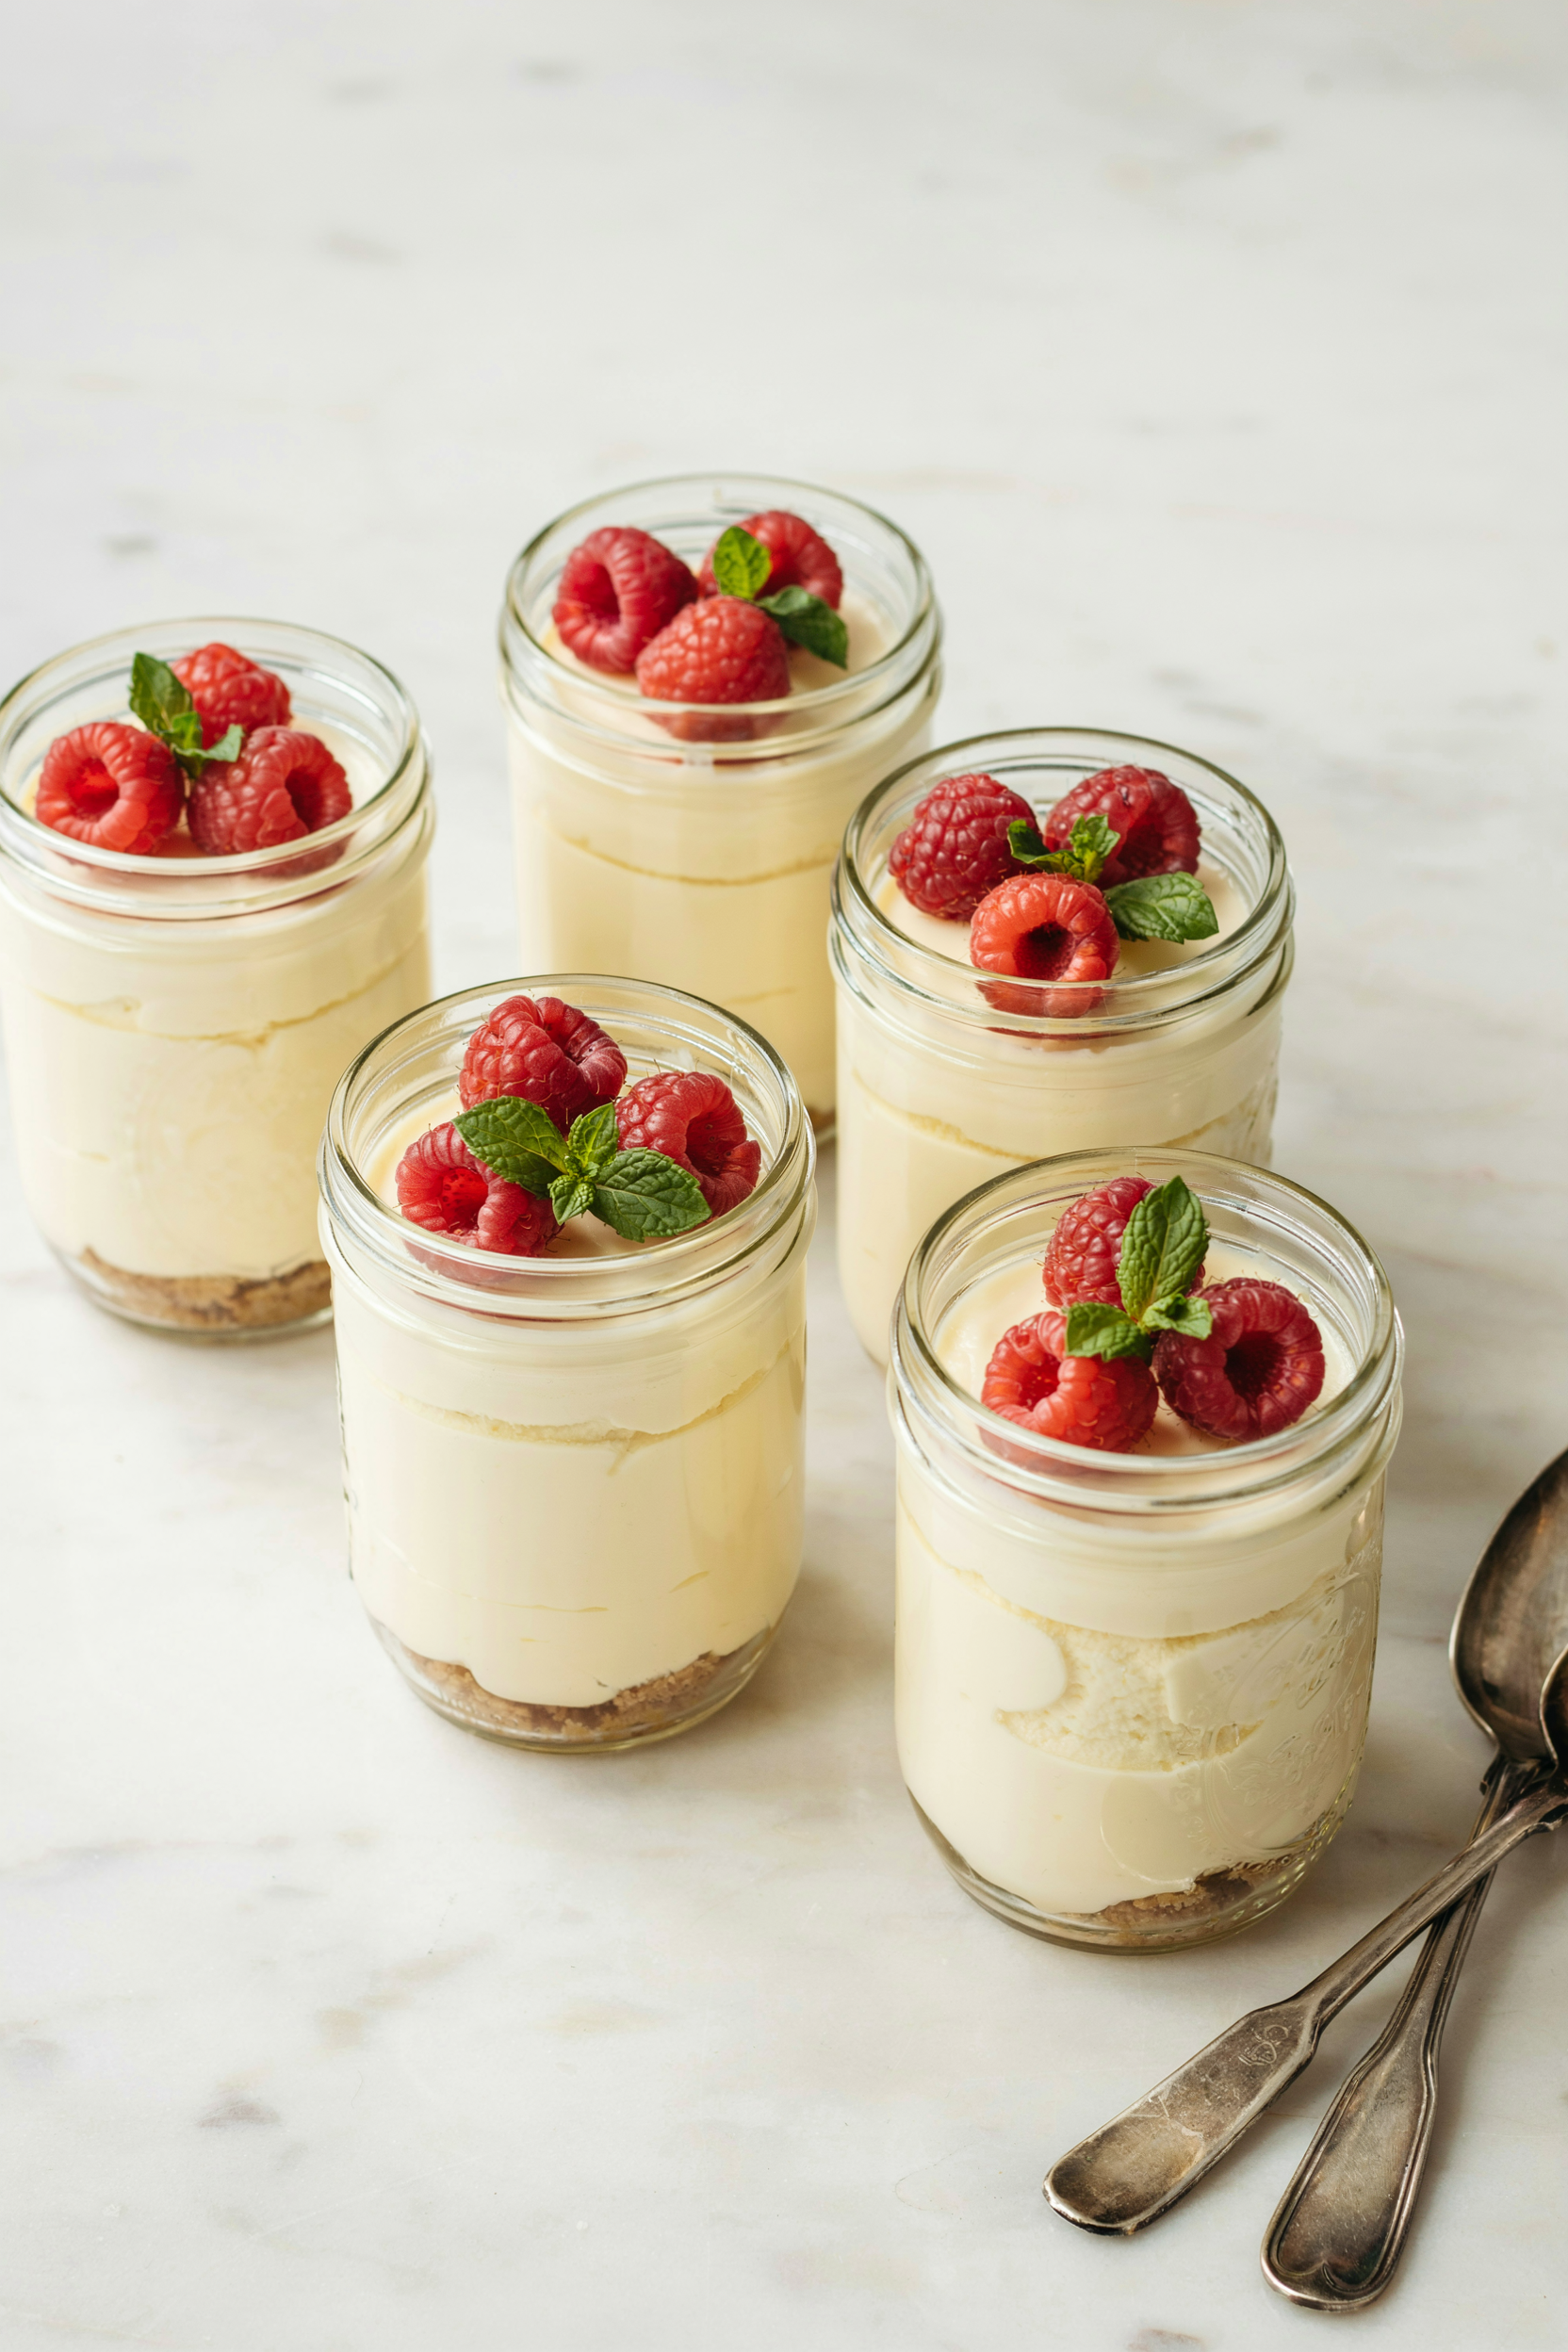
There’s something about individual desserts that just feels a little more special, isn’t there? Maybe it’s the fact that everyone gets their own perfectly portioned treat, or maybe it’s because they look like you spent way more time in the kitchen than you actually did. Either way, these Mini No-Bake Cheesecake Cups are one of those desserts I keep coming back to whenever I need something simple, impressive, and guaranteed to disappear fast.
What I love most about these cheesecake cups is that they deliver all the creamy, rich flavor of classic cheesecake without the hassle of a water bath, springform pan, or hours of baking. A buttery cookie crumb base, silky cheesecake filling, and your favorite toppings come together in adorable little cups that are perfect for parties, holidays, baby showers, or just a random Tuesday when you’re craving something sweet. Keep them classic with berries, drizzle on caramel, or pile them high with chocolate—you really can’t go wrong.
This post may contain affiliate links which helps me keep this blog alive, questions? View the privacy policy.
Why You’ll Love These Mini No-Bake Cheesecake Cups
- No oven required. These cheesecake cups come together without any baking, making them perfect for warm days when you don’t want to heat up the kitchen.
- Perfect individual portions. Everyone gets their own little dessert cup, which makes serving easy and gives them a polished, party-ready look.
- Rich and creamy texture. The smooth cheesecake filling tastes indulgent and satisfying, just like traditional cheesecake but with far less effort.
- Easy to customize. Top them with fresh berries, chocolate sauce, caramel, crushed cookies, lemon curd, or whatever sweet toppings you have on hand.
- Great for make-ahead entertaining. Prepare them a day in advance and keep them chilled until you’re ready to serve guests.
- Simple ingredients, big results. You only need a handful of everyday ingredients to create a dessert that looks bakery-worthy and tastes absolutely delicious.
Ingredients
Method
- In a medium bowl, combine the graham cracker crumbs and melted butter until the mixture resembles wet sand.
- Divide the crumb mixture evenly among six dessert cups or small jars. Press gently into the bottom of each cup to create a crust layer.
- In a large mixing bowl, beat the softened cream cheese until smooth and creamy.
- Add the powdered sugar and vanilla extract. Continue mixing until fully combined and no lumps remain.
- Gently fold the whipped cream into the cream cheese mixture until light and fluffy.
- Spoon or pipe the cheesecake filling evenly over the prepared crusts.
- Cover and refrigerate for at least 2 hours, or until the filling is set.
- Before serving, add your favorite toppings and enjoy chilled.
Notes
These cheesecake cups can be prepared up to 24 hours in advance, making them ideal for parties and gatherings.
For cleaner layers, use a piping bag to add the cheesecake filling.
Store leftovers covered in the refrigerator for up to 3 days.
Avoid freezing if topped with fresh fruit, as the texture may change after thawing.
Try seasonal toppings like pumpkin spice, lemon curd, or fresh peaches for a fun twist throughout the year.
How To Make Mini No-Bake Cheesecake Cups
Step 1: Prepare the Cookie Crust
In a small bowl, combine the crushed graham crackers or cookies with the melted butter. Stir until the crumbs are evenly coated and resemble wet sand.
Step 2: Assemble the Crust Layer
Spoon the crumb mixture into small dessert cups, jars, or glasses. Press the crumbs gently into the bottom of each cup using the back of a spoon to create a firm base.
Step 3: Make the Cheesecake Filling
In a large mixing bowl, beat the softened cream cheese until smooth and creamy. Add the powdered sugar and vanilla extract, then continue mixing until fully combined and lump-free.
Step 4: Fold in the Whipped Cream
Gently fold the whipped cream or whipped topping into the cream cheese mixture. Continue folding until the filling is light, fluffy, and evenly mixed.
Step 5: Fill the Dessert Cups
Spoon or pipe the cheesecake filling over the prepared crusts, dividing it evenly among the cups. Smooth the tops with a spoon or offset spatula.
Step 6: Chill Until Set
Place the cheesecake cups in the refrigerator for at least 2 hours, or until the filling is firm and well chilled.
Step 7: Add Your Favorite Toppings
Just before serving, decorate the cheesecake cups with fresh berries, chocolate shavings, cookie crumbs, caramel sauce, fruit preserves, or any toppings you love.
Step 8: Serve and Enjoy
Serve the cheesecake cups cold and enjoy every creamy, delicious bite. These easy desserts are perfect for parties, holidays, showers, or anytime you’re craving a simple no-bake treat.
Bottom Line
If you love easy individual desserts, don’t stop with these cheesecake cups! Be sure to try these creamy Chocolate Peanut Butter Dessert Cups, fun Halloween Dirt Cups, and delicious Tiramisu Chia Pudding. For fall gatherings, you’ll love these cozy Pumpkin Spice Parfait Cups, while chocolate lovers should definitely save this Easy Chocolate Mousse. And if you’re looking for something fruity and indulgent, these Raspberry Fudge Parfaits are always a crowd favorite. With so many simple no-bake treats to choose from, dessert just got a whole lot easier!