
10 Back to School Cake Pops That Make the First Day Feel Special
Quick Answer: Back to school cake pops are cake-and-frosting balls dipped in candy melts and shaped or decorated as pencils, apples, crayons, books, and buses. Ten designs below — each with its own flavor and a full, bakeable recipe — plus the exact technique to keep the coating from cracking or sliding off the stick.
There’s a very specific kind of first-week-of-school panic that hits when you realize you’re supposed to bring “something fun” to the class party — and a pan of brownies just isn’t going to cut it this year.
Cake pops solve that problem better than almost anything else, because they’re small enough to be perfect and simple enough to actually finish before bedtime. Each one of these ten designs is a full recipe with its own flavor, not the same vanilla ball painted ten different colors, so there’s a version here for whatever mood — or however much time — you’re working with.
Grab your candy melts and a cake pop stand with sticks and wrappers so drying and displaying is one less thing to think about, and let’s get into the lineup.
This post may contain affiliate links which helps me keep this blog alive, questions? View the privacy policy.
1. Pencil Cake Pops
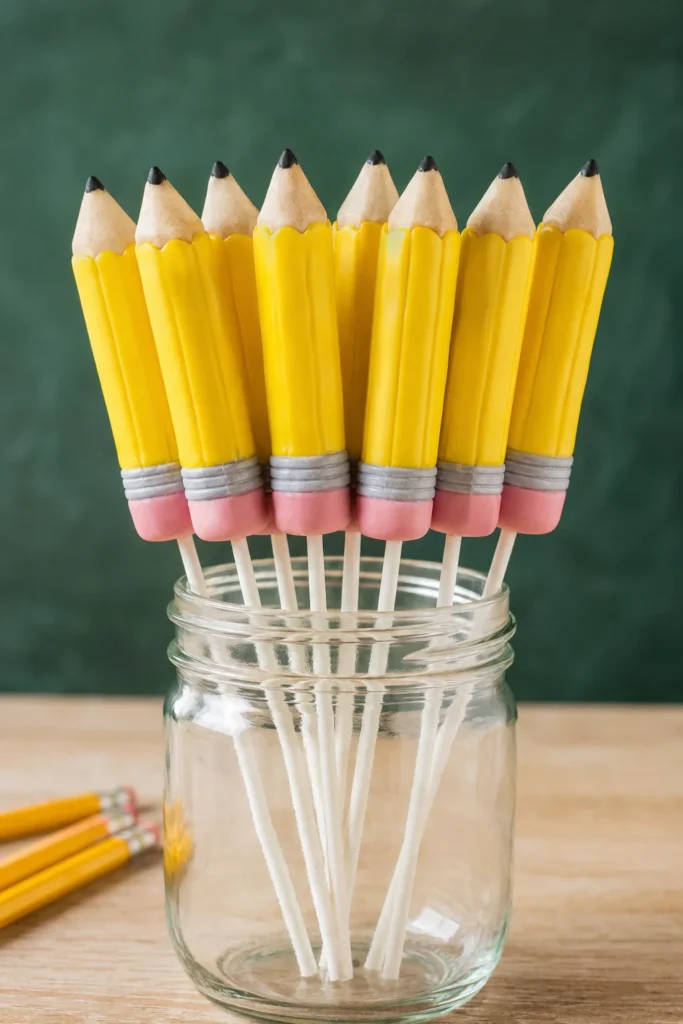
The one every classroom party photo needs. The pointed tip is what sells it — a small cone of chocolate coating pinched to a point before it sets, so it actually looks sharpened instead of just yellow with a black dot on the end.
Prep Time: 45 min | Cook Time: 25 min | Total Time: 3 hrs (includes chilling) | Servings: 16 pops | Difficulty: Medium
Ingredients
- 1 box (15.25 oz) vanilla cake mix, plus ingredients called for on the box (eggs, oil, water)
- 3/4 cup vanilla buttercream frosting
- 16 oz yellow candy melts
- 2 oz pink candy melts
- 2 oz black candy melts
- 2 oz gray or silver candy melts
- 16 cake pop sticks
- 1 block styrofoam or a cake pop stand
Instructions
- Bake the vanilla cake according to the box instructions in a 9×13-inch pan. Let cool completely, about 1 hour.
- Crumble the cooled cake into a large bowl with your hands until no large chunks remain. Add the buttercream frosting and mix with a spatula until the mixture holds together like soft dough when pressed.
- Shape 1 tablespoon of the mixture into an oblong, slightly tapered cylinder about 2 1/2 inches long (not a round ball) to mimic a pencil shape. Repeat with remaining mixture. Place on a parchment-lined tray and freeze for 15 minutes.
- Melt the yellow candy melts in a microwave-safe bowl in 30-second bursts, stirring between each, until smooth.
- Dip the tip of each cake pop stick into the melted yellow candy melt, then insert it about 1 inch into the flat end of each pencil shape. Return to the freezer for 10 minutes to set.
- Dip each pencil shape into the yellow candy melt, covering the body but leaving about 1/2 inch at the pointed tip uncovered. Tap gently to smooth and let excess drip off. Place upright in the styrofoam block to set, about 10 minutes.
- Melt the pink candy melts and dip just the very tip of the pop to form the eraser, about 1/4 inch. Let set.
- Melt the gray candy melt and use a small spoon or piping bag to add a thin band between the yellow body and pink eraser to mimic the metal ferrule.
- Melt the black candy melt, dip a toothpick, and shape a small pointed cone at the uncovered yellow tip to create the pencil point. Let set fully, about 15 minutes, before serving.
Baker’s Tip
Shape the cake mixture into a cylinder, not a ball — round the ends only slightly so the pencil silhouette reads instantly, even from across the room. If hand-shaping isn’t your thing, this 3D back-to-school silicone mold presses out a clean pencil shape — plus apple, book, and letter cavities you’ll use later in this list — in seconds.
Why You’ll Love It
It’s the design every teacher recognizes on sight, and the layered dipping (yellow, then pink, then the black point) means no piping skills required — just steady dips in the right order.
2. Apple Cake Pops

Red velvet under a glossy red shell, with a broken pretzel stick pressed in as the stem — it’s the detail that makes people do a double take before they realize it’s cake.
Prep Time: 40 min | Cook Time: 25 min | Total Time: 3 hrs | Servings: 16 pops | Difficulty: Easy
Ingredients
- 1 box (15.25 oz) red velvet cake mix, plus ingredients called for on the box
- 1/2 cup cream cheese frosting
- 16 oz red candy melts
- 2 oz green candy melts, melted and spread thin on parchment, then cut into small leaf shapes once set
- 16 cake pop sticks
- 16 thin pretzel sticks, broken to 1/2-inch pieces
Instructions
- Bake the red velvet cake according to the box instructions. Cool completely, about 1 hour.
- Crumble the cake into a large bowl and mix in the cream cheese frosting until the mixture holds together when pressed into a ball.
- Roll into 16 round, apple-sized balls, about 1 1/2 tablespoons each. Freeze for 15 minutes.
- Melt the red candy melts in 30-second microwave bursts, stirring between each, until smooth.
- Dip each stick tip into melted candy melt and insert into a cake ball. Freeze another 10 minutes to set.
- Dip each ball fully into the red coating, tapping off excess. While still wet, press a pretzel piece into the top to form the stem, and tuck a candy melt leaf beside it.
- Stand upright in a styrofoam block to set completely, about 20 minutes.
Storage & Freezing
Store finished apple pops in an airtight container at room temperature for up to a week, or freeze the undipped cake balls (before coating) for up to a month.
Best For
Teacher gifts — pair three or four in a small box with a “the apple of my eye” tag for a first-week-of-school gift that doesn’t feel generic.
3. Crayon Cake Pops
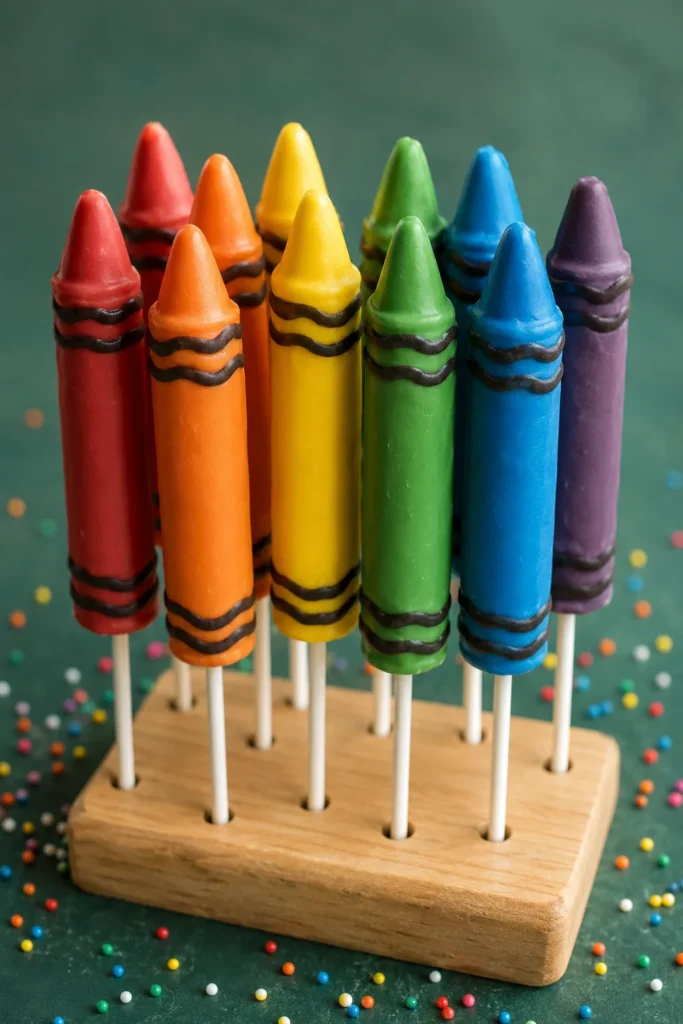
Funfetti under the hood, so every bite has little flecks of color even before the rainbow coating shows up on the outside — this is the design kids ask to help decorate.
Prep Time: 40 min | Cook Time: 25 min | Total Time: 3 hrs | Servings: 18 pops | Difficulty: Easy
Ingredients
- 1 box (15.25 oz) funfetti cake mix, plus ingredients called for on the box
- 3/4 cup vanilla buttercream frosting
- 3 oz each red, orange, yellow, green, blue, and purple candy melts (about 18 oz total)
- 18 cake pop sticks
- Printable or hand-cut paper crayon wrapper labels
Instructions
- Bake the funfetti cake according to the box instructions. Cool completely, about 1 hour.
- Crumble the cake into a bowl and mix in the buttercream frosting until it holds together like dough.
- Shape 1 tablespoon of mixture into a tapered cylinder, rounding one end and leaving the other end flat to insert the stick, about 2 inches long. Freeze 15 minutes.
- Melt one color of candy melt at a time in the microwave in 30-second bursts, stirring between each.
- Dip a stick tip in melted candy melt and insert into the flat end of a shaped cake pop. Freeze 10 minutes.
- Dip each crayon shape into its assigned color, tapping to smooth and remove excess. Place upright in a styrofoam block to set, about 15 minutes per color batch.
- Once fully set, wrap the lower two-thirds of each pop with a paper crayon label, taping or gluing the seam.
Substitutions
No candy melts in every color? Tint white candy melts with oil-based candy coloring instead of gel — gel-based food coloring will cause the coating to seize and clump.
Why You’ll Love It
One base recipe, six colors, endless mix-and-match — it’s the design that stretches furthest for a big class party without repeating the same look twice. Running low on time for paper wrappers? These kawaii back-to-school cupcake topper rings press right into the wet coating for an instant, no-fuss finish instead.
4. School Bus Cake Pops

Rich chocolate fudge cake under a school-bus-yellow shell, with piped black windows and a stop sign red accent — this one photographs like it took hours and takes about twenty minutes of actual decorating time.
Prep Time: 45 min | Cook Time: 25 min | Total Time: 3 hrs 15 min | Servings: 16 pops | Difficulty: Medium
Ingredients
- 1 box (15.25 oz) chocolate fudge cake mix, plus ingredients called for on the box
- 1/2 cup chocolate buttercream frosting
- 16 oz yellow candy melts
- 2 oz black candy melts
- 1 oz red candy melts
- 16 cake pop sticks
Instructions
- Bake the chocolate fudge cake according to the box instructions. Cool completely, about 1 hour.
- Crumble the cake into a bowl and mix in the chocolate buttercream until the mixture holds together when pressed.
- Shape 1 1/2 tablespoons of mixture into a short, flattened oval about 2 inches long and 1 inch tall to mimic a bus body. Freeze 15 minutes.
- Melt the yellow candy melts in 30-second microwave bursts, stirring between each.
- Dip a stick tip in melted yellow candy melt and insert into the bottom edge of each oval, angling slightly so the pop balances horizontally once dipped. Freeze 10 minutes.
- Dip each shape fully into the yellow coating, tapping off excess, and set on a parchment-lined tray (lying on its side) to set, about 15 minutes.
- Melt the black candy melt and use a piping bag or zip-top bag with the corner snipped to pipe a horizontal stripe along the middle, two small wheel circles on the bottom edge, and three small window squares along the top edge.
- Melt the red candy melt and add a tiny dot near the front edge to mimic a stop sign detail. Let set fully, about 15 minutes.
Good to Know
These lie on their side rather than standing upright — dip the stick at enough of an angle that the finished pop balances flat without tipping the bus onto its nose. For an even crisper silhouette without shaping by hand, this school bus and globe silicone fondant mold presses the bus body out ready to dip.
Baker’s Tip
Let the yellow base fully set and firm up before piping the black details — piping onto still-soft coating makes the lines bleed and blur.
5. Book Cake Pops

Cookies and cream cake gives these a subtle crunch in every bite, and the flat, book-shaped mold makes them look intentional and hand-crafted rather than just another round pop.
Prep Time: 45 min | Cook Time: 25 min | Total Time: 3 hrs | Servings: 14 pops | Difficulty: Medium
Ingredients
- 1 box (15.25 oz) white or vanilla cake mix, plus ingredients called for on the box
- 12 chocolate sandwich cookies, finely crushed
- 1/2 cup vanilla buttercream frosting
- 14 oz candy melts in your choice of “cover” color (try blue, purple, or red)
- 3 oz white candy melts
- 14 cake pop sticks
Instructions
- Bake the cake according to the box instructions. Cool completely, about 1 hour.
- Crumble the cooled cake into a bowl, stir in the crushed sandwich cookies, then mix in the buttercream frosting until it holds together like dough.
- Shape 1 1/2 tablespoons of mixture into a flat rectangle about 1 3/4 inches by 1 1/4 inches and 3/4 inch thick. Freeze 15 minutes.
- Melt your chosen “cover” color candy melts in 30-second microwave bursts, stirring between each.
- Dip a stick tip in melted candy melt and insert into one short edge of each rectangle. Freeze 10 minutes.
- Dip each rectangle fully, tapping gently and turning to keep the flat sides even. Lay flat on parchment to set, about 15 minutes, flipping once halfway if needed for even coverage.
- Melt the white candy melt and use a small spoon to add a thin stripe along one long edge to mimic the pages of the book. Let set fully, about 15 minutes.
Flavor Variation
Swap the crushed sandwich cookies for crushed graham crackers and mix in 1/4 cup mini chocolate chips for a s’mores-inspired take on the same book shape.
Why You’ll Love It
The flat shape sets it apart from every round pop on the table, and it doubles as a sweet nod to a first “back to school” reading log or classroom library gift. The same 3D back-to-school silicone mold used for the pencil pops above has a book cavity too, if you’d rather press the cover shape than hand-form it.
Why Your Cake Pops Fail (and How to Fix It)
Before you keep going — a few of these designs lean on technique more than the first ones did, so here’s exactly what to do when something doesn’t go as planned.
| Problem | Likely Cause | Fix |
|---|---|---|
| Coating cracks after dipping | Cake ball was too cold when it hit the warm coating | Let cake balls sit at room temperature 10–15 minutes before dipping, not straight from the freezer |
| Pop falls off the stick | Stick went straight into the ball with no “glue” | Always dip the stick tip in melted coating first, then insert, and chill before the final dip |
| Coating is thick, lumpy, or won’t smooth out | Chocolate chips used instead of true candy melts, or coating overheated | Use candy melts or candy coating (not chocolate chips), and melt in short 20–30 second bursts, stirring often |
| Cake ball is too soft to hold its shape | Too much frosting mixed in | Add frosting a tablespoon at a time — stop as soon as the mixture holds together when pressed, usually 1/3 to 1/2 cup per box of cake |
| Pops “sweat” or look dull after chilling | Condensation forming as a cold pop meets room-temperature air | Let dipped pops come to room temperature slowly, uncovered, rather than pulling them straight from the fridge to serve |
6. ABC Block Cake Pops
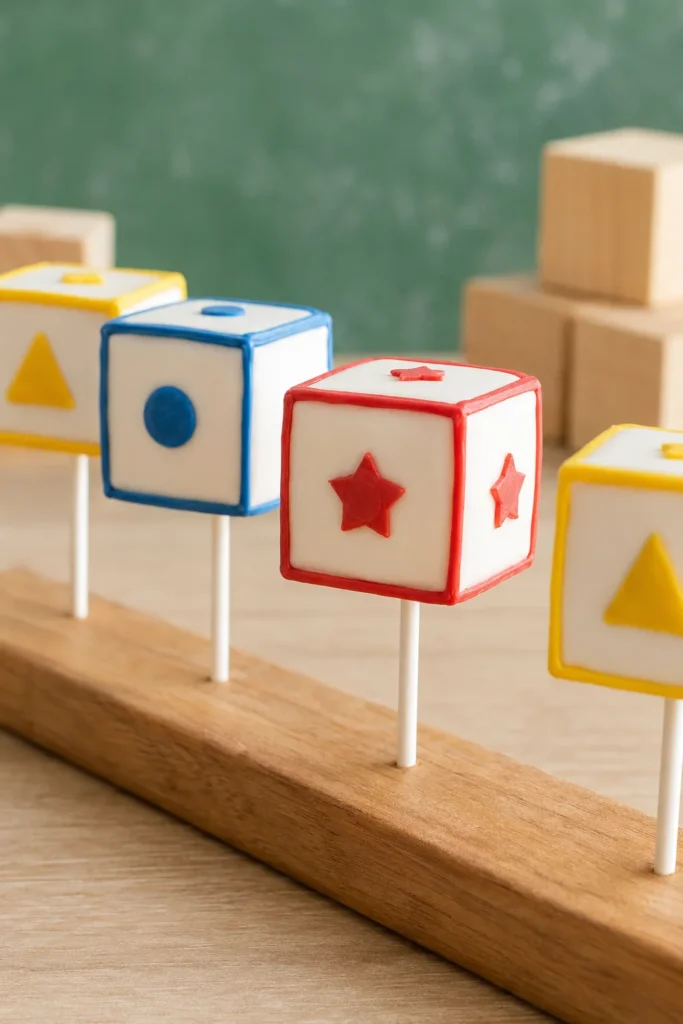
Bright lemon cake shaped into a true cube instead of a ball — the flat faces are what make the block illusion work, and a single painted letter on the front is all the detail it needs.
Prep Time: 45 min | Cook Time: 25 min | Total Time: 3 hrs | Servings: 14 pops | Difficulty: Medium
Ingredients
- 1 box (15.25 oz) lemon cake mix, plus ingredients called for on the box
- 1/2 cup vanilla buttercream frosting
- 1 tablespoon lemon zest
- 16 oz white candy melts
- 1 oz red candy melts, melted, for lettering
- 14 cake pop sticks
Instructions
- Bake the lemon cake according to the box instructions. Cool completely, about 1 hour.
- Crumble the cake into a bowl, add the lemon zest, and mix in the buttercream frosting until the mixture holds together when pressed.
- Shape 1 1/2 tablespoons of mixture into a true cube, roughly 1 1/4 inches on each side, pressing the sides flat with your palm. Freeze 15 minutes.
- Melt the white candy melts in 30-second microwave bursts, stirring between each.
- Dip a stick tip in melted white candy melt and insert into the bottom face of each cube. Freeze 10 minutes.
- Dip each cube fully into the white coating, gently rotating to keep the flat faces sharp rather than rounded. Set upright in a styrofoam block, about 15 minutes.
- Once set, dip a food-safe fine paintbrush or toothpick into the melted red candy melt and paint a single letter onto the front face of each cube. Let set fully, about 10 minutes.
Best For
Spelling out a name or “ABC” across a full set makes these the centerpiece of a first-day-of-preschool or kindergarten table.
Good to Know
A cube holds its shape better than a ball when dipped, but it also cools and sets faster on the corners — work quickly and evenly around all six sides. That same back-to-school silicone mold has letter cavities as well, so you can press a crisp block shape instead of shaping cubes by hand.
7. Chalkboard Cake Pops
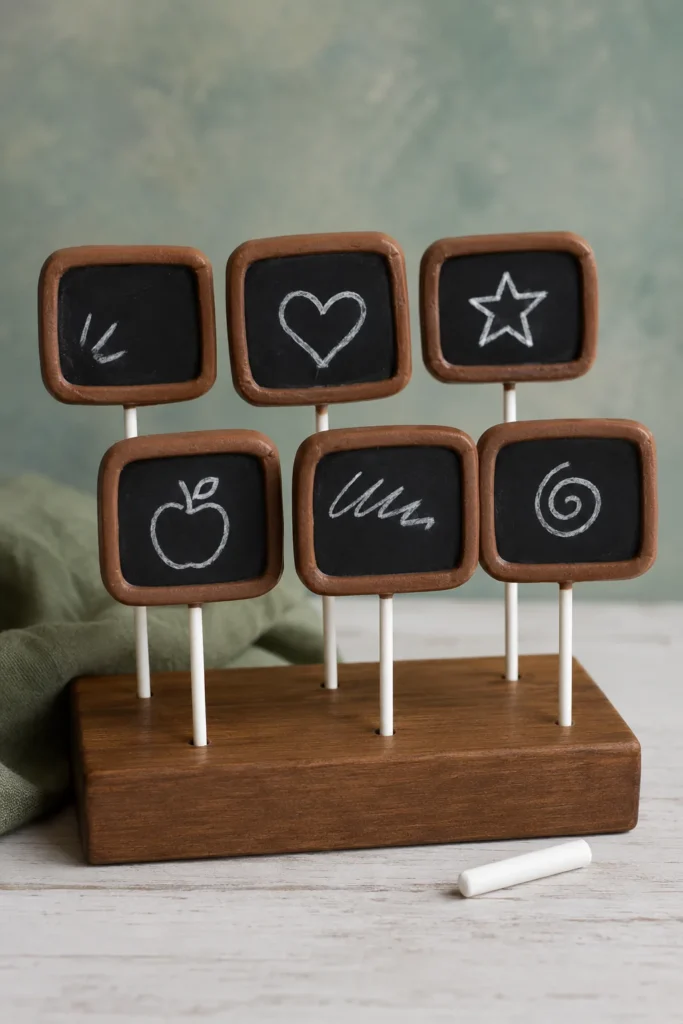
Peanut butter cake with a ribbon of chocolate running through it, dipped completely black, then “chalked” with a food-safe white marker — the contrast is what makes this design stand out on a crowded dessert table.
Prep Time: 45 min | Cook Time: 25 min | Total Time: 3 hrs | Servings: 16 pops | Difficulty: Easy
Ingredients
- 1 box (15.25 oz) chocolate cake mix, plus ingredients called for on the box
- 1/3 cup creamy peanut butter
- 1/3 cup chocolate buttercream frosting
- 16 oz black candy melts
- 1 oz brown candy melts
- 16 cake pop sticks
- 1 food-safe white edible marker
Instructions
- Bake the chocolate cake according to the box instructions. Cool completely, about 1 hour.
- Crumble the cake into a bowl and mix in the peanut butter and chocolate buttercream until the mixture holds together when pressed.
- Roll into 16 round balls, about 1 1/2 tablespoons each. Freeze 15 minutes.
- Melt the black candy melts in 30-second microwave bursts, stirring between each.
- Dip a stick tip in melted black candy melt and insert into each ball. Freeze 10 minutes.
- Dip each ball fully into the black coating, tapping to smooth. Stand upright in a styrofoam block to set, about 20 minutes.
- Melt the brown candy melts and use a small spoon to add a thin rectangular border around each pop’s widest point, mimicking a wooden chalkboard frame. Let set, about 10 minutes.
- Once fully set and at room temperature, use the white edible marker to draw a simple doodle, letter, or small heart on the front of each pop.
Storage & Freezing
Store at room temperature in an airtight container for up to a week. Draw the marker doodles just before serving if humidity is high, since moisture can cause the ink to smudge over time. For hand-rolling perfectly even rounds every time instead of eyeballing it, a round cake pop mold set with tray and sticks shapes and pushes the ball out in one step.
Baker’s Tip
Only write on the marker once the coating is completely set and dry to the touch — writing on tacky chocolate will drag the marker and smear the design.
8. Ruler Cake Pops
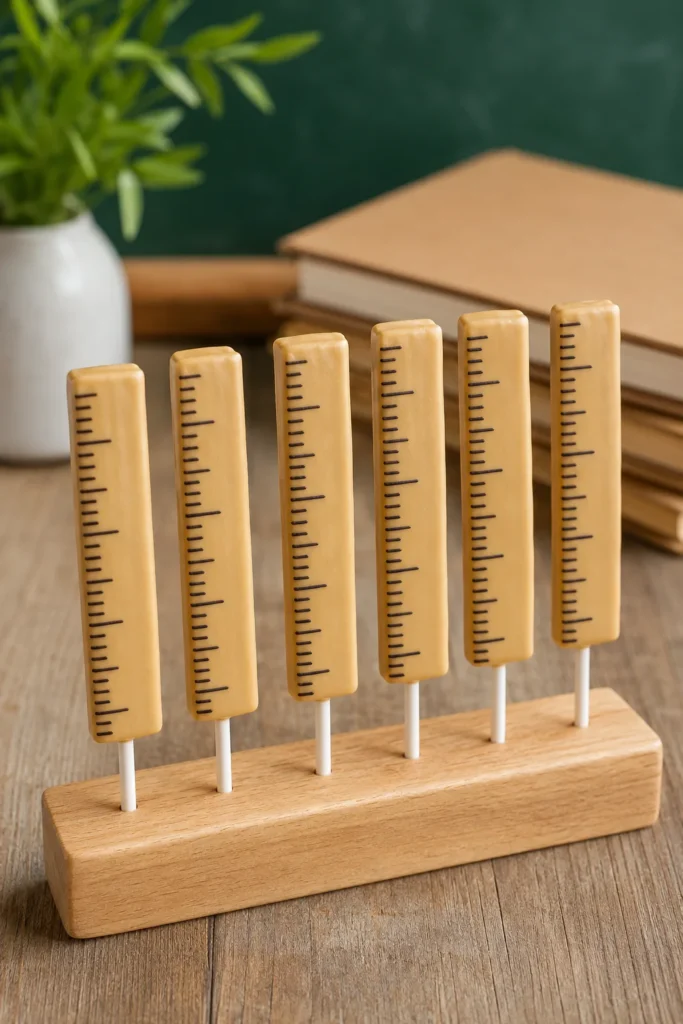
Gooey s’mores flavor packed into a flattened, elongated shape — the tick marks are simple lines, no fine art required, which makes this one of the easiest designs on the list despite how detailed it looks.
Prep Time: 40 min | Cook Time: 25 min | Total Time: 3 hrs | Servings: 14 pops | Difficulty: Easy
Ingredients
- 1 box (15.25 oz) chocolate cake mix, plus ingredients called for on the box
- 1 cup crushed graham crackers
- 1/2 cup marshmallow fluff
- 14 oz tan or ivory candy melts
- 2 oz black candy melts
- 14 cake pop sticks
Instructions
- Bake the chocolate cake according to the box instructions. Cool completely, about 1 hour.
- Crumble the cake into a bowl, stir in the crushed graham crackers, then mix in the marshmallow fluff until the mixture holds together when pressed (add up to 2 tablespoons more fluff if it feels dry).
- Shape 1 1/2 tablespoons of mixture into a flat, elongated rectangle about 2 1/2 inches long, 3/4 inch wide, and 1/2 inch thick. Freeze 15 minutes.
- Melt the tan candy melts in 30-second microwave bursts, stirring between each.
- Dip a stick tip in melted tan candy melt and insert into one short end of each rectangle. Freeze 10 minutes.
- Dip each shape fully into the tan coating, tapping gently to smooth, and lay flat on parchment to set, about 15 minutes.
- Melt the black candy melt and use a piping bag or zip-top bag with the corner snipped to pipe short, evenly spaced lines across the length of each pop, mimicking ruler markings. Let set fully, about 10 minutes.
Make-Ahead Tip
The marshmallow fluff keeps this cake mixture soft even after freezing, so the undipped shapes freeze and thaw especially well — make them up to a month ahead.
Why You’ll Love It
No fondant, no fine painting — just straight piped lines, which makes it the fastest design on this list to finish once the cake balls are shaped.
9. Globe Cake Pops
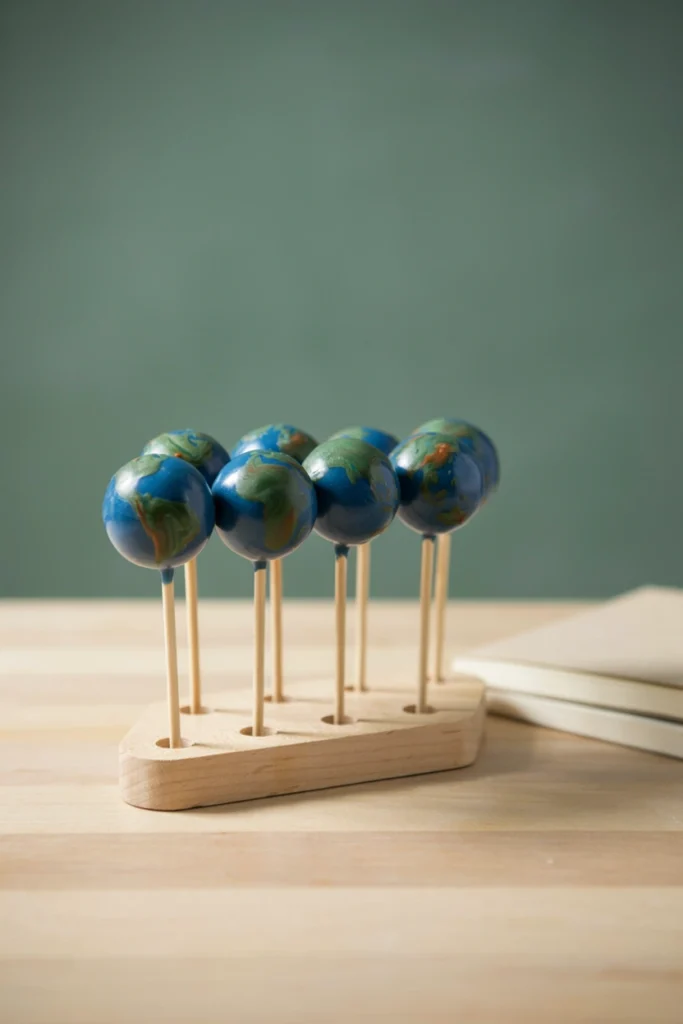
Blueberry cake under a marbled blue-and-green coating — the continents are dragged into the wet coating with a toothpick, so no two pops in the batch look exactly alike, which is exactly the point.
Prep Time: 40 min | Cook Time: 25 min | Total Time: 3 hrs | Servings: 16 pops | Difficulty: Medium
Ingredients
- 1 box (15.25 oz) blueberry or white cake mix, plus ingredients called for on the box (add 1/2 cup dried blueberries, chopped, if using white cake mix)
- 1/2 cup vanilla buttercream frosting
- 14 oz blue candy melts
- 3 oz green candy melts, melted separately
- 1 oz brown candy melts, melted separately
- 16 cake pop sticks
Instructions
- Bake the cake according to the box instructions. Cool completely, about 1 hour.
- Crumble the cake into a bowl and mix in the buttercream frosting until the mixture holds together when pressed.
- Roll into 16 round balls, about 1 1/2 tablespoons each. Freeze 15 minutes.
- Melt the blue candy melts in 30-second microwave bursts, stirring between each.
- Dip a stick tip in melted blue candy melt and insert into each ball. Freeze 10 minutes.
- Dip one ball fully into the blue coating. While still wet, use a toothpick dipped in melted green candy melt to drag two or three irregular “continent” shapes onto the surface, then add a few small brown dots for texture.
- Repeat with remaining pops, working one at a time so the blue coating stays wet enough for the toothpick details to blend in. Stand upright in a styrofoam block to set, about 20 minutes.
Good to Know
Work in small batches of two or three pops — if the blue coating sets before you add the green details, they’ll sit on top instead of marbling in.
Best For
A geography-themed classroom party or a “world of learning” open house table, where the design carries the theme without needing a sign to explain it.
10. Backpack Cake Pops
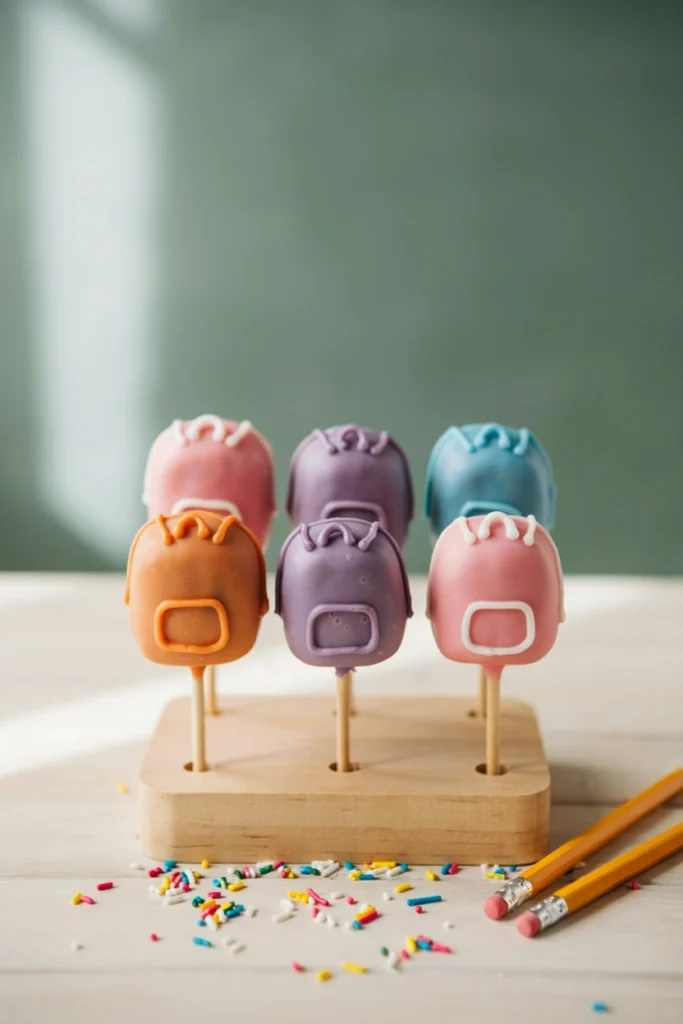
Strawberry cake shaped into a soft square, with two piped straps and a front pocket outline — it’s the design most likely to get requested by name once the kids see it.
Prep Time: 45 min | Cook Time: 25 min | Total Time: 3 hrs | Servings: 14 pops | Difficulty: Medium
Ingredients
- 1 box (15.25 oz) strawberry cake mix, plus ingredients called for on the box
- 1/2 cup vanilla buttercream frosting
- 14 oz pink or purple candy melts
- 2 oz brown candy melts, for straps
- 14 cake pop sticks
Instructions
- Bake the strawberry cake according to the box instructions. Cool completely, about 1 hour.
- Crumble the cake into a bowl and mix in the buttercream frosting until the mixture holds together when pressed.
- Shape 1 1/2 tablespoons of mixture into a slightly rounded square, about 1 1/4 inches on each side. Freeze 15 minutes.
- Melt the pink candy melts in 30-second microwave bursts, stirring between each.
- Dip a stick tip in melted pink candy melt and insert into the bottom edge of each square. Freeze 10 minutes.
- Dip each shape fully into the pink coating, tapping gently to smooth the edges. Stand upright in a styrofoam block to set, about 15 minutes.
- Melt the brown candy melts and use a piping bag or zip-top bag with the corner snipped to pipe two thin vertical straps down the front of each pop, plus a small rectangle outline near the bottom to suggest a front pocket. Let set fully, about 10 minutes.
Flavor Variation
Swap strawberry for chocolate cake and use bright blue or green candy melts for a version that reads more “back to school” and less “sweetheart,” depending on the party theme.
Why You’ll Love It
It closes out the lineup with the most literal back-to-school shape on the list, and the piped straps take less than a minute per pop once the coating sets.
Make-Ahead Timeline for School Week
Cake pops are genuinely a make-ahead treat — spreading the work out over a few days is easier than trying to bake, shape, and dip everything in one evening. Once everything is dipped and set, line them up on a wood cake pop display stand instead of piling them on a plate — it keeps the coating from smudging as they mingle on the party table.
| Task | How Far Ahead | Storage Method |
|---|---|---|
| Bake the cake | Up to 3 days ahead, or 1 month frozen | Wrap tightly in plastic wrap; refrigerate or freeze |
| Shape cake balls (undipped) | Up to 1 month ahead | Freeze on a tray, then transfer to a freezer bag |
| Dip and decorate | 1–2 days before the event | Store finished pops in an airtight container at room temperature |
| Add fine details (piping, marker doodles) | Day of or 1 day before | Keep uncovered until fully set, then store loosely covered |
Frequently Asked Questions
Do I need a cake pop maker to make these?
No. None of these designs use a cake pop maker — the classic method of baking a full cake, crumbling it, and mixing in frosting gives you more control over the shape, which matters for designs like the pencil, ruler, and book that aren’t round.
Can I use a box cake mix instead of baking from scratch?
Yes, and it’s actually the better choice here. Box cake mix bakes up moist and crumbles evenly, which makes it easier to mix into a workable dough than a from-scratch cake that may be denser or drier.
How do I keep the cake pops from falling off the stick?
Dip the stick tip in melted candy melt before inserting it into the cake ball, then chill for at least 10 minutes before the final dip. That thin layer acts as glue and is the single most common step people skip.
Why do my cake pops crack after dipping?
Cracking almost always means the cake ball was too cold when it met the warm coating. Let shaped and chilled cake balls sit at room temperature for 10–15 minutes before dipping.
Can I make these nut-free for a classroom party?
Yes, with two adjustments: skip the peanut butter chalkboard pops or swap in sunflower seed butter, and check that your candy melts are processed in a facility free of tree nuts and peanuts if a classroom has known allergies.
How far in advance can I make cake pops for school?
The undipped cake balls freeze well for up to a month, so you can bake and shape weeks ahead and just dip and decorate the day or two before the party.
More Recipes You’ll Love
- More back to school desserts — breads, cupcakes, and cookies beyond cake pops
- Fall dessert recipes for when the season shifts past back-to-school
- 5-minute desserts for weeks when cake pops just aren’t happening
- Healthy dessert recipes to balance out the classroom party sugar
- More back to school party ideas from Tired Mom Supermom