18 Back to School Desserts Every Busy Mom Actually Needs
Quick Answer: The best back to school desserts are ones that survive a lunchbox, meet nut-free classroom rules, and don’t add another task to your morning. Below you’ll find 18 tried-and-true recipes grouped by exactly what you need — nut-free, no-bake, make-ahead, lunchbox-sturdy, first-day celebration, and bake sale favorites.
That first week back always sneaks up faster than you plan for it — alarms are earlier, backpacks are somehow already a disaster, and someone needs a treat for tomorrow that you did not know about until bedtime tonight. This collection was built with exactly that kind of morning in mind.
Every recipe here is grouped by the situation it solves, not just by how cute it looks in a photo — because a treat that gets crushed by second period or breaks a nut-free rule doesn’t actually help anyone.
Grab whichever category fits tonight’s need, and let’s get something delicious into that lunchbox.
This post may contain affiliate links which helps me keep this blog alive, questions? View the privacy policy.
Pick the Right Treat for Your Situation
Not sure where to start? Use this table to jump straight to the section that solves tonight’s actual problem.
| If You Need… | Jump To | Why It Fits |
|---|---|---|
| A treat that’s safe for a nut-free classroom | Nut-Free & Allergy-Safe Desserts | Made without peanuts or tree nuts, using seed butter and oat-based swaps |
| Zero time to turn on the oven | No-Bake Desserts for Busy Mornings | Ready in 15–20 minutes, no baking required |
| To batch-cook once for the whole week | Make-Ahead & Freezer-Friendly Desserts | Freezes well and thaws by lunchtime |
| Something that survives hours in a backpack | Lunchbox-Sturdy Desserts | Won’t get soggy, crushed, or messy by noon |
| A special first-day-of-school treat | First Day of School Celebration Desserts | Fun, decorated, made for the moment |
| Something for the class bake sale | Bake Sale Favorites | Individually portioned, shelf-stable, easy to wrap |
Nut-Free & Allergy-Safe Desserts
Most classrooms today are nut-free for the whole room, not just for kids with allergies — roughly 1 in 13 children in the U.S. has a food allergy, and peanuts and tree nuts are among the most common triggers. Every recipe below skips nuts entirely and leans on sunflower seed butter or oats instead, so you can send it in with confidence. If you’re also looking to lighten things up, our healthy dessert recipes collection has more better-for-you options.
1. Sunflower Butter Chocolate Chip Cookies
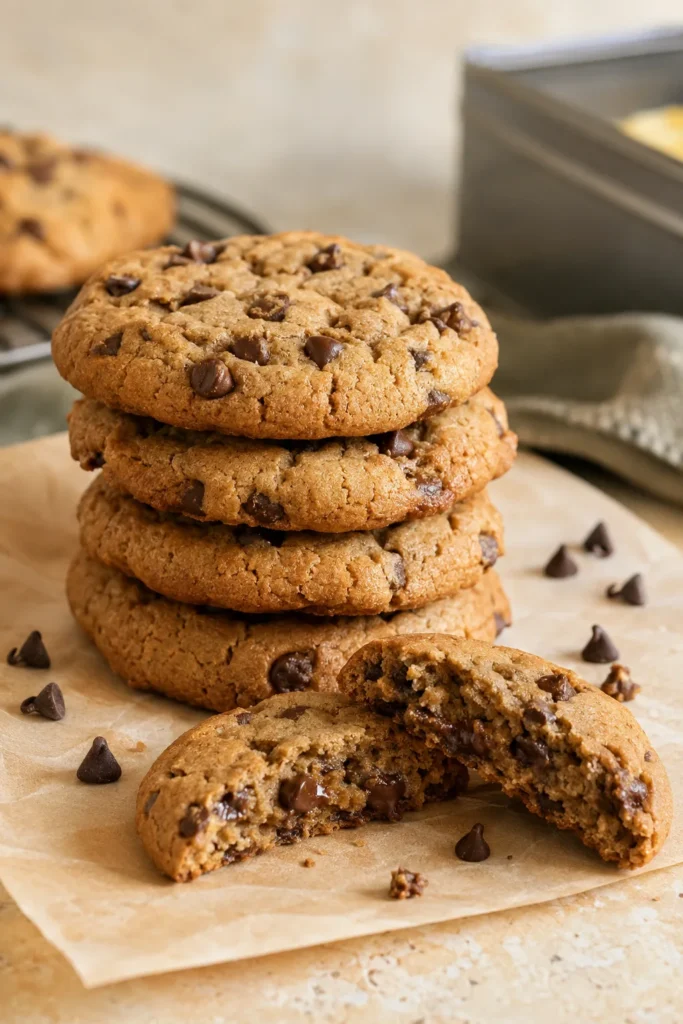
These cookies bake up with crackled tops and soft, almost fudgy centers — no one will guess the “peanut butter cookie” flavor is coming from sunflower seed butter instead. They hold their shape well enough to pack flat in a lunchbox without crumbling.
Prep Time: 10 min | Cook Time: 11 min | Total Time: 21 min | Servings: 18 cookies | Difficulty: Easy
Ingredients
- 1 cup natural sunflower seed butter
- 3/4 cup packed brown sugar
- 1 large egg
- 1 tsp vanilla extract
- 1/2 tsp baking soda
- 1/4 tsp salt
- 2/3 cup mini chocolate chips
Instructions
- Preheat oven to 350°F and line a baking sheet with parchment paper.
- In a large bowl, stir together the sunflower seed butter, brown sugar, egg, and vanilla until smooth.
- Mix in the baking soda and salt, then fold in the chocolate chips.
- Scoop 1.5-tablespoon balls of dough onto the sheet, spacing 2 inches apart, and flatten slightly with a fork.
- Bake 10–11 minutes, until the edges are set but the centers still look slightly underdone.
- Cool on the pan for 5 minutes before transferring to a wire rack; they’ll firm up as they cool.
Baker’s Tip
Sunflower seed butter can turn the inside of baked goods slightly green from a natural reaction with baking soda — it’s completely harmless, but flatten the dough a bit less if you want to minimize the effect.
Good to Know
Double-check your chocolate chip brand’s label — some are processed in facilities that also handle tree nuts, so look for a “nut-free facility” note if your school has a strict policy.
2. Coconut Oat Cranberry Bars
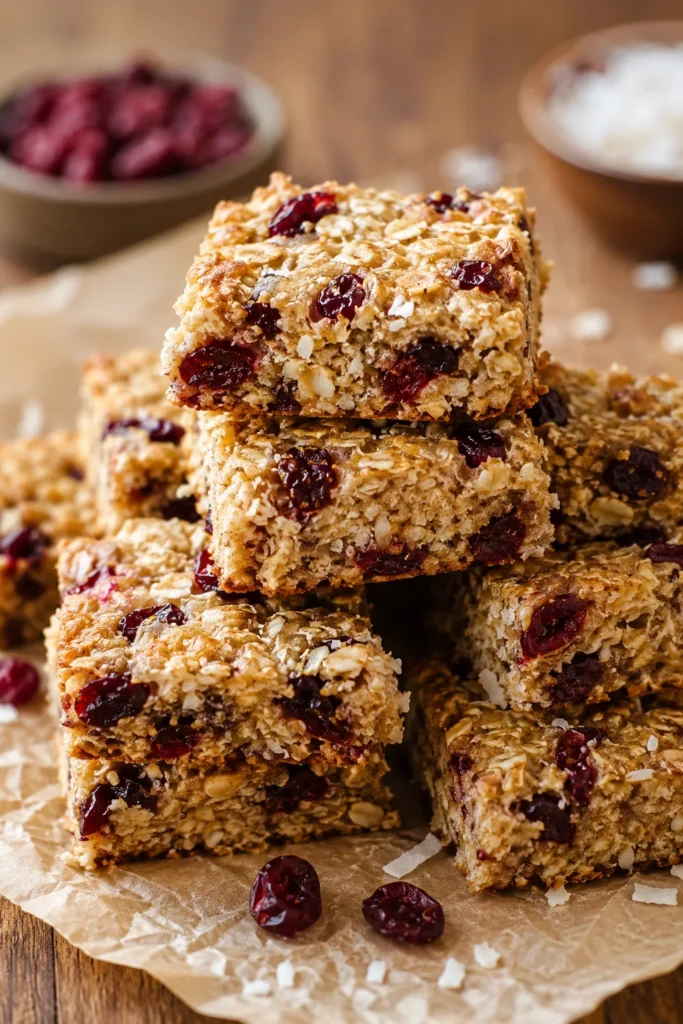
Chewy, dense, and just sweet enough, these bars pack in oats and dried cranberries for a treat that feels like it’s doing something good while still tasting like dessert. The coconut toasts slightly on top for extra flavor.
Prep Time: 10 min | Cook Time: 25 min | Total Time: 35 min | Servings: 16 bars | Difficulty: Easy
Ingredients
- 2 cups old-fashioned rolled oats
- 1 cup shredded unsweetened coconut
- 1/2 cup dried cranberries
- 1/2 cup honey
- 1/3 cup melted coconut oil
- 1 large egg
- 1/2 tsp cinnamon
- 1/4 tsp salt
Instructions
- Preheat oven to 325°F and line an 8×8-inch pan with parchment, leaving an overhang on two sides.
- In a large bowl, combine the oats, coconut, and cranberries.
- In a separate bowl, whisk together the honey, melted coconut oil, egg, cinnamon, and salt.
- Pour the wet mixture over the dry ingredients and stir until evenly coated.
- Press firmly into the prepared pan in an even layer.
- Bake 23–25 minutes, until the top is golden brown and the edges pull slightly from the pan.
- Cool completely in the pan for at least 1 hour before lifting out and slicing into bars — this is what keeps them from crumbling.
Storage & Freezing
Wrap bars individually and freeze for up to 3 months; they thaw in about 2 hours at room temperature, so a frozen bar tucked into a morning lunchbox is ready by lunchtime.
3. Seed Butter Banana Muffins
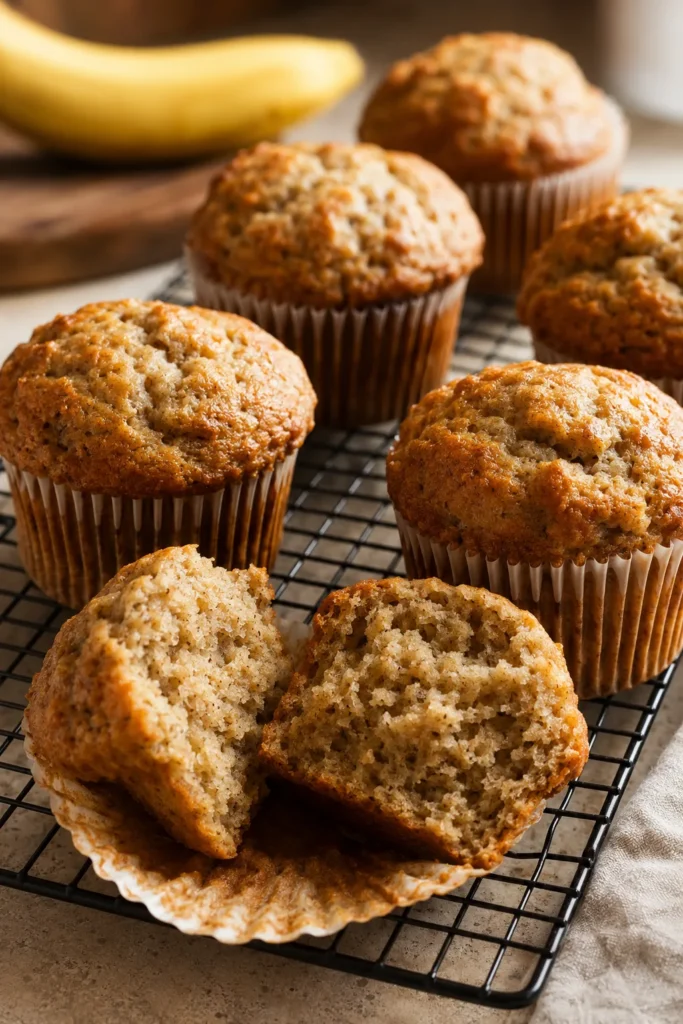
Ripe bananas and a spoonful of sunflower seed butter give these muffins a soft, moist crumb with just a hint of nutty flavor — no actual nuts involved. They rise into tall, bakery-style domes.
Prep Time: 10 min | Cook Time: 20 min | Total Time: 30 min | Servings: 12 muffins | Difficulty: Easy
Ingredients
- 3 large ripe bananas, mashed
- 1/3 cup sunflower seed butter
- 1/2 cup brown sugar
- 1 large egg
- 1 tsp vanilla extract
- 1 1/2 cups all-purpose flour
- 1 tsp baking soda
- 1/4 tsp salt
Instructions
- Preheat oven to 375°F and line a 12-cup muffin tin with paper liners.
- In a large bowl, mash the bananas, then whisk in the seed butter, brown sugar, egg, and vanilla until smooth.
- In a separate bowl, whisk together the flour, baking soda, and salt.
- Add the dry ingredients to the wet ingredients and stir just until combined — don’t overmix.
- Divide batter evenly among the muffin cups, filling each about 3/4 full.
- Bake 18–20 minutes, until a toothpick inserted in the center comes out clean.
- Cool in the pan for 5 minutes, then transfer to a wire rack.
Make-Ahead Tip
These freeze beautifully — cool completely, then freeze in a single layer before bagging so they don’t stick together, and pull one out the night before for lunch. Love banana in your baking? Browse more of our favorite banana bread recipes for more ways to use up ripe bananas.
No-Bake Desserts for Busy Mornings
Some mornings the oven simply isn’t happening. These come together on the counter or stovetop in 20 minutes or less, no baking required. If your kids love fruity no-bake treats, our strawberry desserts for kids are another easy option worth bookmarking.
4. No-Bake Chocolate Oat Energy Bites
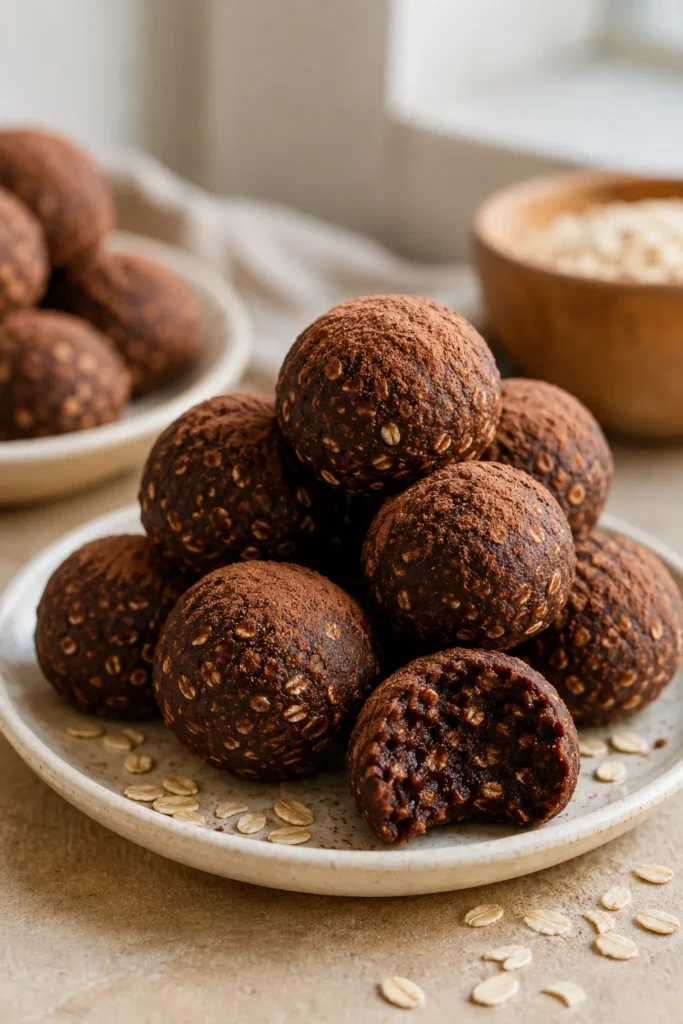
Fudgy and dense with a deep chocolate flavor, these bites come together in one bowl with no cooking at all. Rolled small, they’re perfectly portioned for little hands.
Prep Time: 15 min | Cook Time: 0 min | Total Time: 15 min (plus 30 min chilling) | Servings: 20 bites | Difficulty: Easy
Ingredients
- 1 cup old-fashioned rolled oats
- 1/3 cup unsweetened cocoa powder
- 1/2 cup sunflower seed butter
- 1/3 cup honey
- 1 tsp vanilla extract
- 2 tbsp mini chocolate chips
- Pinch of salt
Instructions
- In a large bowl, stir together the oats and cocoa powder.
- Add the seed butter, honey, and vanilla, and mix until a thick, sticky dough forms.
- Fold in the chocolate chips and a pinch of salt.
- Chill the dough in the fridge for 30 minutes to firm up.
- Roll into 1-inch balls using slightly damp hands to prevent sticking.
- Store in the fridge in an airtight container.
Best For
Mornings when you’re out the door in ten minutes flat — these need no cooking and no cleanup beyond one bowl.
5. Classic Rice Cereal Marshmallow Treats
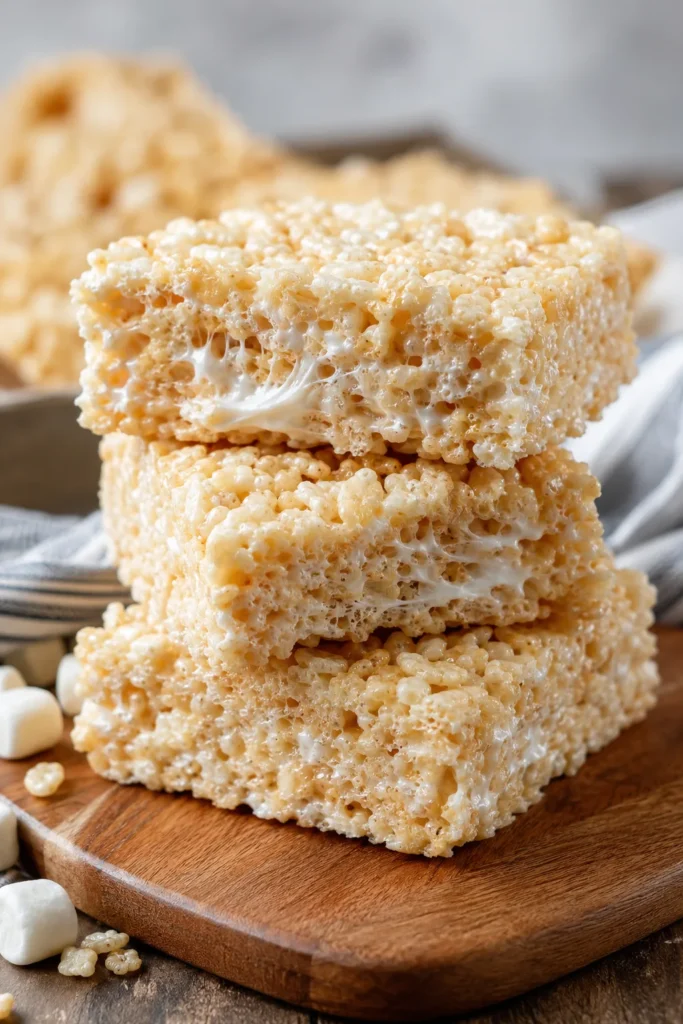
Light, crisp, and pillowy-soft in the center, this is the treat every kid recognizes on sight — and it happens to be naturally nut-free and ready in under 15 minutes.
Prep Time: 5 min | Cook Time: 8 min | Total Time: 13 min | Servings: 16 squares | Difficulty: Easy
Ingredients
- 3 tbsp unsalted butter
- 1 (10 oz) bag mini marshmallows
- 6 cups crisp rice cereal
- 1/4 tsp salt
Instructions
- Line a 9×13-inch pan with parchment paper and lightly grease it.
- Melt the butter in a large pot over medium-low heat.
- Add the marshmallows and salt, stirring constantly until fully melted and smooth, about 3–4 minutes.
- Remove from heat and fold in the rice cereal until evenly coated.
- Press the mixture into the prepared pan using a greased spatula — press gently, not hard, to keep them soft.
- Let cool for at least 20 minutes before cutting into squares.
Good to Know
Double-check your marshmallow and cereal brands for cross-contamination warnings if your school enforces a strict nut-free policy — most major brands are nut-free, but labels do change.
6. No-Bake Pumpkin Spice Oat Bites

Real pumpkin puree and warm spices give these bites a soft, dense texture and a cozy fall flavor — a nice change of pace from the chocolate-heavy no-bake options.
Prep Time: 15 min | Cook Time: 0 min | Total Time: 15 min (plus 30 min chilling) | Servings: 18 bites | Difficulty: Easy
Ingredients
- 1 1/4 cups old-fashioned rolled oats
- 1/4 cup pumpkin puree
- 1/4 cup honey
- 2 tbsp sunflower seed butter
- 1 tsp pumpkin pie spice
- 1/2 tsp vanilla extract
- 2 tbsp cinnamon sugar, for rolling
Instructions
- In a large bowl, stir together the oats, pumpkin puree, honey, seed butter, pumpkin pie spice, and vanilla until a thick dough forms.
- Chill the mixture for 30 minutes so it firms up enough to roll.
- Roll into 1-inch balls, then roll each in cinnamon sugar to coat.
- Store in the fridge in an airtight container.
Flavor Variation
Swap the pumpkin pie spice for just cinnamon and nutmeg if you want a milder flavor, or add a tablespoon of mini chocolate chips for a pumpkin-chocolate combo.
Make-Ahead & Freezer-Friendly Desserts
Batch these on a Sunday and you’re set for the whole week — every recipe here freezes well and thaws in a few hours at room temperature, right in the lunchbox.
7. Freezer Zucchini Muffins with Cinnamon Streusel
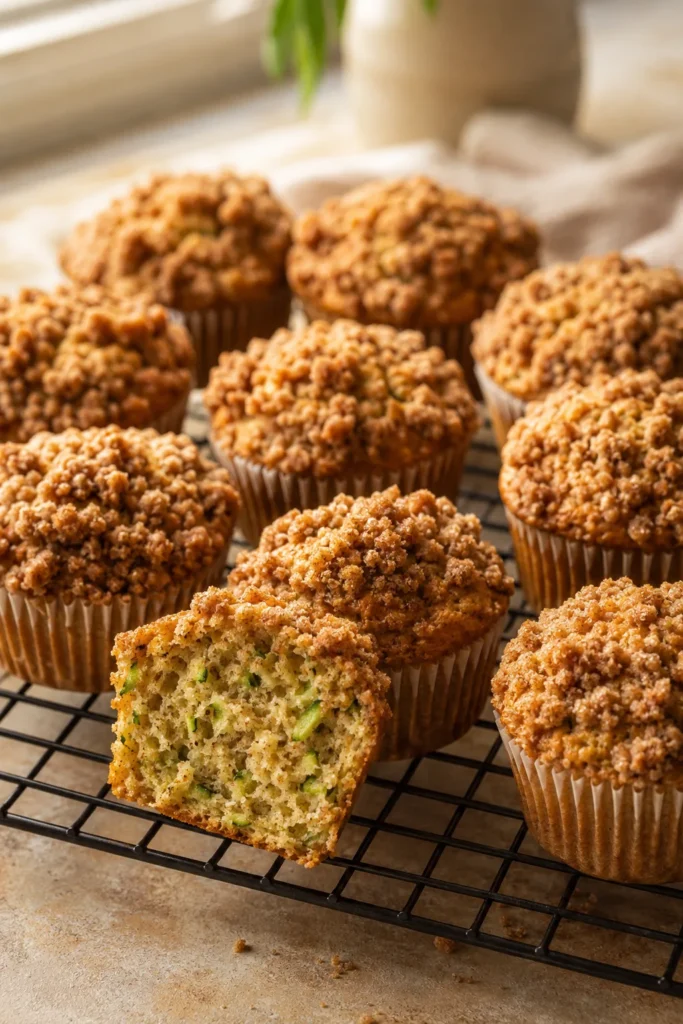
Shredded zucchini keeps these muffins incredibly moist without adding any noticeable vegetable flavor, and the buttery cinnamon streusel on top makes them feel like a real treat.
Prep Time: 15 min | Cook Time: 22 min | Total Time: 37 min | Servings: 12 muffins | Difficulty: Medium
Ingredients
- 1 1/2 cups shredded zucchini, lightly squeezed dry
- 1/2 cup vegetable oil
- 2/3 cup brown sugar
- 2 large eggs
- 1 tsp vanilla extract
- 1 3/4 cups all-purpose flour
- 1 tsp baking powder
- 1/2 tsp cinnamon
- 1/4 tsp salt
- 3 tbsp cold butter, cubed (for streusel)
- 3 tbsp flour, 2 tbsp brown sugar, 1/2 tsp cinnamon (for streusel)
Instructions
- Preheat oven to 375°F and line a 12-cup muffin tin with paper liners.
- In a large bowl, whisk together the oil, brown sugar, eggs, and vanilla, then stir in the zucchini.
- In a separate bowl, whisk together the flour, baking powder, cinnamon, and salt, then fold into the wet ingredients just until combined.
- For the streusel, rub the cold butter into the 3 tbsp flour, 2 tbsp brown sugar, and 1/2 tsp cinnamon with your fingers until crumbly.
- Divide batter among the muffin cups and sprinkle streusel evenly on top.
- Bake 20–22 minutes, until a toothpick comes out clean and the tops spring back lightly.
- Cool in the pan 5 minutes before transferring to a wire rack.
Storage & Freezing
Freeze fully cooled muffins in a single layer, then transfer to a freezer bag for up to 3 months; they thaw in about 2–3 hours at room temperature.
8. Make-Ahead Apple Cinnamon Baked Oatmeal Bars
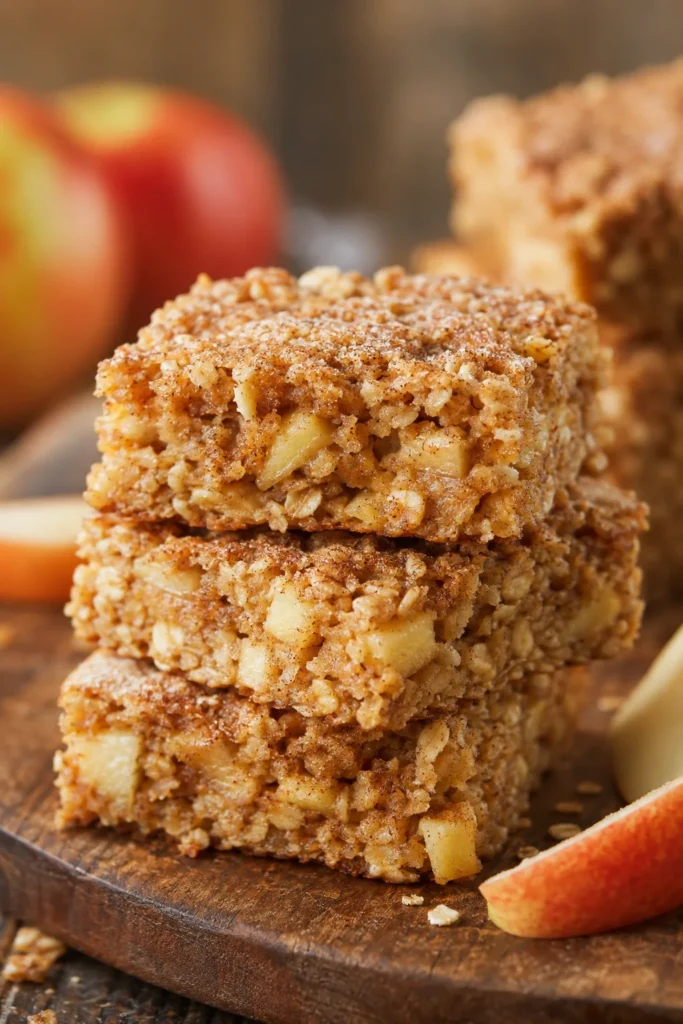
Dense and chewy with tender bites of apple throughout, these bars taste like baked oatmeal in portable form — filling enough that one bar genuinely holds a kid over until lunch.
Prep Time: 15 min | Cook Time: 35 min | Total Time: 50 min | Servings: 16 bars | Difficulty: Medium
Ingredients
- 2 1/2 cups old-fashioned rolled oats
- 1 tsp baking powder
- 1 1/2 tsp cinnamon
- 1/4 tsp salt
- 2 cups milk
- 1/3 cup maple syrup
- 1 large egg
- 1 tsp vanilla extract
- 1 1/2 cups diced apple (about 1 medium apple)
- 1 tbsp turbinado sugar, for topping
Instructions
- Preheat oven to 375°F and line a 9×9-inch pan with parchment paper.
- In a large bowl, combine the oats, baking powder, cinnamon, and salt.
- In a separate bowl, whisk together the milk, maple syrup, egg, and vanilla.
- Pour the wet ingredients into the dry ingredients and stir to combine, then fold in the diced apple.
- Pour into the prepared pan, spread evenly, and sprinkle turbinado sugar on top.
- Bake 32–35 minutes, until set in the center and golden on top.
- Cool completely before slicing into bars, at least 45 minutes.
Make-Ahead Tip
These keep in the fridge for up to 5 days or freeze for up to 2 months — wrap individual bars so you can grab exactly one at a time.
9. Freezer Lemon Blueberry Muffins
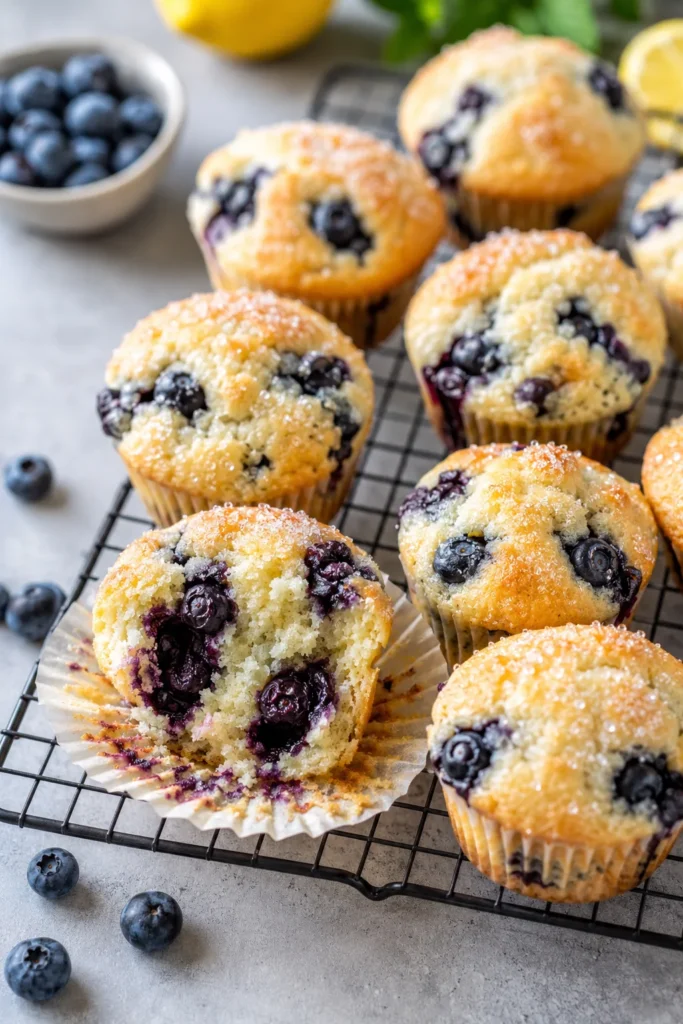
Bright lemon zest cuts through the sweetness here, and juicy blueberries burst throughout every bite — a fresh, fruity change from the spiced and chocolate options above.
Prep Time: 12 min | Cook Time: 20 min | Total Time: 32 min | Servings: 12 muffins | Difficulty: Easy
Ingredients
- 1/2 cup unsalted butter, softened
- 3/4 cup granulated sugar
- 2 large eggs
- Zest of 1 lemon
- 1/2 cup plain yogurt
- 1 3/4 cups all-purpose flour
- 1 1/2 tsp baking powder
- 1/4 tsp salt
- 1 1/2 cups fresh or frozen blueberries
Instructions
- Preheat oven to 375°F and line a 12-cup muffin tin with paper liners.
- Cream the butter and sugar together until light and fluffy, about 2 minutes.
- Beat in the eggs one at a time, then stir in the lemon zest and yogurt.
- In a separate bowl, whisk together the flour, baking powder, and salt, then fold into the wet ingredients just until combined.
- Gently fold in the blueberries.
- Divide batter among the muffin cups and bake 18–20 minutes, until golden and a toothpick comes out clean.
- Cool in the pan 5 minutes before transferring to a wire rack.
Storage & Freezing
Freeze in a single layer, then bag once solid; a frozen muffin tucked into the lunchbox at 7am is fully thawed by lunchtime.
Lunchbox-Sturdy Desserts
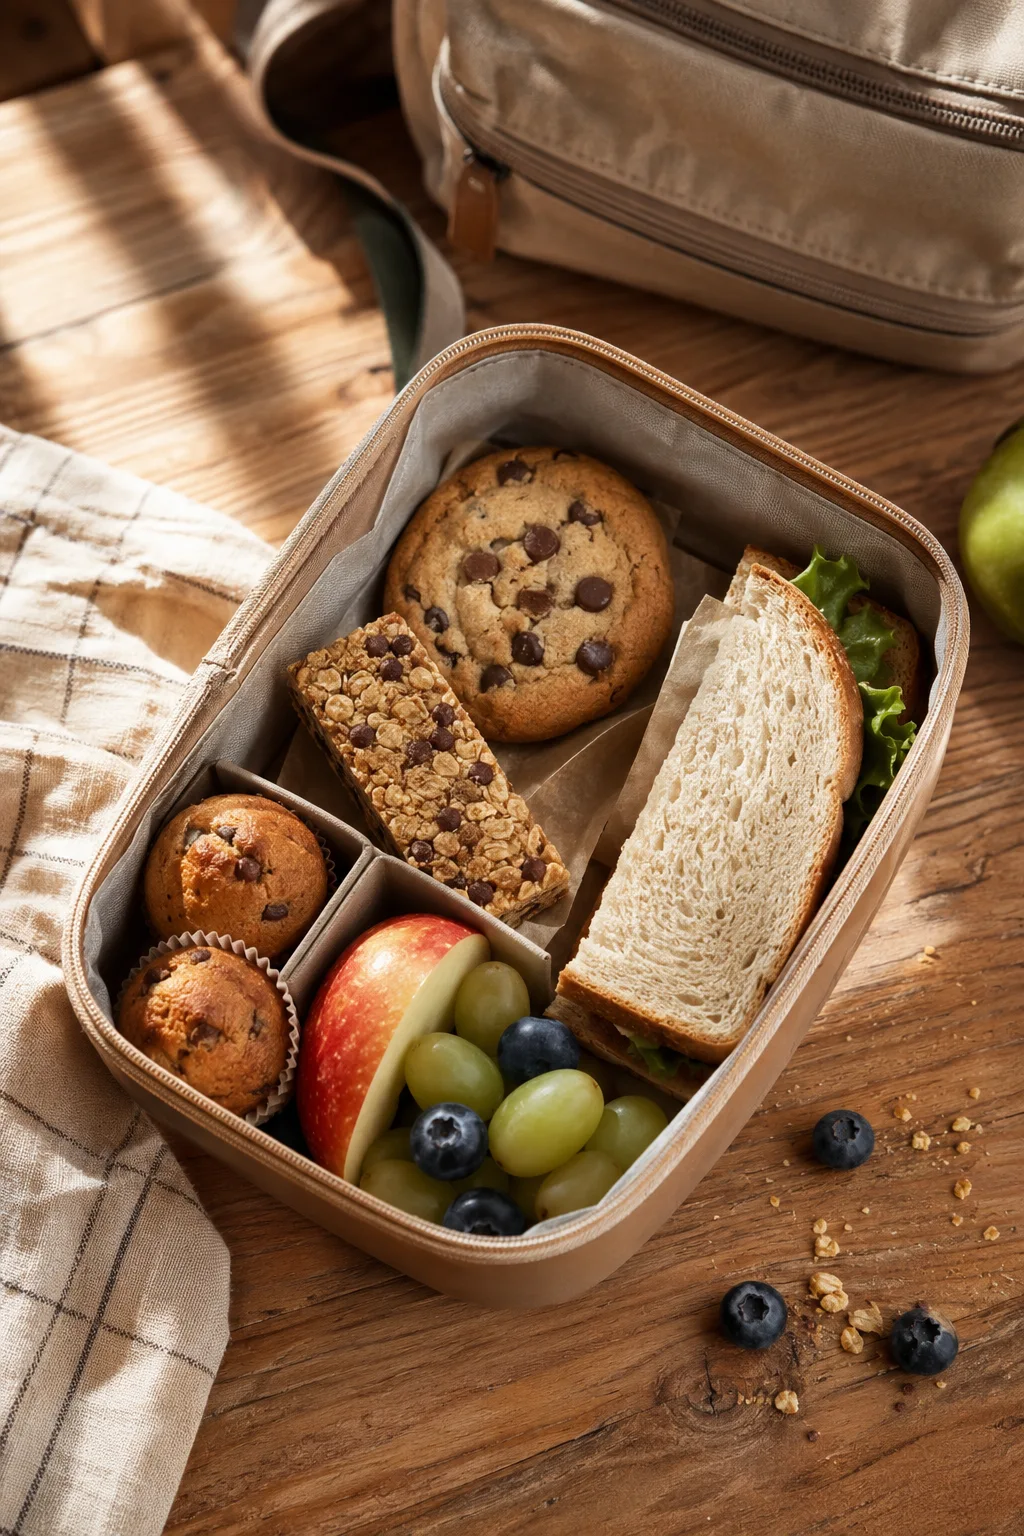
These are built to survive several hours in a backpack without turning to mush, getting crushed, or leaking through the container.
10. Chewy Honey Oat Granola Bars
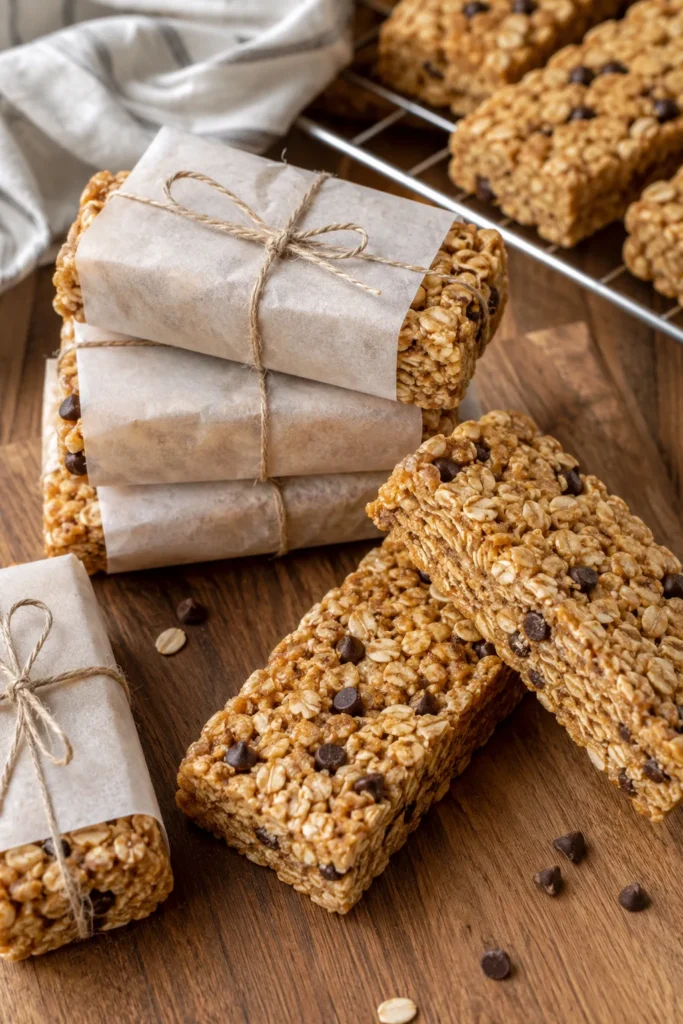
These hold together firmly enough to survive being tossed into a backpack pocket, with a chewy texture that’s closer to a cookie than a crumbly store-bought bar.
Prep Time: 10 min | Cook Time: 20 min | Total Time: 30 min (plus 1 hr cooling) | Servings: 14 bars | Difficulty: Easy
Ingredients
- 2 1/2 cups old-fashioned rolled oats
- 1/2 cup crisp rice cereal
- 1/2 cup honey
- 1/4 cup packed brown sugar
- 1/4 cup unsalted butter
- 1 tsp vanilla extract
- 1/2 tsp salt
- 1/3 cup mini chocolate chips
Instructions
- Line an 8×8-inch pan with parchment paper, leaving overhang on two sides.
- In a large bowl, combine the oats and rice cereal.
- In a small saucepan over medium heat, melt the honey, brown sugar, and butter together, stirring until smooth, about 3 minutes.
- Remove from heat and stir in the vanilla and salt, then pour over the oat mixture and stir until fully coated.
- Let the mixture cool for 5 minutes, then fold in the chocolate chips.
- Press very firmly into the prepared pan using the back of a greased spatula — firm pressing is what keeps these from crumbling.
- Chill in the fridge for at least 1 hour before lifting out and cutting into bars.
Baker’s Tip
Pressing hard is the whole trick here — a light press gives you crumbly bars that fall apart in the lunchbox, while a firm, even press gives you bars that hold together through a whole backpack ride.
11. Mini Carrot Cake Loaves with Cream Cheese Glaze
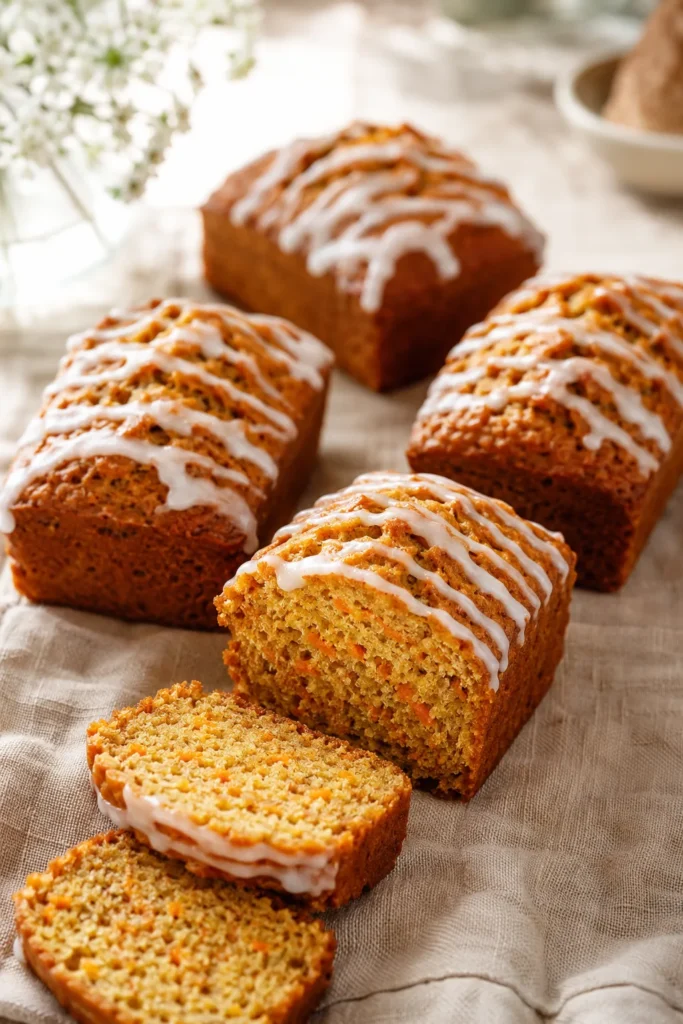
Baked in individual mini loaf pans, these come pre-portioned so there’s no messy cutting, and the thin glaze sets enough to travel without smearing.
Prep Time: 15 min | Cook Time: 25 min | Total Time: 40 min | Servings: 8 mini loaves | Difficulty: Medium
Ingredients
- 1 1/2 cups shredded carrot
- 1/2 cup vegetable oil
- 2/3 cup brown sugar
- 2 large eggs
- 1 1/2 cups all-purpose flour
- 1 tsp baking powder
- 1 tsp cinnamon
- 1/4 tsp salt
- 4 oz cream cheese, softened
- 3/4 cup powdered sugar
- 2–3 tsp milk
Instructions
- Preheat oven to 350°F and grease 8 mini loaf pan cavities.
- Whisk together the oil, brown sugar, and eggs, then stir in the shredded carrot.
- In a separate bowl, whisk the flour, baking powder, cinnamon, and salt, then fold into the wet ingredients just until combined.
- Divide batter among the mini loaf cavities, filling each about 2/3 full.
- Bake 22–25 minutes, until a toothpick comes out clean.
- Cool completely, then whisk the cream cheese, powdered sugar, and milk until smooth and drizzle over the tops.
- Let the glaze set for 15 minutes before wrapping individually.
Best For
Kids who want something that feels a little fancier than a muffin but still travels in one clean, pre-portioned piece.
12. Soft Pretzel Bites with Cinnamon Sugar
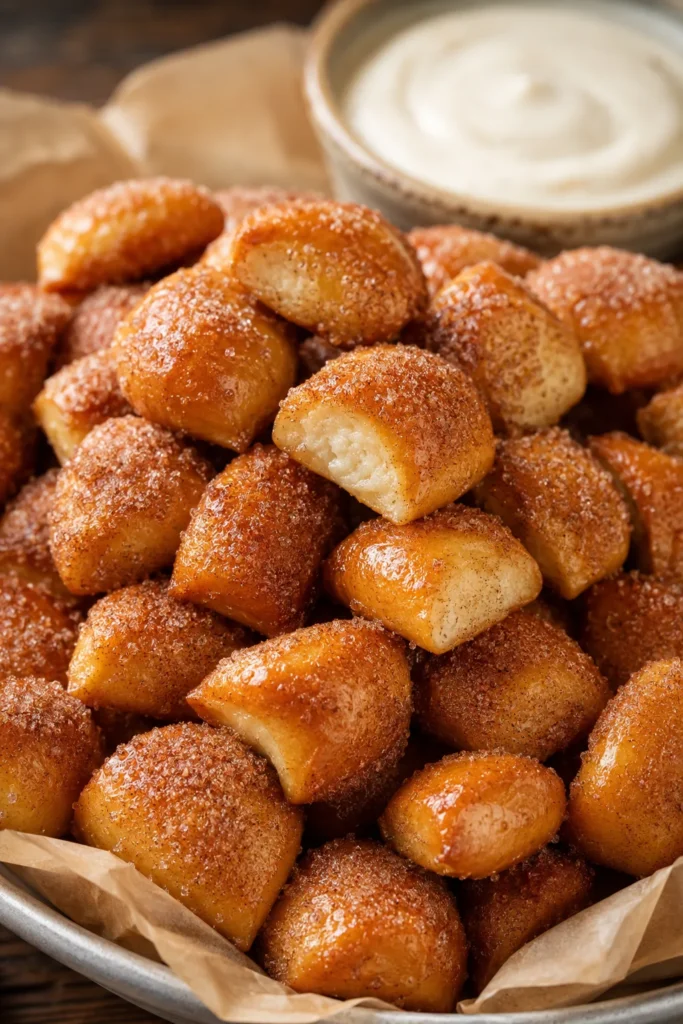
A sweet twist on the classic mall pretzel, these bake up with a shiny, chewy crust and a soft interior, then get rolled in butter and cinnamon sugar while still warm.
Prep Time: 20 min | Cook Time: 12 min | Total Time: 32 min (plus 1 hr rise) | Servings: 30 bites | Difficulty: Medium
Ingredients
- 1 cup warm water
- 2 1/4 tsp active dry yeast
- 1 tbsp brown sugar
- 2 3/4 cups all-purpose flour
- 1 tsp salt
- 2 tbsp melted butter, plus 3 tbsp for coating
- 1/3 cup baking soda (for the water bath)
- 1/3 cup granulated sugar mixed with 1 tsp cinnamon, for coating
Instructions
- In a large bowl, stir the warm water, yeast, and brown sugar together and let sit 5 minutes until foamy.
- Add the flour, salt, and 2 tbsp melted butter, and knead by hand or mixer for 5 minutes until smooth and elastic.
- Cover and let rise in a warm spot for 1 hour, until doubled in size.
- Preheat oven to 425°F and bring a large pot of water with the baking soda to a boil.
- Divide dough into small pieces and roll into 1-inch balls.
- Boil the dough balls in batches for 20 seconds each, then transfer to a parchment-lined baking sheet.
- Bake 10–12 minutes, until deep golden brown.
- While still warm, toss the bites in the remaining melted butter, then roll in the cinnamon sugar mixture.
Good to Know
These are best eaten within a day or two — pack them the morning you make them for the best chewy texture.
First Day of School Celebration Desserts
Save these for the moment that actually calls for something a little extra — the first morning, the first bus ride, the first big milestone. Want more ways to make the day feel special? Our friends at Tired Mom Supermom have a great roundup of back to school party ideas to pair with any of the treats below.
13. School Bus Snack Cake
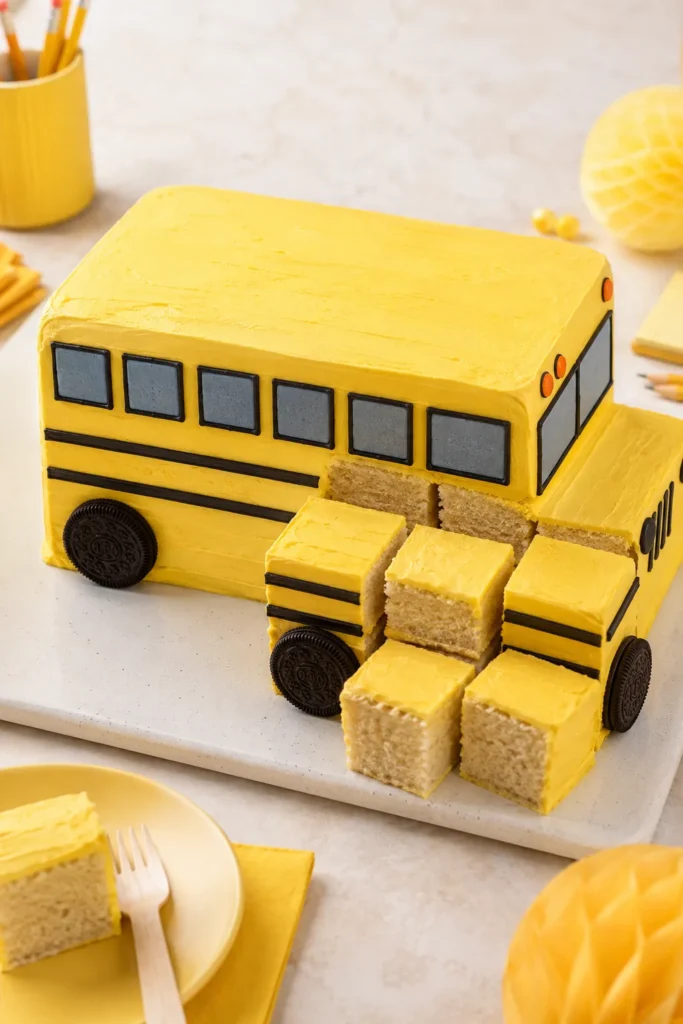
A soft, tender vanilla sheet cake gets a playful yellow buttercream makeover — simple piping turns it into a school bus without requiring any advanced cake-decorating skills.
Prep Time: 25 min | Cook Time: 25 min | Total Time: 50 min | Servings: 20 squares | Difficulty: Medium
Ingredients
- 2 1/2 cups all-purpose flour
- 2 1/2 tsp baking powder
- 1/2 tsp salt
- 1 cup unsalted butter, softened (divided)
- 1 3/4 cups granulated sugar
- 4 large eggs
- 1 cup milk
- 2 tsp vanilla extract
- 4 cups powdered sugar
- 2–3 tbsp milk (for frosting)
- Yellow and black gel food coloring
Instructions
- Preheat oven to 350°F and grease a 9×13-inch pan.
- Whisk together the flour, baking powder, and salt.
- Cream 3/4 cup of the butter with the granulated sugar until fluffy, about 3 minutes, then beat in the eggs one at a time.
- Alternate adding the flour mixture and milk to the butter mixture, mixing just until combined, then stir in the vanilla.
- Pour batter into the pan and bake 23–25 minutes, until a toothpick comes out clean. Cool completely.
- Beat the remaining 1/4 cup butter with the powdered sugar and milk until smooth, then tint most of it yellow, reserving a small amount tinted black.
- Spread the yellow frosting over the cooled cake and pipe black stripe and wheel details with the reserved frosting before slicing.
Best For
A first-day-of-school breakfast or after-school celebration where you want something that gets an immediate reaction from kids.
14. Apple-Shaped Cupcakes with Caramel Drizzle
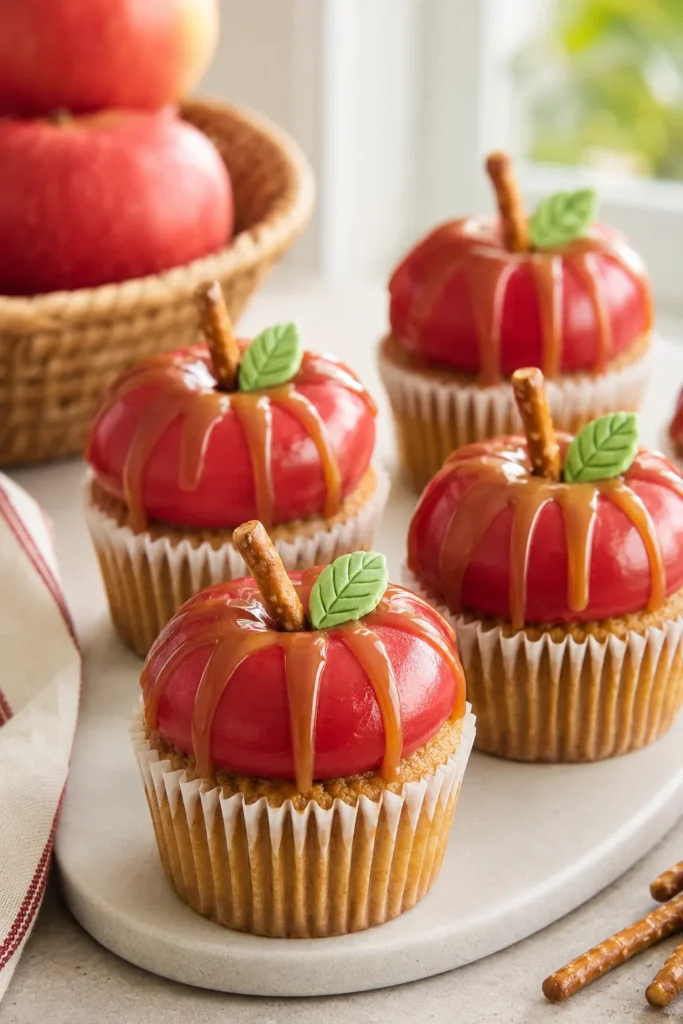
These vanilla cupcakes get shaped into apples with simple frosting technique and a pretzel stick stem — the warm caramel drizzle on top adds a sticky-sweet finishing touch.
Prep Time: 20 min | Cook Time: 18 min | Total Time: 38 min | Servings: 12 cupcakes | Difficulty: Medium
Ingredients
- 1 1/3 cups all-purpose flour
- 1 1/4 tsp baking powder
- 1/4 tsp salt
- 1/2 cup unsalted butter, softened
- 3/4 cup granulated sugar
- 2 large eggs
- 1/2 cup milk
- 1 tsp vanilla extract
- 2 cups powdered sugar, 1/4 cup butter, 2 tbsp milk (for frosting)
- Red gel food coloring
- 12 small pretzel sticks
- 1/4 cup caramel sauce, warmed
Instructions
- Preheat oven to 350°F and line a 12-cup muffin tin with paper liners.
- Whisk together the flour, baking powder, and salt.
- Cream the butter and sugar until fluffy, then beat in the eggs one at a time.
- Alternate adding the flour mixture and milk, mixing just until smooth, then stir in the vanilla.
- Divide batter among the liners and bake 16–18 minutes, until a toothpick comes out clean. Cool completely.
- Beat the powdered sugar, butter, and milk until smooth, then tint red and pipe or spread onto each cupcake in a rounded dome.
- Insert a pretzel stick into the top of each for a stem, then drizzle with warmed caramel just before serving.
Good to Know
Add the caramel drizzle the morning you’re serving these, not the night before — it stays glossy longer and won’t soak into the frosting. For extra first-day flair, bake these in back to school themed cupcake liners and finish each one with a back to school cupcake topper.
15. Pencil-Shaped Sugar Cookies
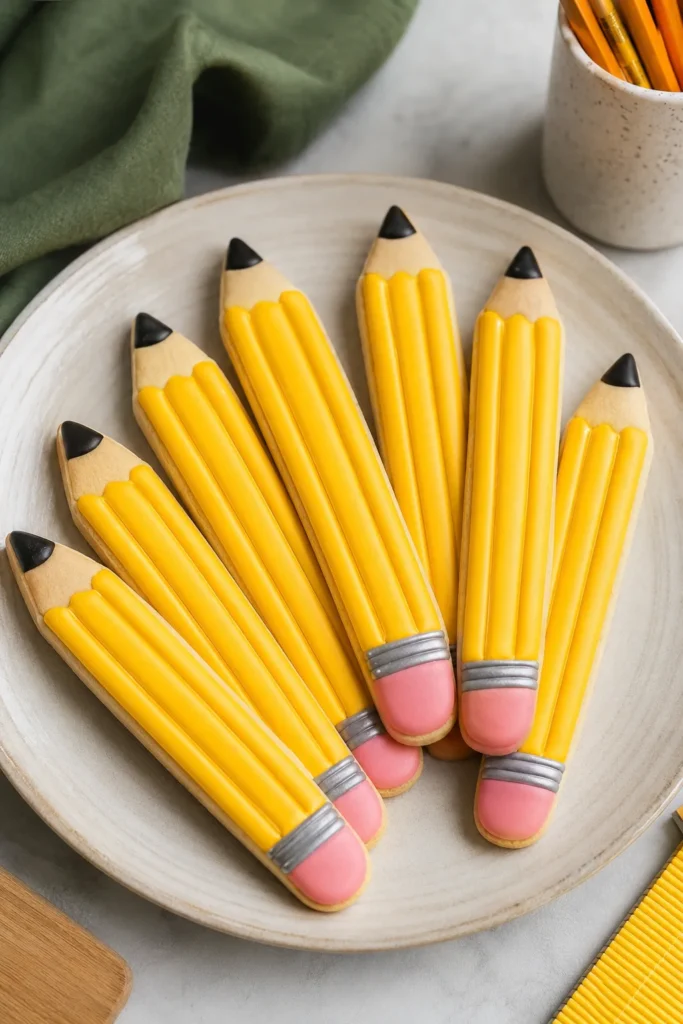
A crisp, buttery sugar cookie base gets rolled long and decorated in simple bands of color to look exactly like a classic yellow pencil — a real showstopper for the first day.
Prep Time: 25 min | Cook Time: 10 min | Total Time: 35 min (plus 1 hr chilling) | Servings: 16 cookies | Difficulty: Advanced
Ingredients
- 2 3/4 cups all-purpose flour
- 1/2 tsp baking powder
- 1/4 tsp salt
- 1 cup unsalted butter, softened
- 1 cup granulated sugar
- 1 large egg
- 1 tsp vanilla extract
- 2 cups royal icing
- Yellow, pink, gray, and black food coloring
Instructions
- Whisk together the flour, baking powder, and salt.
- Cream the butter and sugar until fluffy, then beat in the egg and vanilla.
- Gradually mix in the flour mixture until a smooth dough forms.
- Divide the dough in half, flatten into discs, and chill for at least 1 hour.
- Preheat oven to 350°F and line baking sheets with parchment.
- Roll dough to 1/4-inch thickness and cut into long, narrow pencil shapes, tapering one end. Bake 9–10 minutes, until edges are just set. Cool completely.
- Tint royal icing yellow, pink, gray, and black, and pipe bands of color onto each cookie to mimic a pencil’s body, eraser, and tip. Let dry for at least 2 hours before packing.
Baker’s Tip
Chill the cut cookie shapes for 10 minutes on the tray before baking — this keeps the long, narrow pencil shape from spreading in the oven. A dedicated back to school cookie cutter set makes quick work of getting clean pencil, apple, and school bus shapes without any freehand cutting.
Bake Sale Favorites
Shelf-stable, no refrigeration needed, and easy to wrap individually — these are built for the class bake sale table.
16. Individually Wrapped Salted Caramel Blondies
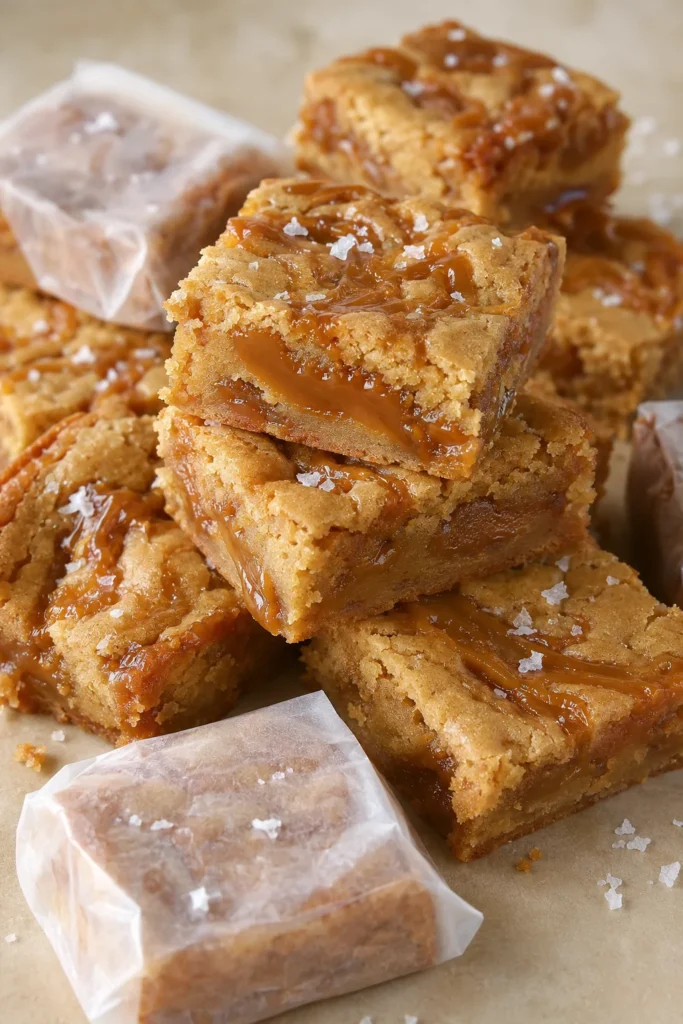
Dense and fudgy with ribbons of caramel running through the center, these blondies get a finishing touch of flaky salt that keeps the sweetness perfectly balanced.
Prep Time: 10 min | Cook Time: 28 min | Total Time: 38 min | Servings: 16 blondies | Difficulty: Easy
Ingredients
- 1/2 cup unsalted butter, melted
- 1 cup packed brown sugar
- 1 large egg
- 1 tsp vanilla extract
- 1 1/4 cups all-purpose flour
- 1/2 tsp baking powder
- 1/4 tsp salt
- 1/3 cup caramel sauce
- Flaky sea salt, for topping
Instructions
- Preheat oven to 350°F and line an 8×8-inch pan with parchment paper.
- Whisk together the melted butter and brown sugar, then beat in the egg and vanilla.
- Fold in the flour, baking powder, and salt just until combined.
- Spread batter into the prepared pan and drizzle caramel sauce over the top, swirling gently with a knife.
- Bake 26–28 minutes, until the edges are set and the center is just barely firm.
- Sprinkle with flaky salt while still warm, then cool completely before slicing and wrapping individually.
Good to Know
Individually wrapping each square is more than just presentation — many school bake sale policies require pre-wrapped, single-serving items for food safety. Back to school themed wax paper makes each square look intentional instead of just foil-wrapped.
17. Mini Vanilla Bean Cheesecakes

Rich and creamy with flecks of real vanilla bean, these bake in a muffin tin for perfectly portioned single servings — no slicing, no mess, no fighting over who got the bigger piece.
Prep Time: 15 min | Cook Time: 20 min | Total Time: 35 min (plus 3 hrs chilling) | Servings: 12 mini cheesecakes | Difficulty: Medium
Ingredients
- 1 cup graham cracker crumbs
- 3 tbsp melted butter
- 16 oz cream cheese, softened
- 2/3 cup granulated sugar
- 2 large eggs
- 1 tsp vanilla bean paste (or vanilla extract)
- 1/4 cup sour cream
Instructions
- Preheat oven to 325°F and line a 12-cup muffin tin with paper liners.
- Stir together the graham cracker crumbs and melted butter, then press about 1 tbsp into the bottom of each liner.
- Beat the cream cheese and sugar until smooth, then beat in the eggs one at a time.
- Mix in the vanilla bean paste and sour cream until fully combined and smooth.
- Divide the batter evenly over the crusts, filling each liner nearly to the top.
- Bake 18–20 minutes, until the centers are just barely set and slightly jiggly.
- Cool to room temperature, then chill for at least 3 hours before serving.
Storage & Freezing
Keep these refrigerated rather than at room temperature on the bake sale table — set out just before the sale starts and keep in a cooler if the sale runs long.
18. Chewy Oatmeal Raisin Cookies
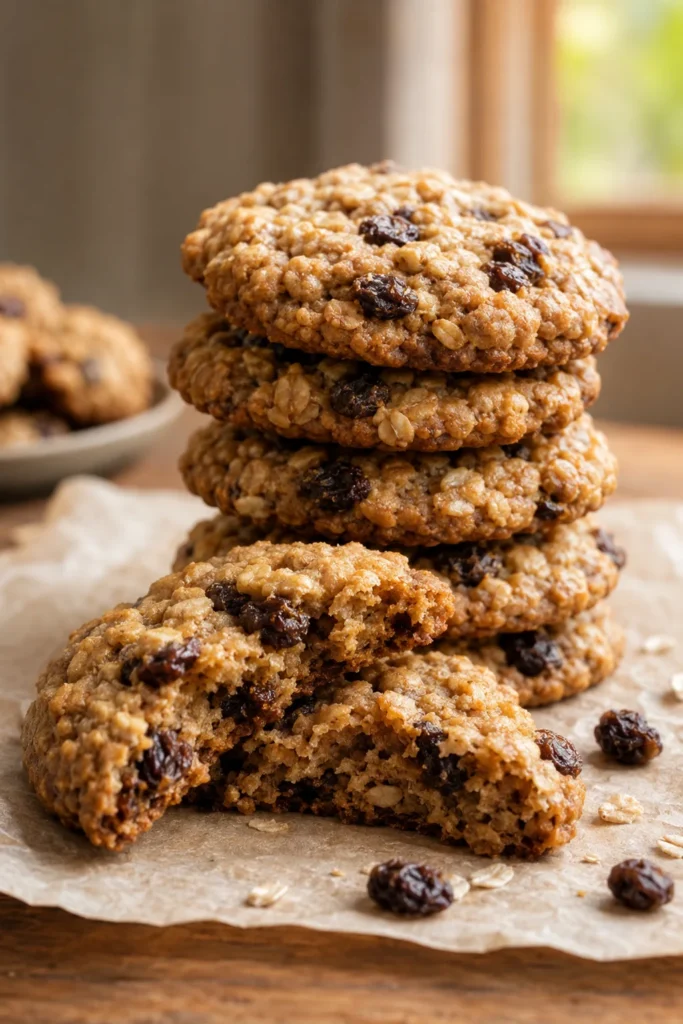
Classic and nostalgic, these cookies stay soft and chewy for days thanks to a touch of extra brown sugar — a reliable, crowd-pleasing pick that never lasts long on the bake sale table.
Prep Time: 15 min | Cook Time: 11 min | Total Time: 26 min | Servings: 24 cookies | Difficulty: Easy
Ingredients
- 1 cup unsalted butter, softened
- 1 cup packed brown sugar
- 1/2 cup granulated sugar
- 2 large eggs
- 1 tsp vanilla extract
- 1 1/2 cups all-purpose flour
- 1 tsp baking soda
- 1 1/2 tsp cinnamon
- 1/2 tsp salt
- 3 cups old-fashioned rolled oats
- 1 cup raisins
Instructions
- Preheat oven to 350°F and line baking sheets with parchment paper.
- Cream the butter with both sugars until light and fluffy, about 3 minutes.
- Beat in the eggs one at a time, then stir in the vanilla.
- In a separate bowl, whisk together the flour, baking soda, cinnamon, and salt, then mix into the wet ingredients.
- Fold in the oats and raisins until evenly distributed.
- Scoop 2-tablespoon balls of dough onto the sheets, spacing 2 inches apart.
- Bake 10–11 minutes, until the edges are golden but the centers still look soft.
- Cool on the pan for 5 minutes before transferring to a wire rack.
Storage & Freezing
These stay soft at room temperature in an airtight container for up to 5 days, making them one of the most reliable shelf-stable picks on this whole list.
Easy Nut-Free Ingredient Swaps
Since several recipes above call for a nut-free swap, here’s a quick reference for adapting any of your own favorite recipes for a nut-free classroom.
| Instead of… | Use… | Works Best In |
|---|---|---|
| Peanut butter | Sunflower seed butter | Cookies, energy bites, muffins |
| Almond flour | Oat flour or all-purpose flour | Baked bars, cookies |
| Chopped nuts (topping/mix-in) | Sunflower seeds, pepitas, or crisp rice cereal | Bars, granola, cookies |
| Nutella or nut-based spreads | Sunflower seed butter mixed with cocoa powder | Spreads, fillings |
Common Mistakes to Avoid
- Assuming “no peanuts” covers it: Most school policies ban all tree nuts too — always check your ingredient labels for both, not just peanuts.
- Sending frosted or cream-based treats in a warm backpack: Buttercream and cream cheese frosting soften quickly without refrigeration; save those for celebration mornings when they’ll be eaten within an hour or two.
- Freezing fully assembled treats with wet fillings: Glazes and fillings can turn soggy on thaw — freeze unfrosted when possible and add toppings the morning of.
- Not checking store-bought ingredient labels: Chocolate chips, marshmallows, and cereal can carry cross-contamination warnings even when the product itself is nut-free.
- Skipping the individual wrap for bake sale items: Many schools require pre-wrapped, single-serving treats for food safety — wrap before you arrive, not at the table.
- Choosing an elaborate decorated treat on a weekday morning: Save the pencil cookies and school bus cake for a weekend prep session, not a Tuesday before the bus arrives.
How to Store and Freeze These Desserts
Most bars, cookies, and muffins in this collection keep well at room temperature in an airtight container for 3–5 days. For longer storage, cool completely, then freeze in a single layer on a baking sheet before transferring to a freezer bag — this keeps individual pieces from sticking together, so you can pull out exactly one at a time. Most items thaw at room temperature in 2–3 hours, meaning a treat packed frozen at 7am is ready well before lunch. Frosted or glazed items are the exception: freeze unfrosted when possible and finish decorating the morning you plan to serve them.
Frequently Asked Questions
What are good back to school desserts for lunchboxes?
Sturdy, non-perishable options like granola bars, mini loaf cakes, and firmly-pressed oat bars travel best — they won’t get soggy or crushed the way frosted or cream-filled treats can.
What desserts are nut-free for school?
Recipes made with sunflower seed butter instead of peanut or almond butter, along with oat- and seed-based bars, are naturally nut-free and safe for most classroom policies — just double-check your specific ingredient labels.
What can I substitute for peanut butter in school desserts?
Sunflower seed butter is the closest 1:1 swap in flavor and texture for most cookie, bar, and energy bite recipes; tahini and soy nut butter also work well.
What are quick, no-bake back to school treats?
No-bake energy bites and classic rice cereal treats come together in 15–20 minutes with no oven required, making them ideal for mornings with zero extra time.
How far ahead can I make lunchbox desserts?
Most bars, cookies, and muffins can be made up to a week ahead and refrigerated, or frozen up to 2–3 months for even longer storage.
How do I keep a dessert from getting soggy in a lunchbox?
Pack any wet or glazed component separately, place a piece of parchment between layers, and choose sturdier bakes like bars or cookies over frosted or cream-filled treats for anything sitting several hours before lunch.
Are Rice Krispie treats nut-free?
Traditional Rice Krispie treats made with butter, marshmallows, and rice cereal are naturally nut-free — just check your specific cereal and marshmallow brands for cross-contamination warnings.
What’s a good dessert for a first-day-of-school treat for the whole class?
Individually portioned, nut-free options like mini muffins or wrapped rice cereal treats are easiest to share safely across a full classroom.
Can homemade treats go to school, or does it need to be store-bought?
Policies vary by school and classroom, especially around food allergies — check with your child’s teacher before sending homemade treats for a class-wide event.
What desserts keep well without refrigeration?
Cookies, granola bars, and most oat-based bars are shelf-stable for a full school day without needing an ice pack; anything with cream cheese frosting or fresh dairy should stay chilled.