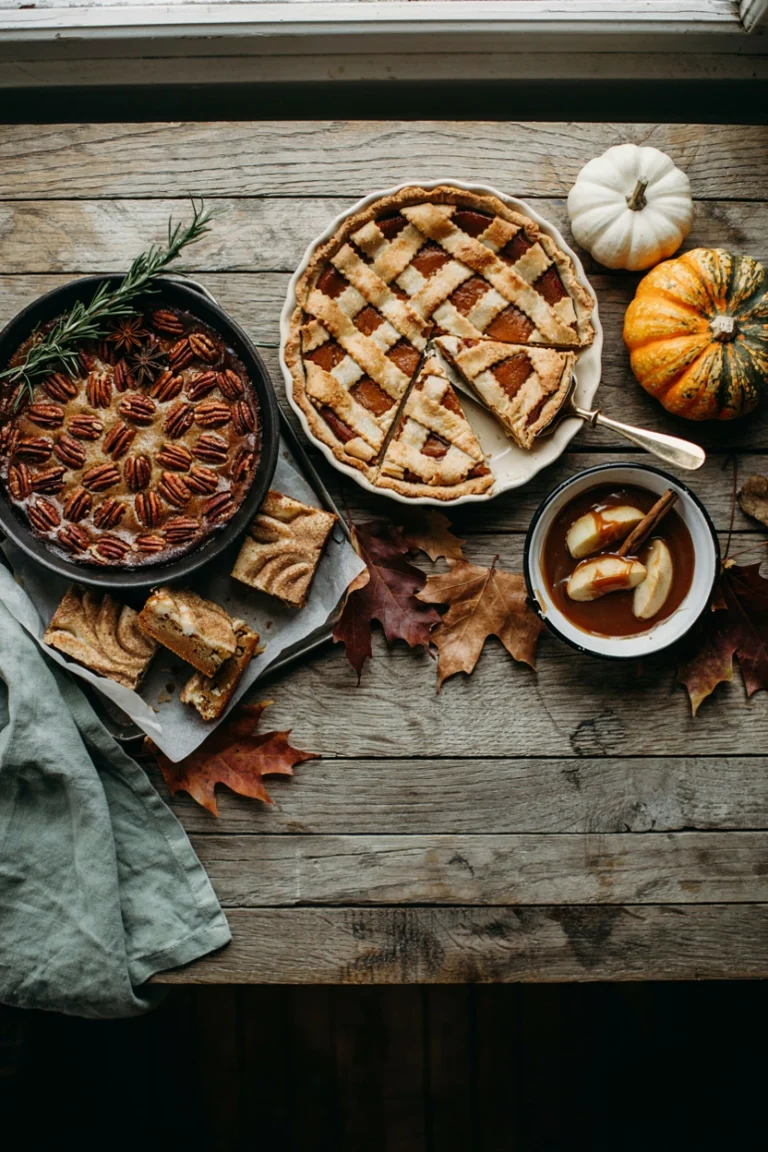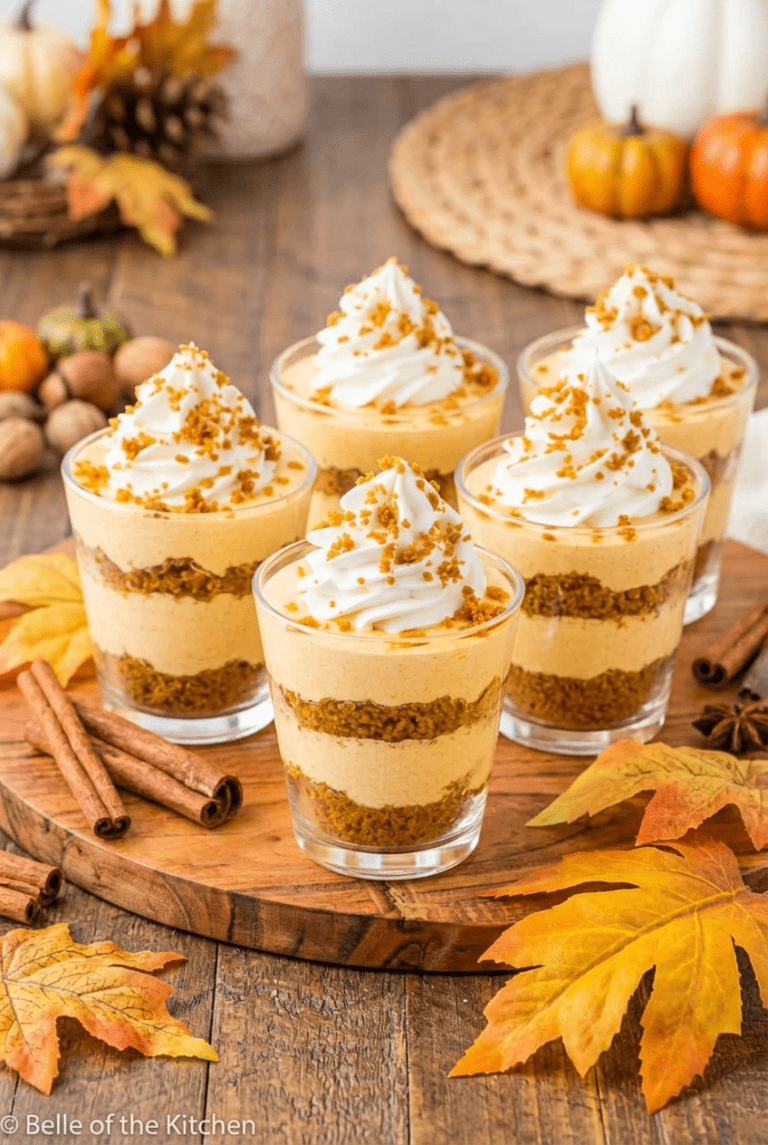
25 Fall Baked Goods for a Bake Sale That’ll Sell Out Fast
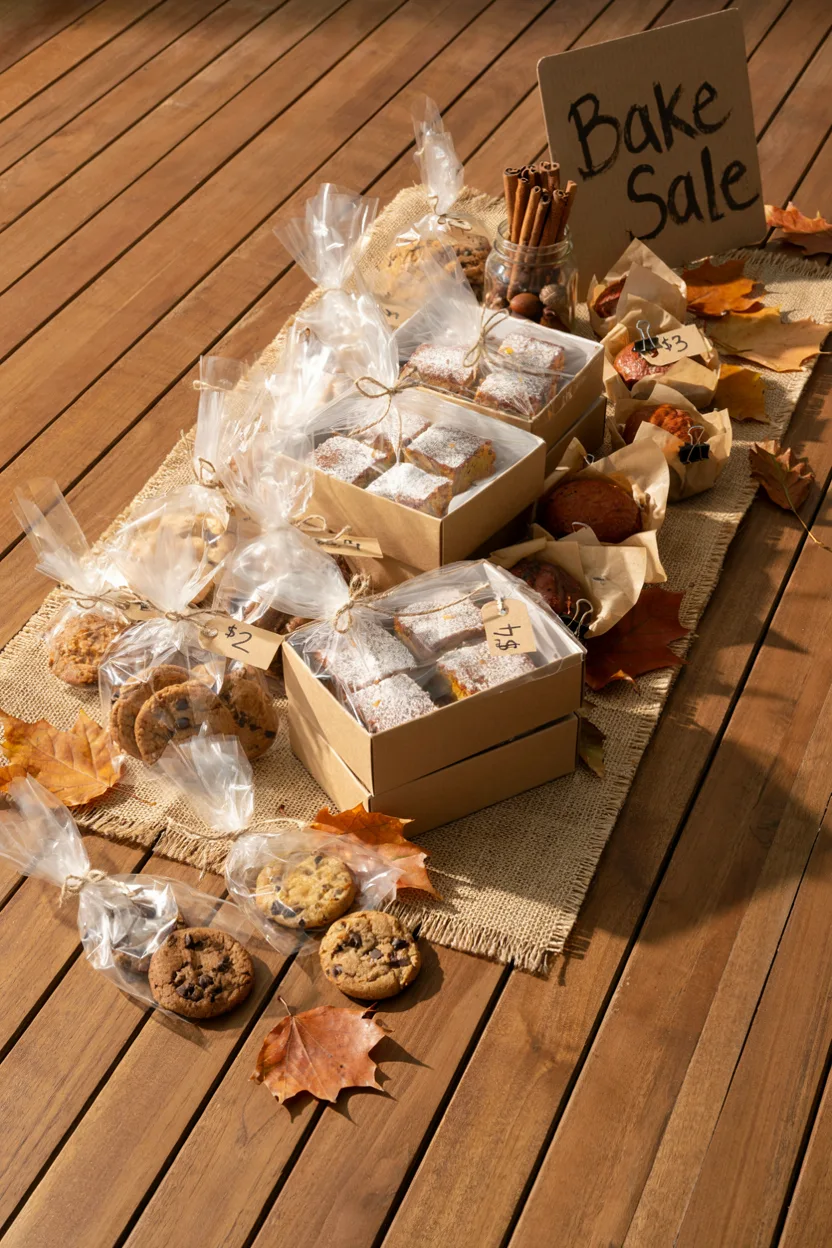
Quick Answer: The best fall baked goods for a bake sale are portable, individually portioned treats with cozy seasonal flavor — think pumpkin bars, apple hand pies, spiced cookies, and mini loaves. Below are 25 tried-and-true recipes organized by category, plus packaging tips to help every batch sell out.
You just found out about the bake sale, and now you’re standing in the kitchen wondering what will actually sell. Between school fundraisers, church socials, and fall festivals, this is prime bake sale season, and the treats that disappear first all share a few things in common: they travel well, they smell like the season, and they’re easy to grab with one hand.
This collection pulls together 25 fall favorites, from pumpkin bars and snickerdoodles to Halloween cupcakes and no-bake candy corn bark, organized so you can find exactly what fits your afternoon.
Grab your mixing bowls and let’s get baking.
This post may contain affiliate links which helps me keep this blog alive, questions? View the privacy policy.
Cookies & Bars
1. Pumpkin Bars
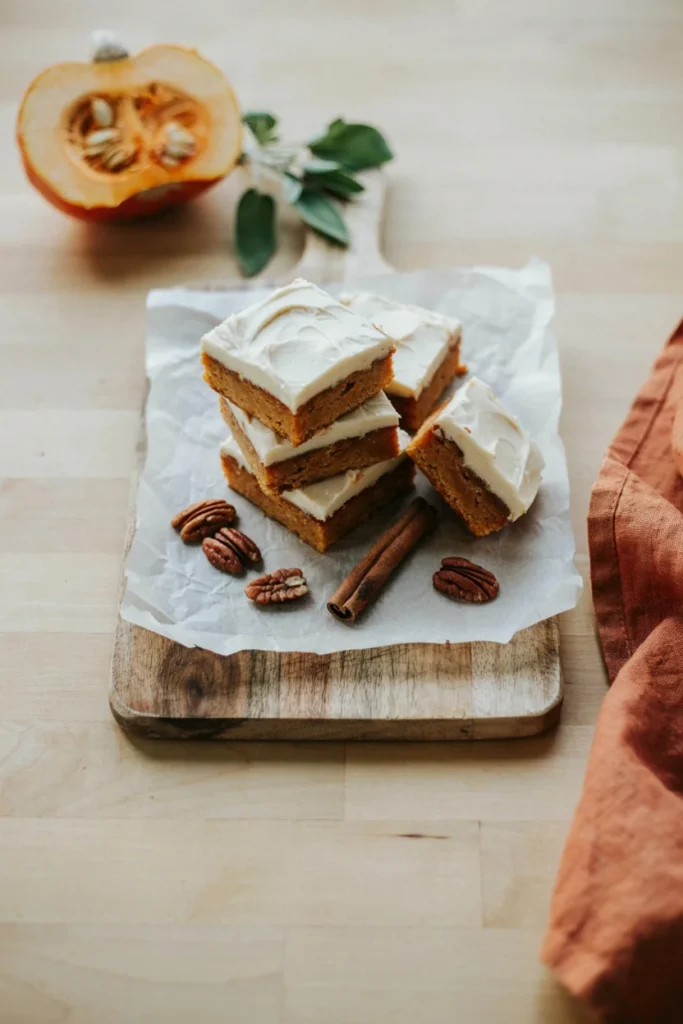
These bars stay soft and moist for days, which is exactly why they’re a bake sale staple — they taste just as good the morning of the sale as they did the night you baked them. The cream cheese frosting sets just enough to stack without smearing, so they hold up beautifully in a bakery box.
Prep Time: 15 min | Cook Time: 25 min | Total Time: 40 min | Servings: 24 bars | Difficulty: Easy
Ingredients
- 4 large eggs
- 1 2/3 cups granulated sugar
- 1 cup vegetable oil
- 15 oz canned pumpkin puree
- 2 cups all-purpose flour
- 2 tsp baking powder
- 2 tsp ground cinnamon
- 1 tsp salt
- 8 oz cream cheese, softened
- 1/4 cup unsalted butter, softened
- 2 cups powdered sugar
- 1 tsp vanilla extract
Instructions
- Preheat the oven to 350°F and line a 9×13-inch baking pan with parchment paper.
- Whisk the eggs, sugar, oil, and pumpkin puree together until smooth.
- In a separate bowl, whisk the flour, baking powder, cinnamon, and salt, then fold into the wet ingredients until just combined.
- Pour into the pan and bake 22–25 minutes, until a toothpick inserted in the center comes out clean.
- Cool completely, about 1 hour, before frosting.
- Beat the cream cheese and butter until smooth, then add the powdered sugar and vanilla and beat until fluffy.
- Spread over the cooled bars and cut into 24 squares.
Baker’s Tip
Frost the bars only once they’re fully cool, or the frosting will melt into the cake instead of sitting on top. If you’re baking a day ahead, frost the morning of the sale for the cleanest slices.
Why You’ll Love It
They cut into clean, stackable squares — no forks needed, no crumbling in the box.
For the full step-by-step and photos, see the full Pumpkin Bars recipe.
2. Carrot Cake Blondies with Cream Cheese Frosting
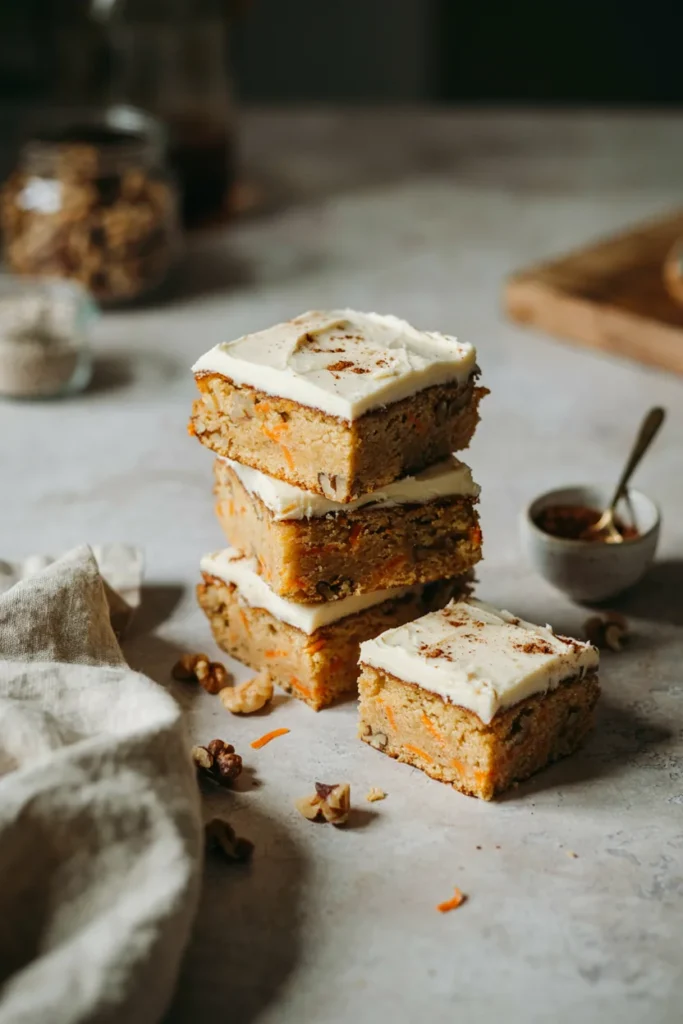
These blondies give you all the cozy spice of carrot cake in a chewy, hand-held bar — no layers to assemble, no slicing a round cake into wedges. The edges turn slightly caramelized while the center stays dense and fudgy.
Prep Time: 15 min | Cook Time: 28 min | Total Time: 43 min | Servings: 20 bars | Difficulty: Easy
Ingredients
- 3/4 cup unsalted butter, melted
- 1 cup brown sugar, packed
- 2 large eggs
- 1 tsp vanilla extract
- 1 3/4 cups all-purpose flour
- 1 tsp baking powder
- 1 1/2 tsp ground cinnamon
- 1/2 tsp salt
- 1 1/2 cups finely shredded carrot
- 1/2 cup chopped walnuts
- 4 oz cream cheese, softened
- 2 tbsp unsalted butter, softened
- 1 cup powdered sugar
Instructions
- Preheat the oven to 350°F and line an 8×8-inch pan with parchment.
- Whisk the melted butter and brown sugar together, then beat in the eggs and vanilla.
- Fold in the flour, baking powder, cinnamon, and salt until just combined, then stir in the carrot and walnuts.
- Spread into the pan and bake 25–28 minutes, until the edges pull slightly from the sides and the center is set.
- Cool completely, about 45 minutes.
- Beat the cream cheese, butter, and powdered sugar until smooth, then spread over the cooled blondies.
- Cut into 20 bars.
Substitutions
Swap the walnuts for pecans, or leave them out entirely for a nut-free bake sale table.
Best For
Buyers who want carrot cake flavor without committing to a full slice.
Full recipe and photos here: Carrot Cake Blondies recipe.
3. Pumpkin Pudding Cookies
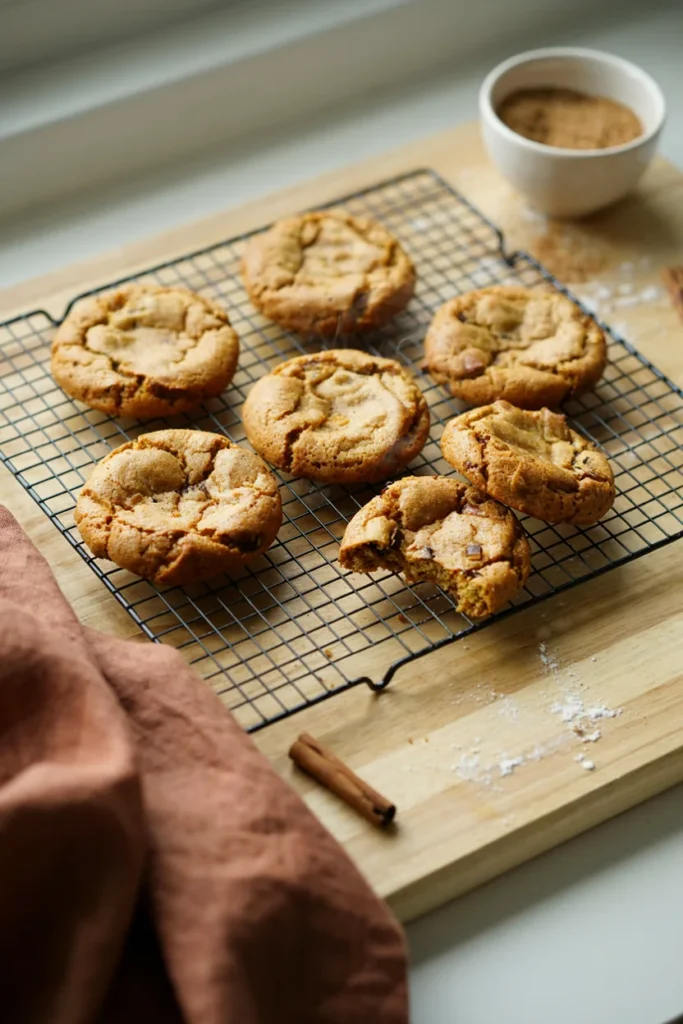
Instant pudding mix is the secret to how thick and cake-like these cookies turn out — they hold their domed shape instead of spreading thin, which makes them look extra bakery-worthy piled in a box.
Prep Time: 15 min | Cook Time: 12 min | Total Time: 27 min | Servings: 28 cookies | Difficulty: Easy
Ingredients
- 1/2 cup unsalted butter, softened
- 1 cup granulated sugar
- 1 cup canned pumpkin puree
- 1 large egg
- 1 tsp vanilla extract
- 2 1/2 cups all-purpose flour
- 3.4 oz box instant vanilla pudding mix
- 1 tsp baking soda
- 2 tsp ground cinnamon
- 1/2 tsp ground nutmeg
- 1/2 tsp salt
Instructions
- Preheat the oven to 350°F and line two baking sheets with parchment.
- Cream the butter and sugar until fluffy, about 2 minutes.
- Beat in the pumpkin puree, egg, and vanilla until smooth.
- Whisk the flour, pudding mix, baking soda, cinnamon, nutmeg, and salt together, then mix into the wet ingredients until just combined.
- Scoop 2-tablespoon portions onto the sheets, spaced 2 inches apart.
- Bake 11–13 minutes, until the tops look set and no longer wet.
- Cool on the pan 5 minutes before transferring to a wire rack.
Baker’s Tip
Don’t overbake — these should still look slightly pale on top when you pull them. They firm up as they cool.
Storage & Freezing
Store in an airtight container at room temperature for up to 4 days, or freeze the baked cookies for up to 2 months.
Get the complete recipe here: Pumpkin Pudding Cookies recipe.
4. Brown Sugar Pecan Cookies
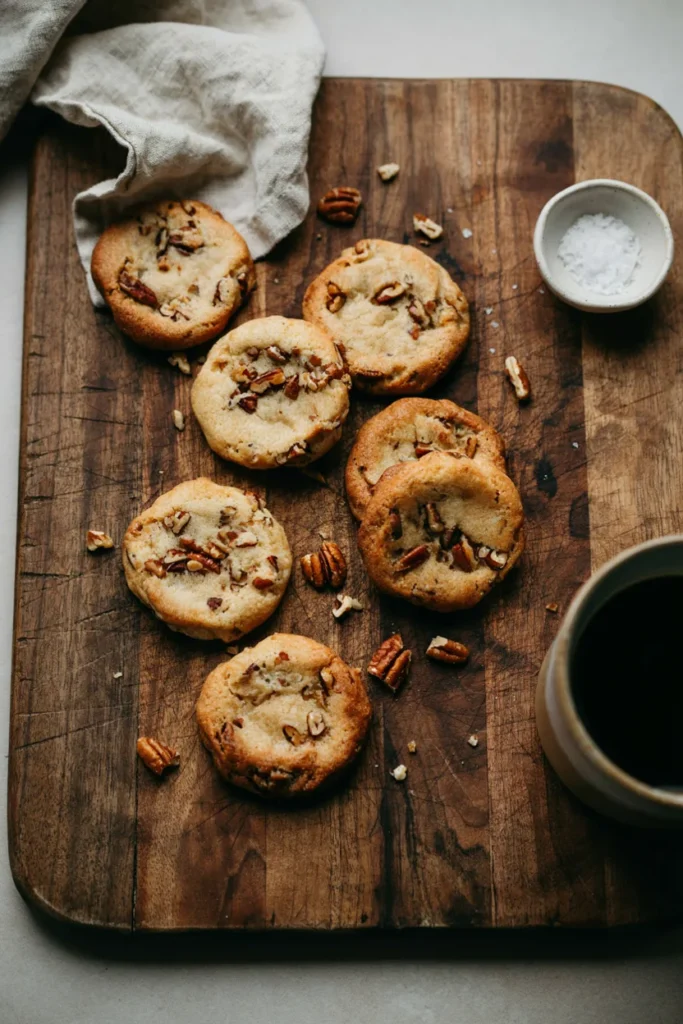
Where the pumpkin cookies above are cakey, these lean crisp at the edge and chewy in the middle, with toasted pecans giving every bite a little crunch. The brown sugar caramelizes as they bake, so the whole kitchen smells like a candy shop.
Prep Time: 15 min | Cook Time: 11 min | Total Time: 26 min | Servings: 24 cookies | Difficulty: Easy
Ingredients
- 1 cup unsalted butter, softened
- 1 1/2 cups brown sugar, packed
- 1 large egg plus 1 egg yolk
- 2 tsp vanilla extract
- 2 3/4 cups all-purpose flour
- 1 tsp baking soda
- 1/2 tsp salt
- 1 cup chopped toasted pecans
Instructions
- Preheat the oven to 350°F and line two baking sheets with parchment.
- Cream the butter and brown sugar until light and fluffy, about 3 minutes.
- Beat in the egg, egg yolk, and vanilla until smooth.
- Whisk the flour, baking soda, and salt together, then mix into the dough until just combined, and fold in the pecans.
- Scoop 1.5-tablespoon portions onto the sheets, spaced 2 inches apart.
- Bake 10–12 minutes, until the edges are golden and the centers still look slightly soft.
- Cool on the pan 5 minutes before moving to a wire rack.
Good to Know
These are one of the few entries here with nuts baked directly into the dough — flag them clearly if you’re setting up next to nut-free items.
Why You’ll Love It
That deep, toffee-like brown sugar flavor tastes like it took hours, but it’s a one-bowl dough.
Full recipe: Brown Sugar Pecan Cookies recipe.
5. Soft Pumpkin Cookies with Cream Cheese Frosting
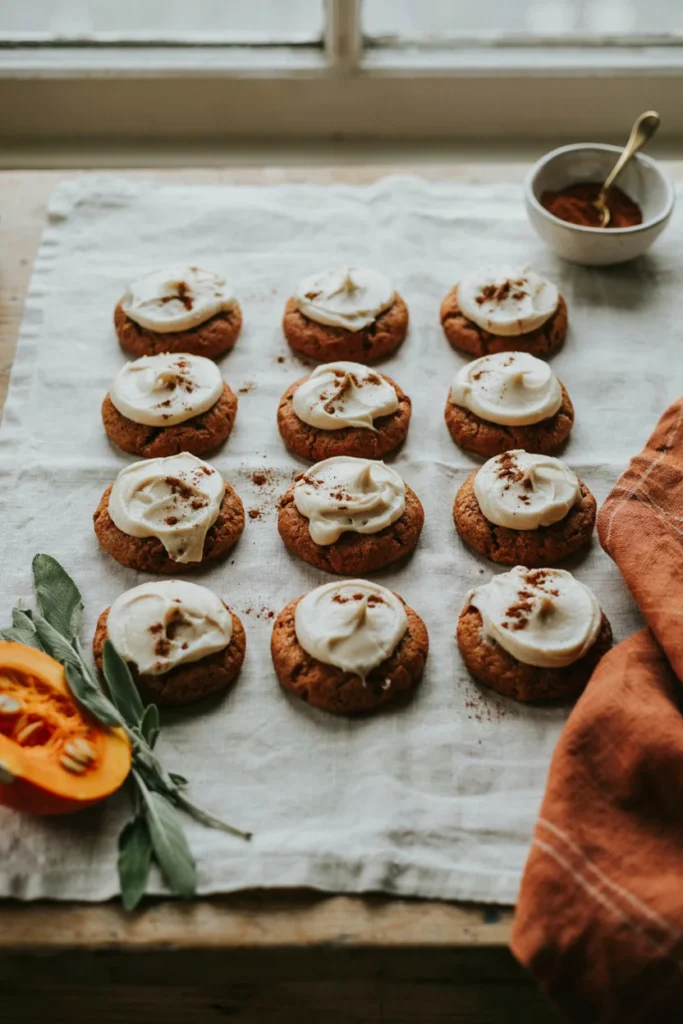
These are closer to a hand-held mini cake than a traditional cookie — soft, tender, and topped with just enough frosting to feel indulgent without being messy to eat on the go.
Prep Time: 15 min | Cook Time: 13 min | Total Time: 28 min | Servings: 22 cookies | Difficulty: Easy
Ingredients
- 1/2 cup unsalted butter, softened
- 1 cup granulated sugar
- 1 cup canned pumpkin puree
- 1 tsp vanilla extract
- 2 1/2 cups all-purpose flour
- 1 tsp baking powder
- 1 tsp baking soda
- 2 tsp ground cinnamon
- 1/4 tsp ground cloves
- 1/2 tsp salt
- 4 oz cream cheese, softened
- 2 tbsp unsalted butter, softened
- 1 1/4 cups powdered sugar
Instructions
- Preheat the oven to 350°F and line two baking sheets with parchment.
- Cream the butter and sugar until fluffy, then beat in the pumpkin puree and vanilla.
- Whisk the flour, baking powder, baking soda, cinnamon, cloves, and salt together, then fold into the wet ingredients.
- Scoop 2-tablespoon portions onto the sheets, spaced 2 inches apart, and flatten slightly.
- Bake 12–14 minutes, until the edges are set and the centers spring back to a light touch.
- Cool completely, about 20 minutes.
- Beat the cream cheese, butter, and powdered sugar until smooth, then spread over each cooled cookie.
Make-Ahead Tip
Bake and freeze the unfrosted cookies up to a month ahead, then thaw and frost the morning of the sale.
Best For
Anyone hunting for a lighter, cakier alternative to the denser pumpkin bars above.
Full recipe here: Soft Pumpkin Cookies recipe.
6. Snickerdoodles
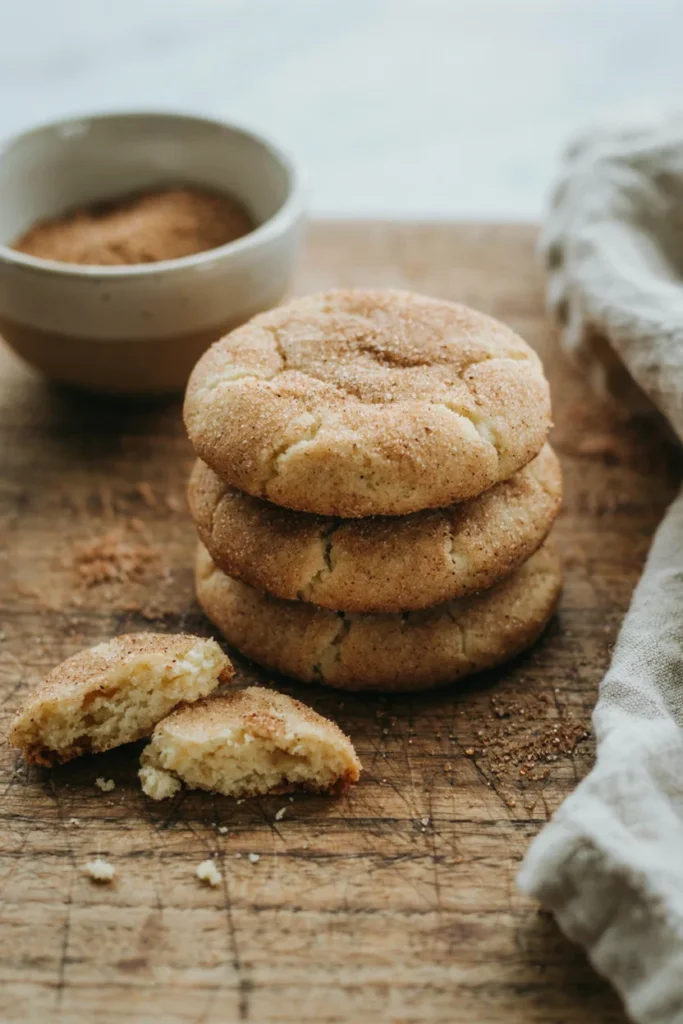
No fall bake sale table feels complete without a plate of these — crisp cinnamon-sugar edges giving way to a soft, tangy center from the cream of tartar. They’re the cookie people reach for out of nostalgia, and they never seem to last long.
Prep Time: 15 min | Cook Time: 10 min | Total Time: 25 min | Servings: 30 cookies | Difficulty: Easy
Ingredients
- 1 cup unsalted butter, softened
- 1 1/2 cups granulated sugar, divided
- 2 large eggs
- 2 3/4 cups all-purpose flour
- 2 tsp cream of tartar
- 1 tsp baking soda
- 1/4 tsp salt
- 2 tbsp ground cinnamon
Instructions
- Preheat the oven to 375°F and line two baking sheets with parchment.
- Cream the butter and 1 1/4 cups of the sugar until fluffy, then beat in the eggs.
- Whisk the flour, cream of tartar, baking soda, and salt together, then mix into the dough until just combined.
- Combine the remaining 1/4 cup sugar with the cinnamon in a small bowl.
- Roll the dough into 1.5-tablespoon balls and roll each in the cinnamon sugar.
- Place on the sheets 2 inches apart and bake 9–10 minutes, until the edges are set but the centers still look slightly soft — they’ll crackle as they cool.
Baker’s Tip
Pull them the moment the centers look just barely underbaked. Snickerdoodles firm up entirely on the pan as they cool, and overbaking is the most common way to lose that soft center.
Why You’ll Love It
A guaranteed seller — everyone knows what a snickerdoodle is, and everyone wants one.
Full recipe: Snickerdoodle recipe.
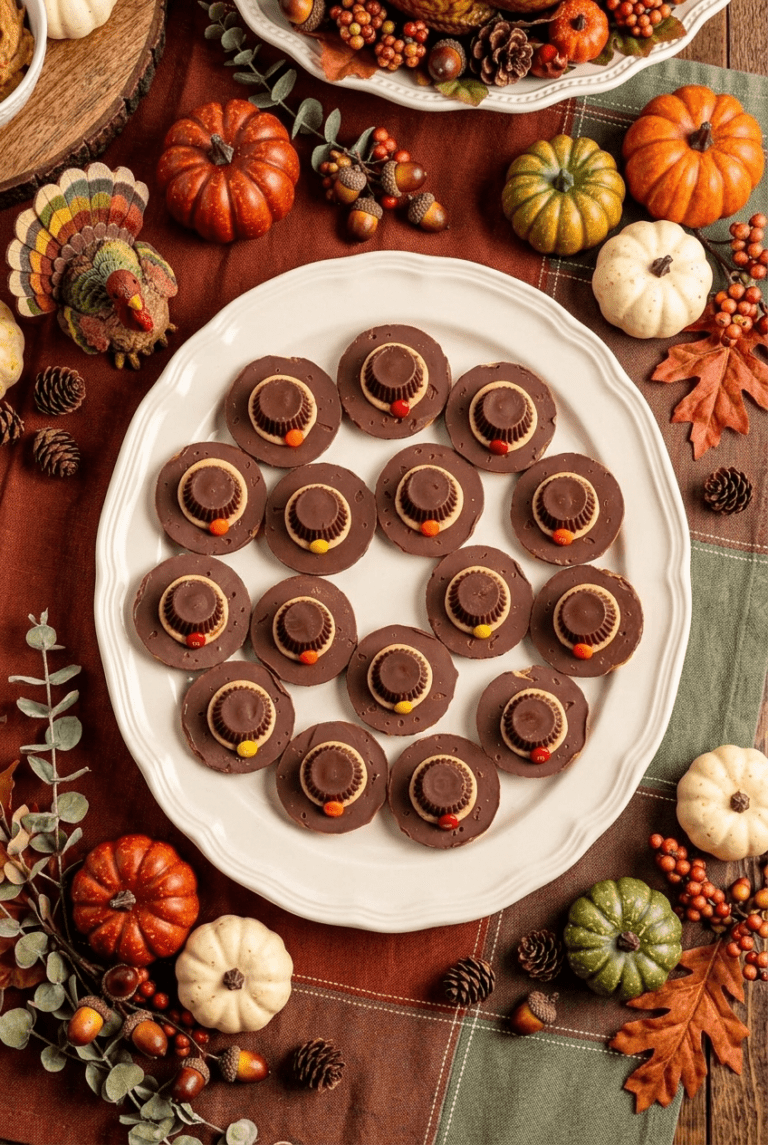
7. Pilgrim Hat Cookies
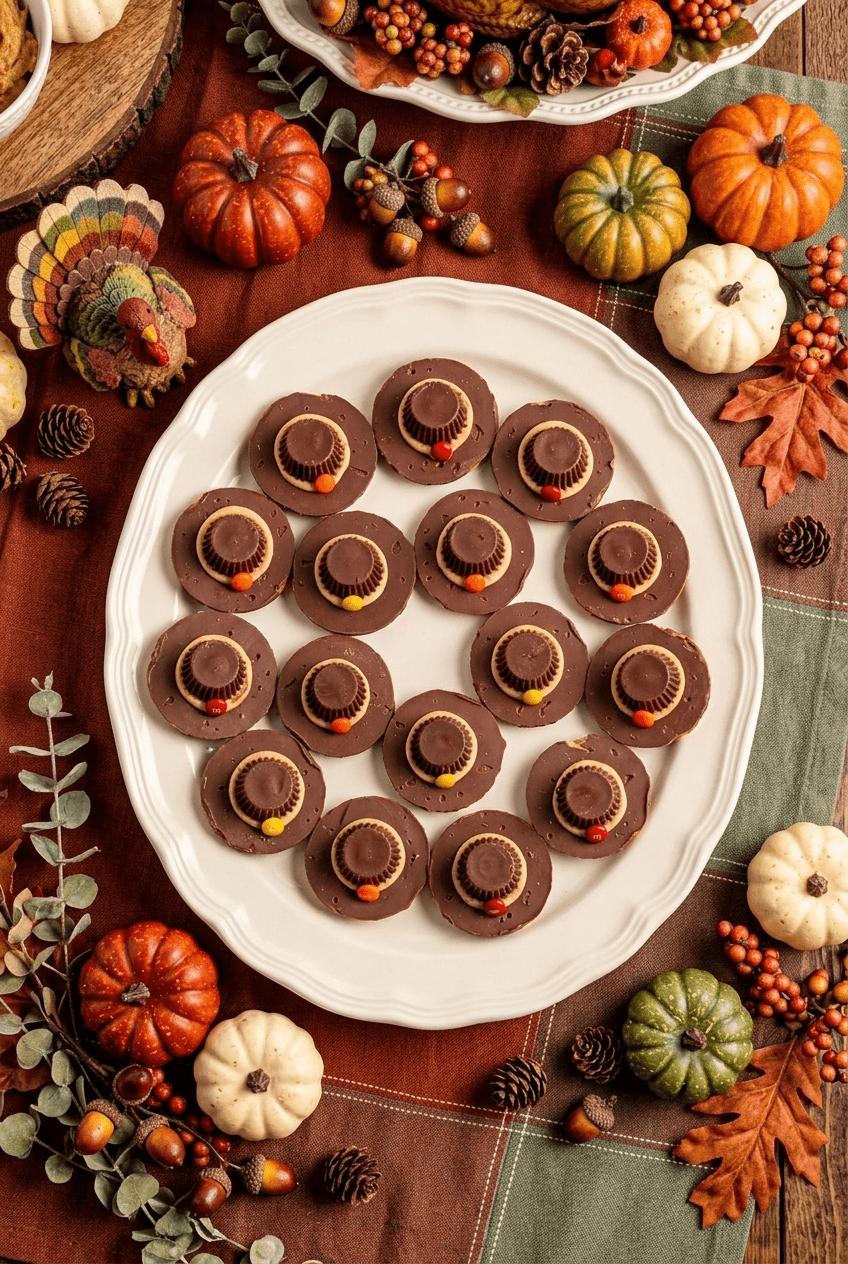
These are as much a craft project as a recipe, and that’s exactly why they sell — a novelty item like this stands out on a table full of bars and muffins, and kids especially can’t resist the little hat shape.
Prep Time: 30 min | Cook Time: 0 min | Total Time: 45 min (includes setting time) | Servings: 18 cookies | Difficulty: Easy
Ingredients
- 18 fudge-striped shortbread cookies
- 18 chocolate peanut butter cup miniatures, unwrapped
- 2 tbsp melted chocolate (for gluing)
- 1/4 cup yellow candy melts, melted
- Small piping bag or squeeze bottle
Instructions
- Line a baking sheet with parchment paper.
- Dab a small amount of melted chocolate onto the flat bottom of each peanut butter cup.
- Press the peanut butter cup, bottom-down, onto the center of each fudge-striped cookie to form the “hat.”
- Let set at room temperature for 15 minutes, until the chocolate glue firms up.
- Pipe a small rectangle of melted yellow candy melt across the base of each peanut butter cup to form the “buckle.”
- Let the buckles set for 10–15 minutes before packaging.
Flavor Variation
Swap the peanut butter cup for a mini chocolate-covered marshmallow if you’re avoiding peanuts.
Good to Know
No oven required — this is a great one to make while another batch is baking, or to hand off to a kid helper.
Full instructions and step photos: Pilgrim Hat Cookies recipe.
8. Salted Caramel Apple Blondies
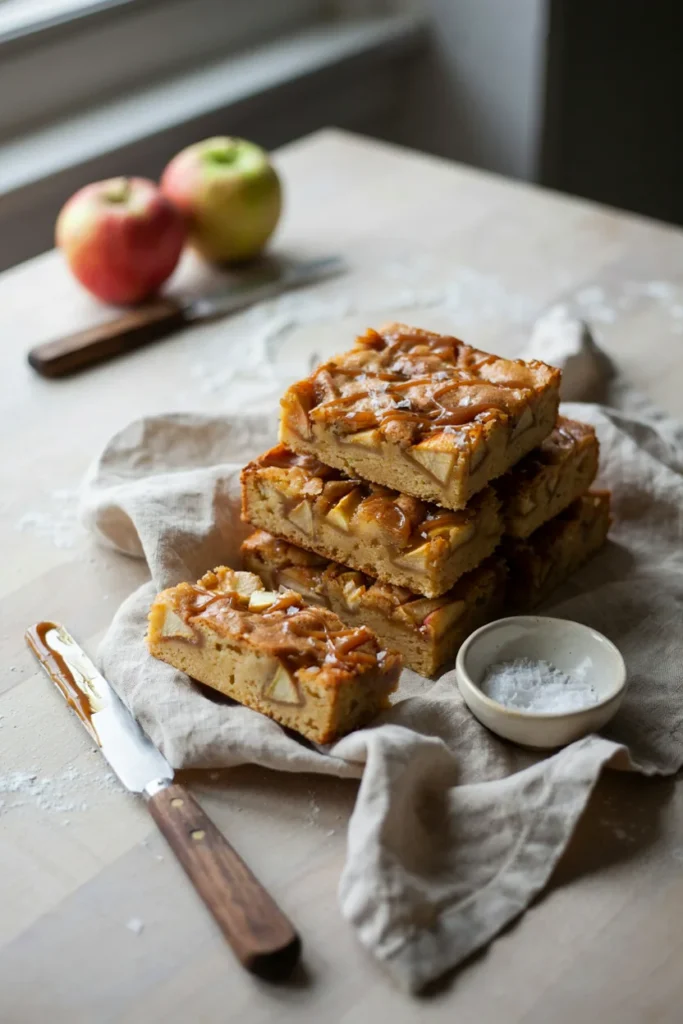
Diced fresh apple keeps every bite moist, while a caramel drizzle and a pinch of flaky salt on top give these blondies a bakery-case finish that makes them look far fancier than the one-bowl method behind them.
Prep Time: 15 min | Cook Time: 30 min | Total Time: 45 min | Servings: 20 bars | Difficulty: Easy
Ingredients
- 3/4 cup unsalted butter, melted
- 1 1/4 cups brown sugar, packed
- 2 large eggs
- 1 tsp vanilla extract
- 2 cups all-purpose flour
- 1 tsp baking powder
- 1/2 tsp salt
- 1 tsp ground cinnamon
- 1 1/2 cups peeled, finely diced apple (about 2 medium apples)
- 1/2 cup store-bought caramel sauce
- 1/2 tsp flaky sea salt
Instructions
- Preheat the oven to 350°F and line a 9×13-inch pan with parchment.
- Whisk the melted butter and brown sugar, then beat in the eggs and vanilla.
- Fold in the flour, baking powder, salt, and cinnamon until just combined, then fold in the diced apple.
- Spread into the pan and bake 28–30 minutes, until golden and a toothpick comes out with a few moist crumbs.
- Cool completely, about 1 hour.
- Drizzle with caramel sauce and sprinkle with flaky sea salt before cutting into 20 bars.
Good to Know
Wait to drizzle the caramel until close to packaging time — it stays glossy longer and won’t soak into the bars overnight.
Best For
The bake sale table’s answer to caramel apples, minus the stick and the sticky fingers.
Cakes, Rolls & Cheesecakes
9. Easy Pumpkin Roll
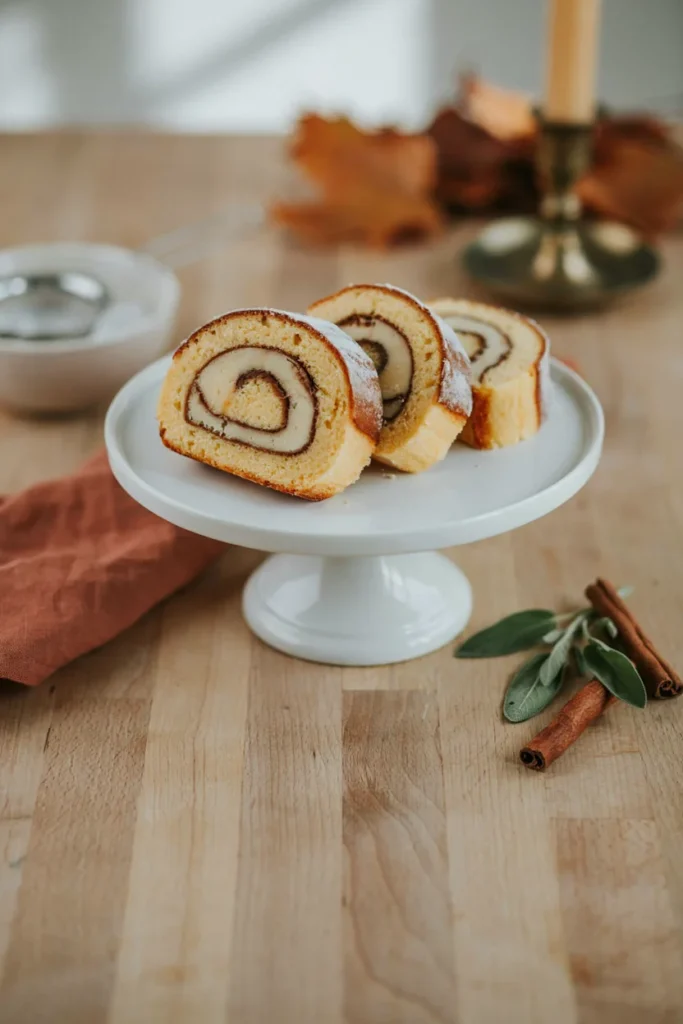
Rolled desserts always draw a crowd because they look far more advanced than they are — one thin sheet cake, rolled while warm, filled with a tangy cream cheese filling. Slice it into rounds and each piece has that signature spiral.
Prep Time: 20 min | Cook Time: 13 min | Total Time: 2 hrs (includes chilling) | Servings: 12 slices | Difficulty: Medium
Ingredients
- 3 large eggs
- 1 cup granulated sugar
- 2/3 cup canned pumpkin puree
- 3/4 cup all-purpose flour
- 1 tsp baking powder
- 2 tsp ground cinnamon
- 1/2 tsp salt
- 8 oz cream cheese, softened
- 1/4 cup unsalted butter, softened
- 1 cup powdered sugar, plus extra for dusting
- 1 tsp vanilla extract
Instructions
- Preheat the oven to 375°F and line a 10×15-inch jelly roll pan with parchment, greasing the paper.
- Beat the eggs and sugar until thick and pale, about 3 minutes, then beat in the pumpkin puree.
- Whisk the flour, baking powder, cinnamon, and salt together, then fold into the batter.
- Spread evenly in the pan and bake 12–13 minutes, until the top springs back to a light touch.
- Dust a clean kitchen towel with powdered sugar, invert the warm cake onto it, peel off the parchment, and roll the cake up in the towel from the short end. Cool completely, about 1 hour.
- Beat the cream cheese, butter, powdered sugar, and vanilla until smooth.
- Unroll the cooled cake, spread with the filling, and re-roll without the towel. Chill at least 30 minutes before slicing and dusting with powdered sugar.
Baker’s Tip
Rolling the cake while it’s still warm is what prevents cracking — don’t let it cool flat first.
Storage & Freezing
Wrap tightly and refrigerate up to 4 days, or freeze the filled roll (unsliced) for up to 2 months.
Full step-by-step: Easy Pumpkin Roll recipe.
10. Pumpkin Cream Cheese Bundt Cake
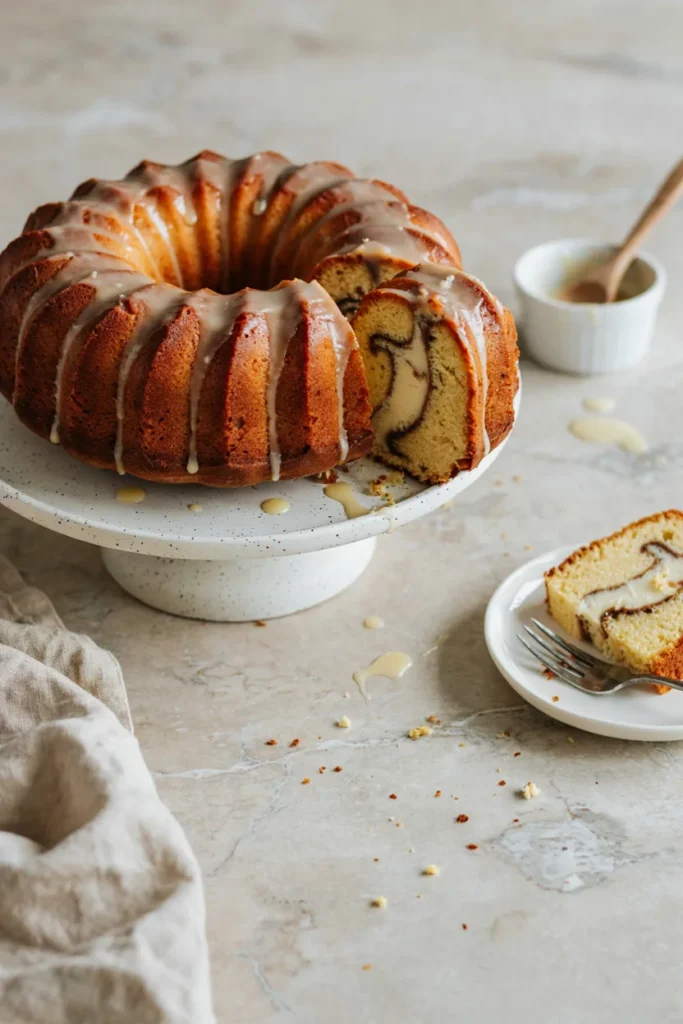
This is the showstopper of the table — a hidden ribbon of cream cheese swirled through the center of a moist pumpkin cake, finished with a simple glaze. Slice it into thin wedges and it stretches to serve a crowd.
Prep Time: 20 min | Cook Time: 55 min | Total Time: 1 hr 30 min | Servings: 16 slices | Difficulty: Medium
Ingredients
- 8 oz cream cheese, softened
- 1/4 cup granulated sugar
- 1 large egg
- 3 cups all-purpose flour
- 2 tsp baking powder
- 1 tsp baking soda
- 2 1/2 tsp ground cinnamon
- 1/2 tsp ground nutmeg
- 1/2 tsp salt
- 1 1/2 cups brown sugar, packed
- 1 cup vegetable oil
- 15 oz canned pumpkin puree
- 4 large eggs
- 1 cup powdered sugar
- 2 tbsp milk
Instructions
- Preheat the oven to 350°F and generously grease a 10-cup bundt pan.
- Beat the cream cheese, granulated sugar, and 1 egg until smooth; set aside.
- Whisk the flour, baking powder, baking soda, cinnamon, nutmeg, and salt together.
- In a separate bowl, whisk the brown sugar, oil, pumpkin puree, and 4 eggs until smooth, then fold in the dry ingredients.
- Pour half the pumpkin batter into the pan, spoon the cream cheese mixture over it in a ring (avoiding the edges), then top with the remaining pumpkin batter.
- Bake 50–55 minutes, until a toothpick inserted away from the cream cheese layer comes out clean.
- Cool in the pan 20 minutes, then invert onto a rack to cool completely, about 1 hour.
- Whisk the powdered sugar and milk until pourable, then drizzle over the cooled cake.
Baker’s Tip
Keep the cream cheese layer away from the edges of the pan so it stays hidden inside the cake instead of leaking out during baking.
Best For
Bake sales where you want one impressive centerpiece alongside the smaller grab-and-go items.
Full recipe here: Pumpkin Cream Cheese Bundt Cake recipe.
11. Cinnamon Apple Cake
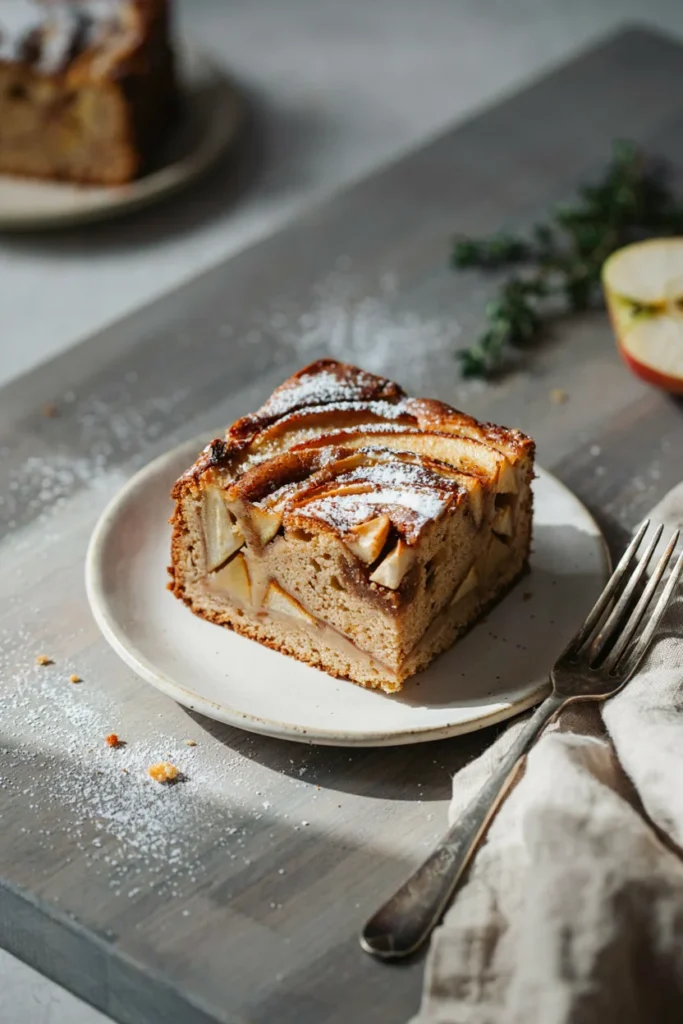
Layers of thinly sliced apple and cinnamon sugar run through this cake instead of just sitting on top, so every square has that swirl running through the center. It’s dense enough to hold together as individually cut pieces, not crumbly like a streusel cake.
Prep Time: 20 min | Cook Time: 50 min | Total Time: 1 hr 10 min | Servings: 20 squares | Difficulty: Easy
Ingredients
- 3 medium apples, peeled and thinly sliced
- 1/4 cup granulated sugar
- 2 tbsp ground cinnamon, divided
- 1/2 cup unsalted butter, softened
- 1 cup granulated sugar
- 2 large eggs
- 1 tsp vanilla extract
- 2 cups all-purpose flour
- 2 tsp baking powder
- 1/2 cup milk
Instructions
- Preheat the oven to 350°F and grease a 9×13-inch pan.
- Toss the sliced apples with 1/4 cup sugar and 1 tbsp cinnamon; set aside.
- Cream the butter and 1 cup sugar until fluffy, then beat in the eggs and vanilla.
- Whisk the flour and baking powder together, then add to the batter alternately with the milk, mixing just until smooth.
- Spread half the batter in the pan, layer with half the apple mixture, then repeat with the remaining batter and apples, swirling gently with a knife.
- Sprinkle the remaining 1 tbsp cinnamon over the top.
- Bake 45–50 minutes, until a toothpick inserted in the center comes out clean.
- Cool completely, about 1 hour, before cutting into squares.
Storage & Freezing
Keeps well at room temperature, covered, for up to 3 days — the apples actually help it stay moist longer than most cakes.
Why You’ll Love It
It smells like an apple pie baking, at a fraction of the effort.
Full recipe: Cinnamon Apple Cake recipe.
12. Mini Pumpkin Spice Cakes
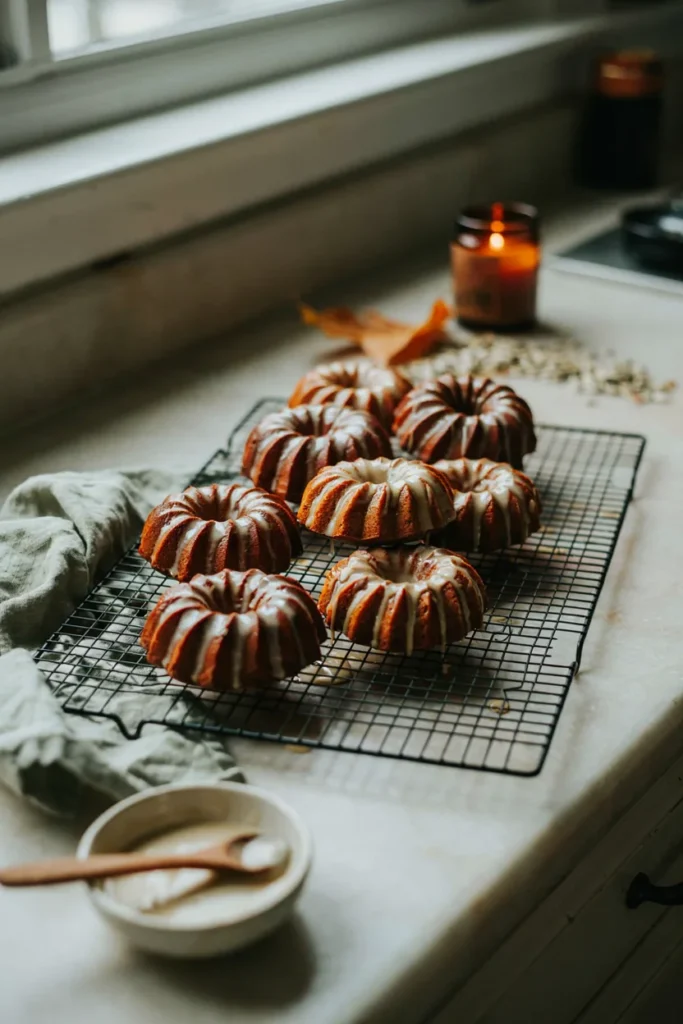
Baked in individual portions instead of one large cake, these give you all the appeal of a showstopper bundt without the slicing — each buyer gets their own perfectly portioned little cake to grab and go.
Prep Time: 15 min | Cook Time: 22 min | Total Time: 45 min | Servings: 12 mini cakes | Difficulty: Easy
Ingredients
- 1 3/4 cups all-purpose flour
- 1 1/2 tsp baking powder
- 1/2 tsp baking soda
- 2 tsp pumpkin pie spice
- 1/2 tsp salt
- 1 cup canned pumpkin puree
- 3/4 cup granulated sugar
- 1/2 cup vegetable oil
- 2 large eggs
- 1 tsp vanilla extract
- 1 cup powdered sugar
- 2 tbsp milk
Instructions
- Preheat the oven to 350°F and grease a 12-cavity mini bundt pan.
- Whisk the flour, baking powder, baking soda, pumpkin pie spice, and salt together.
- In a separate bowl, whisk the pumpkin puree, sugar, oil, eggs, and vanilla until smooth.
- Fold the dry ingredients into the wet ingredients until just combined.
- Divide the batter evenly among the mini bundt cavities, filling each about two-thirds full.
- Bake 20–22 minutes, until a toothpick inserted in the center comes out clean.
- Cool in the pan 10 minutes, then turn out onto a rack to cool completely.
- Whisk the powdered sugar and milk until pourable, then drizzle over the cooled cakes.
Good to Know
No mini bundt pan? A standard muffin tin works fine — just skip the drizzle pattern and dust with powdered sugar instead.
Best For
Buyers who want cake but don’t want to deal with a fork and plate at the table.
Original inspiration and full-size version here: Pumpkin Cakes recipe.
13. Pecan Pie Cheesecake Bars
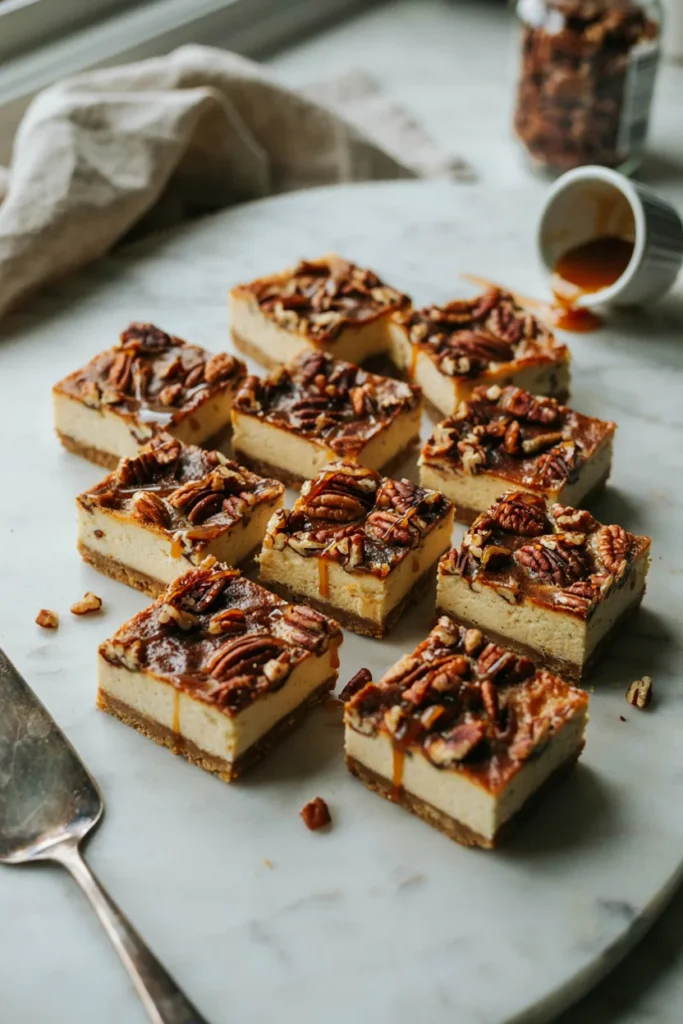
This one splits the difference between two Thanksgiving classics — a creamy cheesecake layer topped with the gooey, nutty topping of a pecan pie, all baked into bars that are far easier to portion and box than either dessert on its own.
Prep Time: 20 min | Cook Time: 45 min | Total Time: 5 hrs (includes chilling) | Servings: 20 bars | Difficulty: Medium
Ingredients
- 1 1/2 cups graham cracker crumbs
- 6 tbsp unsalted butter, melted
- 16 oz cream cheese, softened
- 2/3 cup granulated sugar
- 2 large eggs
- 1 tsp vanilla extract
- 1 cup chopped pecans
- 3/4 cup brown sugar, packed
- 1/3 cup corn syrup
- 3 tbsp unsalted butter, melted
- 1/2 tsp salt
Instructions
- Preheat the oven to 325°F and line a 9×13-inch pan with parchment.
- Mix the graham cracker crumbs with 6 tbsp melted butter and press firmly into the bottom of the pan. Bake 8 minutes, then set aside.
- Beat the cream cheese and granulated sugar until smooth, then beat in the eggs one at a time and the vanilla.
- Pour over the crust and bake 25–28 minutes, until the edges are set and the center jiggles slightly.
- Cool 20 minutes while you make the topping: whisk the pecans, brown sugar, corn syrup, 3 tbsp melted butter, and salt together.
- Spread the pecan topping evenly over the cheesecake layer and bake an additional 12–15 minutes, until bubbling at the edges.
- Cool completely, then refrigerate at least 4 hours before cutting into 20 bars.
Make-Ahead Tip
These need to chill fully to slice cleanly, so bake them a full day ahead of the sale.
Storage & Freezing
Keep refrigerated in an airtight container up to 5 days; these travel best in a cooler bag if the sale is more than an hour from home.
Full recipe and step photos: Pecan Pie Cheesecake recipe.
Muffins & Quick Breads
14. Cranberry Orange Muffins
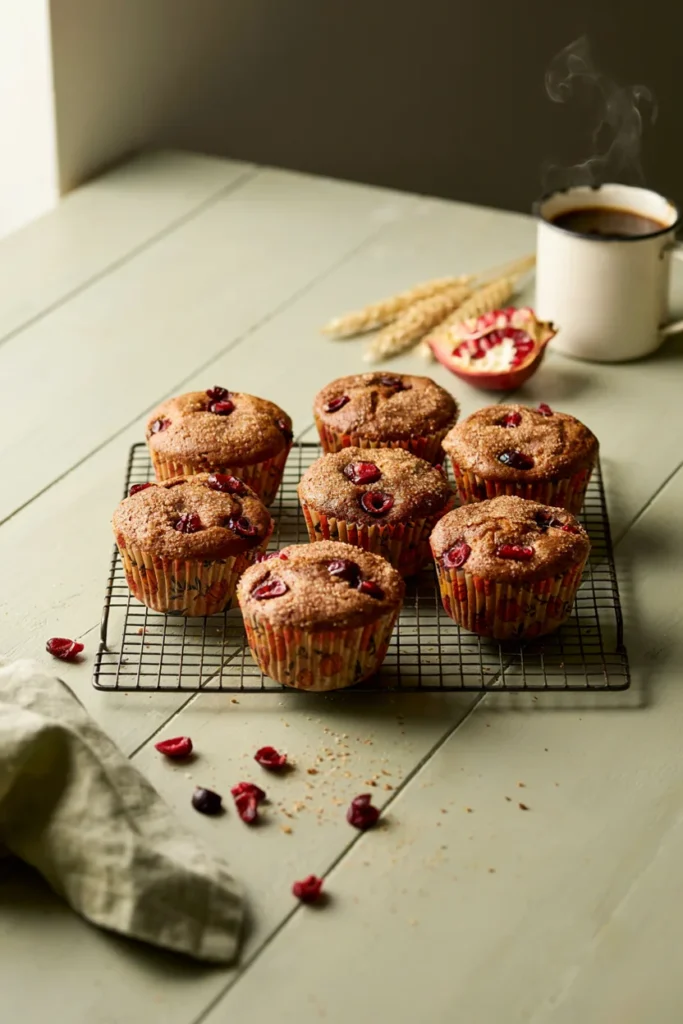
Bright orange zest and tart cranberries cut through the richness of everything else on this list — a welcome contrast next to a table full of pumpkin and caramel. The tops bake up domed and crackly, the way a bakery muffin should.
Prep Time: 15 min | Cook Time: 20 min | Total Time: 35 min | Servings: 12 muffins | Difficulty: Easy
Ingredients
- 2 cups all-purpose flour
- 3/4 cup granulated sugar, plus 2 tbsp for topping
- 2 1/2 tsp baking powder
- 1/2 tsp salt
- 1 tbsp orange zest
- 2 large eggs
- 1/2 cup vegetable oil
- 3/4 cup milk
- 1/3 cup fresh orange juice
- 1 1/2 cups fresh or dried cranberries (dried, roughly chopped)
Instructions
- Preheat the oven to 400°F and line a 12-cup muffin tin with liners.
- Whisk the flour, 3/4 cup sugar, baking powder, salt, and orange zest together.
- In a separate bowl, whisk the eggs, oil, milk, and orange juice, then fold into the dry ingredients until just combined. Fold in the cranberries.
- Divide the batter evenly among the liners and sprinkle the tops with the remaining 2 tbsp sugar.
- Bake 18–20 minutes, until the tops are golden and a toothpick comes out clean.
- Cool in the pan 5 minutes before transferring to a wire rack.
Good to Know
Use fall pumpkin maple leaf cupcake wrappers in place of plain liners to give these a seasonal look on the table without any extra effort.
Why You’ll Love It
A fresher, tangier option for buyers who want fall flavor without more pumpkin or caramel.
15. Maple Pumpkin Mini Loaves
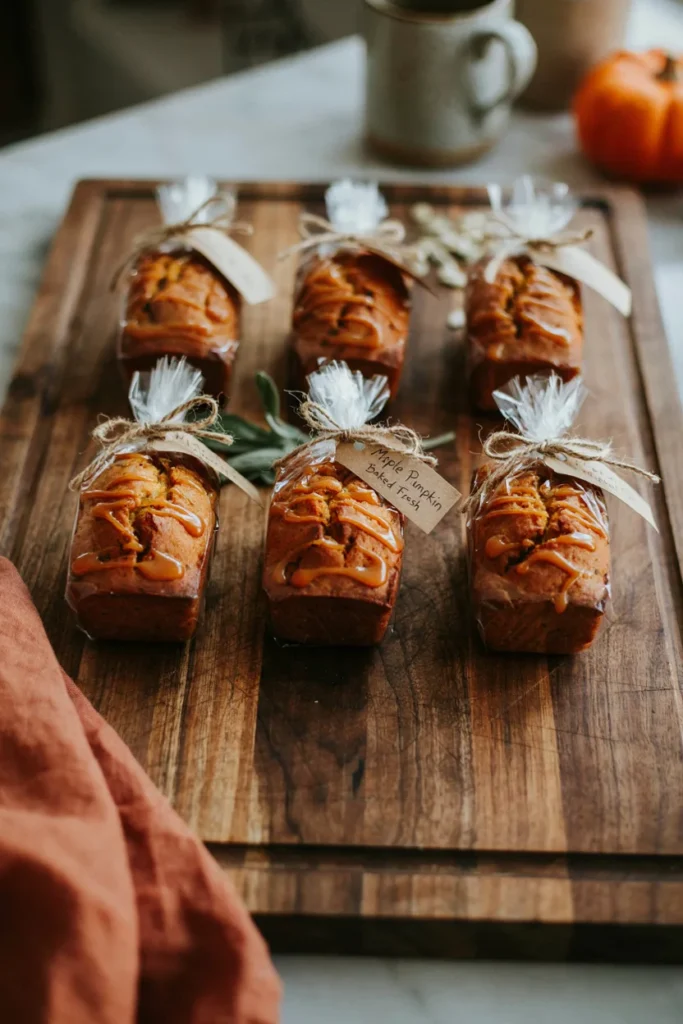
Baking this batter in mini loaf pans instead of one large loaf means every buyer takes home their own complete loaf — no slicing, no crumbs left on the table, and they look like a genuine gift rather than a bake sale grab.
Prep Time: 15 min | Cook Time: 35 min | Total Time: 55 min | Servings: 6 mini loaves | Difficulty: Easy
Ingredients
- 1 3/4 cups all-purpose flour
- 1 tsp baking soda
- 1/2 tsp baking powder
- 2 tsp pumpkin pie spice
- 1/2 tsp salt
- 15 oz canned pumpkin puree
- 1 cup granulated sugar
- 1/2 cup vegetable oil
- 2 large eggs
- 1/4 cup pure maple syrup
- 1 cup powdered sugar
- 2 tbsp pure maple syrup (for glaze)
Instructions
- Preheat the oven to 350°F and grease six mini loaf pans (or line with mini loaf liners).
- Whisk the flour, baking soda, baking powder, pumpkin pie spice, and salt together.
- In a separate bowl, whisk the pumpkin puree, granulated sugar, oil, eggs, and 1/4 cup maple syrup until smooth.
- Fold the dry ingredients into the wet ingredients until just combined.
- Divide the batter evenly among the loaf pans, filling each about two-thirds full.
- Bake 32–35 minutes, until a toothpick inserted in the center comes out clean.
- Cool in the pans 10 minutes, then turn out onto a rack to cool completely.
- Whisk the powdered sugar and 2 tbsp maple syrup until pourable, then drizzle over the cooled loaves.
Baker’s Tip
A set of mini loaf pans with lids and spoons makes this recipe simple to bake, gift-wrap, and transport all in one — the included lids mean you can skip separate packaging entirely.
Best For
Buyers looking for something to take home for breakfast the next morning, not just a single sweet bite.
16. Apple Cinnamon Streusel Muffins
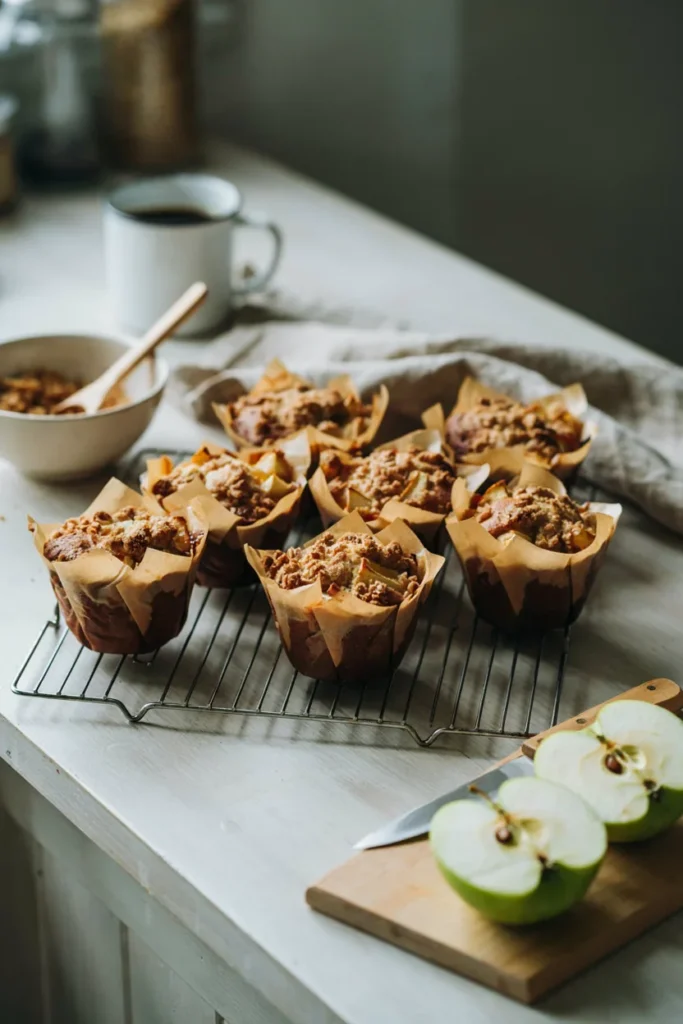
Fresh diced apple keeps the crumb moist, while a generous streusel topping gives these muffins a crunchy contrast that a plain muffin can’t match — the kind of texture that makes people go back for a second one.
Prep Time: 20 min | Cook Time: 22 min | Total Time: 42 min | Servings: 12 muffins | Difficulty: Easy
Ingredients
- 2 cups all-purpose flour, divided
- 2/3 cup brown sugar, packed
- 2 1/2 tsp baking powder
- 1/2 tsp salt
- 1 1/2 tsp ground cinnamon, divided
- 2 large eggs
- 1/2 cup vegetable oil
- 3/4 cup milk
- 1 1/2 cups peeled, finely diced apple
- 1/3 cup granulated sugar (for streusel)
- 3 tbsp cold unsalted butter, cubed (for streusel)
Instructions
- Preheat the oven to 400°F and line a 12-cup muffin tin with liners.
- Whisk 1 3/4 cups flour, brown sugar, baking powder, salt, and 1 tsp cinnamon together.
- In a separate bowl, whisk the eggs, oil, and milk, then fold into the dry ingredients until just combined. Fold in the diced apple.
- For the streusel, combine the remaining 1/4 cup flour, granulated sugar, and 1/2 tsp cinnamon, then cut in the cold butter with a fork until crumbly.
- Divide the batter among the liners and sprinkle each generously with streusel.
- Bake 20–22 minutes, until golden and a toothpick comes out clean.
- Cool in the pan 5 minutes before moving to a wire rack.
Substitutions
Pears work just as well as apples here if that’s what you have on hand.
Why You’ll Love It
That streusel topping means these read as a “special” muffin, not an everyday one — worth the higher price point at the table.
Hand Pies, Pastries & Whoopie Pies
17. Mini Apple Hand Pies
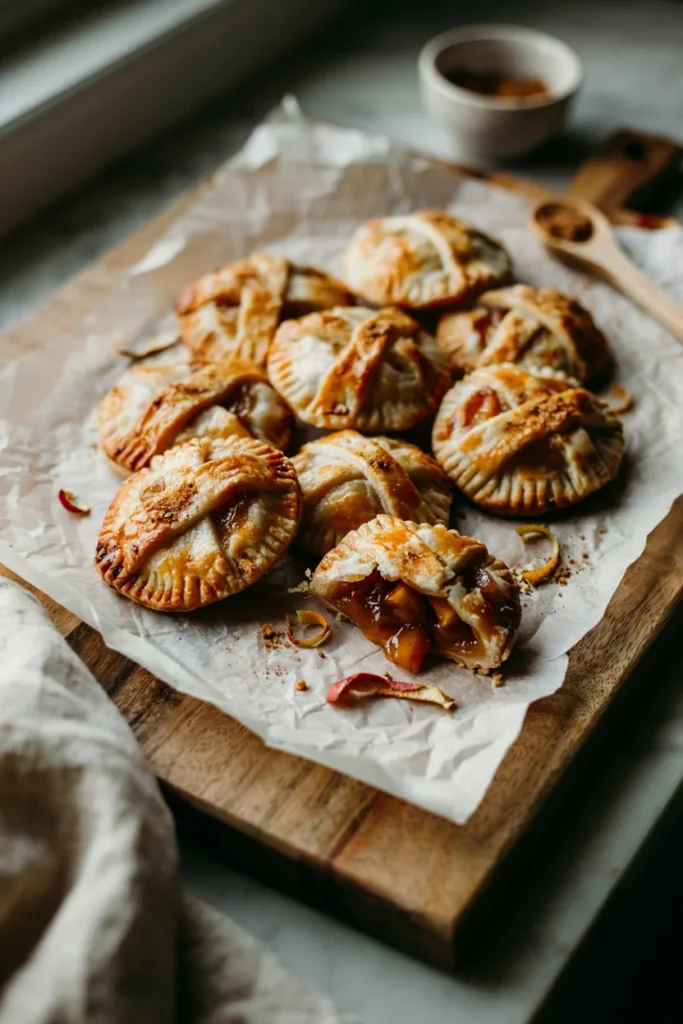
These are the quintessential bake sale item — all the flavor of a full apple pie, sized down into a portable, handheld pastry with no fork or plate required. The lattice cutout lets a little steam escape and gives a peek at the spiced filling inside.
Prep Time: 30 min | Cook Time: 22 min | Total Time: 55 min | Servings: 12 hand pies | Difficulty: Medium
Ingredients
- 2 refrigerated pie crusts (or 1 double batch homemade)
- 2 cups peeled, finely diced apple
- 1/3 cup granulated sugar
- 1 tbsp cornstarch
- 1 1/2 tsp ground cinnamon
- 1/4 tsp ground nutmeg
- 1 tbsp lemon juice
- 1 large egg, beaten (for egg wash)
- 2 tbsp coarse sugar, for topping
Instructions
- Preheat the oven to 400°F and line a baking sheet with parchment.
- Toss the diced apple with the granulated sugar, cornstarch, cinnamon, nutmeg, and lemon juice.
- Roll out the pie crusts and cut into 24 rounds using a 4-inch cutter.
- Spoon about 2 tablespoons of the apple filling onto the center of 12 rounds, leaving a 1/2-inch border.
- Cut a small lattice or vent shape into the remaining 12 rounds, then place over the filling and crimp the edges with a fork to seal.
- Brush the tops with egg wash and sprinkle with coarse sugar.
- Bake 20–22 minutes, until deep golden brown.
- Cool at least 20 minutes before packaging — the filling stays very hot.
Make-Ahead Tip
Short on time? Skip making the filling from scratch and use this Instant Pot apple pie filling instead — it comes together in minutes and tastes just as good tucked into the crust.
Storage & Freezing
Freeze the unbaked, assembled hand pies for up to 2 months and bake straight from frozen, adding 5–7 extra minutes.
18. Pumpkin Pie Turnovers
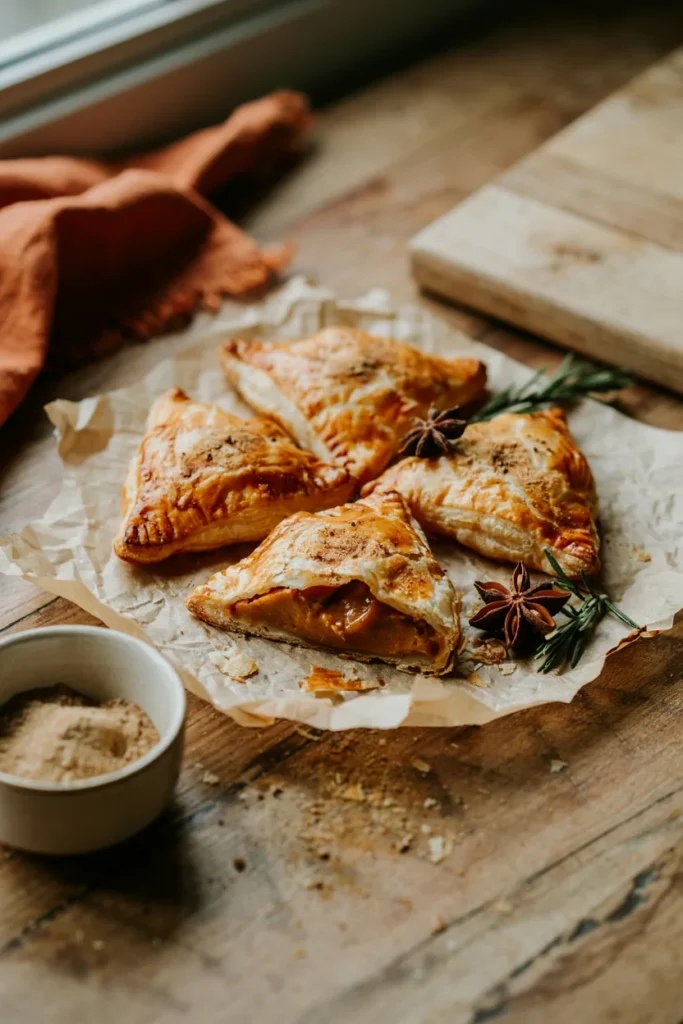
Store-bought puff pastry does all the heavy lifting here, puffing into shatter-crisp layers around a creamy, spiced pumpkin filling. They come together faster than any pie crust recipe and still taste like a from-scratch bakery pastry.
Prep Time: 15 min | Cook Time: 20 min | Total Time: 35 min | Servings: 8 turnovers | Difficulty: Easy
Ingredients
- 1 sheet puff pastry, thawed
- 3/4 cup canned pumpkin puree
- 1/4 cup brown sugar, packed
- 1 tsp pumpkin pie spice
- 1 tbsp cornstarch
- 1 large egg, beaten (for egg wash)
- 2 tbsp cinnamon sugar, for topping
Instructions
- Preheat the oven to 400°F and line a baking sheet with parchment.
- Whisk the pumpkin puree, brown sugar, pumpkin pie spice, and cornstarch together until smooth.
- Roll the puff pastry into a 12×12-inch square and cut into 4 squares, then cut each in half diagonally to make 8 triangles.
- Spoon about 1 1/2 tablespoons of filling onto one half of each triangle, leaving a 1/2-inch border, then fold over and crimp the edges with a fork.
- Brush the tops with egg wash and sprinkle with cinnamon sugar.
- Bake 18–20 minutes, until puffed and deep golden brown.
- Cool at least 15 minutes before packaging.
Baker’s Tip
Keep the puff pastry cold right up until it goes in the oven — a warm, soft dough won’t puff nearly as dramatically.
Good to Know
These are best eaten within a day of baking, since puff pastry loses its crispness quickly — a good pick for a sale happening the same afternoon you bake.
19. Pumpkin Whoopie Pies with Cinnamon Cream Filling
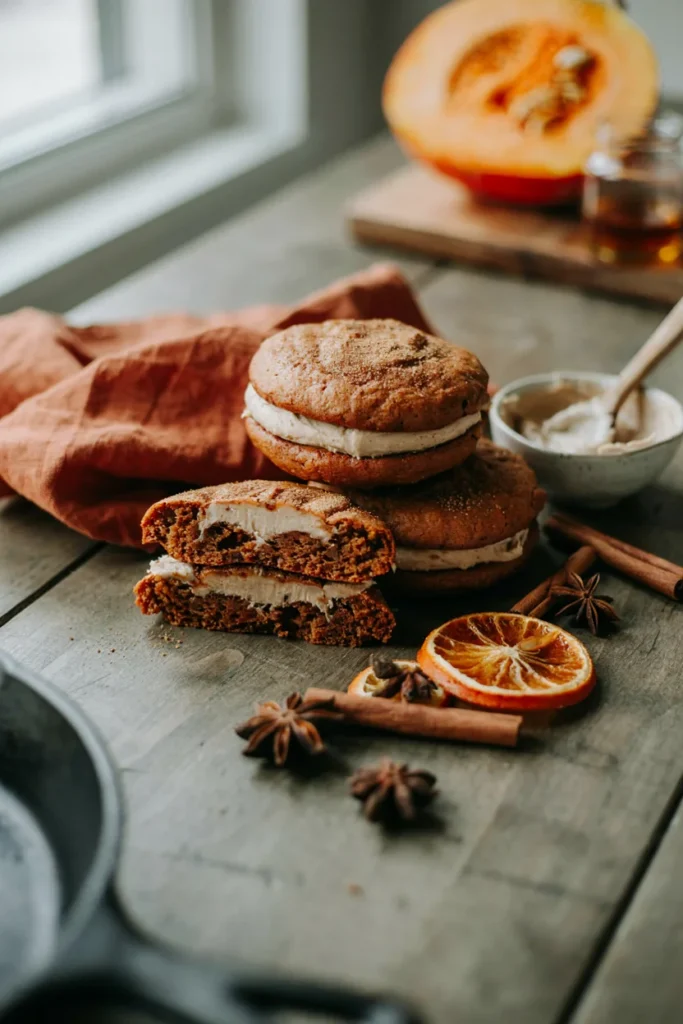
Two soft, cake-like pumpkin rounds sandwich a thick layer of cinnamon-spiced cream filling — closer to a portable little cake than a cookie, and one of the few items on this list that reads as genuinely special rather than familiar.
Prep Time: 20 min | Cook Time: 12 min | Total Time: 40 min | Servings: 14 whoopie pies | Difficulty: Medium
Ingredients
- 2 cups all-purpose flour
- 1 tsp baking soda
- 1 tsp baking powder
- 2 tsp pumpkin pie spice
- 1/2 tsp salt
- 1 cup canned pumpkin puree
- 3/4 cup brown sugar, packed
- 1/2 cup vegetable oil
- 1 large egg
- 1 tsp vanilla extract
- 4 oz cream cheese, softened
- 1/4 cup unsalted butter, softened
- 2 cups powdered sugar
- 1 tsp ground cinnamon
Instructions
- Preheat the oven to 350°F and line two baking sheets with parchment.
- Whisk the flour, baking soda, baking powder, pumpkin pie spice, and salt together.
- In a separate bowl, whisk the pumpkin puree, brown sugar, oil, egg, and vanilla until smooth, then fold in the dry ingredients.
- Drop 2-tablespoon portions of batter onto the sheets, spaced 2 inches apart, and smooth into rounds with the back of a spoon.
- Bake 11–12 minutes, until the tops spring back to a light touch. Cool completely, about 20 minutes.
- Beat the cream cheese and butter until smooth, then beat in the powdered sugar and cinnamon until fluffy.
- Spread or pipe the filling onto the flat side of half the cakes, then sandwich with the remaining halves.
Storage & Freezing
Refrigerate assembled whoopie pies in an airtight container for up to 4 days, since the cream filling is perishable at room temperature for more than a few hours.
Best For
An indoor bake sale table, since the filling softens quickly in warm weather.
Full recipe here: Pumpkin Whoopie Pies recipe.
20. Ghost Halloween Cupcakes
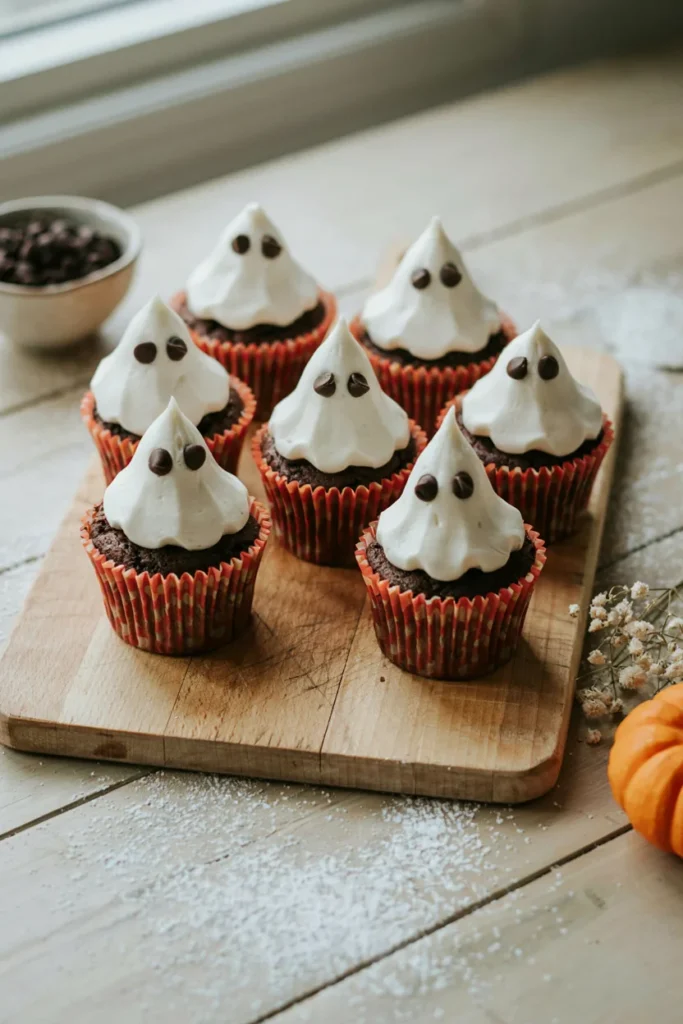
The buttercream is piped tall and swirled into a simple ghost shape, then finished with two chocolate chip eyes — a fun, kid-approved centerpiece for the Halloween end of your fall bake sale table without requiring any special decorating skill.
Prep Time: 25 min | Cook Time: 18 min | Total Time: 55 min | Servings: 12 cupcakes | Difficulty: Medium
Ingredients
- 1 1/3 cups all-purpose flour
- 1/2 cup unsweetened cocoa powder
- 1 tsp baking soda
- 1/2 tsp salt
- 1 cup granulated sugar
- 1/2 cup vegetable oil
- 2 large eggs
- 1/2 cup buttermilk
- 1/2 cup hot water
- 1 cup unsalted butter, softened (for frosting)
- 4 cups powdered sugar
- 2 tbsp heavy cream
- 24 mini chocolate chips (for eyes)
Instructions
- Preheat the oven to 350°F and line a 12-cup muffin tin with Thanksgiving and fall themed cupcake liners.
- Whisk the flour, cocoa powder, baking soda, and salt together.
- In a separate bowl, whisk the sugar, oil, eggs, and buttermilk, then fold into the dry ingredients. Stir in the hot water last until the batter is smooth and thin.
- Divide among the liners and bake 16–18 minutes, until a toothpick comes out clean. Cool completely, about 30 minutes.
- Beat the butter until fluffy, then gradually beat in the powdered sugar and cream until light and spreadable.
- Fit a piping bag with a large round tip and pipe a tall swirl of frosting onto each cupcake to form a ghost shape.
- Press two mini chocolate chips into the top of each swirl as eyes.
Good to Know
Pipe these as close to the sale as possible — a tall buttercream swirl holds its shape best in the first few hours after piping, especially if the room is warm.
Why You’ll Love It
Novelty items like this tend to sell first at a bake sale, simply because they’re the most fun to look at on the table.
Full recipe here: Ghost Halloween Cupcakes recipe.
No-Bake & Kid-Friendly Treats
21. Halloween Rice Krispie Treats
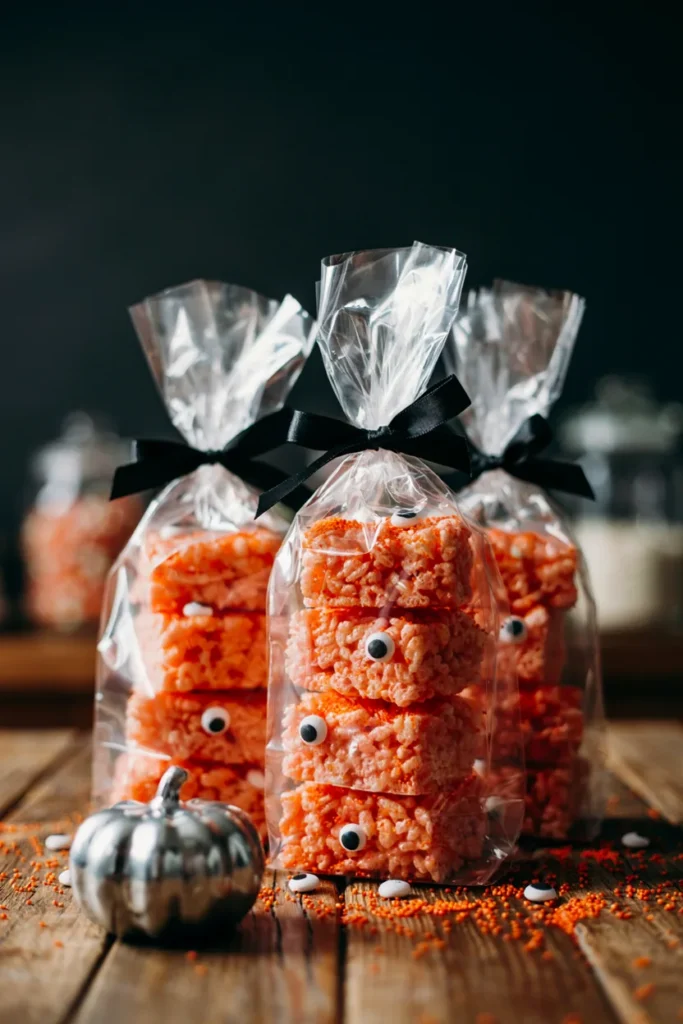
No oven time beyond melting marshmallows makes these the fastest item on this whole list — orange food coloring and a handful of candy eyeballs turn a childhood classic into a festive Halloween grab that costs almost nothing to make in bulk.
Prep Time: 10 min | Cook Time: 5 min | Total Time: 30 min (includes setting) | Servings: 16 squares | Difficulty: Easy
Ingredients
- 3 tbsp unsalted butter
- 10 oz mini marshmallows
- Orange gel food coloring
- 6 cups crisp rice cereal
- 1/4 cup candy eyeballs
- 2 tbsp orange and black sprinkles
Instructions
- Line a 9×9-inch pan with parchment paper.
- Melt the butter in a large pot over low heat, then add the marshmallows and stir until fully melted and smooth.
- Stir in a few drops of orange food coloring until evenly tinted.
- Remove from heat and fold in the cereal until fully coated.
- Press the mixture evenly into the pan using a greased spatula or parchment-lined hands.
- Immediately press candy eyeballs and sprinkles onto the top before it sets.
- Let cool at room temperature 20 minutes before cutting into 16 squares.
Good to Know
Press gently when packing the pan — over-compacting makes these dense and hard instead of light and chewy.
Best For
A last-minute contribution that a kid can help make from start to finish.
Full recipe: Halloween Rice Krispie Treats recipe.
22. Halloween Dirt Cups
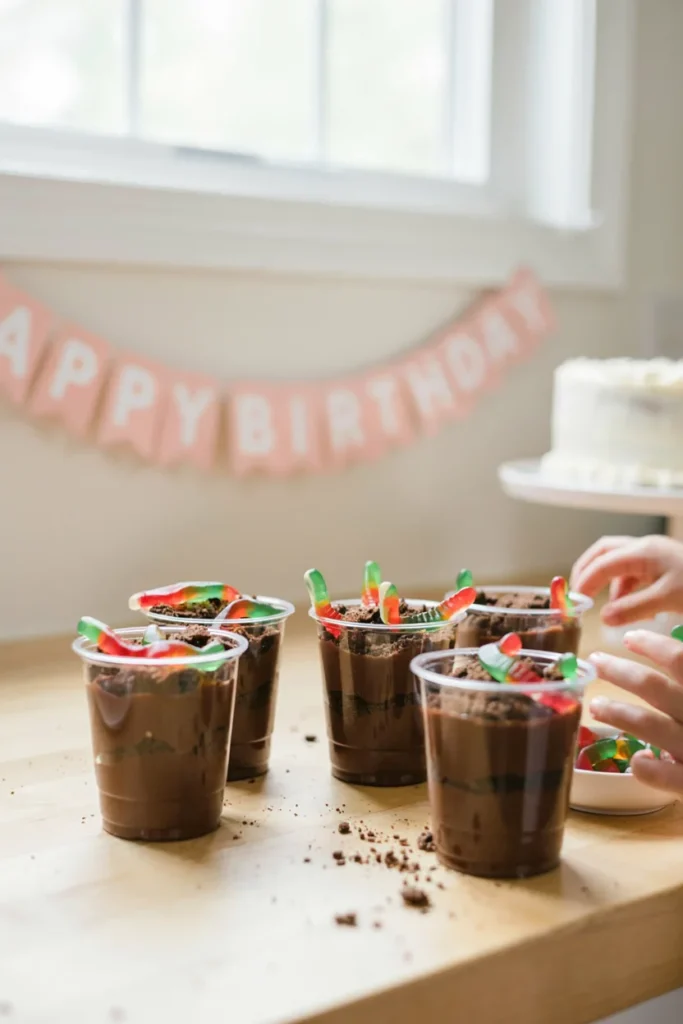
Layered right in individual cups, these need no cutting or plating at all — just hand one over as-is. The crushed cookie topping and gummy worms make them an instant hit with the kids browsing the table.
Prep Time: 15 min | Cook Time: 0 min | Total Time: 30 min (includes chilling) | Servings: 10 cups | Difficulty: Easy
Ingredients
- 3.4 oz box instant chocolate pudding mix
- 2 3/4 cups cold milk
- 20 chocolate sandwich cookies, crushed
- 10 gummy worms
- Extra crushed cookies, for topping
Instructions
- Whisk the pudding mix and cold milk together for 2 minutes, then refrigerate 5 minutes to set slightly.
- Spoon a layer of crushed cookies into the bottom of each cup.
- Top with a layer of pudding, then repeat with another layer of crushed cookies and pudding.
- Top each cup with a final layer of crushed cookies to look like dirt.
- Chill at least 15 minutes, then press a gummy worm into the top of each cup just before serving.
Good to Know
individual cupcake containers with airtight dome lids are a perfect fit for these, since they stack neatly on a table and keep the pudding from shifting during transport.
Storage & Freezing
Keep refrigerated until serving; assemble no more than a day ahead so the cookies don’t turn soggy.
Full recipe: Halloween Dirt Cups recipe.
23. Candy Corn Popcorn Bark
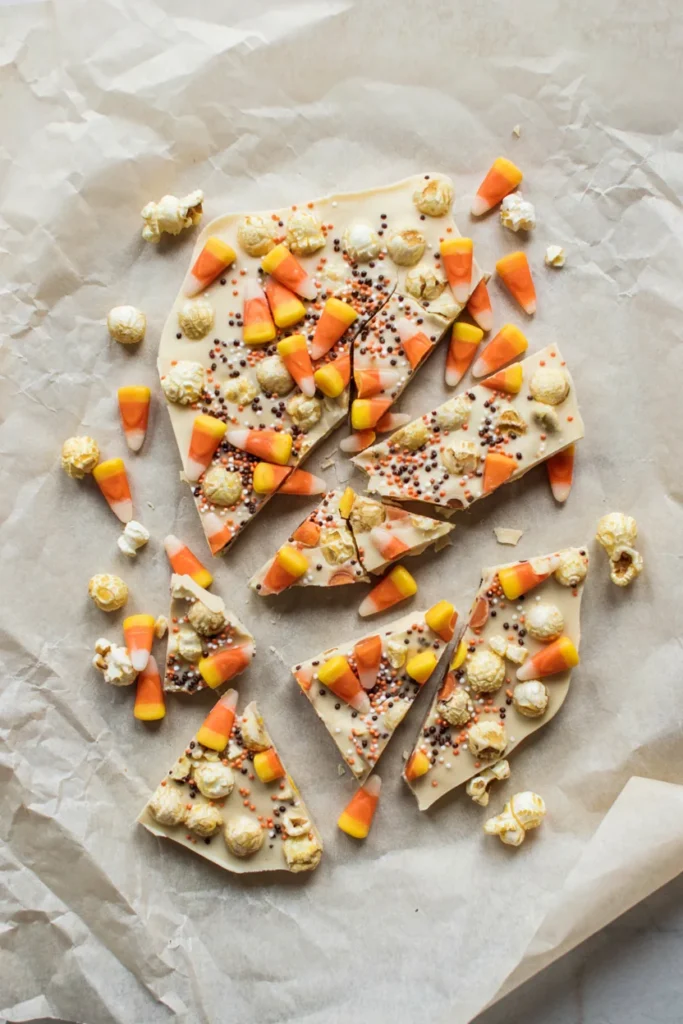
Popcorn tossed in melted white chocolate and studded with candy corn sets into a bark you simply break into pieces — no cutting, no baking, and it keeps well in a bag for days without going stale.
Prep Time: 15 min | Cook Time: 0 min | Total Time: 30 min (includes setting) | Servings: 12 servings | Difficulty: Easy
Ingredients
- 8 cups popped popcorn, unpopped kernels removed
- 16 oz white chocolate melting wafers
- 1 cup candy corn
- 2 tbsp orange and brown sprinkles
Instructions
- Line a large baking sheet with parchment paper and spread the popcorn in an even layer.
- Melt the white chocolate in the microwave in 30-second bursts, stirring between each, until smooth.
- Drizzle the melted chocolate evenly over the popcorn and gently toss to coat.
- Spread the coated popcorn back into an even layer on the sheet.
- Scatter the candy corn and sprinkles over the top while the chocolate is still wet.
- Let set at room temperature, about 20 minutes, or refrigerate 10 minutes to speed it up, then break into pieces.
Good to Know
Pick through the popcorn for any unpopped kernels before coating — the one step people skip, and the one that matters most for a good bite.
Best For
Selling by the bag rather than the piece, since it breaks unevenly by nature.
24. Chocolate Caramel Pretzel Bites
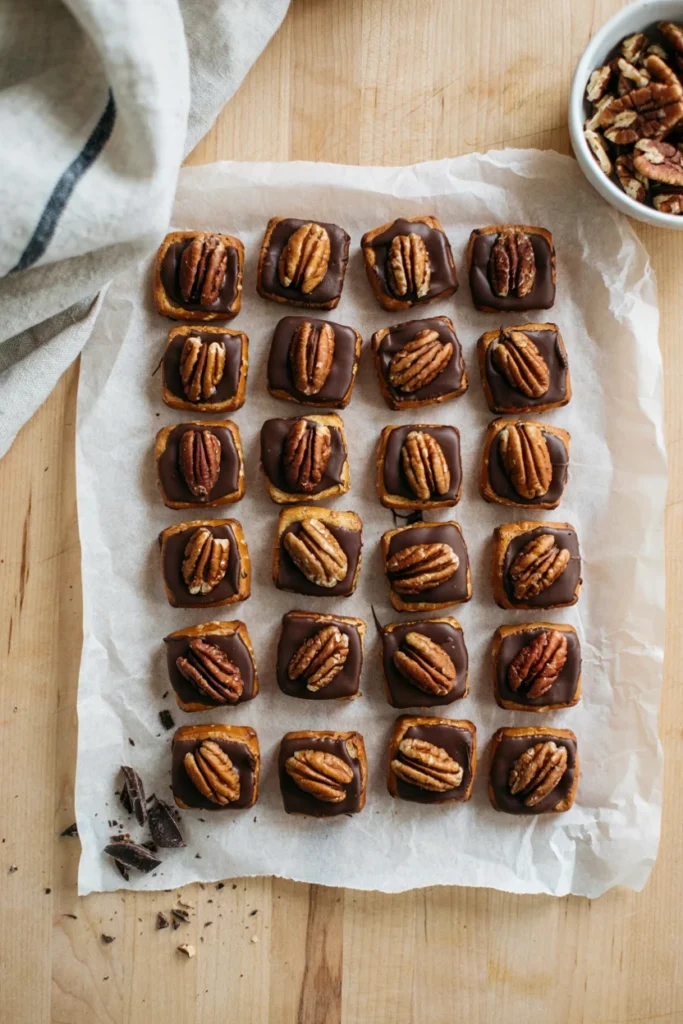
Three ingredients, no oven required beyond a quick warm-up to melt the chocolate — the salty pretzel base against sweet chocolate and caramel makes these disappear fast, and they’re one of the most budget-friendly items on the whole table.
Prep Time: 10 min | Cook Time: 3 min | Total Time: 25 min (includes setting) | Servings: 24 pieces | Difficulty: Easy
Ingredients
- 24 small square pretzels
- 24 soft caramel candy squares, unwrapped
- 24 milk chocolate squares
- 24 pecan halves
- Flaky sea salt, for topping
Instructions
- Preheat the oven to 300°F and line a baking sheet with parchment.
- Arrange the pretzels in a single layer and top each with one caramel square.
- Bake 3–4 minutes, just until the caramel softens and looks glossy — it should hold its shape, not melt flat.
- Remove from the oven and immediately press a chocolate square onto each softened caramel.
- Let sit 1 minute for the chocolate to soften, then press a pecan half on top of each.
- Sprinkle with a pinch of flaky sea salt and let cool completely, about 15 minutes, before packaging.
Baker’s Tip
Watch the caramel closely in the oven — a minute too long and it melts off the pretzel instead of staying put.
Why You’ll Love It
The salty-sweet combination sells itself, and a full batch costs only a few dollars to make.
25. Maple Pecan Fudge
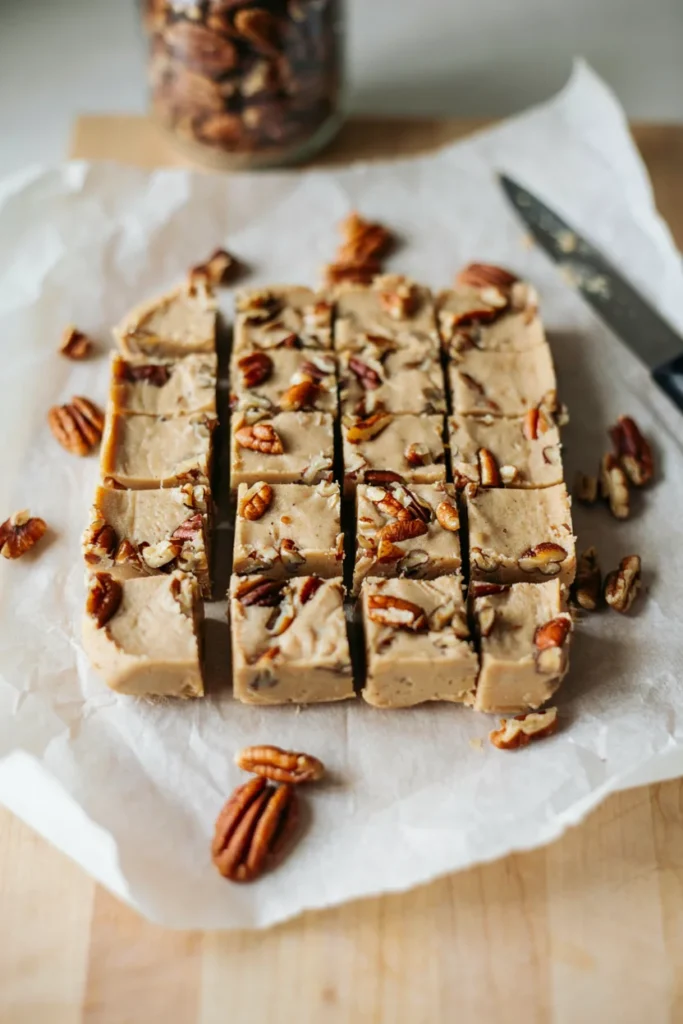
Real maple syrup gives this fudge a deeper, more complex sweetness than a standard vanilla fudge, and toasted pecans add crunch throughout. It sets up firm enough to package and stack without any refrigeration needed on the table.
Prep Time: 15 min | Cook Time: 10 min | Total Time: 2 hrs 25 min (includes setting) | Servings: 25 pieces | Difficulty: Medium
Ingredients
- 2 cups granulated sugar
- 1 cup pure maple syrup
- 1/2 cup heavy cream
- 4 tbsp unsalted butter
- 1/4 tsp salt
- 1 tsp vanilla extract
- 3/4 cup chopped toasted pecans
Instructions
- Line an 8×8-inch pan with parchment paper, leaving an overhang on two sides.
- Combine the sugar, maple syrup, cream, butter, and salt in a heavy-bottomed saucepan over medium heat.
- Bring to a boil, stirring constantly, and cook until a candy thermometer reads 236°F, about 8–10 minutes.
- Remove from heat and let cool undisturbed for 5 minutes, without stirring.
- Add the vanilla and beat vigorously with a wooden spoon for 3–4 minutes, until the mixture thickens and loses its shine.
- Stir in the pecans, then quickly pour into the prepared pan and smooth the top.
- Let set at room temperature at least 2 hours before lifting out and cutting into 25 squares.
Baker’s Tip
A candy thermometer isn’t optional here — fudge that doesn’t reach the right temperature won’t set firm enough to cut cleanly.
Storage & Freezing
Store at room temperature in an airtight container for up to 2 weeks, making this one of the best items to make well ahead of the sale.
Packaging These Treats for Your Bake Sale
The right packaging is what turns a plate of homemade treats into something that looks worth paying for — and it makes handing out change so much easier.
- For hand pies, whoopie pies, and mini loaves, box them individually in kraft bakery boxes with a window so buyers can see exactly what they’re getting.
- For bars and blondies, slide a few squares into window bakery bags with a tin tie closure — the resealable tab keeps them fresh if they don’t sell right away.
- For individual cookies like snickerdoodles or pecan cookies, tuck two or three into self-sealing fall cellophane treat bags for an easy grab-and-pay item.
Common Mistakes to Avoid
- Bringing whole cakes or pies instead of portioned pieces: They’re harder to price and slower to sell than individually wrapped items — cut and package everything before the sale starts.
- Skipping allergen labels: A simple “contains nuts” or “dairy-free” tag builds buyer trust and helps organizers direct people to the right table.
- Waiting until the night before to bake everything: Cookies, bars, and quick breads all freeze well — spread your baking out over the two weeks before the sale.
- Not making enough of the fastest sellers: Cookies and bars typically outsell cakes, so weight your batches accordingly if you can only make a few items.
- Leaving cream-filled items unrefrigerated too long: Whoopie pies and cheesecake bars need to stay cool, especially if the sale runs for several hours.
Frequently Asked Questions
What’s the easiest fall treat to make last-minute for a bake sale?
Halloween rice krispie treats and chocolate caramel pretzel bites both come together in under 30 minutes with no real baking involved, making them the best options when you’re short on time.
How many baked goods should I bring to a bake sale?
A general rule is 2–3 individually portioned pieces per expected attendee, adjusted down if several other parents are also contributing baked goods.
What sells the fastest at a fall bake sale?
Individually wrapped cookies, bars, and novelty items like the ghost cupcakes tend to sell before whole cakes or pies, since they’re easier to grab and price.
Can I make any of these ahead and freeze them?
Yes — cookies, bars, muffins, quick breads, and unbaked hand pies all freeze well for up to 2 months, so you can spread your baking out over several weeks.
What’s a good nut-free option for a fall bake sale?
Pumpkin bars, snickerdoodles, cranberry orange muffins, and the Halloween rice krispie treats are all naturally nut-free and popular sellers.
Do I need to label items with allergen information?
It’s not always required, but a simple label noting nuts, dairy, or gluten builds trust with buyers and is considered good etiquette at most school and community bake sales.