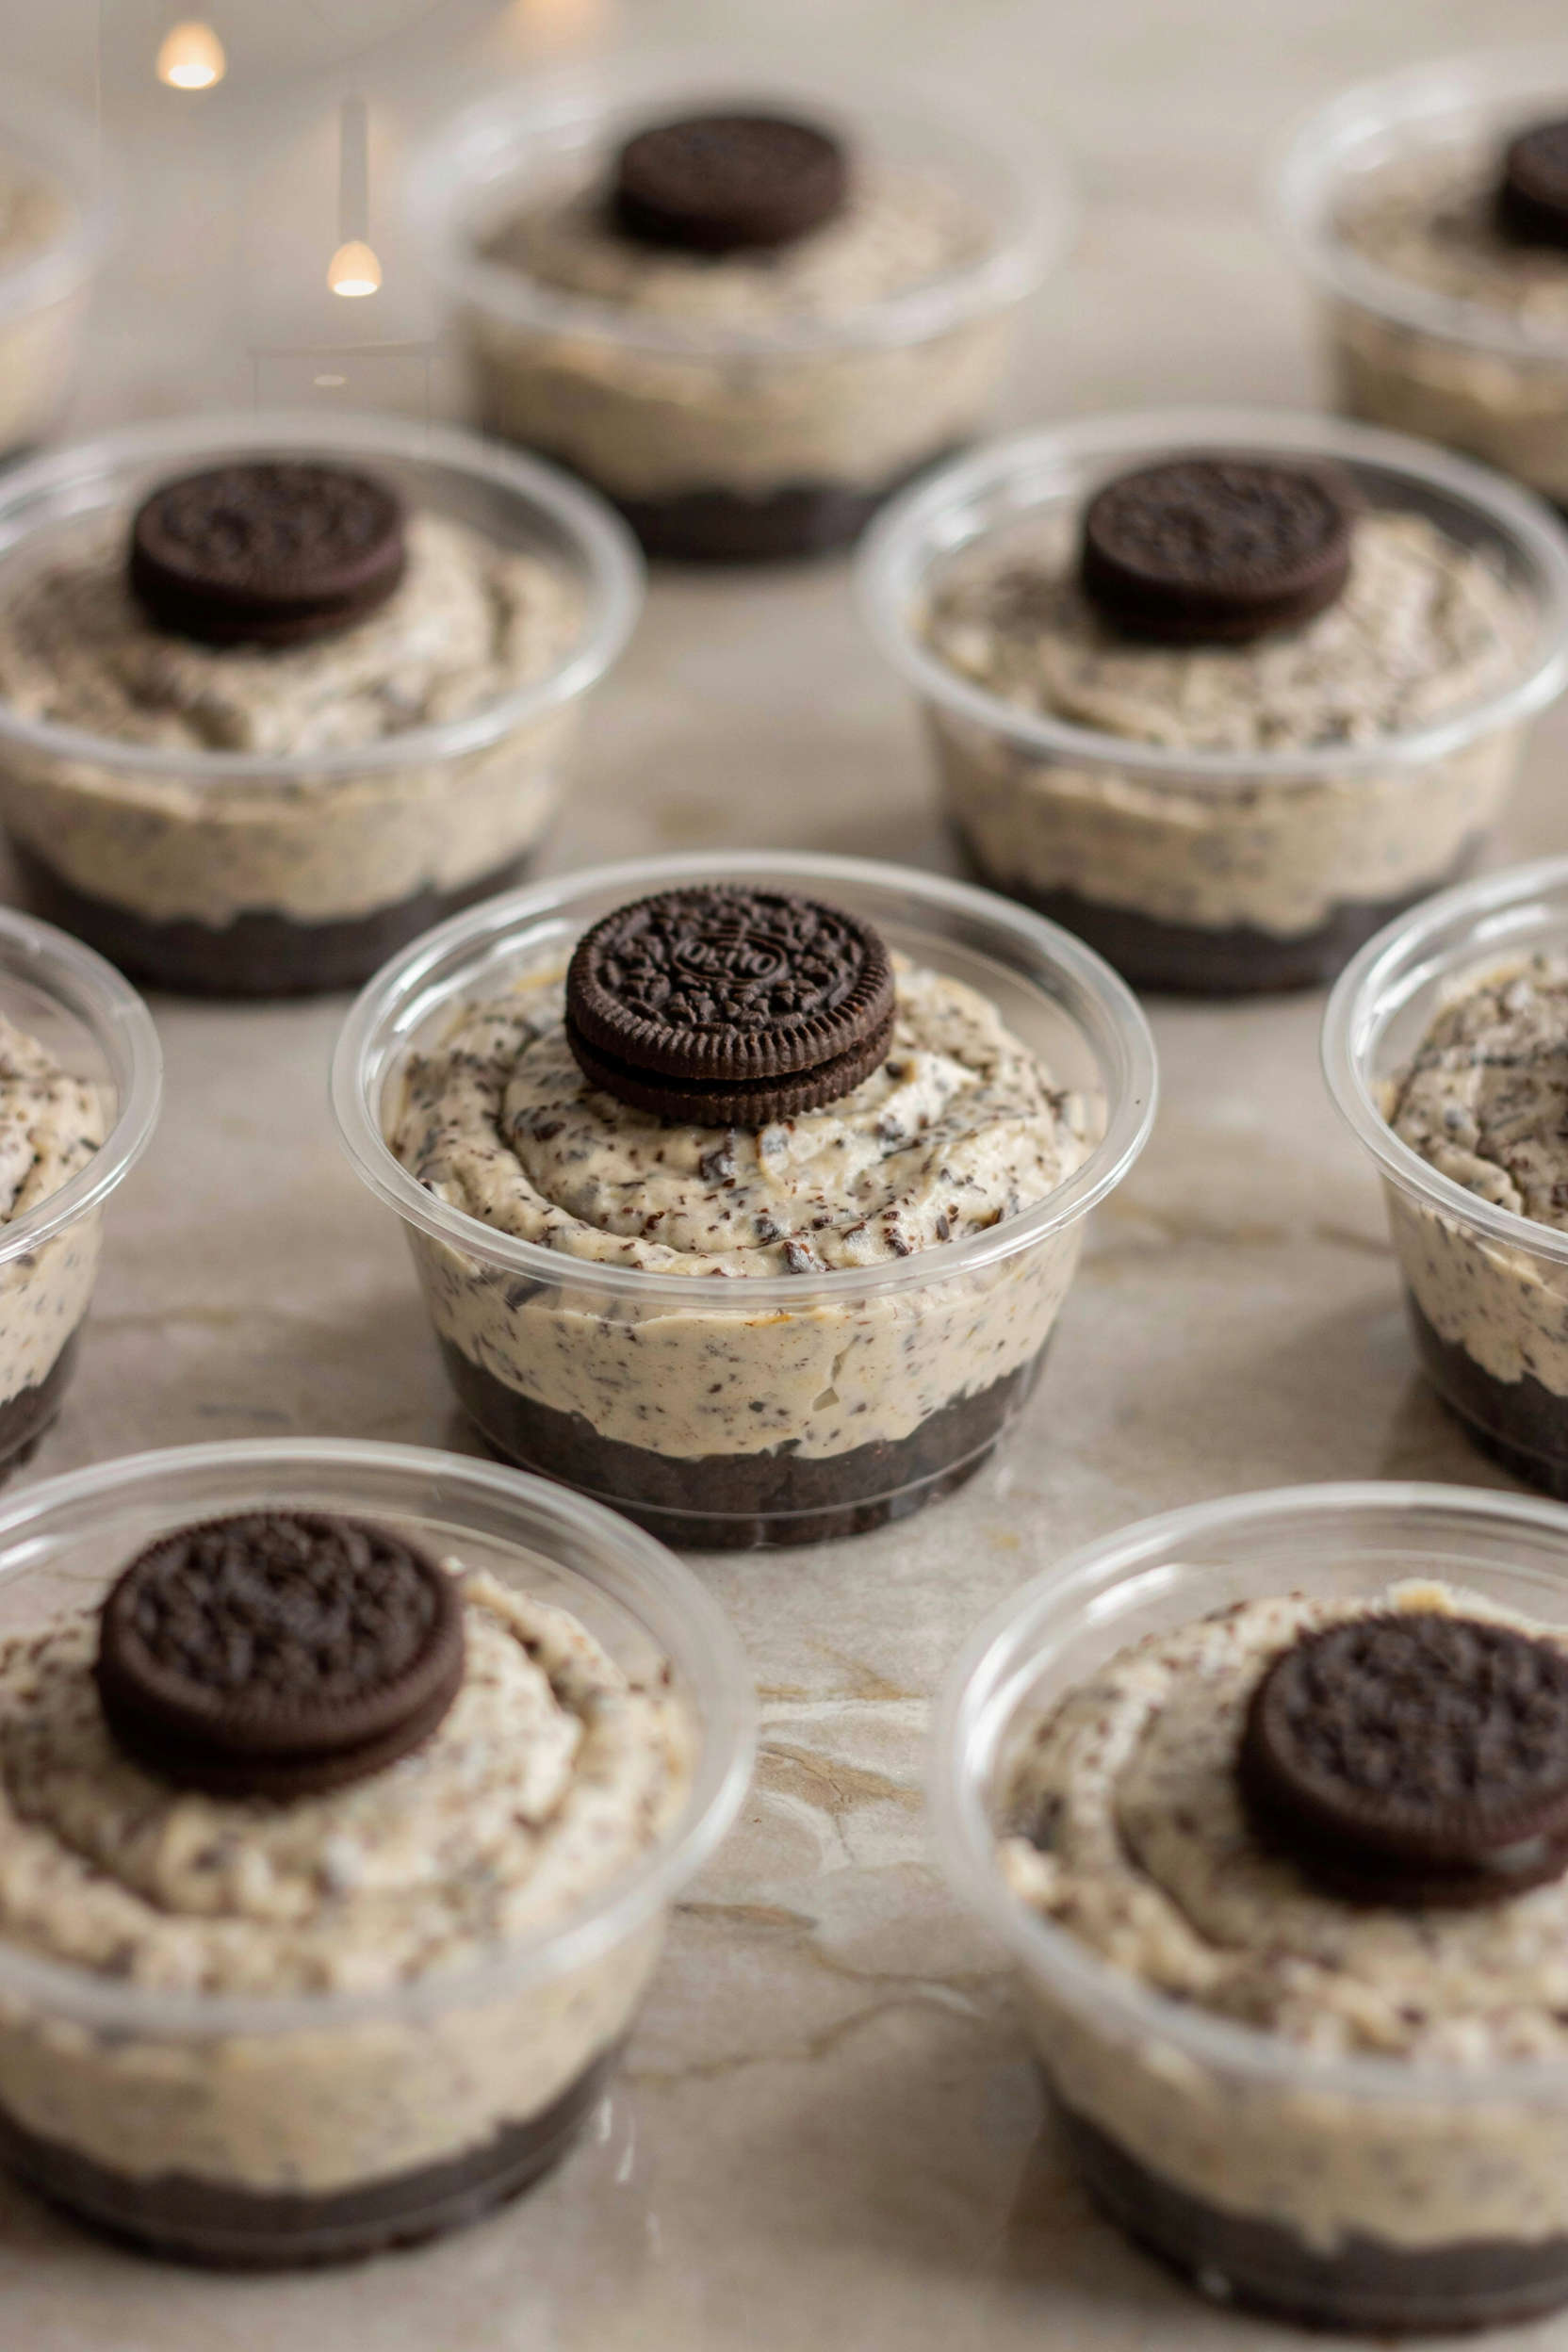
There’s something about cookies and cream desserts that never goes out of style. Maybe it’s the combination of rich chocolate cookies and creamy vanilla filling, or maybe it’s because every bite feels a little nostalgic. Either way, these Cookies and Cream Dessert Cups are the kind of no-bake treat that disappears fast at potlucks, birthday parties, and family gatherings. With layers of crunchy chocolate cookie crumbs and a fluffy cookies-and-cream filling, they look impressive without requiring much effort. Inspired by classic cookies and cream dessert cups, this recipe combines a cookie crumb base with a light cheesecake-style filling for the perfect handheld treat.
What I love most about these little dessert cups is how easy they are to make ahead. You can prepare them the night before a party, pop them in the fridge, and forget about them until serving time. They’re rich enough to satisfy a serious sweet tooth but perfectly portioned so guests can enjoy one without feeling weighed down. If you’re an Oreo lover like I am, these creamy dessert cups are about to become a permanent addition to your dessert rotation.
This post may contain affiliate links which helps me keep this blog alive, questions? View the privacy policy.
Why You’ll Love These Cookies and Cream Dessert Cups
- No baking required – Perfect for warm days when you want a homemade dessert without turning on the oven.
- Easy to make ahead – These dessert cups chill beautifully, making party prep so much easier.
- Individual servings – No slicing, scooping, or mess. Just grab a cup and enjoy.
- Loaded with cookies and cream flavor – Every bite is packed with crunchy chocolate cookie pieces and creamy filling.
- Perfect for any occasion – Great for birthdays, baby showers, potlucks, holidays, or simple family desserts.
- Looks bakery-worthy with minimal effort – The layered presentation makes these cups feel special, even though they’re surprisingly simple to put together.
Ingredients
Method
- Crush the chocolate sandwich cookies into fine crumbs. Set aside about ¼ cup of the crumbs for topping.
- Combine the remaining cookie crumbs with the melted butter until evenly moistened.
- Divide the crumb mixture among 8 dessert cups and gently press it into the bottom of each cup to create a crust layer.
- In a large mixing bowl, beat the softened cream cheese until smooth and creamy.
- Add the powdered sugar and vanilla extract and continue mixing until fully incorporated.
- Fold the whipped topping into the cream cheese mixture until light and fluffy.
- Stir in about 1 cup of crushed cookie crumbs, leaving some texture throughout the filling.
- Spoon or pipe the filling evenly into the prepared dessert cups.
- Sprinkle the reserved cookie crumbs over the tops of the cups.
- Refrigerate for at least 2 hours before serving.
- Garnish with whipped cream and additional cookie pieces if desired.
Notes
Mini dessert cups are perfect for parties, baby showers, and holiday gatherings.
These dessert cups can be made up to 24 hours in advance and stored covered in the refrigerator.
Double-stuffed sandwich cookies will create an even richer cookies and cream flavor.
For extra crunch, reserve some coarsely crushed cookies and sprinkle them on just before serving.
Store leftovers in the refrigerator for up to 3 days.
How To Make Cookies and Cream Dessert Cups
Step 1: Crush the Cookies
Crush the chocolate sandwich cookies into fine crumbs using a food processor or by placing them in a zip-top bag and rolling over them with a rolling pin. Reserve a few tablespoons for garnish later.
Step 2: Prepare the Crust Layer
Combine the cookie crumbs with melted butter until evenly moistened. Divide the mixture among your serving cups and gently press it into the bottom of each cup to form a crust.
Step 3: Make the Filling
In a large mixing bowl, beat the softened cream cheese until smooth. Add powdered sugar and vanilla extract, mixing until creamy and well combined.
Step 4: Add the Cookies and Cream Flavor
Fold the whipped topping into the cream cheese mixture until light and fluffy. Stir in additional crushed cookies, making sure they are evenly distributed throughout the filling.
Step 5: Assemble the Dessert Cups
Spoon or pipe the filling over the cookie crusts, dividing it evenly between all the cups. Smooth the tops with a spoon or create decorative swirls if desired.
Step 6: Garnish the Tops
Sprinkle the reserved cookie crumbs over each dessert cup. Add a mini cookie, whipped cream, or chocolate shavings for an extra-special presentation.
Step 7: Chill and Serve
Refrigerate the dessert cups for at least 2 hours before serving. Once chilled, serve cold and enjoy every creamy, cookie-filled bite.
Bottom Line
If you loved these Cookies and Cream Dessert Cups, don’t stop at just one sweet treat! Try these rich and creamy Chocolate Peanut Butter Dessert Cups, fun and festive Halloween Dirt Cups, wholesome Tiramisu Chia Pudding, cozy Pumpkin Spice Parfait Cups, silky Easy Chocolate Mousse, or these crowd-favorite Raspberry Fudge Parfaits. They’re all easy, delicious, and perfect when you need a simple no-bake dessert that looks as good as it tastes!