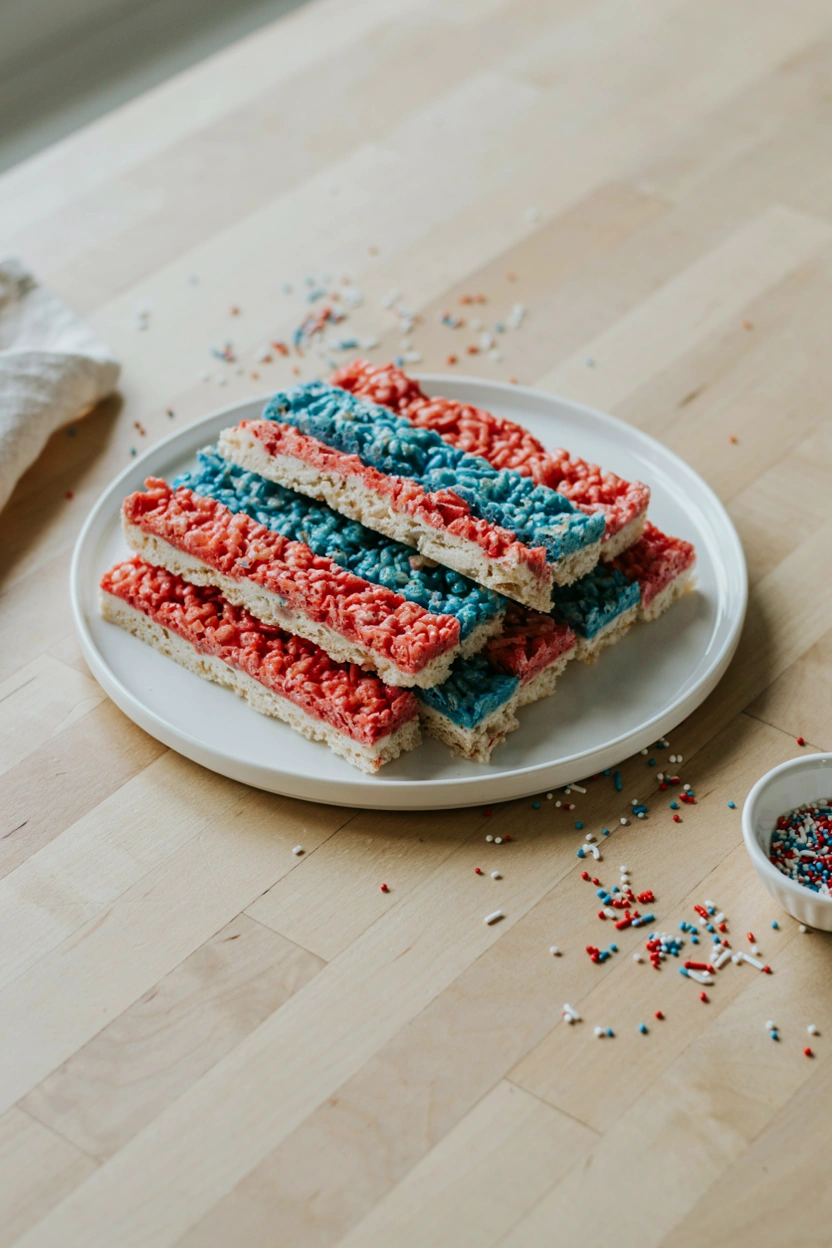
Red White and Blue Rice Krispie Treats (The No-Slide Layering Method)
Quick Answer: Red white and blue rice krispie treats are made by preparing three separate batches of the classic recipe, tinting one red and one blue with gel food coloring, then pressing the layers into a pan one at a time while each is still warm. Chill 15 minutes before cutting for clean, distinct stripes that hold together.
It’s 9pm the night before the cookout and you just remembered you signed up to bring dessert.
Red white and blue rice krispie treats are the answer — three layers of the classic no-bake treat, stacked and cut into clean bars that look like you spent hours on them. The truth is, the recipe itself isn’t hard. What trips people up is the layering, and that’s exactly what this guide fixes.
A treat that looks patriotic but falls apart the second you cut it isn’t worth the flour on your counter. Nobody wants to show up with a plate of smeared, sliding bars when the whole point was to look festive.
By the end of this, you’ll have the exact recipe, a layering method that actually keeps the colors separate and stacked, and a make-ahead plan so you’re not doing this at midnight.
What You Need for Red White and Blue Rice Krispie Treats
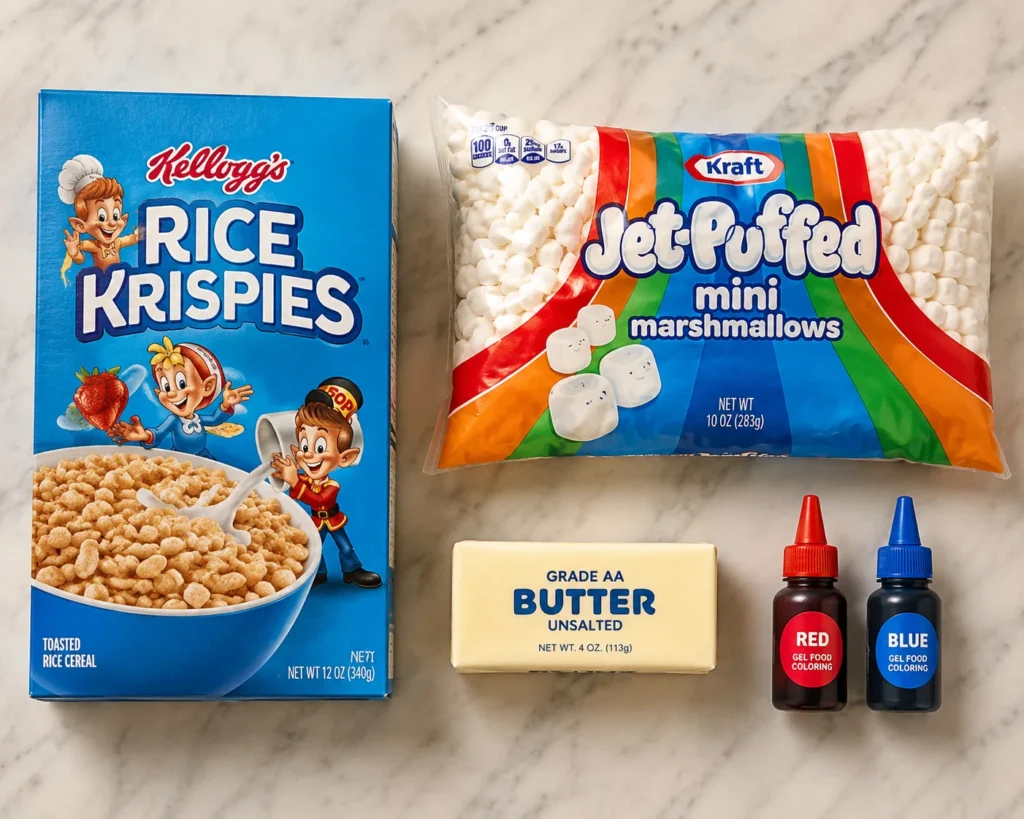
This is a short ingredient list, and most of it is already in your pantry. The one thing worth being picky about is the food coloring — it makes a bigger difference than you’d think.
- Unsalted butter — 6 tablespoons total, divided across three batches
- Mini marshmallows — 30 ounces total (about 10 cups), divided across three batches
- Rice Krispies cereal — 18 cups total, divided across three batches
- Red and blue gel food coloring — a few drops of each, for the colored layers
- A 9×13-inch pan, lined with parchment paper
- Cooking spray or extra butter, for greasing your hands and the spatula
Gel Dye vs. Liquid Dye vs. Natural Dye
The type of food coloring you grab makes or breaks how vivid and workable your layers turn out. Here’s how the three options actually compare in a sticky marshmallow mixture.
| Type | Color Payoff | Effect on Texture |
|---|---|---|
| Gel food coloring | Vivid, true red and true blue | Minimal — a few drops won’t add noticeable liquid |
| Liquid food coloring | Muted, often needs a lot to get true color | Can make the mixture wetter and stickier, harder to press |
| Natural food coloring | Softer, more pastel tones | Varies by brand — some add more liquid than others |
If you only remember one thing from this list: reach for gel, not the little drugstore liquid bottles. It gives you that true red and true blue without turning your marshmallow mixture into soup.
How to Make Layered Rice Krispie Treats (Step-by-Step)
This recipe is really three small batches of classic rice krispie treats made back to back. Working in batches, rather than tripling everything in one pot, is what makes the layering possible.
Step 1: Make the Base Batches
- Melt the butter: In a large saucepan over low heat, melt 2 tablespoons of butter until just liquid. Don’t let it brown.
- Add the marshmallows: Stir in 10 ounces of mini marshmallows and cook over low heat, stirring constantly, until fully melted and smooth. This takes about 3 minutes.
- Fold in the cereal: Remove from heat and fold in 6 cups of Rice Krispies until evenly coated. Work quickly but gently — overmixing crushes the cereal and makes the treats dense.
- Repeat two more times to make your second and third batches, keeping them separate.
Low heat is doing a lot of work here. If your marshmallows scorch or your butter browns, the treats turn hard instead of soft, and no amount of pressing fixes that.
Step 2: Tint the Red and Blue Layers
Leave your first batch plain for the white layer. For the other two, stir in gel food coloring right after you fold in the cereal, while the mixture is still warm and pliable.
- Add red gel coloring a drop at a time, stirring until you hit a true red — usually 4 to 6 drops.
- Repeat with blue gel coloring for the third batch.
- Grease a spoon or spatula lightly so the color doesn’t streak unevenly as you mix.
Step 3: The No-Slide Layering Method
This is the part every other recipe glosses over, and it’s the reason so many layered treats end up sliding apart the moment you cut into them. The fix comes down to timing, not luck.
- Press the red layer first: While it’s still warm, press it evenly into your parchment-lined pan using greased hands or the back of a greased spatula.
- Wait until it’s tacky, not wet: Give it about 3 to 4 minutes. You want the surface to feel slightly sticky when you touch it, not glossy and warm. That tackiness is what the next layer grips onto.
- Press the white layer on top: Use firm, even pressure across the whole surface so there are no air gaps between layers.
- Repeat for the blue layer, waiting the same 3 to 4 minutes before pressing it on.
Once all three layers are stacked, chill the whole pan for exactly 15 minutes before cutting — not longer. Fifteen minutes is enough for the layers to set together without letting the colors bleed at the seams, which is what happens if you chill it for an hour or more.
Why Your Layers Slide Apart (And the Fix)
I learned this one the hard way at a neighborhood cookout a few summers ago. I let each layer cool completely before adding the next, thinking that would keep the colors crisp — instead, the whole stack slid apart into a pile of loose bars the second I tried to cut it.
The problem is that fully cooled marshmallow mixture doesn’t bond to anything. It just sits there, stacked but not connected, waiting to fall apart under a knife. The next layer has to go on while the one underneath is still warm and slightly tacky — that’s the only thing that actually glues them together.
The other common mistake is over-chilling. Popping the pan in the fridge for an hour “to be safe” sounds smart, but it lets the colors seep into each other along the seams, leaving you with muddy purple and pink lines instead of crisp stripes. Fifteen minutes, no more, is the sweet spot.
Make-Ahead Tips for Party Day
These treats are genuinely easier to make ahead than most desserts, which makes them a good pick when your evening is already full.
- Make them the night before: Prepare and cut them the evening before your party, then store at room temperature in an airtight container. They stay soft and fresh.
- Don’t refrigerate long-term: A quick 15-minute chill for layering is fine, but storing them in the fridge overnight dries them out and makes them tough.
- Cut them the night before, not the morning of, so party morning is just plating and going.
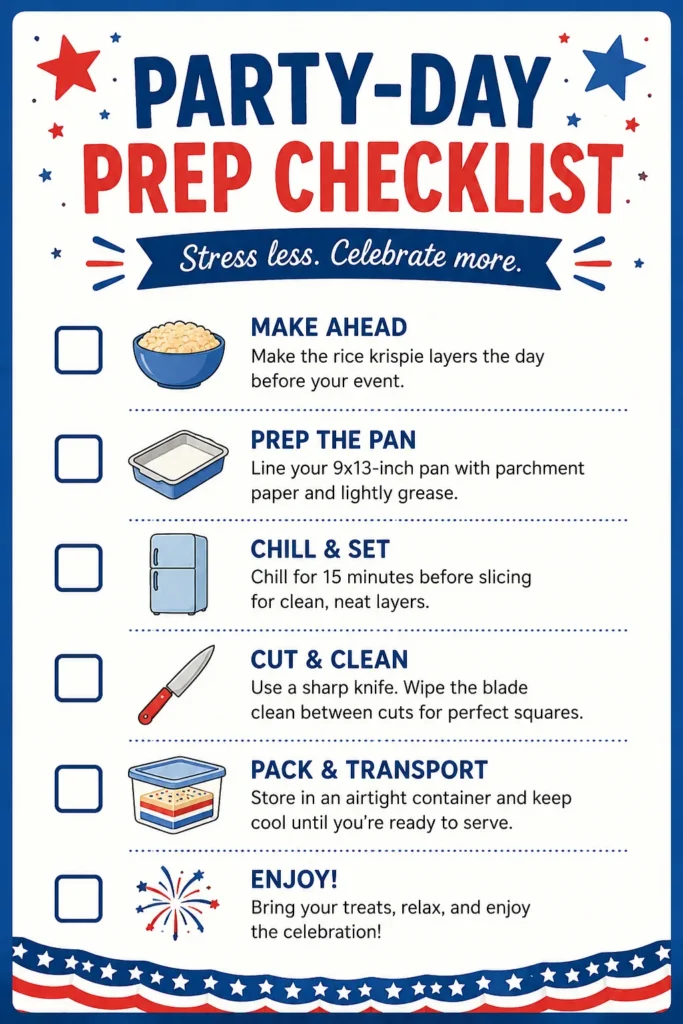
Party-Day Prep Checklist
- Make all three batches and layer them the night before
- Chill exactly 15 minutes, then cut into bars
- Store cut treats in an airtight container at room temperature overnight
- Pack them in a covered container or on a lidded platter for transport
- Add sprinkles or a star-shaped cutter touch right before serving, if using
Print or save this checklist and stick it on the fridge the night before — it takes the guesswork out of timing when you’re juggling everything else a holiday weekend throws at you.
Cutting and Serving Tips
How you cut these treats affects both how clean they look and how well the layers hold together on the plate.
- Use a sharp knife, not a serrated one, and wipe it clean between cuts so the colors don’t smear across the cut edges.
- Cut straight down, don’t saw, which pulls the layers apart instead of slicing through them cleanly.
- Want star shapes instead of bars? Let the treats cool completely, then press a star-shaped cutter straight down through all three layers rather than twisting it.
- Grease your knife lightly if the marshmallow starts sticking to the blade.
Storage: How Long Do They Stay Fresh?
Quick Answer: Store cut red white and blue rice krispie treats in an airtight container at room temperature for 2 to 3 days. For longer storage, wrap them tightly and freeze for up to 6 weeks, then thaw at room temperature before serving.
Room temperature is genuinely their best friend. The fridge dries out marshmallow treats faster than you’d expect, so skip it unless you’re just chilling the pan briefly to set the layers.
Recipe Card: Red White and Blue Rice Krispie Treats
Ingredients
- 6 tablespoons unsalted butter, divided into 2 tablespoons per batch
- 30 ounces mini marshmallows (about 10 cups), divided into 10 ounces per batch
- 18 cups Rice Krispies cereal, divided into 6 cups per batch
- Red gel food coloring
- Blue gel food coloring
Instructions
- Line a 9×13-inch pan with parchment paper and lightly grease it.
- Melt 2 tablespoons of butter over low heat. Stir in 10 ounces of mini marshmallows until fully melted.
- Remove from heat and fold in 6 cups of Rice Krispies until evenly coated. Leave this batch plain for your white layer.
- Repeat the process for a second batch, stirring in red gel food coloring while the mixture is warm.
- Repeat again for a third batch, stirring in blue gel food coloring while warm.
- Press the red layer into the prepared pan while still warm. Wait 3 to 4 minutes until tacky.
- Press the white layer on top with firm, even pressure. Wait 3 to 4 minutes.
- Press the blue layer on top.
- Chill the pan for exactly 15 minutes, then cut into bars with a sharp, clean knife.
Prep time: 15 minutes | Cook time: 15 minutes | Chill time: 15 minutes | Yield: 24 bars
Frequently Asked Questions
Can I make rice krispie treats ahead of time for a party?
Yes. Make them up to 2 days ahead and store the finished, cut treats in an airtight container at room temperature. They stay soft and fresh without drying out before the party.
What food coloring works best for red and blue treats?
Gel food coloring gives the most vivid true red and true blue without adding excess liquid. That extra liquid from regular drops can make the mixture too sticky or soft to hold clean layers.
Why do my rice krispie treat layers slide apart when I cut them?
The layers were likely pressed in after cooling too long. Each layer needs to go in while the previous one is still warm and slightly tacky so they bond together instead of just sitting stacked.
Can I use marshmallow fluff instead of mini marshmallows?
Yes, though mini marshmallows give a slightly chewier texture. If you use fluff, reduce your cook time a little since it melts faster than whole marshmallows.
How long do rice krispie treats stay fresh?
About 2 to 3 days at room temperature in an airtight container, or up to 6 weeks frozen if wrapped tightly.
Do I need to grease the pan?
Yes. A light coat of butter or cooking spray on the pan, your hands, and your spatula keeps the sticky mixture from tearing apart while you press it into layers.
Can I cut these into star shapes instead of bars?
Yes. Use a star-shaped cutter after the treats have fully cooled and set, pressing straight down rather than twisting to keep the layers intact.
Will the blue food coloring stain kids’ hands while helping?
It can, especially gel dye, since it’s more concentrated than liquid coloring. Have kids wear food-safe gloves during the tinting and pressing steps to keep little hands stain-free.
Can I make this recipe gluten-free?
Yes. Use a certified gluten-free rice cereal, since the original Rice Krispies cereal is not gluten-free, and double-check that your marshmallows are labeled gluten-free too.
Do these travel well to a cookout or picnic?
Yes. Once fully cooled and cut, they hold up well in a covered container at room temperature or in a cooler for a few hours without going soggy or falling apart.
One Batch, Three Colors, Zero Stress
Layered rice krispie treats look like a bakery project, but they really come down to one simple habit: press each layer while the last one is still a little warm and sticky. That’s the whole trick.
You’ve got this — even if it’s your first time layering anything more complicated than a sandwich. Give yourself the make-ahead evening, follow the timing, and you’ll walk into your cookout with a dessert that actually looks as good as it tastes.
Try it this weekend, and if it becomes a new holiday tradition in your house, share it with a friend who’s still bringing store-bought cookies to every party.
You might also love:
- this Halloween rice krispie treats recipe for another fun, colorful spin on the classic
- dessert bar recipe ideas for crowd-pleasing parties if you need more than one treat on the table
- lazy, easy no-bake desserts for a crowd for more make-ahead options that skip the oven entirely