20 Halloween Cake Ideas That’ll Steal the Whole Dessert Table
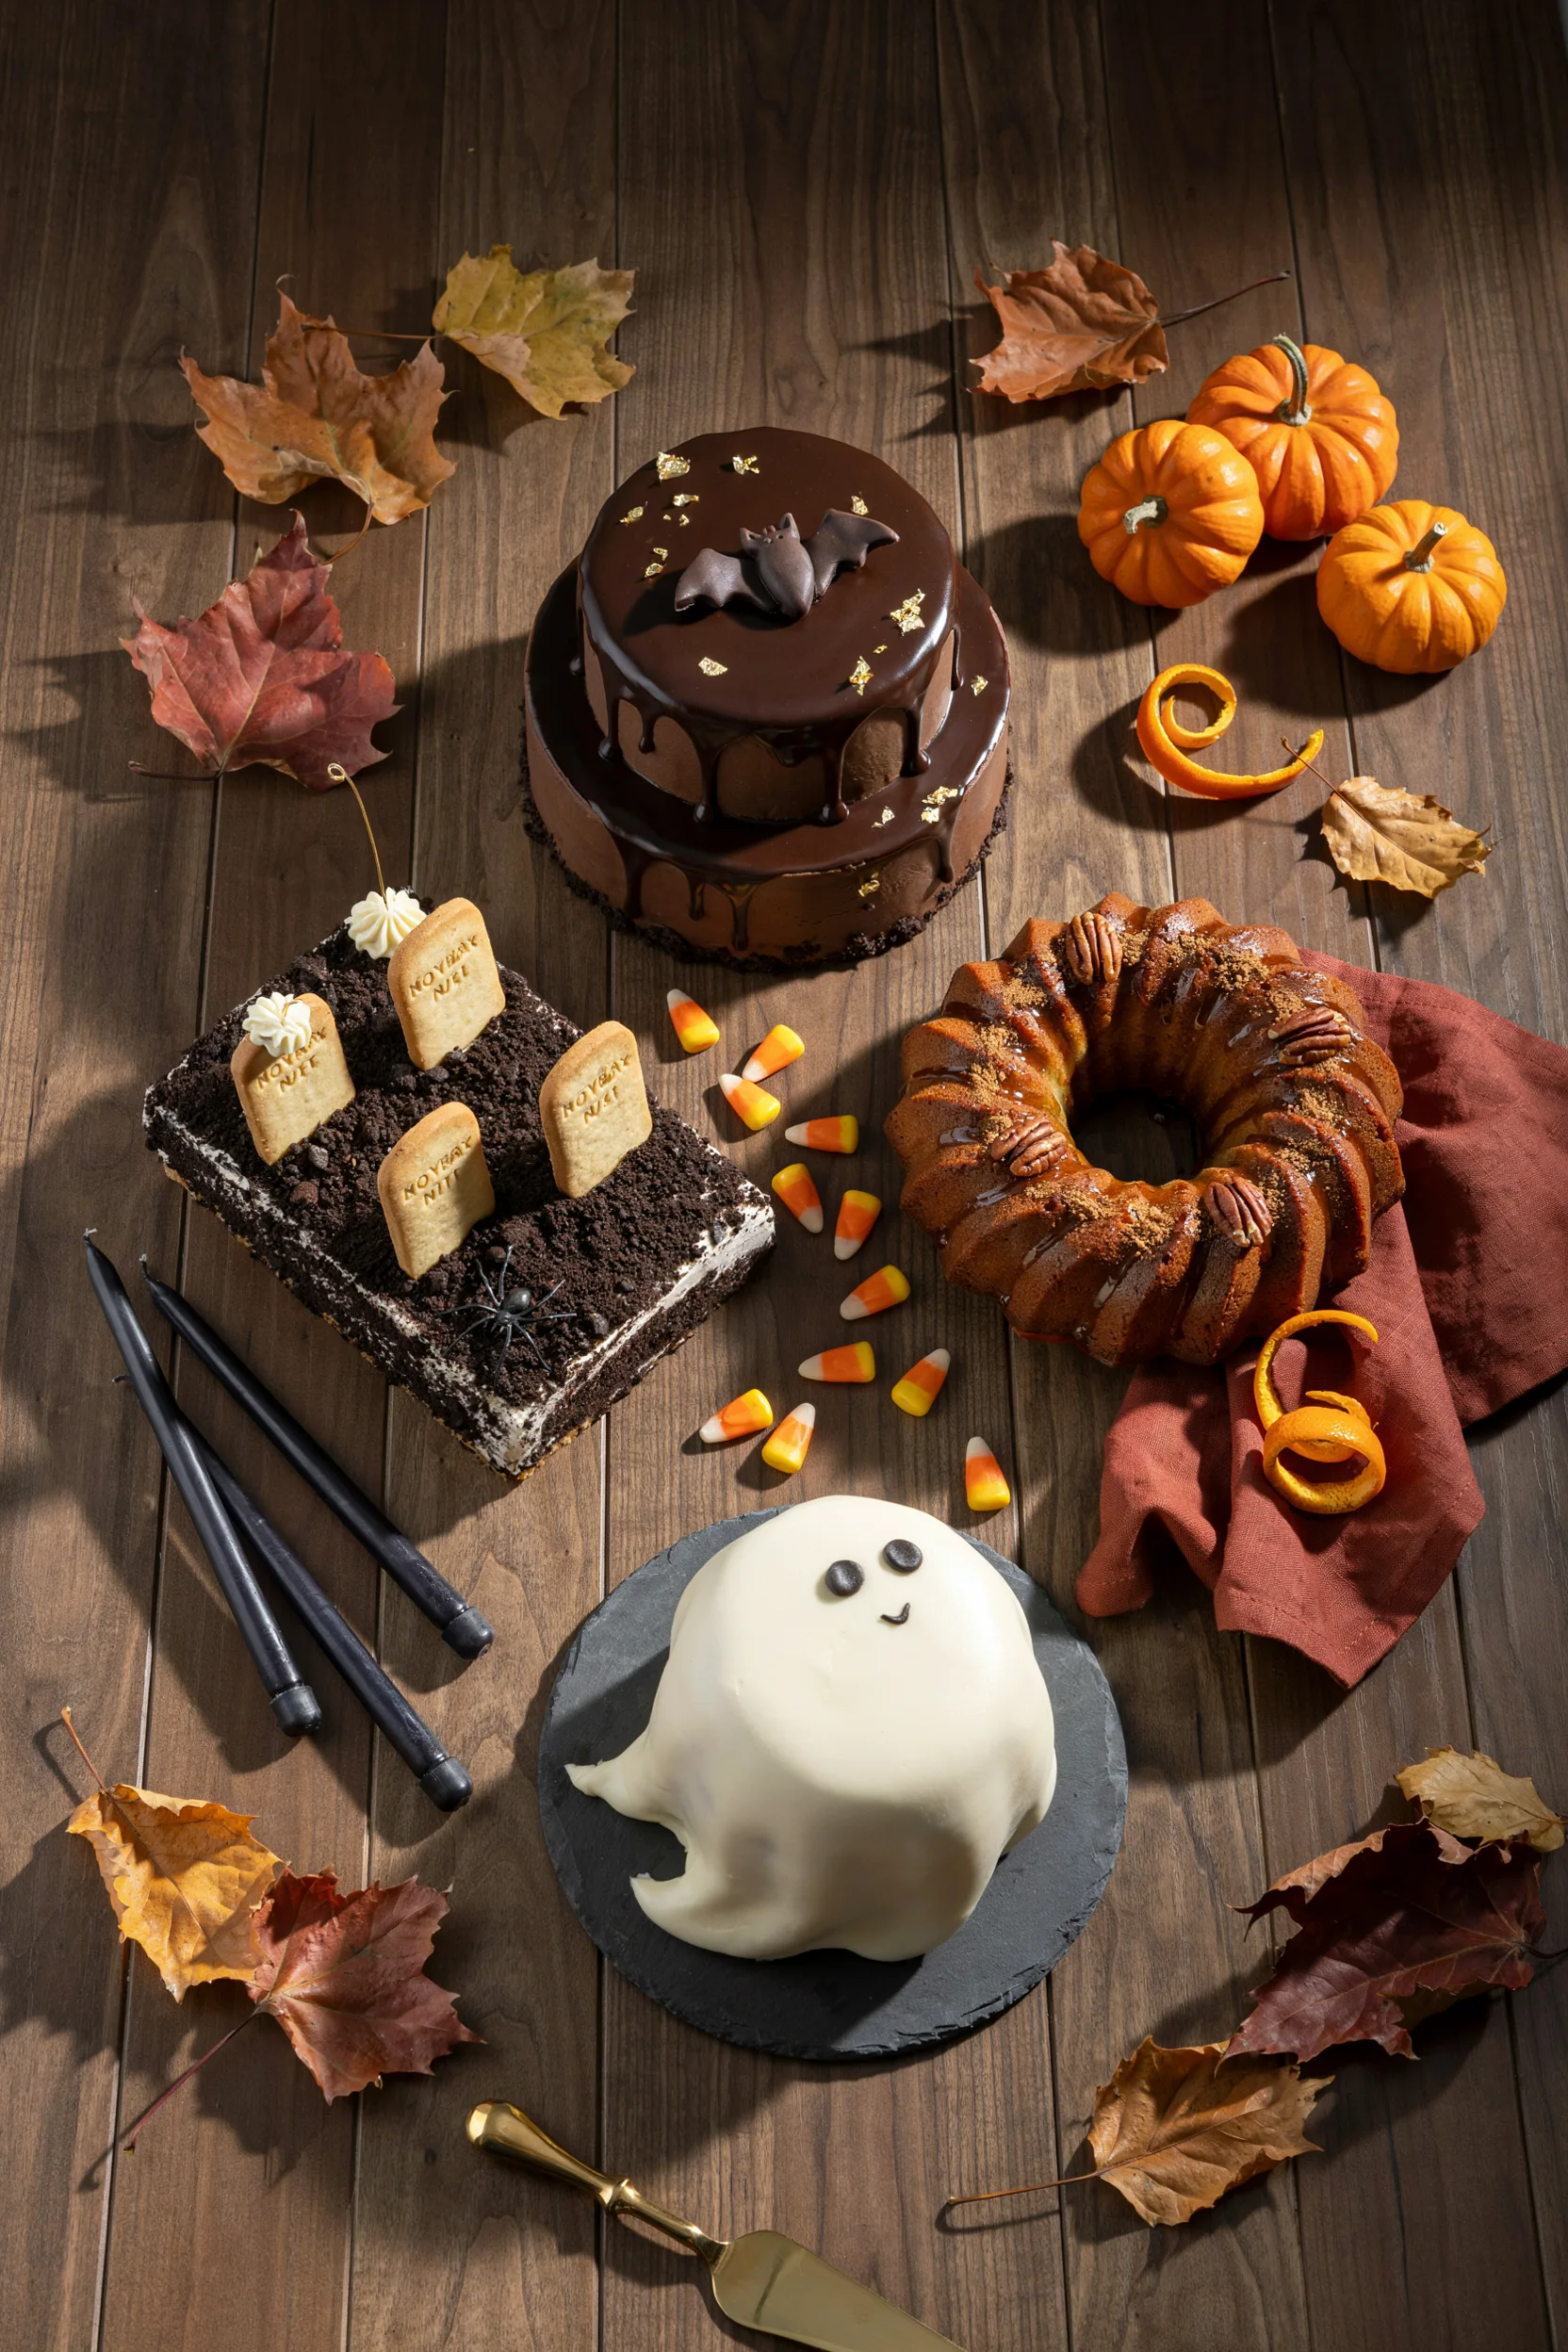
Quick Answer: The best Halloween cake ideas range from a 20-minute graveyard dirt pudding cake to a showstopping black cocoa drip cake dripping with chocolate “blood.” This roundup collects 20 complete recipes — layer cakes, cupcakes, a bundt, and a cake roll — sorted into easy, showstopper, creative-technique, and dietary-friendly categories so there’s a real, bakeable option for every skill level.
There’s a particular kind of pressure that comes with “can you bring the Halloween cake?” — you want something that gets gasps at the dessert table, but you also have a house to decorate, costumes to finish, and maybe forty-five minutes of actual free time before the party starts.
This collection covers both ends of that spectrum. You’ll find fast, forgiving bakes that come together with pantry staples, alongside genuine showstoppers worth the extra hour — black velvet layers, a carved pumpkin bundt, a rolled chai-spiced log — all with real ingredient amounts and steps you can follow exactly as written.
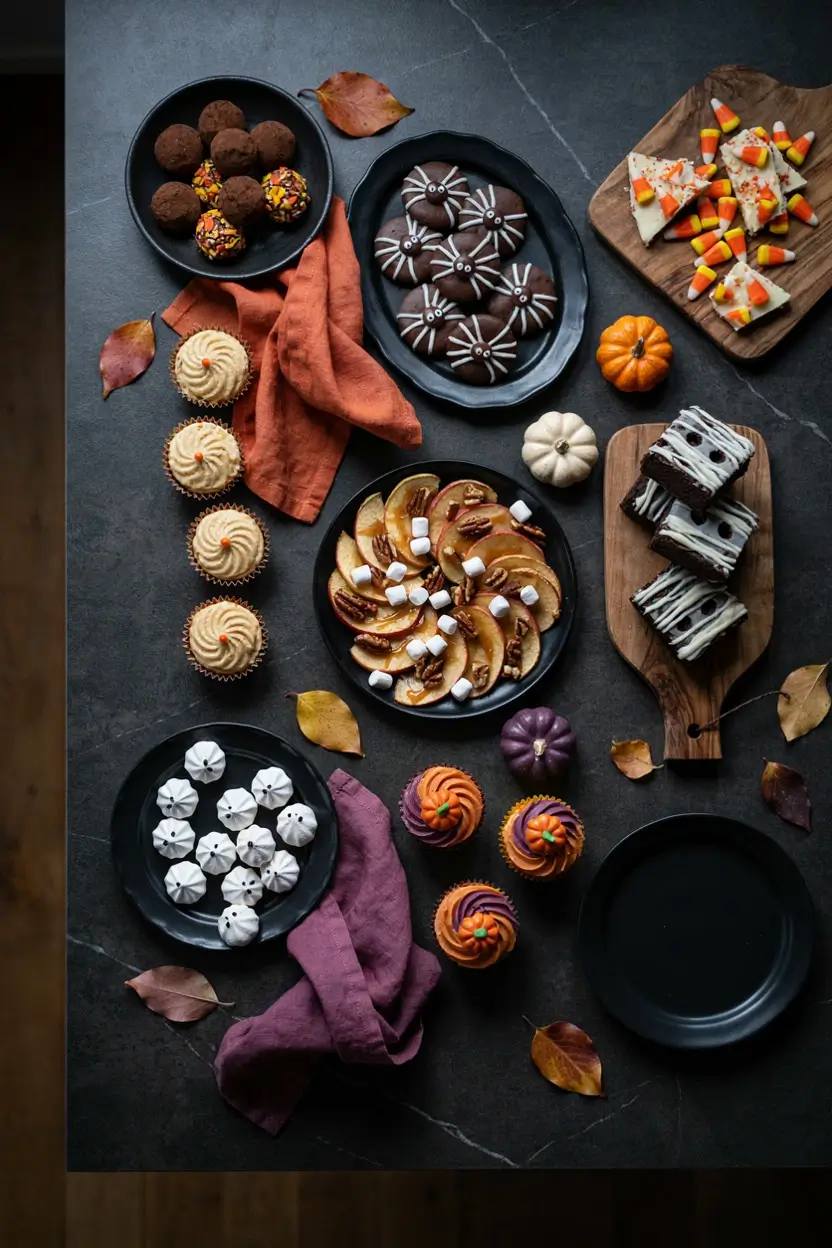
If you want to round out the rest of the dessert table once the cake is decided, our full Halloween dessert ideas roundup has cookies, bars, and no-bake treats to fill in the gaps. For now, here are 20 Halloween cakes worth saving.
This post may contain affiliate links which helps me keep this blog alive, questions? View the privacy policy.
Easy & Last-Minute Halloween Cakes
1. Graveyard Dirt Pudding Cake
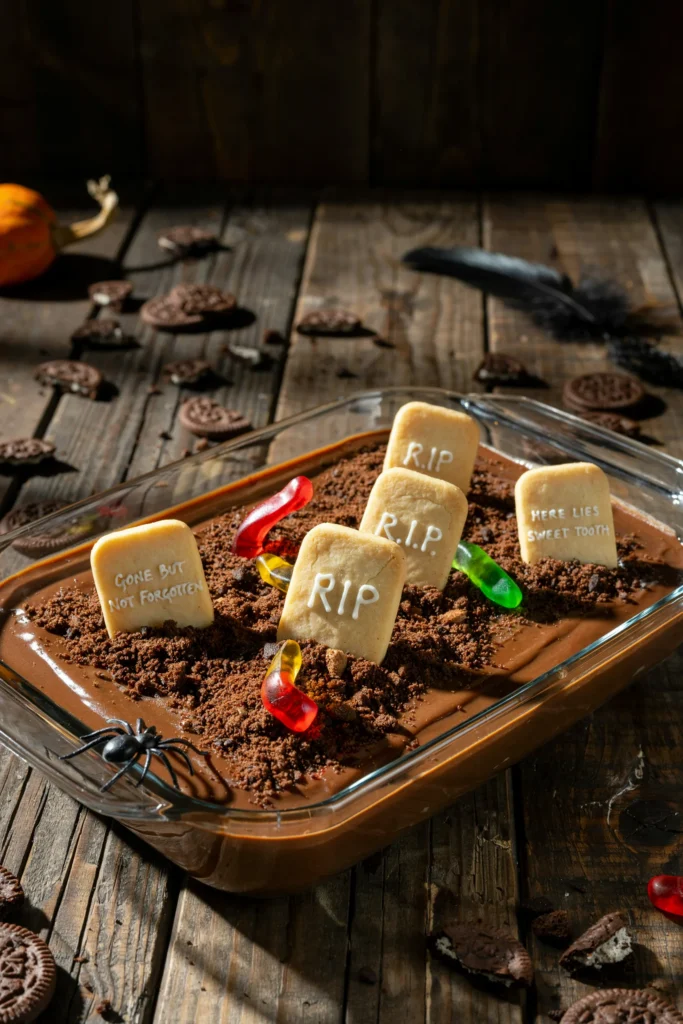
The crumb layer on this one is genuinely black, not just dark brown, and it’s what sells the whole effect — no food coloring required. Underneath, the pudding stays cold and silky against the crunch of the cookie dirt, and the tombstones lean in just enough to look like they’re actually sinking into the ground. It’s the cake you make when you have twenty minutes and zero interest in turning on the oven.
Prep Time: 20 min | Cook Time: 0 min | Total Time: 20 min (plus 2 hr chill) | Servings: 12 | Difficulty: Easy
Ingredients
- 36 chocolate sandwich cookies, crushed into fine crumbs
- 2 (3.9 oz) boxes instant chocolate pudding mix
- 4 cups cold whole milk
- 1 (8 oz) tub whipped topping, thawed
- 8 oz cream cheese, softened
- 1/2 cup powdered sugar
- 8–10 rectangular chocolate cookies (for tombstones)
- Black and white gel icing, for tombstone lettering
- 6 gummy worms
Instructions
- In a large bowl, whisk both boxes of instant pudding mix with the 4 cups cold milk for 2 minutes, until thickened. Refrigerate for 5 minutes to set further.
- In a separate bowl, beat the cream cheese and powdered sugar until smooth, then fold in the whipped topping until fully combined.
- Fold the cream cheese mixture into the set pudding until streaky (don’t fully combine — you want a marbled look).
- Spread one-third of the crushed cookies in the bottom of a 9×13-inch dish. Add half the pudding mixture, then another third of the crumbs, then the rest of the pudding, finishing with a final layer of crumbs on top.
- Refrigerate, covered, for at least 2 hours to set.
- Just before serving, pipe “R.I.P.” in black or white gel icing onto the rectangular cookies and press them into the crumb layer at slight angles to look like leaning tombstones.
- Tuck the gummy worms into the crumb layer so they appear to be crawling out of the dirt, then serve chilled.
Baker’s Tip
Add the tombstone cookies no more than an hour before serving — the crumb topping will soften them if they sit too long, and you’ll lose that crisp, leaning-headstone look. For a full graveyard scene, this 26-piece Halloween cupcake and cake topper set with tombstones, tiny trees, and spiders adds extra height and detail without any extra baking.
Best For
Potlucks and last-minute party invites — this one has zero oven time and can be fully assembled the morning of.
2. Mummy Wrap Vanilla Sheet Cake
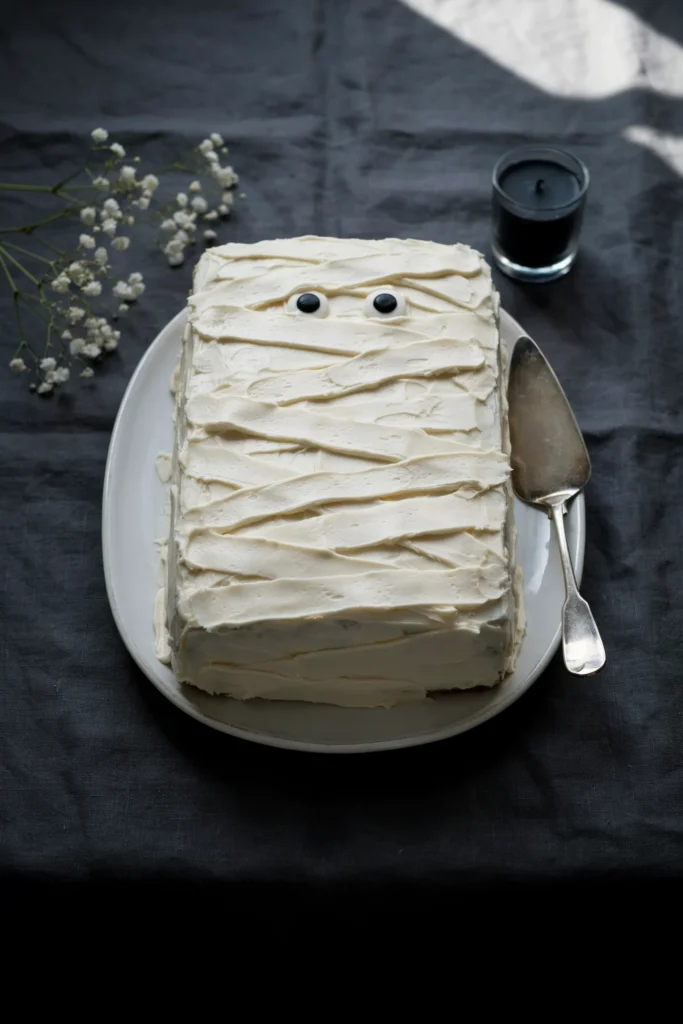
This is the cake for readers who want maximum payoff for minimum piping skill — the “bandages” are just wide, slightly uneven stripes, so there’s no delicate technique to mess up. The vanilla crumb underneath stays soft for days, and the whole thing reads as intentional even when the wraps aren’t perfectly straight, which honestly makes it look more bandage-like.
Prep Time: 20 min | Cook Time: 28 min | Total Time: 1 hr (with cooling) | Servings: 15 | Difficulty: Easy
Ingredients
- 2 1/2 cups all-purpose flour
- 2 1/2 tsp baking powder
- 1/2 tsp salt
- 1 cup unsalted butter, softened
- 1 3/4 cups granulated sugar
- 4 large eggs
- 1 tbsp vanilla extract
- 1 cup whole milk
- 3 cups powdered sugar
- 2/3 cup unsalted butter, softened (for frosting)
- 2–3 tbsp heavy cream
- 2 large candy eyeballs
Instructions
- Preheat oven to 350°F. Grease a 9×13-inch baking pan.
- Whisk together flour, baking powder, and salt in a bowl; set aside.
- Beat 1 cup butter and granulated sugar until pale and fluffy, about 3 minutes. Add eggs one at a time, then the vanilla.
- Add the flour mixture in three additions, alternating with the milk, mixing just until combined.
- Pour batter into the prepared pan and bake 26–28 minutes, until a toothpick comes out clean. Cool completely in the pan.
- For the frosting, beat 2/3 cup butter until smooth, then gradually add powdered sugar and 2–3 tbsp cream until light and spreadable.
- Using a wide flat piping tip (or a zip-top bag with a large corner snipped off), pipe wide diagonal stripes of frosting across the cooled cake, overlapping slightly and leaving small gaps here and there.
- Press the candy eyeballs into two of the gaps between the “bandages” and serve.
Baker’s Tip
Pipe the stripes in slightly uneven widths on purpose — a too-perfect mummy wrap actually looks less convincing than one with a little variation.
Best For
Classroom parties and family gatherings where a big sheet cake needs to feed a crowd without individual slicing and plating.
3. Witch Hat Ice Cream Cone Cupcakes
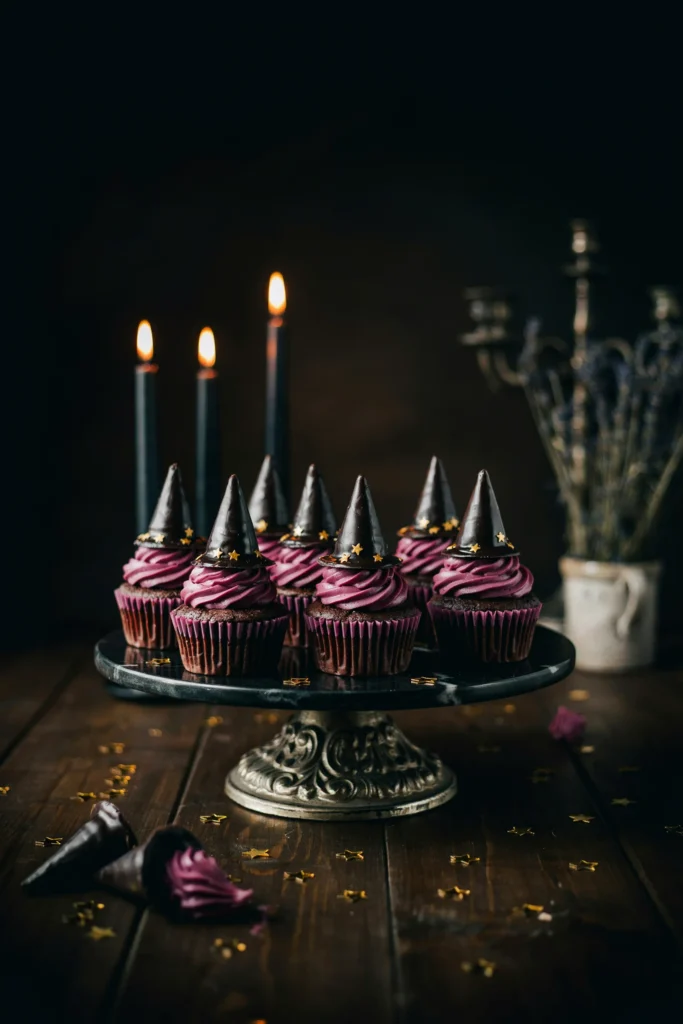
These get their height and drama entirely from an ice cream cone — no fondant sculpting, no cake carving. The chocolate cupcake underneath is deeply fudgy, and the purple buttercream swirl gives just enough color contrast against the black cone to look genuinely witchy rather than just purple frosting with a hat stuck on top.
Prep Time: 25 min | Cook Time: 18 min | Total Time: 1 hr | Servings: 12 cupcakes | Difficulty: Easy
Ingredients
- 1 1/4 cups all-purpose flour
- 1/2 cup unsweetened cocoa powder
- 1 tsp baking soda
- 1/2 tsp salt
- 1 cup granulated sugar
- 1/2 cup vegetable oil
- 2 large eggs
- 1 cup buttermilk
- 1 tsp vanilla extract
- 1 1/2 cups unsalted butter, softened (for frosting)
- 4 cups powdered sugar
- 2 tbsp heavy cream
- Purple gel food coloring
- 12 pointed sugar cones
- 1 cup black candy melts
Instructions
- Preheat oven to 350°F and line a muffin tin with 12 liners.
- Whisk flour, cocoa powder, baking soda, and salt in a bowl.
- In a second bowl, whisk sugar, oil, eggs, buttermilk, and vanilla until smooth. Add the dry ingredients and whisk just until combined.
- Divide batter evenly among the liners and bake 16–18 minutes, until a toothpick comes out clean. Cool completely.
- Melt the black candy melts according to package directions. Dip each sugar cone about two-thirds of the way in, letting excess drip off, and set upright on parchment to harden, about 10 minutes.
- Beat the 1 1/2 cups butter until fluffy, then gradually add powdered sugar and cream, beating until smooth. Tint with purple gel coloring.
- Pipe a tall swirl of purple frosting onto each cooled cupcake, then press a black cone upside down into the top of the swirl at a slight angle, like a witch hat tipping over.
Baker’s Tip
Let the dipped cones harden completely before pressing them into the frosting, or the black coating will smudge into the purple swirl.
Best For
Kids’ parties — these are more silly than spooky, and there’s a full-size cupcake baking guide with more character ideas in our Halloween cupcakes roundup if this shape becomes a favorite.
4. Peanut Butter Chocolate Spiderweb Cupcakes
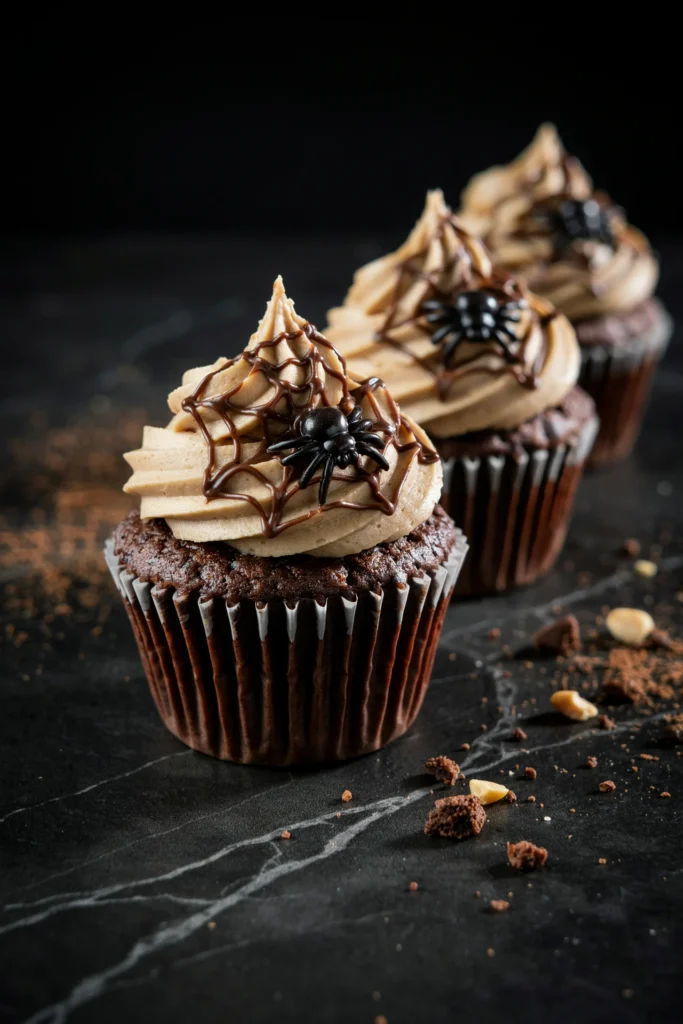
Peanut butter and chocolate together already feels like a treat, and the web on top takes about ninety seconds per cupcake once you get the rhythm down. The frosting itself is dense and a little salty against the sweet chocolate cake, which keeps these from tasting one-note the way an all-chocolate cupcake sometimes can.
Prep Time: 20 min | Cook Time: 16 min | Total Time: 45 min | Servings: 12 cupcakes | Difficulty: Easy
Ingredients
- 1 1/4 cups all-purpose flour
- 1/2 cup unsweetened cocoa powder
- 1 tsp baking soda
- 1/4 tsp salt
- 1 cup granulated sugar
- 1/2 cup vegetable oil
- 2 large eggs
- 1 cup buttermilk
- 3/4 cup creamy peanut butter
- 1/2 cup unsalted butter, softened
- 2 1/2 cups powdered sugar
- 2–3 tbsp milk
- 1/3 cup semisweet chocolate chips, melted
- 12 small candy spiders
Instructions
- Preheat oven to 350°F and line a muffin tin with 12 liners.
- Whisk flour, cocoa powder, baking soda, and salt together.
- In a second bowl, whisk sugar, oil, eggs, and buttermilk until smooth, then stir in the dry ingredients just until combined.
- Divide batter among liners and bake 14–16 minutes, until a toothpick comes out clean. Cool completely.
- Beat the peanut butter and butter together until smooth, then gradually beat in the powdered sugar and milk until light and spreadable.
- Spread or pipe a flat layer of peanut butter frosting onto each cupcake.
- Transfer the melted chocolate to a piping bag or zip-top bag with a tiny corner snipped off. Pipe 3 concentric circles onto the frosting, then drag a toothpick from the center outward in 6–8 evenly spaced lines to form a web.
- Top each with a candy spider and serve.
Flavor Variation
Swap the peanut butter for almond butter or sunflower seed butter for a nut-free-classroom-friendly version — the texture and web technique stay exactly the same.
Best For
Bake sales and office parties, since these travel well in a covered container without smudging the web.
5. Vanilla Bean Meringue Ghost Cupcakes
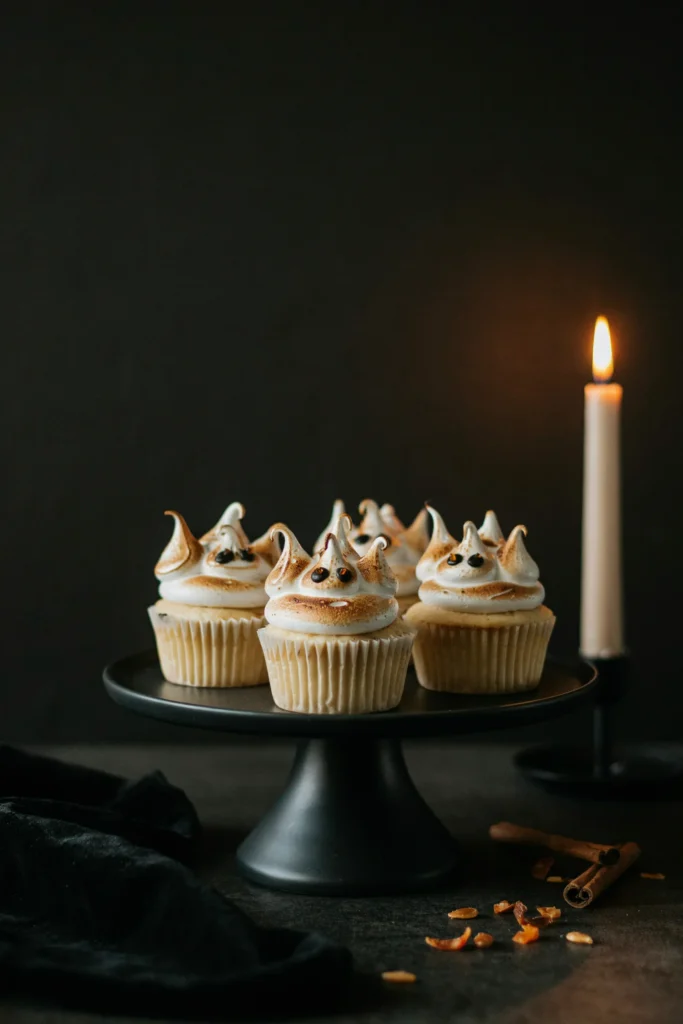
These are the elegant, not-scary option — the meringue frosting is lightly toasted at the tips with a kitchen torch, giving each “ghost” a soft golden shadow that makes it look like it’s glowing. Underneath, the vanilla bean cupcake is light and delicate, closer to a classic party cake than a dense Halloween treat.
Prep Time: 25 min | Cook Time: 16 min | Total Time: 1 hr | Servings: 12 cupcakes | Difficulty: Medium
Ingredients
- 1 1/2 cups all-purpose flour
- 1 1/2 tsp baking powder
- 1/4 tsp salt
- 1/2 cup unsalted butter, softened
- 1 cup granulated sugar
- 2 large eggs
- 1 vanilla bean, seeds scraped (or 1 tbsp vanilla bean paste)
- 1/2 cup whole milk
- 4 large egg whites
- 1 cup granulated sugar (for meringue)
- 1/4 tsp cream of tartar
- Black gel icing, for eyes
Instructions
- Preheat oven to 350°F and line a muffin tin with 12 liners.
- Whisk flour, baking powder, and salt together.
- Beat butter and 1 cup sugar until fluffy, then add eggs one at a time and the vanilla bean seeds.
- Add the flour mixture in three additions, alternating with the milk, mixing just until smooth.
- Divide batter among liners and bake 14–16 minutes, until a toothpick comes out clean. Cool completely.
- For the meringue, combine egg whites, 1 cup sugar, and cream of tartar in a heatproof bowl set over simmering water. Whisk until the sugar dissolves and the mixture is warm to the touch, about 3 minutes.
- Remove from heat and beat with an electric mixer on high for 6–7 minutes, until stiff, glossy peaks form.
- Transfer to a piping bag fitted with a round tip and pipe tall, tapering swirls onto each cupcake to look like ghosts.
- Lightly toast the tips with a kitchen torch, then add two small dots of black gel icing for eyes on each.
Baker’s Tip
Make sure your mixing bowl and beaters are completely grease-free before whipping the meringue, or it won’t reach stiff peaks. For more character-shaped cupcake ideas in this same gentle, kid-friendly style, our dedicated ghost Halloween cupcakes guide has several piping variations.
Good to Know
Torch the meringue right before serving — it holds its shape for hours, but the toasted color is most vivid within the first couple of hours after torching.
Showstopper Layer Cakes
6. Chocolate Spiderweb Drip Cake
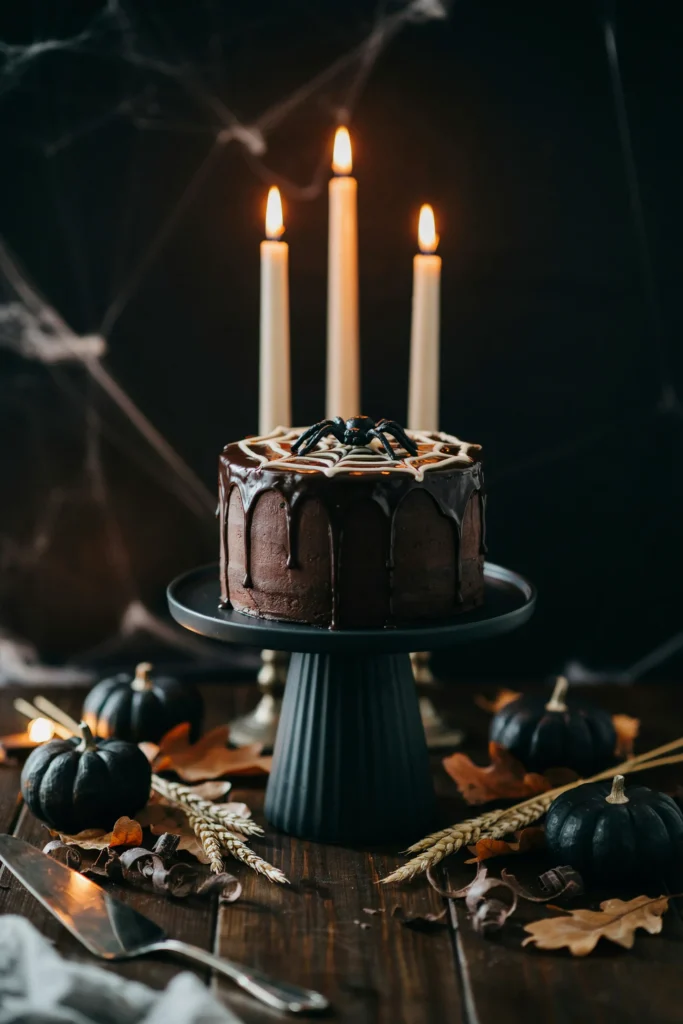
This is the one that stops people at the dessert table. The layers are deep, moist chocolate cake, and the black ganache drip is genuinely black rather than the muddy dark brown a lot of “black” cakes end up with, thanks to a little black cocoa powder in the mix. The white web on top is the only decoration it needs — no fondant sculpting required to make it look professional.
Prep Time: 40 min | Cook Time: 32 min | Total Time: 2 hr (with cooling and assembly) | Servings: 14 | Difficulty: Advanced
Ingredients
- 2 1/2 cups all-purpose flour
- 1 cup unsweetened cocoa powder
- 1/4 cup black cocoa powder
- 2 1/2 tsp baking soda
- 1 tsp salt
- 2 1/2 cups granulated sugar
- 1 cup vegetable oil
- 4 large eggs
- 1 1/4 cups buttermilk
- 1 1/4 cups hot coffee
- 2 cups unsalted butter, softened (for frosting)
- 6 cups powdered sugar
- 1/2 cup heavy cream
- 1 cup dark chocolate chips
- 1/2 cup heavy cream (for ganache drip)
- 1/3 cup white chocolate chips, melted
- 1 fondant or candy spider
Instructions
- Preheat oven to 350°F. Grease and flour three 8-inch round cake pans.
- Whisk flour, both cocoas, baking soda, and salt together.
- In a large bowl, whisk sugar, oil, and eggs until smooth. Add the dry ingredients alternately with the buttermilk, mixing just until combined. Stir in the hot coffee last (batter will be thin).
- Divide batter evenly among the pans and bake 28–32 minutes, until a toothpick comes out clean. Cool 10 minutes in the pans, then turn out onto racks to cool completely.
- Beat the 2 cups butter until pale and fluffy, then gradually add powdered sugar and 1/2 cup cream, beating until smooth.
- Level the cake layers if needed, then stack and frost with buttercream, smoothing the sides and top. Chill 20 minutes.
- Heat 1/2 cup cream just to a simmer, pour over the dark chocolate chips, and let sit 2 minutes, then stir until smooth. Let cool 5 minutes until slightly thickened, then spoon around the top edge of the cake, letting it drip down the sides.
- Transfer melted white chocolate to a piping bag with a tiny tip. Pipe 3–4 concentric circles on top of the cake, then drag a toothpick from the center out to the edges to create a web pattern. Finish with the spider.
Baker’s Tip
Test your ganache drip on the back of a cold spoon before committing it to the cake — it should hold a slow drip, not run straight off. If it’s too thin, let it cool a few more minutes.
Why You’ll Love It
It looks like a bakery cake but uses the same basic layer-cake method as any birthday cake — the drama comes from color and technique, not difficulty.
7. Pumpkin Spice Layer Cake with Maple Cream Cheese Frosting
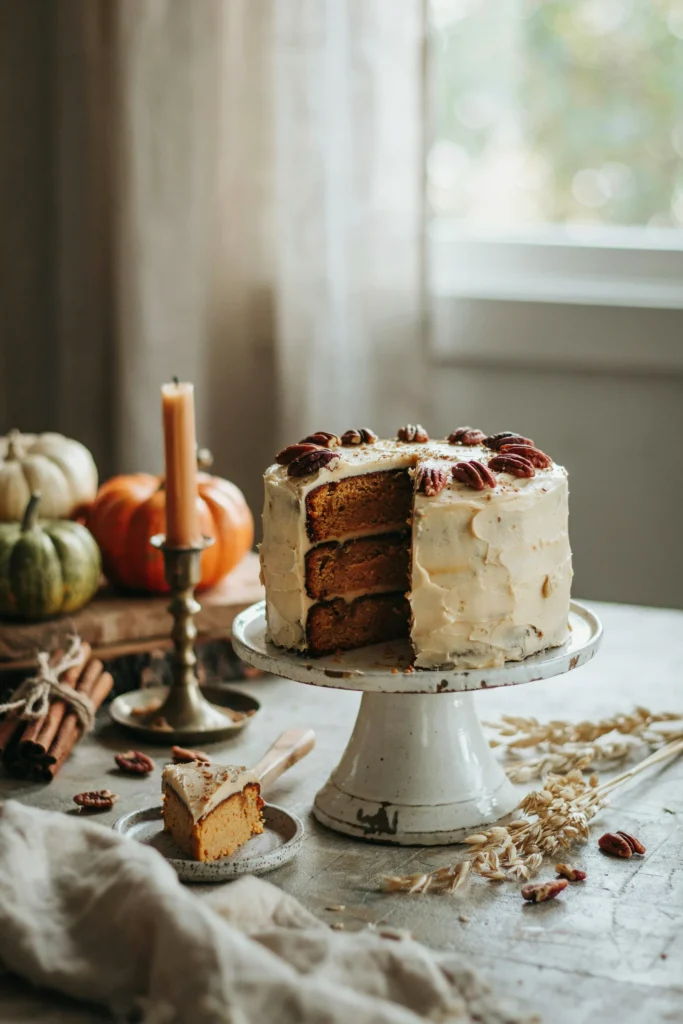
This is the cake for the reader who wants “cozy fall” more than “spooky Halloween.” The crumb is dense and moist from real pumpkin puree, warmly spiced without tipping into pumpkin-pie territory, and the maple in the frosting keeps it from being cloyingly sweet against three full layers of cake.
Prep Time: 30 min | Cook Time: 30 min | Total Time: 1 hr 30 min | Servings: 14 | Difficulty: Medium
Ingredients
- 3 cups all-purpose flour
- 1 tbsp baking powder
- 1 tsp baking soda
- 1/2 tsp salt
- 2 tsp ground cinnamon
- 1 tsp ground ginger
- 1/4 tsp ground cloves
- 1 1/2 cups vegetable oil
- 2 cups granulated sugar
- 1/2 cup packed brown sugar
- 4 large eggs
- 1 (15 oz) can pumpkin puree
- 16 oz cream cheese, softened
- 1/2 cup unsalted butter, softened
- 4 cups powdered sugar
- 3 tbsp pure maple syrup
- 1/2 cup chopped candied pecans, for garnish
Instructions
- Preheat oven to 350°F. Grease and flour three 8-inch round cake pans.
- Whisk flour, baking powder, baking soda, salt, cinnamon, ginger, and cloves together.
- In a large bowl, whisk oil, both sugars, and eggs until smooth. Whisk in the pumpkin puree.
- Add the dry ingredients to the wet ingredients and stir just until no streaks of flour remain.
- Divide batter evenly among the pans and bake 26–30 minutes, until a toothpick comes out clean. Cool 10 minutes in the pans, then turn out onto racks to cool completely.
- Beat the cream cheese and butter together until smooth, then gradually add powdered sugar and maple syrup, beating until light and fluffy.
- Level the layers if needed, then stack and frost with the maple cream cheese frosting, swooping the top and sides with the back of a spoon for texture.
- Garnish the top with candied pecans and a light dusting of cinnamon just before serving.
Baker’s Tip
Pat the pumpkin puree dry with a paper towel before measuring if it looks especially watery — excess moisture is the most common reason this cake sinks in the middle.
Storage & Freezing
Because of the cream cheese frosting, this cake needs to be refrigerated; bring slices to room temperature for about 20 minutes before serving for the best texture. The unfrosted layers freeze well for up to 2 months, wrapped tightly in plastic.
8. Black Cocoa Velvet Cake with Orange Buttercream
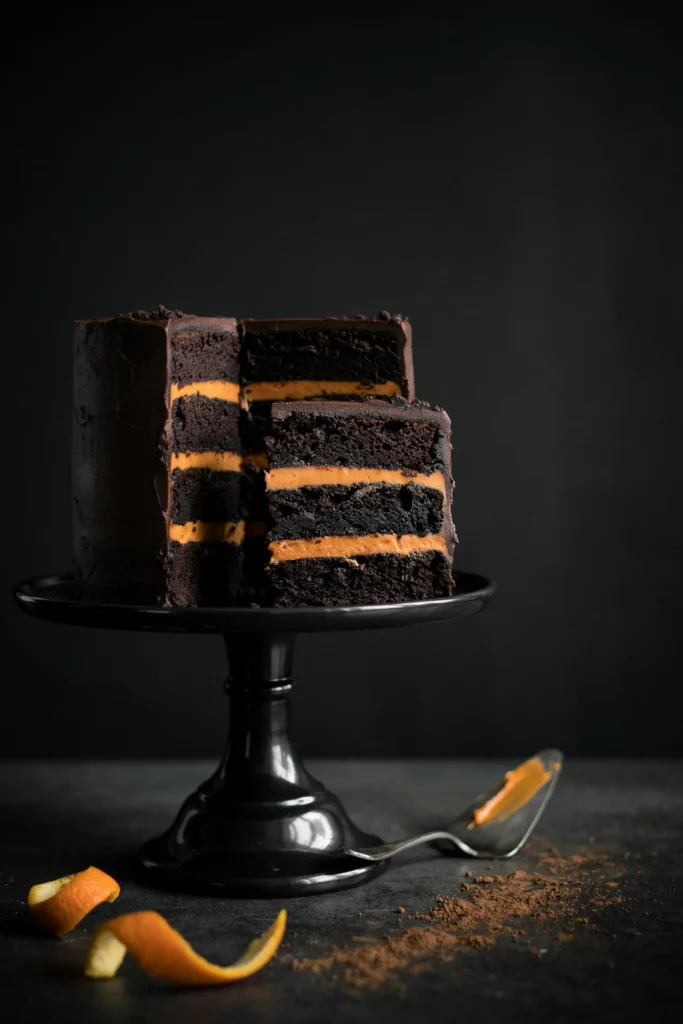
The contrast is the whole point here — slice into it and you get true black cake against genuinely orange frosting, no muddy in-between shade. Black cocoa powder gives the crumb its color without any food dye, and it has a slightly deeper, less bitter flavor than regular cocoa, closer to an Oreo cookie than standard chocolate cake.
Prep Time: 30 min | Cook Time: 28 min | Total Time: 1 hr 30 min | Servings: 12 | Difficulty: Medium
Ingredients
- 2 1/4 cups all-purpose flour
- 3/4 cup black cocoa powder
- 1 3/4 tsp baking soda
- 3/4 tsp salt
- 1 3/4 cups granulated sugar
- 3/4 cup vegetable oil
- 3 large eggs
- 1 cup buttermilk
- 3/4 cup hot water
- 1 1/2 cups unsalted butter, softened
- 5 cups powdered sugar
- 3 tbsp fresh orange juice
- 1 tbsp orange zest
- Orange gel food coloring
Instructions
- Preheat oven to 350°F. Grease and flour two 8-inch round cake pans.
- Whisk flour, black cocoa powder, baking soda, and salt together.
- In a large bowl, whisk sugar, oil, and eggs until smooth. Add the dry ingredients alternately with the buttermilk, mixing just until combined, then stir in the hot water (batter will be thin).
- Divide batter between the pans and bake 25–28 minutes, until a toothpick comes out clean. Cool 10 minutes in the pans, then turn out onto racks to cool completely.
- Beat the butter until pale and fluffy, then gradually add powdered sugar, orange juice, and zest, beating until smooth. Tint with a few drops of orange gel coloring for a vivid color.
- Level the layers if needed, then spread a generous layer of orange buttercream between the two layers.
- Apply a thin “naked” coat of buttercream around the outside, scraping most of it away so the black crumb shows through, then pipe a decorative border of orange buttercream around the top edge.
Good to Know
Black cocoa powder is lower in fat than regular cocoa, so don’t substitute it 1:1 in other recipes without adjusting — but for this cake, it’s exactly what gives that true black color without any artificial dye.
Why You’ll Love It
It photographs beautifully with almost no decorating effort — the color contrast does all the visual work.
9. Ghostly White Chocolate Cake with Marshmallow Frosting
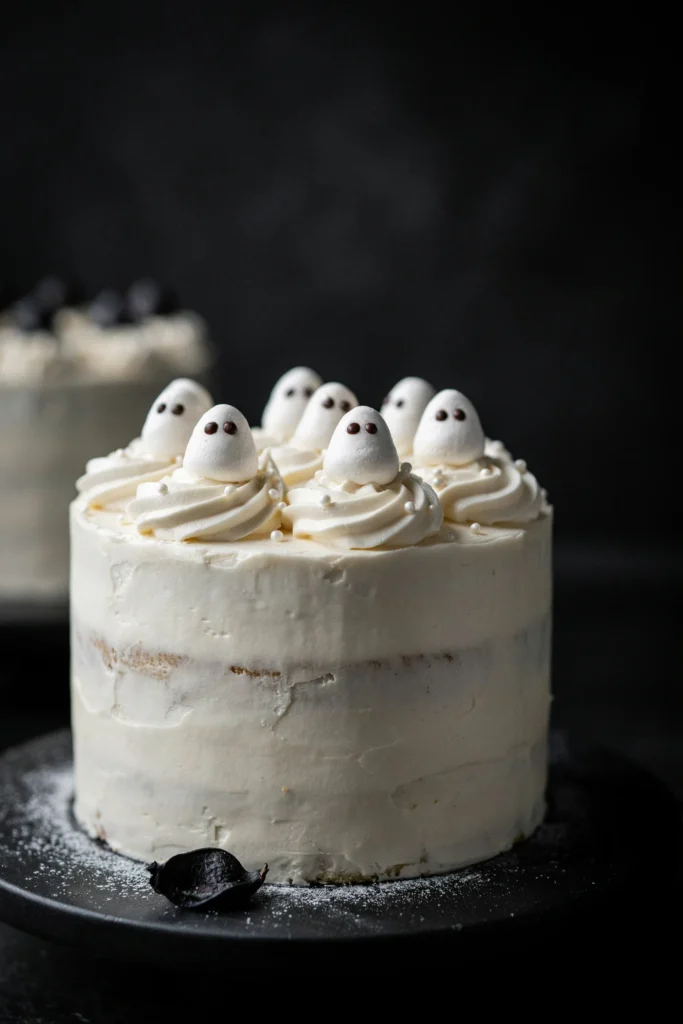
Everything about this cake is soft — soft crumb, soft white color, soft billowy frosting — which makes it the gentlest option in this whole roundup. The white chocolate folded into the batter keeps the cake tender and adds a faint sweetness that pairs perfectly with the marshmallow frosting, which is fluffier and less sweet than a standard buttercream.
Prep Time: 30 min | Cook Time: 28 min | Total Time: 1 hr 20 min | Servings: 12 | Difficulty: Medium
Ingredients
- 2 3/4 cups all-purpose flour
- 2 1/2 tsp baking powder
- 1/2 tsp salt
- 1 cup unsalted butter, softened
- 1 3/4 cups granulated sugar
- 4 large egg whites
- 1 cup whole milk
- 6 oz white chocolate, melted and cooled
- 1 tsp vanilla extract
- 1 cup unsalted butter, softened (for frosting)
- 2 cups marshmallow fluff
- 2 cups powdered sugar
- 1 tsp vanilla extract
Instructions
- Preheat oven to 350°F. Grease and flour two 9-inch round cake pans.
- Whisk flour, baking powder, and salt together.
- Beat 1 cup butter and sugar until fluffy, about 3 minutes. Add egg whites in two additions, beating well after each.
- Add the flour mixture in three additions, alternating with the milk, then mix in the melted white chocolate and vanilla until just combined.
- Divide batter between the pans and bake 25–28 minutes, until a toothpick comes out clean. Cool 10 minutes in the pans, then turn out onto racks to cool completely.
- Beat 1 cup butter until fluffy, then beat in the marshmallow fluff until smooth. Gradually add powdered sugar and vanilla, beating until light and spreadable.
- Level the layers if needed, then fill and frost the cake, using an offset spatula to create soft swoops and peaks across the top and sides.
- Pipe a few small ghost shapes on top using extra frosting and a round piping tip, and finish with a light dusting of edible pearl shimmer if desired.
Baker’s Tip
Using egg whites instead of whole eggs keeps this cake pale and prevents any yellow tint from showing through the white frosting.
Why You’ll Love It
It’s genuinely not scary — a good pick for a family gathering with younger kids or anyone who wants festive without gore.
10. Red Velvet “Bloody Heart” Cake
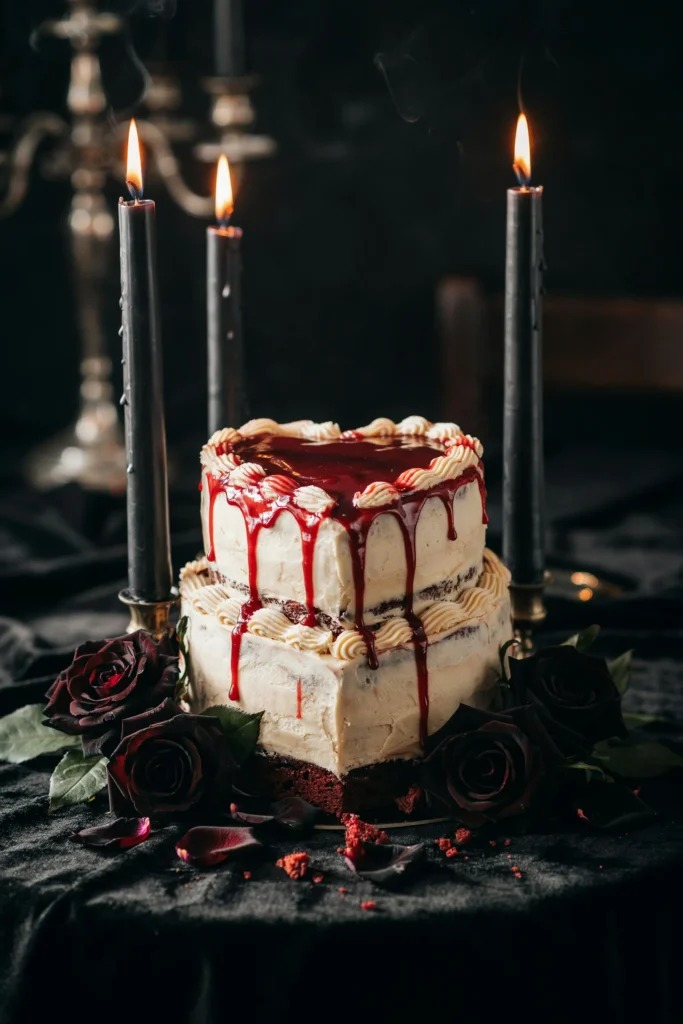
Red velvet already has a naturally dramatic color, and this version leans all the way into it with a bright red glaze cracking down the white frosting. The cake itself is the classic — tangy cream cheese frosting against a mild cocoa crumb — it’s the presentation that turns it into a genuine Halloween centerpiece rather than just a red cake.
Prep Time: 30 min | Cook Time: 30 min | Total Time: 1 hr 30 min | Servings: 12 | Difficulty: Medium
Ingredients
- 2 1/2 cups all-purpose flour
- 2 tbsp unsweetened cocoa powder
- 1 tsp baking soda
- 1/2 tsp salt
- 1 1/2 cups granulated sugar
- 1 1/2 cups vegetable oil
- 2 large eggs
- 1 cup buttermilk
- 2 tbsp red gel food coloring
- 1 tsp vanilla extract
- 1 tsp white vinegar
- 16 oz cream cheese, softened
- 1/2 cup unsalted butter, softened
- 4 cups powdered sugar
- 1/2 cup corn syrup
- Red gel food coloring, for glaze
Instructions
- Preheat oven to 350°F. Grease and flour a heart-shaped cake pan (or two 8-inch round pans).
- Whisk flour, cocoa powder, baking soda, and salt together.
- In a large bowl, whisk sugar and oil, then whisk in the eggs, buttermilk, red food coloring, and vanilla until smooth. Stir in the vinegar last.
- Add the dry ingredients and stir just until no streaks remain.
- Divide batter into the pan(s) and bake 28–30 minutes, until a toothpick comes out clean. Cool 10 minutes in the pan, then turn out onto a rack to cool completely.
- Beat the cream cheese and butter until smooth, then gradually add powdered sugar, beating until light and fluffy.
- Frost the cooled cake in a smooth, even layer of white cream cheese frosting, chilling for 15 minutes once frosted.
- Warm the corn syrup slightly and tint it deep red with gel coloring. Drizzle it over the top edge of the cake, letting it run down the sides in uneven streaks. Lay an edible or decorative knife on top and serve.
Good to Know
For an extra-thematic finish, these edible bloody knife cupcake toppers can be pressed right into the top of the cake alongside the glaze drips.
Best For
Adult Halloween parties — the “bloody” presentation is a little too intense for a toddler’s birthday table.
11. Black Forest Halloween Cake
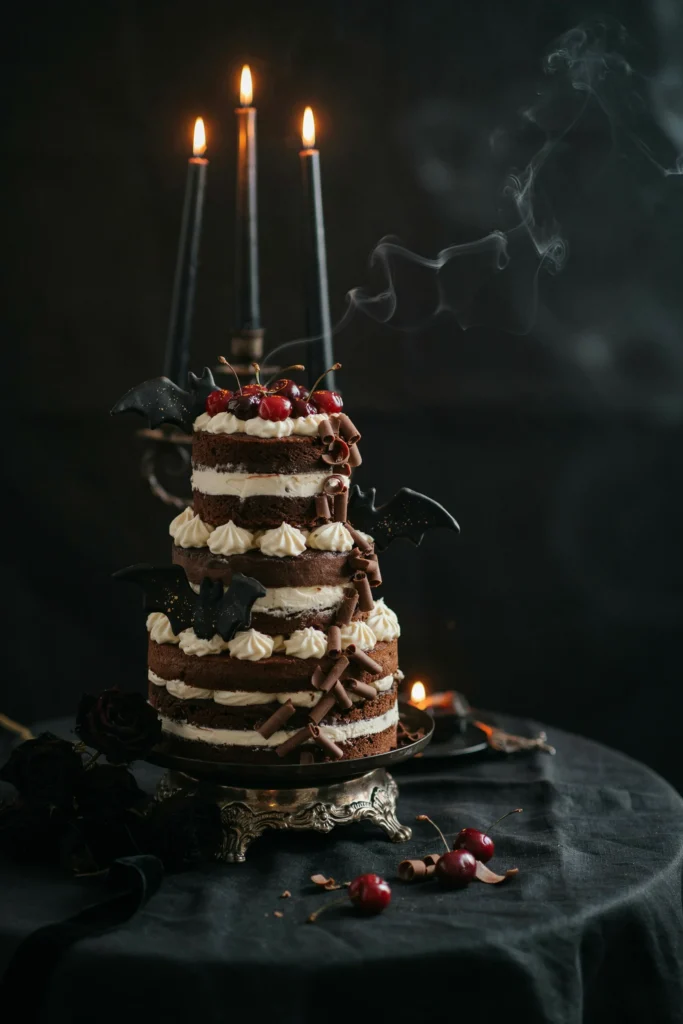
Classic Black Forest cake already leans dramatic with its dark chocolate and deep red cherries, so it needed almost no adjustment to earn its place here. The whipped cream filling stays light against the rich cake, and the tart cherry compote cuts through what would otherwise be a very heavy, all-chocolate dessert.
Prep Time: 35 min | Cook Time: 28 min | Total Time: 1 hr 45 min | Servings: 12 | Difficulty: Medium
Ingredients
- 2 cups all-purpose flour
- 3/4 cup unsweetened cocoa powder
- 1 3/4 tsp baking soda
- 1/2 tsp salt
- 2 cups granulated sugar
- 1/2 cup vegetable oil
- 2 large eggs
- 1 cup buttermilk
- 1 cup hot water
- 1 (14.5 oz) can pitted dark cherries, drained (juice reserved)
- 1/4 cup granulated sugar (for compote)
- 1 tbsp cornstarch
- 2 cups heavy cream
- 3 tbsp powdered sugar
- 1/2 cup dark chocolate shavings
Instructions
- Preheat oven to 350°F. Grease and flour two 9-inch round cake pans.
- Whisk flour, cocoa powder, baking soda, and salt together.
- Whisk sugar, oil, and eggs until smooth, then add the dry ingredients alternately with the buttermilk. Stir in the hot water last (batter will be thin).
- Divide batter between the pans and bake 25–28 minutes, until a toothpick comes out clean. Cool 10 minutes in the pans, then turn out onto racks to cool completely.
- For the compote, combine the cherries, 1/2 cup reserved cherry juice, 1/4 cup sugar, and cornstarch in a saucepan. Simmer 5 minutes, stirring, until thickened, then cool completely.
- Whip the heavy cream and powdered sugar to stiff peaks.
- Level the cake layers, spread a layer of whipped cream on the bottom layer, top with half the cherry compote, then repeat with the second layer.
- Frost the top and sides with the remaining whipped cream, top with the rest of the cherry compote, dark chocolate shavings, and a scatter of black candy bats.
Substitutions
Frozen dark cherries work in place of canned — thaw and drain them well first, and add 1 extra tablespoon of sugar to the compote since frozen cherries tend to be slightly more tart.
Why You’ll Love It
It’s the rare Halloween cake that reads as genuinely elegant, not just spooky — a good pick when the party skews more grown-up.
12. Oreo Cookies & Cream Spider Cake
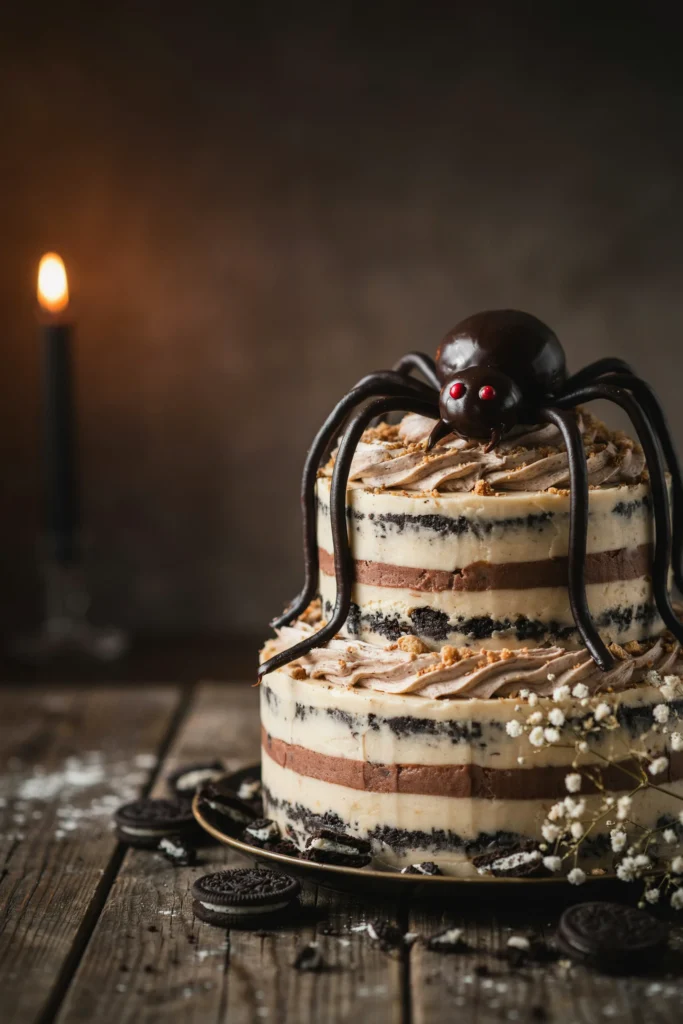
The cake itself is a crowd-pleaser on its own — crushed Oreos folded straight into the batter and again into the frosting, so every bite has that cookies-and-cream crunch. The spider on top is built from a simple ganache dome, so it looks handmade and slightly imperfect in the best way, like it’s actually crawling across the frosting.
Prep Time: 30 min | Cook Time: 28 min | Total Time: 1 hr 30 min | Servings: 12 | Difficulty: Medium
Ingredients
- 2 1/2 cups all-purpose flour
- 2 1/2 tsp baking powder
- 1/2 tsp salt
- 1 cup unsalted butter, softened
- 1 3/4 cups granulated sugar
- 4 large egg whites
- 1 cup buttermilk
- 1 tsp vanilla extract
- 18 chocolate sandwich cookies, roughly crushed, divided
- 1 cup unsalted butter, softened (for frosting)
- 4 cups powdered sugar
- 2–3 tbsp heavy cream
- 1/2 cup dark chocolate chips
- 1/4 cup heavy cream (for ganache spider)
- 2 black licorice laces, cut into legs
Instructions
- Preheat oven to 350°F. Grease and flour two 9-inch round cake pans.
- Whisk flour, baking powder, and salt together.
- Beat 1 cup butter and sugar until fluffy, then add egg whites in two additions.
- Add the flour mixture in three additions, alternating with the buttermilk and vanilla, mixing just until smooth. Fold in half the crushed cookies.
- Divide batter between the pans and bake 25–28 minutes, until a toothpick comes out clean. Cool 10 minutes in the pans, then turn out onto racks to cool completely.
- Beat 1 cup butter until fluffy, then gradually add powdered sugar and cream, beating until smooth. Fold in the remaining crushed cookies.
- Level the layers if needed, then fill and frost the cake with the cookies-and-cream buttercream.
- Heat 1/4 cup cream to a simmer, pour over the dark chocolate chips, let sit 2 minutes, then stir smooth. Cool 5 minutes until slightly thickened, then mound a rounded dollop on top of the cake to form a spider body. Press licorice legs into the sides of the mound and let set 10 minutes before serving.
Baker’s Tip
Reserve a few whole cookie halves to press around the base of the cake — it hides any uneven frosting and adds texture without extra piping. If cookies are the star flavor in your house, our full lineup of Halloween cookie recipes is worth a look too.
Why You’ll Love It
It’s the most universally loved flavor combination in this whole roundup — even guests who claim not to like “fancy” Halloween cakes tend to go back for a second slice.
Creative Shapes & Techniques
13. Candy Corn Tri-Color Layer Cake
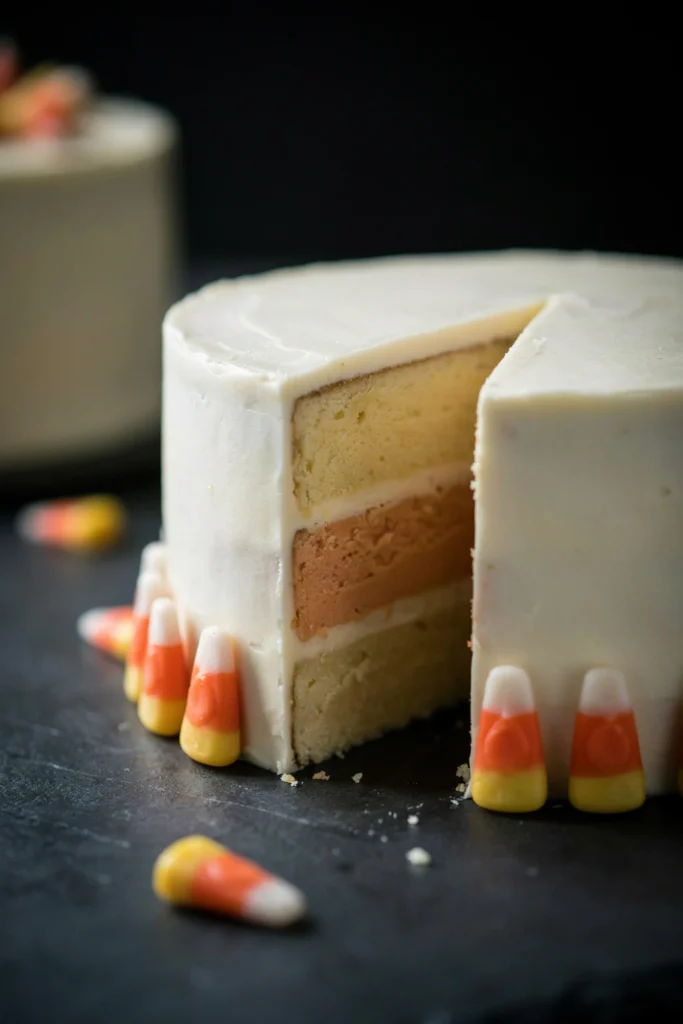
The outside of this cake looks deceptively plain — it’s the slice that delivers the surprise, with three clean bands of yellow, orange, and white cake stacked to look exactly like a giant piece of candy corn. It’s a genuinely fun technique to pull off, using one simple vanilla batter split and tinted three ways rather than three separate recipes.
Prep Time: 35 min | Cook Time: 22 min | Total Time: 1 hr 45 min | Servings: 12 | Difficulty: Medium
Ingredients
- 3 cups all-purpose flour
- 1 tbsp baking powder
- 3/4 tsp salt
- 1 cup unsalted butter, softened
- 2 cups granulated sugar
- 5 large egg whites
- 1 cup whole milk
- 1 tbsp vanilla extract
- Yellow gel food coloring
- Orange gel food coloring
- 1 1/2 cups unsalted butter, softened (for frosting)
- 5 cups powdered sugar
- 3 tbsp heavy cream
Instructions
- Preheat oven to 350°F. Grease and flour three 8-inch round cake pans.
- Whisk flour, baking powder, and salt together.
- Beat 1 cup butter and sugar until fluffy, then add egg whites in two additions.
- Add the flour mixture in three additions, alternating with the milk and vanilla, mixing just until smooth.
- Divide the batter evenly into three bowls. Leave one plain (white), tint one yellow, and tint one orange.
- Pour each color into its own prepared pan and bake 20–22 minutes, until a toothpick comes out clean. Cool 10 minutes in the pans, then turn out onto racks to cool completely.
- Beat the 1 1/2 cups butter until fluffy, then gradually add powdered sugar and cream, beating until smooth.
- Stack the layers in order — yellow on the bottom, orange in the middle, white on top — with a thin layer of frosting between each. Frost the outside in a smooth white coat so the color only reveals itself when sliced.
Baker’s Tip
Weigh or measure each portion of batter after dividing to make sure the three layers bake up the same height — an uneven candy corn stack looks off-balance once sliced.
Substitutions
If you’d rather skip food dye entirely, natural options like turmeric (for yellow) and a mix of turmeric and beet powder (for orange) work, though the colors will be more muted.
14. Jack-o’-Lantern Carved Pumpkin Bundt Cake
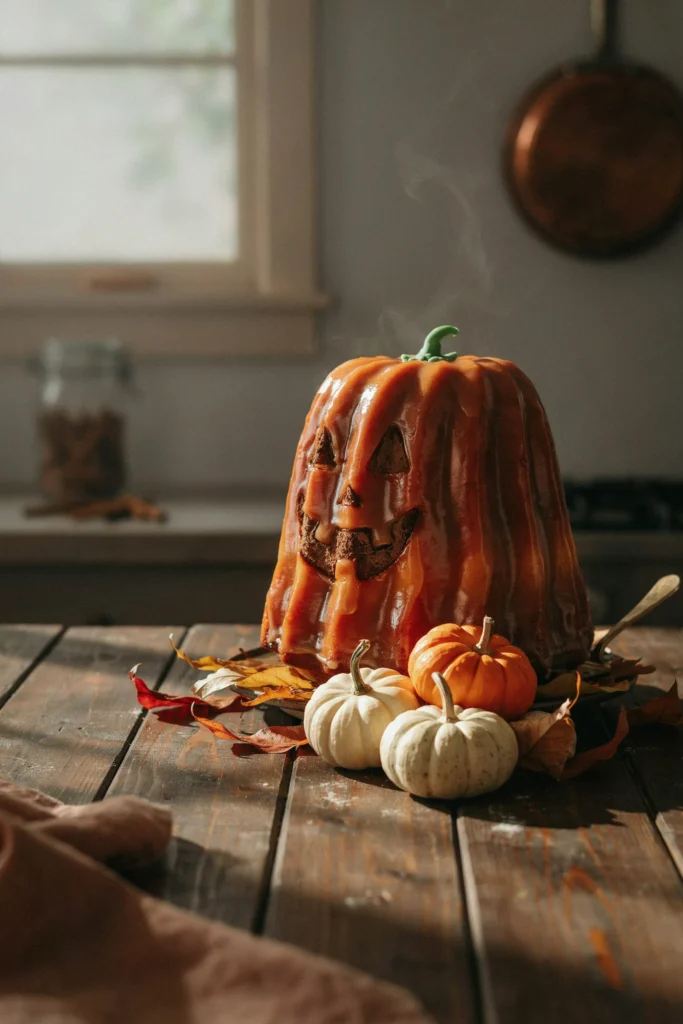
Carving a face into a bundt cake sounds intimidating, but the ridged shape of a bundt pan actually makes it easier than decorating a flat-sided cake — the natural grooves help guide straight cuts. The pumpkin batter itself is dense and moist, closer to a pound cake, and holds up well to the carving without crumbling.
Prep Time: 25 min | Cook Time: 55 min | Total Time: 2 hr (with cooling) | Servings: 12 | Difficulty: Advanced
Ingredients
- 3 cups all-purpose flour
- 1 tbsp baking powder
- 1/2 tsp baking soda
- 1/2 tsp salt
- 2 tsp pumpkin pie spice
- 1 cup unsalted butter, softened
- 2 cups granulated sugar
- 4 large eggs
- 1 (15 oz) can pumpkin puree
- 1/2 cup sour cream
- 1 cup powdered sugar
- 2–3 tbsp orange juice
- 2 tbsp unsweetened cocoa powder, for shading
Instructions
- Preheat oven to 350°F. Generously grease and flour a 10-cup bundt pan, working into every groove.
- Whisk flour, baking powder, baking soda, salt, and pumpkin pie spice together.
- Beat butter and sugar until fluffy, then add eggs one at a time. Beat in the pumpkin puree and sour cream.
- Add the dry ingredients and mix just until no streaks of flour remain.
- Pour batter into the prepared pan, smoothing the top, and bake 50–55 minutes, until a toothpick comes out clean.
- Cool in the pan for 20 minutes, then invert onto a rack and cool completely, at least 1 hour, before carving.
- Using a small paring knife, carve a simple jack-o’-lantern face (triangle eyes, triangle nose, jagged mouth) into one side of the cake, cutting about 1/2 inch deep.
- Whisk powdered sugar with orange juice to a thick, pourable glaze and drizzle it over the top, avoiding the carved face. Dust the carved grooves lightly with cocoa powder using a small dry brush to deepen the shadows.
Baker’s Tip
The cake must be fully cooled — ideally even chilled for 20 minutes — before carving, or the crumb will tear instead of cutting cleanly.
Good to Know
Keep the carved cuts shallow on your first attempt; you can always deepen a line, but you can’t undo a cut that goes too far into the cake.
15. Cinnamon Spiral “Snake” Cake
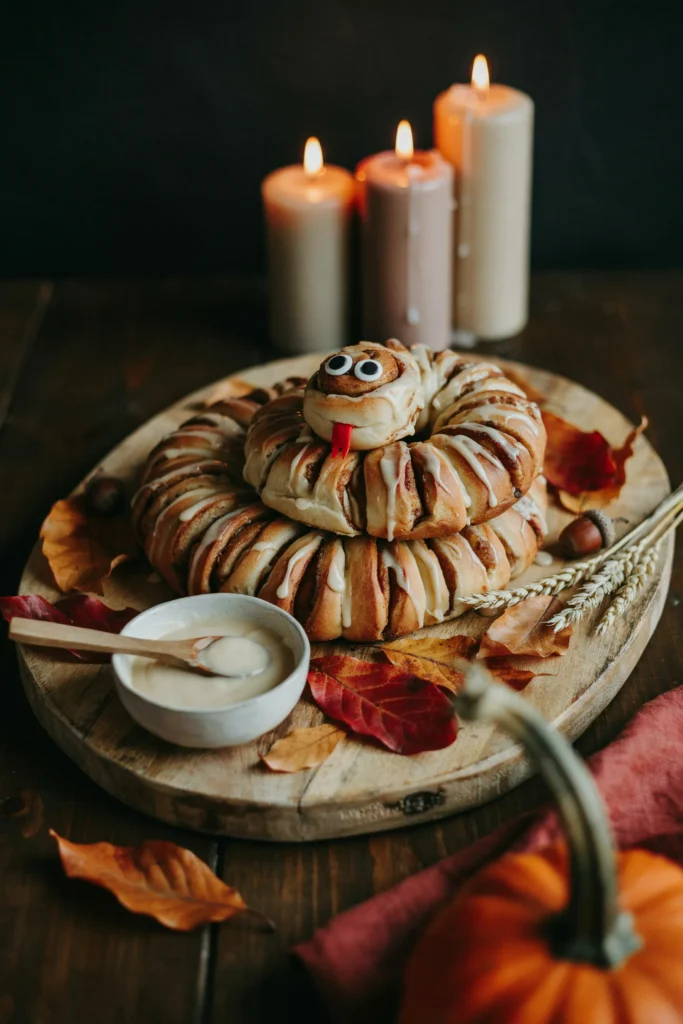
This one is technically a giant yeasted cinnamon roll shaped into a coil, but it bakes and serves like a cake — sliced into swirled rounds at the table. The cinnamon-brown-sugar filling turns almost caramelized at the edges, and shaping it into a coiled “snake” with a fondant tongue turns a familiar breakfast bake into a genuine Halloween centerpiece.
Prep Time: 40 min (plus 1.5 hr rise) | Cook Time: 30 min | Total Time: 2 hr 40 min | Servings: 12 | Difficulty: Advanced
Ingredients
- 3 1/2 cups all-purpose flour
- 1/4 cup granulated sugar
- 2 1/4 tsp active dry yeast
- 1 tsp salt
- 3/4 cup warm whole milk
- 1/3 cup unsalted butter, melted
- 2 large eggs
- 1/2 cup unsalted butter, softened (for filling)
- 1 cup packed brown sugar
- 2 tbsp ground cinnamon
- 4 oz cream cheese, softened
- 1 1/2 cups powdered sugar
- 2–3 tbsp milk
- 2 candy eyes
- 1 small piece red fondant, for the tongue
Instructions
- Whisk flour, sugar, yeast, and salt together in a large bowl. Add the warm milk, melted butter, and eggs, and mix until a shaggy dough forms.
- Knead on a floured surface for 8 minutes, until smooth and elastic. Place in a greased bowl, cover, and let rise in a warm spot for 1 1/2 hours, until doubled.
- Punch down the dough and roll it into a large rectangle, about 20×12 inches.
- Spread the softened 1/2 cup butter evenly over the dough, then sprinkle with brown sugar and cinnamon, pressing gently to adhere.
- Roll the dough up tightly from the long edge into a log, then slice it lengthwise in half to expose the swirled layers (cut side up).
- Twist the two strips together, keeping the cut sides facing up, then coil the twisted rope into a spiral on a parchment-lined baking sheet to form a “snake.” Pinch one end into a rounded head shape.
- Cover loosely and let rise 30 minutes, then bake at 350°F for 26–30 minutes, until deep golden brown. Cool 15 minutes.
- Beat the cream cheese, powdered sugar, and milk into a smooth glaze, then drizzle generously over the warm coil. Press candy eyes and the fondant tongue onto the head end before serving.
Baker’s Tip
Cutting the rolled log lengthwise before coiling is what creates the scaled, textured look — don’t skip that step even though it feels counterintuitive after just rolling it up.
Good to Know
This one is genuinely a project — plan for the full 2 hr 40 min including rise time, and consider making the dough the night before, letting it do its first rise slowly in the refrigerator.
16. Chai-Spiced Pumpkin Cake Roll
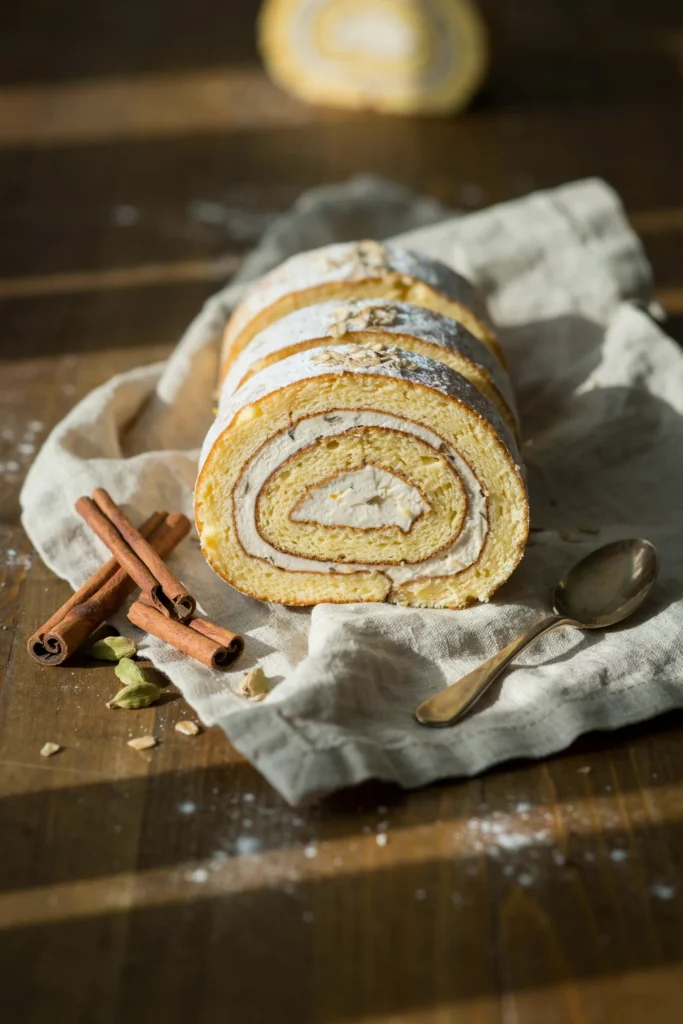
A cake roll always looks more impressive than it is to make, and this one adds a chai twist — cardamom and black pepper alongside the usual cinnamon and ginger — that sets it apart from a standard pumpkin roll. Rolled while warm and unrolled once filled, it holds a tight, even spiral that looks bakery-made when sliced.
Prep Time: 30 min | Cook Time: 13 min | Total Time: 1 hr 30 min (with cooling) | Servings: 10 | Difficulty: Advanced
Ingredients
- 3/4 cup all-purpose flour
- 1 tsp baking powder
- 1/2 tsp ground cinnamon
- 1/2 tsp ground cardamom
- 1/4 tsp ground ginger
- 1/4 tsp ground cloves
- 1/8 tsp black pepper
- 1/4 tsp salt
- 3 large eggs
- 2/3 cup granulated sugar
- 2/3 cup pumpkin puree
- Powdered sugar, for dusting
- 8 oz cream cheese, softened
- 1/4 cup unsalted butter, softened
- 1 cup powdered sugar (for filling)
- 1/2 tsp vanilla extract
Instructions
- Preheat oven to 375°F. Grease a 10×15-inch jelly roll pan and line with parchment, then grease the parchment.
- Whisk flour, baking powder, and all the spices and salt together.
- In a separate bowl, beat eggs and sugar for 3 minutes, until pale and thick. Beat in the pumpkin puree.
- Fold the dry ingredients into the pumpkin mixture just until combined.
- Spread batter evenly into the prepared pan and bake 11–13 minutes, until the cake springs back when touched.
- While still hot, dust a clean kitchen towel generously with powdered sugar. Invert the cake onto the towel, peel off the parchment, and roll the cake up with the towel from the short end. Cool completely rolled, about 45 minutes.
- Beat cream cheese and butter until smooth, then gradually add powdered sugar and vanilla, beating until fluffy.
- Unroll the cooled cake, spread the filling evenly to the edges, then re-roll without the towel. Chill 15 minutes before slicing, and dust with extra powdered sugar just before serving.
Make-Ahead Tip
The filled roll can be wrapped tightly and refrigerated up to 2 days ahead — it slices more cleanly cold, so this is one Halloween cake that actually benefits from being made in advance.
Baker’s Tip
Rolling the cake while it’s still warm is what prevents cracking — once it cools flat, it will crack when you try to roll it later.
17. Coconut “Skeleton Bones” Cake
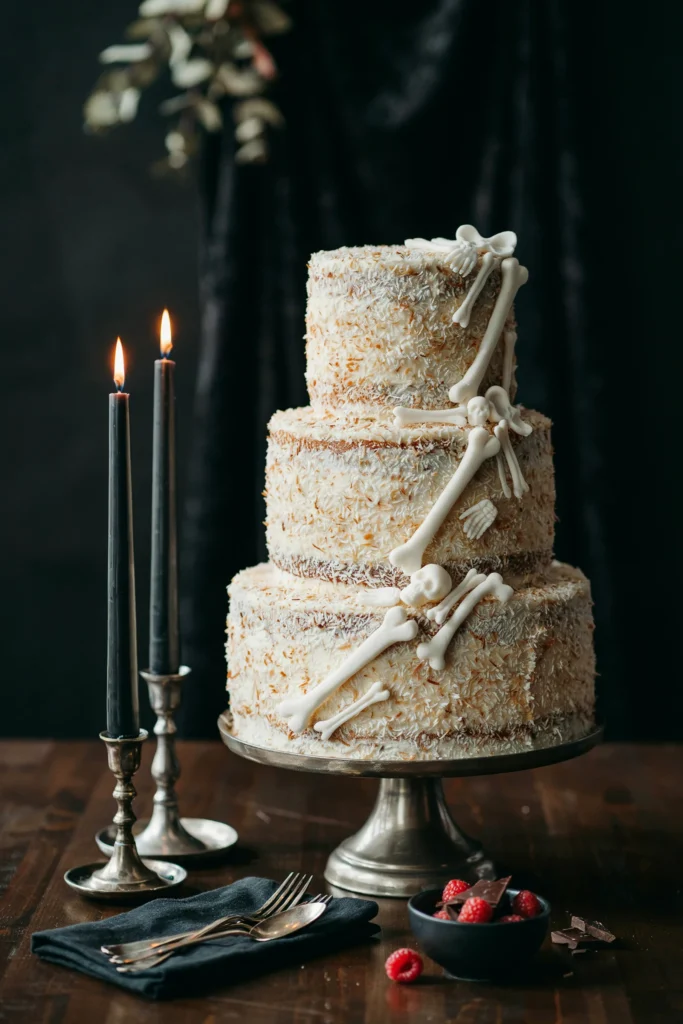
The shredded coconut coating gives this cake real texture against the smooth fondant bones — it’s soft and slightly chewy where the coconut meets the frosting, and delicately crisp on the very outside where the coconut has toasted just slightly in the oven beforehand. It reads as elegant-spooky rather than gory, closer to a bone-white ossuary than a horror scene.
Prep Time: 35 min | Cook Time: 28 min | Total Time: 1 hr 45 min | Servings: 12 | Difficulty: Medium
Ingredients
- 2 1/2 cups all-purpose flour
- 2 1/2 tsp baking powder
- 1/2 tsp salt
- 1 cup unsalted butter, softened
- 1 3/4 cups granulated sugar
- 4 large egg whites
- 1 cup full-fat coconut milk
- 1 tsp coconut extract
- 1 cup unsalted butter, softened (for frosting)
- 4 cups powdered sugar
- 2 tbsp coconut milk
- 2 cups sweetened shredded coconut, lightly toasted
- White fondant, for bone shapes
Instructions
- Preheat oven to 350°F. Grease and flour two 9-inch round cake pans. Spread the shredded coconut on a baking sheet and toast at 325°F for 5–7 minutes, stirring once, until just barely golden. Set aside to cool.
- Whisk flour, baking powder, and salt together.
- Beat 1 cup butter and sugar until fluffy, then add egg whites in two additions.
- Add the flour mixture in three additions, alternating with the coconut milk and extract, mixing just until smooth.
- Divide batter between the pans and bake 26–28 minutes, until a toothpick comes out clean. Cool 10 minutes in the pans, then turn out onto racks to cool completely.
- Beat 1 cup butter until fluffy, then gradually add powdered sugar and 2 tbsp coconut milk, beating until smooth.
- Fill and frost the cake, then press the toasted shredded coconut all over the top and sides while the frosting is still soft.
- Shape small bone and skull forms from the white fondant (or use store-bought fondant bone molds) and arrange them across the top of the cake and cascading down one side.
Baker’s Tip
For a full skeletal effect without hand-sculpting every bone, this skeleton hands, skull, and tombstone cake topper set can be pressed directly into the coconut coating.
Best For
A dessert table that wants “elegant Halloween” rather than gore — this one would fit as easily at a fall dinner party as a kids’ party.
Flavor Twists & Dietary-Friendly Picks
18. Salted Caramel Apple Spice Cake
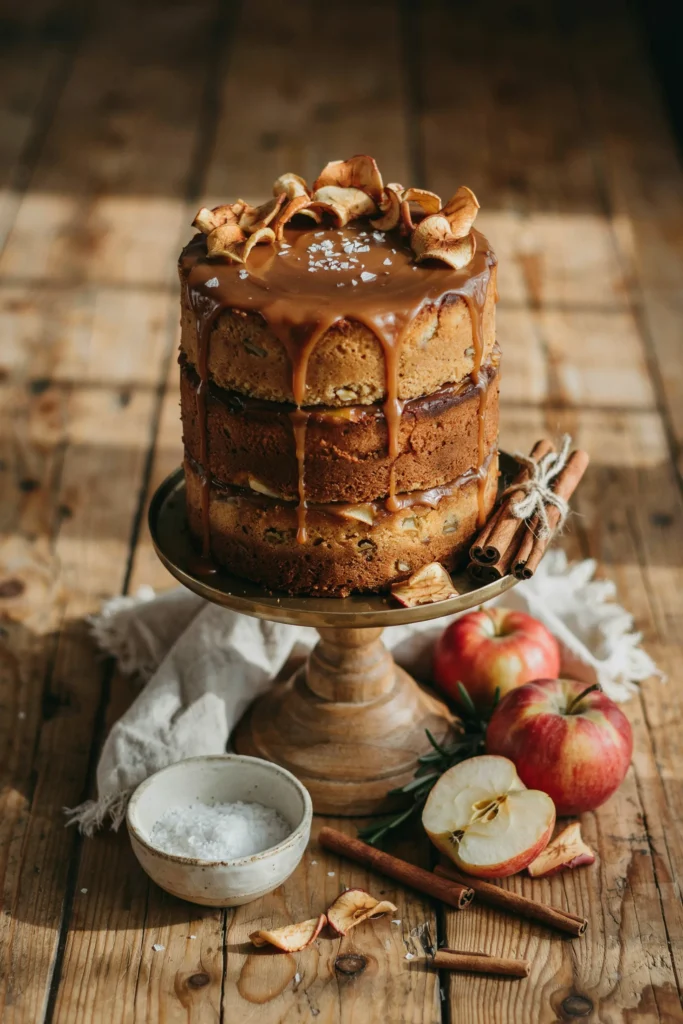
Grated apple folded straight into the batter keeps every layer genuinely moist, not just sweet, and the spice blend leans warmer and more peppery than a typical pumpkin cake. The salted caramel drip is the payoff — deeply amber, slightly bitter at the edges in the best way, and balanced by a real pinch of flaky salt rather than just a sweet glaze.
Prep Time: 30 min | Cook Time: 30 min | Total Time: 1 hr 30 min | Servings: 12 | Difficulty: Medium
Ingredients
- 2 1/2 cups all-purpose flour
- 1 tbsp baking powder
- 1/2 tsp baking soda
- 1/2 tsp salt
- 2 tsp ground cinnamon
- 1/2 tsp ground nutmeg
- 1/4 tsp ground allspice
- 3/4 cup vegetable oil
- 1 cup packed brown sugar
- 1/2 cup granulated sugar
- 3 large eggs
- 2 cups peeled, finely grated apple (about 2 medium apples), squeezed dry
- 1 cup granulated sugar (for caramel)
- 6 tbsp unsalted butter
- 1/2 cup heavy cream
- 1 tsp flaky sea salt, plus more for garnish
Instructions
- Preheat oven to 350°F. Grease and flour two 8-inch round cake pans.
- Whisk flour, baking powder, baking soda, salt, cinnamon, nutmeg, and allspice together.
- Whisk oil and both sugars together, then whisk in the eggs one at a time. Fold in the grated apple.
- Add the dry ingredients and stir just until no streaks of flour remain.
- Divide batter between the pans and bake 27–30 minutes, until a toothpick comes out clean. Cool 10 minutes in the pans, then turn out onto racks to cool completely.
- For the caramel, melt 1 cup sugar in a saucepan over medium heat, swirling (not stirring) until amber, about 6–8 minutes. Carefully whisk in the butter, then slowly stream in the cream, whisking constantly. Stir in the salt and let cool 15 minutes until thickened but still pourable.
- Stack the layers with a thin layer of caramel between them, then pour the remaining caramel over the top, letting it drip down the sides. Sprinkle with extra flaky salt before serving.
Baker’s Tip
Squeeze the grated apple firmly in a clean kitchen towel before folding it into the batter — skipping this step is the most common reason this cake turns out dense or gummy in the middle.
Flavor Variation
Swap half the apple for grated pear for a softer, less tart version, or add 1/4 cup chopped toasted walnuts to the batter for extra texture.
19. Matcha “Monster” Green Tea Layer Cake
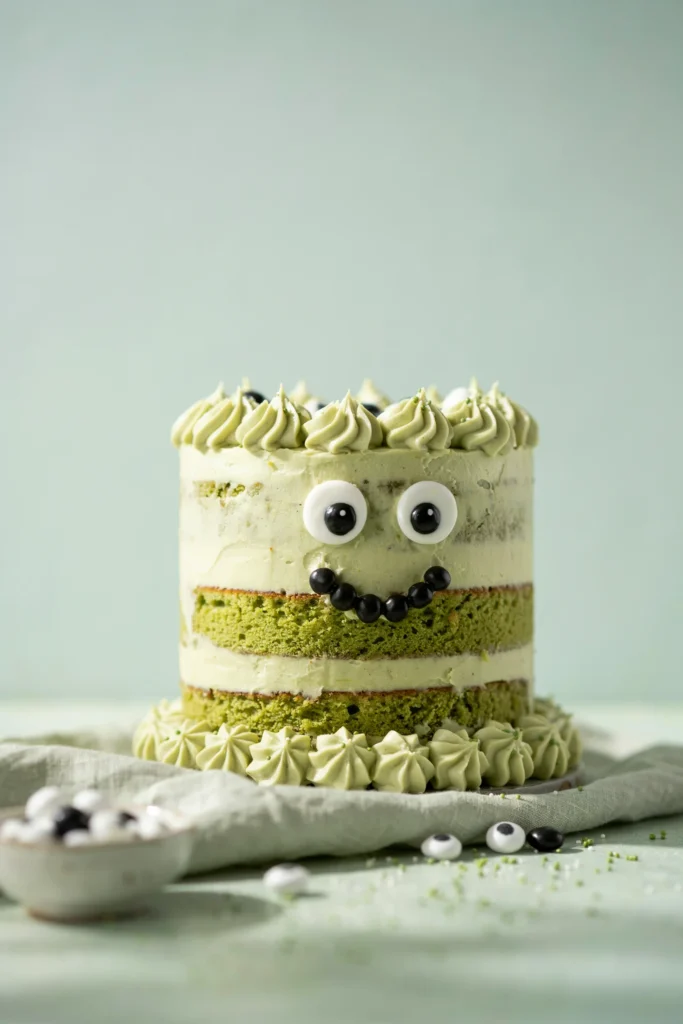
Matcha gives this cake its color naturally, without a drop of food dye, along with a gentle grassy bitterness that keeps the whole cake from tasting like straight sugar. It’s the most flavor-forward entry in this roundup — genuinely tastes like matcha, not just green frosting — while the scattered candy eyes keep the presentation playful rather than sophisticated.
Prep Time: 30 min | Cook Time: 26 min | Total Time: 1 hr 20 min | Servings: 12 | Difficulty: Medium
Ingredients
- 2 1/2 cups all-purpose flour
- 2 1/2 tsp baking powder
- 1/2 tsp salt
- 3 tbsp culinary-grade matcha powder
- 1 cup unsalted butter, softened
- 1 3/4 cups granulated sugar
- 4 large egg whites
- 1 cup whole milk
- 1 tsp vanilla extract
- 1 cup unsalted butter, softened (for frosting)
- 4 cups powdered sugar
- 2 tbsp heavy cream
- 1 tbsp culinary-grade matcha powder
- 8–10 candy eyeballs, assorted sizes
Instructions
- Preheat oven to 350°F. Grease and flour two 8-inch round cake pans.
- Whisk flour, baking powder, salt, and 3 tbsp matcha together, sifting if the matcha is lumpy.
- Beat 1 cup butter and sugar until fluffy, then add egg whites in two additions.
- Add the flour mixture in three additions, alternating with the milk and vanilla, mixing just until smooth.
- Divide batter between the pans and bake 24–26 minutes, until a toothpick comes out clean. Cool 10 minutes in the pans, then turn out onto racks to cool completely.
- Beat 1 cup butter until fluffy, then gradually add powdered sugar, cream, and 1 tbsp matcha, beating until smooth and evenly colored.
- Fill and frost the cake, smoothing the top and sides.
- Press candy eyeballs of assorted sizes randomly across the top and sides of the cake to give it a friendly, one-eyed-monster look.
Substitutions
Look for culinary-grade (not ceremonial-grade) matcha for this recipe — it’s more affordable and has a slightly stronger, more baking-friendly flavor.
Why You’ll Love It
It’s the cake to make for a Halloween party where half the guests don’t even like traditional Halloween flavors — matcha is its own reason to bake this one.
20. Gluten-Free Almond Black Cat Cake
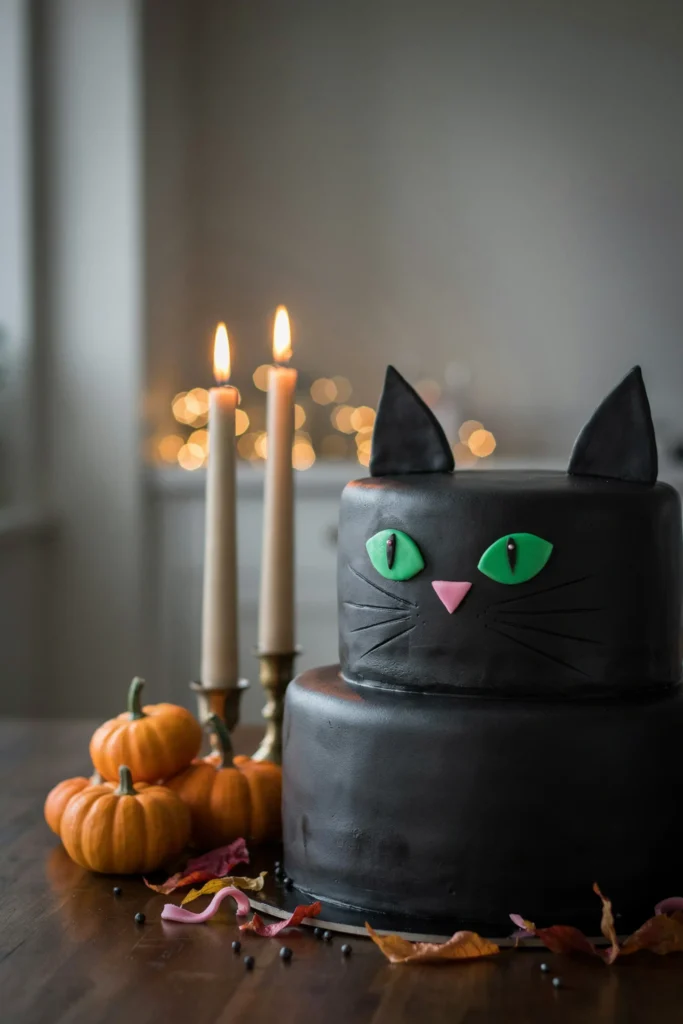
Almond flour gives this cake a naturally dense, slightly nutty crumb that holds its shape well for cutting into the cat silhouette, and it stays moist without any gum-based flour blends. It’s built specifically to be a genuinely great gluten-free cake first — the black cat shaping is a fun bonus, not a workaround for a recipe that only works with wheat flour.
Prep Time: 30 min | Cook Time: 32 min | Total Time: 1 hr 30 min | Servings: 10 | Difficulty: Medium
Ingredients
- 2 1/2 cups blanched almond flour
- 1/2 cup gluten-free all-purpose flour blend
- 1 1/2 tsp baking powder
- 1/2 tsp salt
- 3/4 cup unsalted butter, softened
- 1 cup granulated sugar
- 4 large eggs
- 1 tsp almond extract
- 1/2 cup sour cream
- 1 1/4 cups unsalted butter, softened (for frosting)
- 4 cups powdered sugar
- 2 tbsp cocoa powder
- Black gel food coloring
- Small piece pink fondant, for the nose
- 2 green candy eyes
Instructions
- Preheat oven to 325°F. Grease and flour one 9-inch round cake pan and one small (6-inch) round pan for the head, plus a mini loaf pan for the ears if available.
- Whisk almond flour, gluten-free flour blend, baking powder, and salt together.
- Beat 3/4 cup butter and sugar until fluffy, then add eggs one at a time and the almond extract. Beat in the sour cream.
- Add the dry ingredients and mix just until combined (the batter will be thicker than a standard cake batter).
- Divide batter between the pans, filling each about two-thirds full, and bake 28–32 minutes for the large pan and 18–20 minutes for smaller pans, until a toothpick comes out clean. Cool completely.
- Beat 1 1/4 cups butter until fluffy, then gradually add powdered sugar and cocoa powder, beating until smooth. Tint with black gel coloring until deep and even.
- Trim the smaller cakes into triangular ear shapes and arrange them at the top of the large round cake to form a sitting cat silhouette. Frost the entire shape smoothly in black buttercream.
- Add the pink fondant nose and green candy eyes to finish the face.
Substitutions
Check that your baking powder and gluten-free flour blend are both certified gluten-free if baking for a guest with celiac disease, since cross-contamination can happen even in products that aren’t labeled with wheat.
Why You’ll Love It
It doesn’t taste like a “special diet” cake — the almond flour adds real flavor and richness rather than just standing in for wheat flour.
Which Halloween Cake Should You Make?
With 20 options on the table, here’s a quick way to narrow it down by what actually matters most for your party.
| Cake | Best For | Difficulty | Total Time |
|---|---|---|---|
| Graveyard Dirt Pudding Cake | No oven, last-minute | Easy | 20 min + chill |
| Mummy Wrap Vanilla Sheet Cake | Feeding a crowd | Easy | 1 hr |
| Witch Hat Ice Cream Cone Cupcakes | Kids’ parties | Easy | 1 hr |
| Chocolate Spiderweb Drip Cake | Maximum visual impact | Advanced | 2 hr |
| Pumpkin Spice Layer Cake | Cozy fall gatherings | Medium | 1 hr 30 min |
| Ghostly White Chocolate Cake | Younger kids, not-too-scary | Medium | 1 hr 20 min |
| Salted Caramel Apple Spice Cake | Flavor-forward fall dessert | Medium | 1 hr 30 min |
| Gluten-Free Almond Black Cat Cake | Dietary-restricted guests | Medium | 1 hr 30 min |
How to Store These Halloween Cakes
Buttercream- and ganache-frosted cakes (like the Chocolate Spiderweb Drip Cake, Black Cocoa Velvet Cake, and Candy Corn Layer Cake) keep well at room temperature, covered, for up to 2 days, or refrigerated for up to 5 days — just bring refrigerated cake to room temperature for about 30 minutes before serving so the frosting softens back up.
Anything with cream cheese frosting or a dairy-based filling — the Pumpkin Spice Layer Cake, Red Velvet Bloody Heart Cake, Black Forest Cake, and the Graveyard Dirt Pudding Cake — needs to stay refrigerated the whole time and is best eaten within 3–4 days.
Unfrosted cake layers freeze beautifully for up to 2 months. Wrap each cooled layer tightly in plastic wrap, then foil, and thaw overnight in the refrigerator before frosting and decorating.
Common Mistakes to Avoid
- Decorating a warm cake: Frosting slides right off warm cake and pools at the base — cool cakes completely, and chill for 15–20 minutes before adding a drip or glaze.
- Using liquid food coloring for black or deep colors: It takes so much liquid dye to get true black or red that it can throw off the batter’s texture — use gel food coloring, and lean on black cocoa powder for chocolate cakes when possible.
- Skipping the “level the layers” step: A domed cake layer makes the whole stack lean, which becomes very obvious once a drip or glaze is added.
- Adding delicate decorations too early: Cookie tombstones, candy eyes, and fondant pieces can soften or bleed color if added more than an hour or two before serving.
- Not accounting for chill time before transport: A freshly frosted cake needs to firm up in the refrigerator before it travels, or decorations will shift in the car.
Frequently Asked Questions
What’s the easiest Halloween cake to make?
The Graveyard Dirt Pudding Cake is the fastest option in this roundup — it needs no oven time, comes together in about 20 minutes of active work, and just needs a couple of hours to chill and set before serving.
How do I make black frosting without it tasting bitter?
Start with a chocolate buttercream base instead of white, then add black gel food coloring gradually — you’ll need much less dye than starting from white, and the flavor stays balanced instead of turning metallic or bitter.
Can I make a Halloween cake ahead of time?
Yes — unfrosted cake layers can be baked and frozen up to 2 months ahead, and most frosted cakes hold well in the refrigerator for 1–2 days before the party. Add delicate decorations like cookie tombstones or fondant pieces the day of.
What are good Halloween cake ideas for kids that aren’t scary?
The Ghostly White Chocolate Cake, Witch Hat Ice Cream Cone Cupcakes, and Vanilla Bean Meringue Ghost Cupcakes are all designed to be festive and fun without any gore — good picks for a toddler’s party or a classroom celebration.
What should I do with leftover Halloween candy after the party?
Save it for baking — crushed candy bars, candy corn, and gummy worms can be folded into cookie dough, blondies, or bark. This leftover Halloween candy treats guide has a full list of ideas that put the extra candy to good use instead of it sitting in a bowl for weeks.
Do I need fondant to make any of these cakes?
Only a few — the Coconut Skeleton Bones Cake, Cinnamon Snake Cake, and Gluten-Free Black Cat Cake use small fondant accents, but even those can be swapped for store-bought cake toppers if fondant work isn’t your thing.
More Halloween Treats You’ll Love
- Halloween Cupcakes: 20+ Fun & Easy Designs
- Ghost Halloween Cupcakes
- Halloween Cookies Everyone Will Love
- Halloween Rice Krispie Treats
- What to Make With Leftover Halloween Candy
- 50+ Halloween Dessert Ideas