60 Halloween Desserts
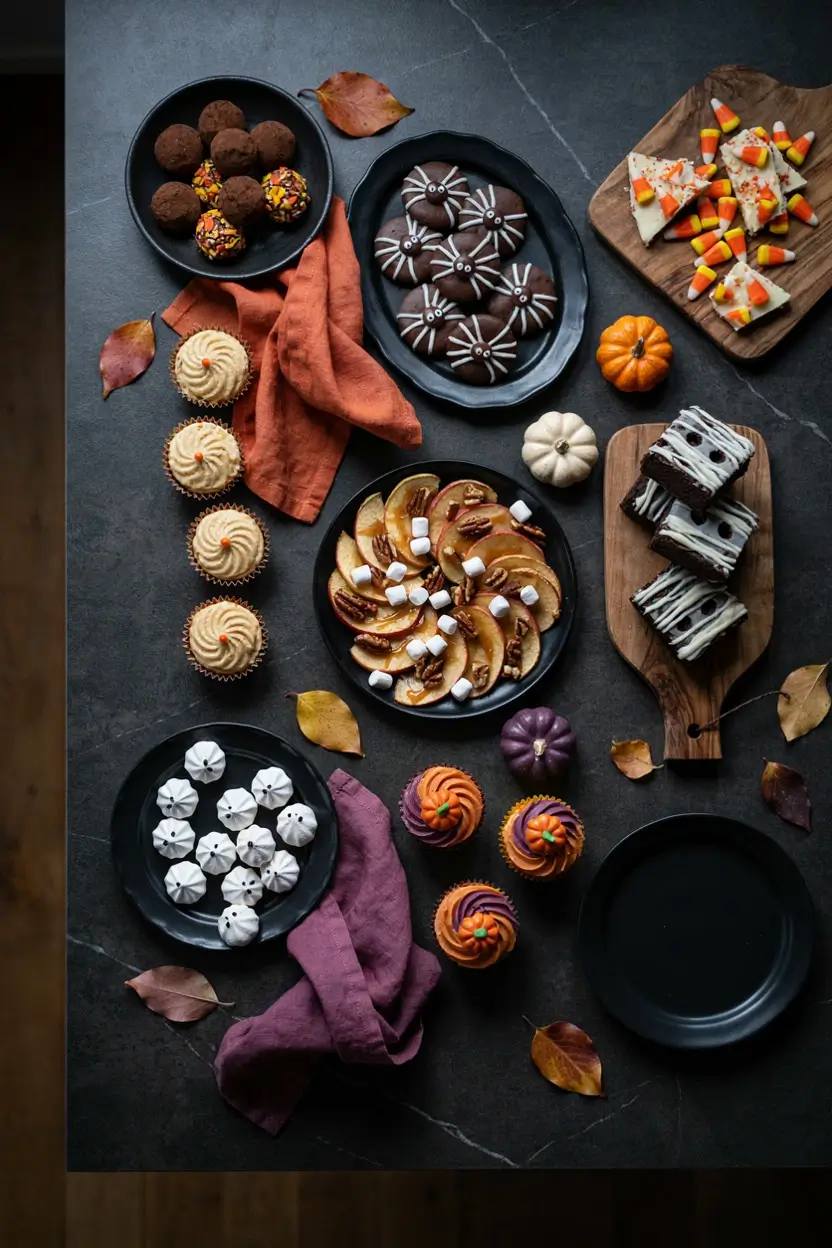
Sixty five Halloween desserts, from five minute no-bake snacks to full on showstoppers, so you never run out of ideas before the candy bowl runs out of candy.
This post may contain affiliate links which helps me keep this blog alive, questions? View the privacy policy.
1. Witch’s Brew Oreo Truffles
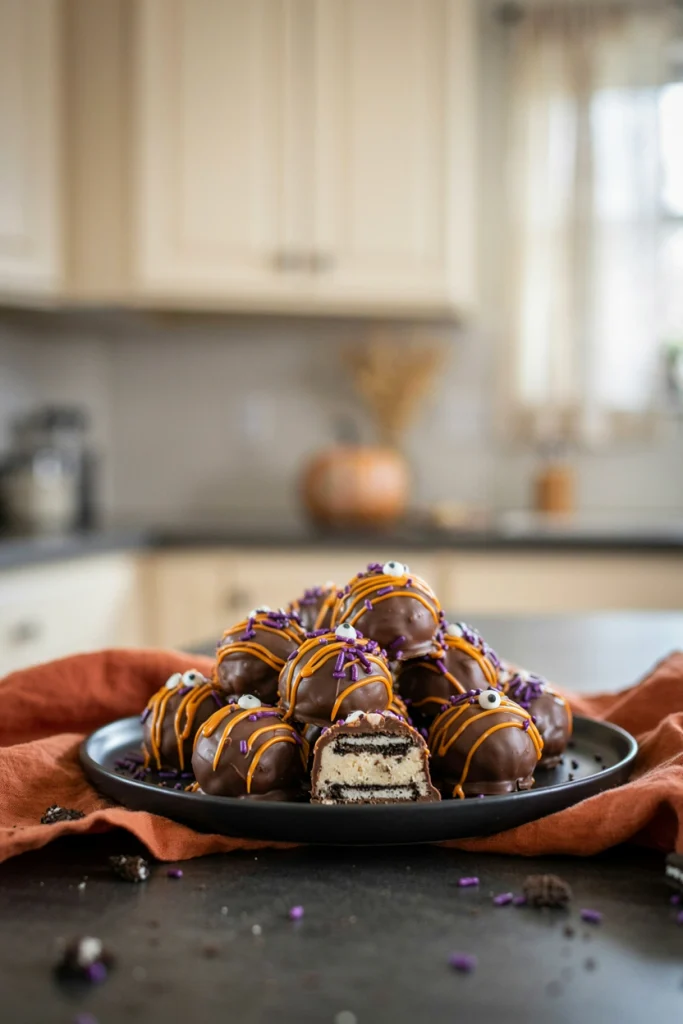
Crushed Oreos blend into a dense, fudgy filling that tastes like cookies and cream cheesecake in truffle form, then get dipped in dark chocolate for a bakery case finish.
Time: 50 min | Makes: 24 truffles
You’ll need: Oreo cookies, cream cheese, dark chocolate melting wafers, orange candy melts, Halloween sprinkles, candy eyes
Quick Method
Pulse Oreos in a food processor to fine crumbs, add softened cream cheese, and pulse until it forms a thick paste. Roll into 1-inch balls, freeze 20-30 minutes until firm, then dip each ball in melted dark chocolate using a fork. Drizzle with melted orange candy melts, add sprinkles or candy eyes while wet, and chill 15 minutes until set.
2. Peanut Butter Spider Cookies

A soft, chewy peanut butter cookie base gets dressed up with pretzel legs and googly eyes for a treat kids beg to help decorate.
Time: 27 min | Makes: 24 cookies
You’ll need: peanut butter, granulated sugar, egg, vanilla extract, baking soda, salt, pretzel sticks, candy eyes, melted chocolate
Quick Method
Preheat the oven to 350°F. Stir peanut butter, sugar, egg, and vanilla until smooth, then mix in baking soda and salt. Roll into 1-inch balls, flatten with a fork in a crisscross pattern, and bake 10-12 minutes until edges are set and lightly golden. Cool completely, then press 8 pretzel halves into each cookie for legs and attach candy eyes with a dot of melted chocolate.
3. Candy Corn Layered Bark

Three thin layers of tinted white chocolate stack up to mimic candy corn itself, topped with the real thing for maximum payoff with minimum effort.
Time: 50 min | Makes: 16 pieces
You’ll need: white chocolate candy melts, orange gel food coloring, yellow gel food coloring, candy corn, Halloween sprinkles
Quick Method
Melt one third of the candy melts, tint orange, spread on parchment, and freeze 10 minutes. Melt another third, tint yellow, spread over the orange layer, and freeze 10 more minutes. Melt the remaining white chocolate, spread as the final layer, and immediately scatter candy corn and sprinkles on top. Chill 15 minutes until set, then break into pieces.
4. Mini Pumpkin Cheesecake Bites
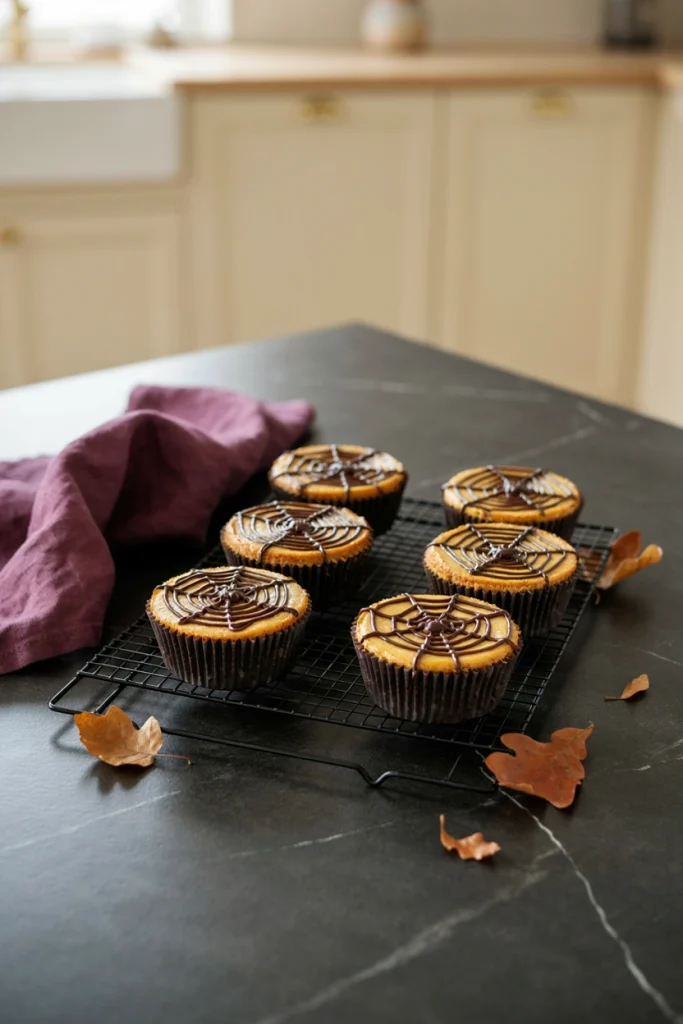
A graham crust and spiced pumpkin filling bake up perfectly portioned, finished with a piped spiderweb that looks far more elegant than the effort involved.
Time: 2 hr 40 min | Makes: 12 bites
You’ll need: graham cracker crumbs, butter, cream cheese, pumpkin puree, sugar, eggs, pumpkin pie spice, vanilla extract, chocolate chips
Quick Method
Preheat the oven to 350°F. Press graham crumbs mixed with melted butter into a lined muffin tin and bake 5 minutes. Beat cream cheese, pumpkin, and sugar smooth, add eggs one at a time, then mix in spice and vanilla. Divide over the crusts and bake 18-20 minutes until just set. Chill at least 2 hours, then pipe melted chocolate in circles and drag a toothpick outward for a web.
5. Caramel Apple Nachos
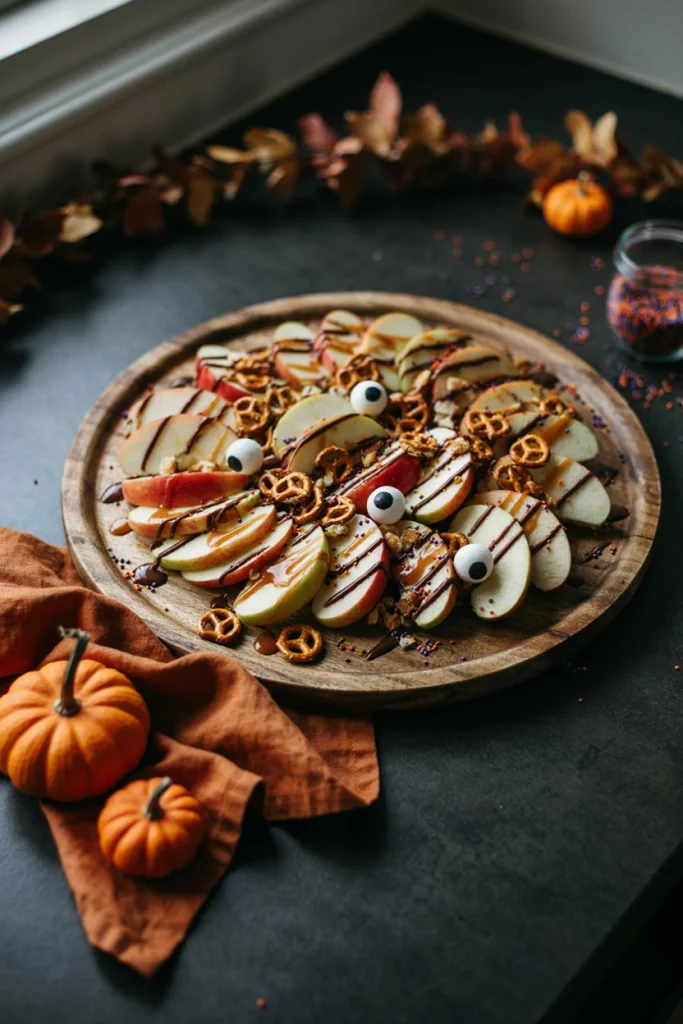
Deconstructed caramel apples, fanned out and drizzled with warm caramel and chocolate so every bite hits a different ratio of crunch to sweet.
Time: 10 min | Makes: 6 servings
You’ll need: apples, lemon juice, caramel sauce, chocolate chips, crushed pretzels, Halloween sprinkles or candy eyes
Quick Method
Toss thin apple slices with lemon juice and fan out on a platter. Drizzle with warmed caramel sauce, then melted chocolate in the opposite direction, and finish with crushed pretzels and sprinkles or candy eyes. Serve immediately.
6. Mummy Fudge Brownies
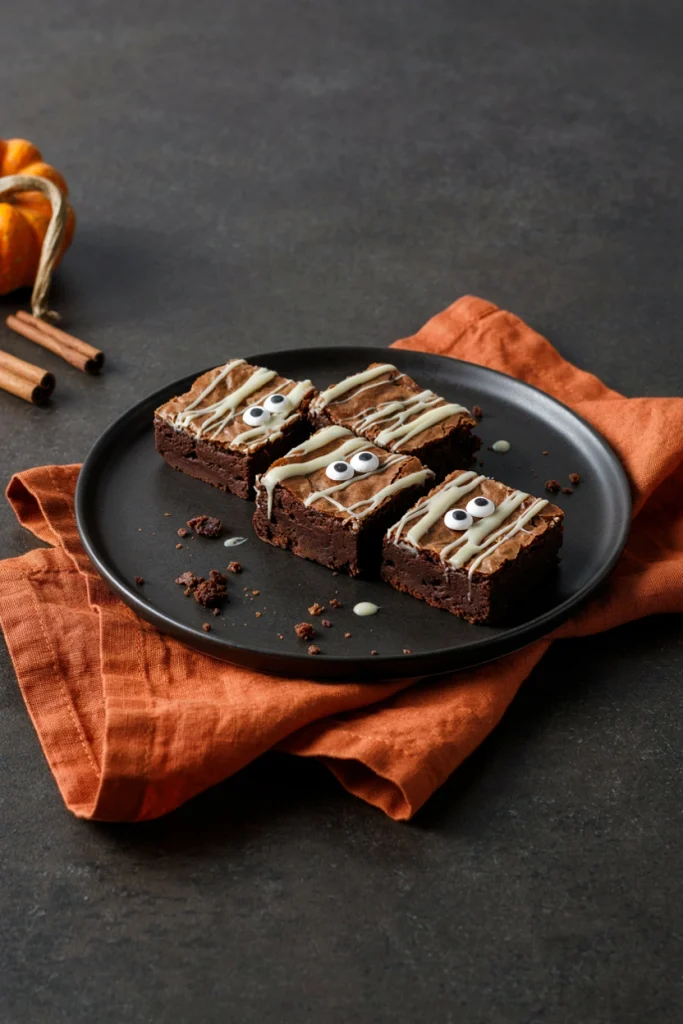
A dense, fudgy brownie with a shiny crackled top gets wrapped in wavy white chocolate bandages, with eyes peeking through the gaps.
Time: 45 min | Makes: 9 brownies
You’ll need: butter, sugar, eggs, vanilla extract, cocoa powder, flour, salt, baking powder, white chocolate, candy eyes
Quick Method
Preheat the oven to 350°F and line an 8×8-inch pan. Melt butter and whisk in sugar, eggs, and vanilla, then fold in cocoa, flour, salt, and baking powder. Bake 22-25 minutes until a toothpick shows a few moist crumbs. Cool completely, then pipe melted white chocolate in wavy strips across each square, leaving gaps, and press in candy eyes.
7. Black Cat Popcorn Balls
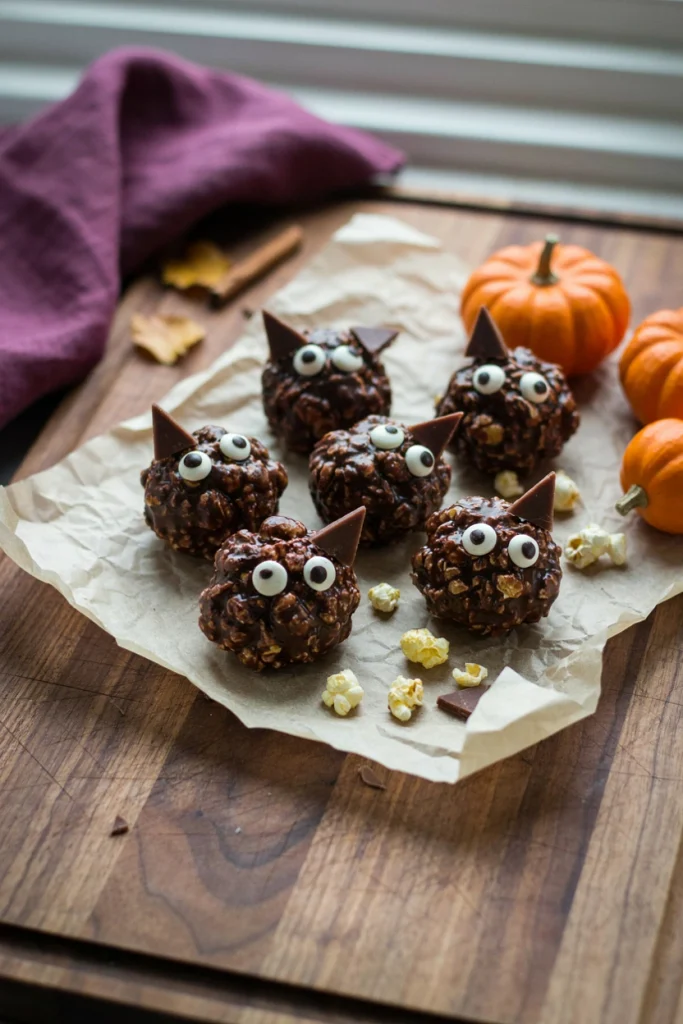
A classic marshmallow popcorn ball gets candy ears and googly eyes pressed on while still warm, sticky sweet outside with plenty of crunch inside.
Time: 30 min | Makes: 12 balls
You’ll need: popped popcorn, butter, mini marshmallows, candy eyes, black candy melts
Quick Method
Melt butter and marshmallows together over low heat until smooth, about 5 minutes, then pour over popcorn and toss to coat. Let cool 2-3 minutes until handleable, then shape into 12 balls with buttered hands. While warm, press on candy melt triangle ears and candy eyes. Cool completely on parchment.
8. Loaded Monster Cookie Bars

Everything people love about monster cookies, pressed into a pan instead of scooped one at a time, for thick, chewy bars with crisp edges.
Time: 45 min | Makes: 16 bars
You’ll need: butter, peanut butter, brown sugar, granulated sugar, eggs, vanilla extract, baking soda, oats, flour, candy-coated chocolate pieces, chocolate chips
Quick Method
Preheat the oven to 350°F and line a 9×13-inch pan. Cream butter, peanut butter, and both sugars until fluffy, beat in eggs and vanilla, then mix in baking soda, oats, and flour. Fold in candy pieces and chocolate chips, press into the pan, and scatter extra candy on top. Bake 20-22 minutes until edges are golden, then cool completely before cutting.
9. Witch Hat Cookie Caramels
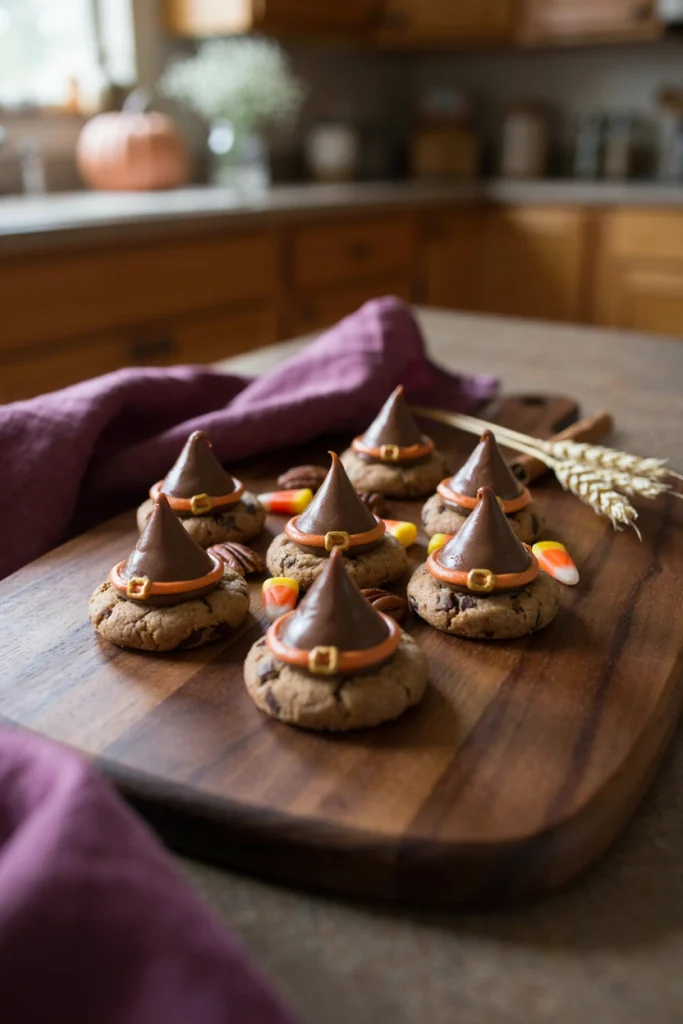
No oven needed here, just fudge-striped cookies, chocolate kisses, and a ring of orange icing that instantly reads as a witch’s hat.
Time: 40 min | Makes: 24 cookies
You’ll need: fudge-striped shortbread cookies, chocolate kiss candies, buttercream frosting, orange gel icing, edible glitter
Quick Method
Pipe a dot of buttercream onto the flat side of each cookie and press a chocolate kiss point up into it. Let sit 5 minutes to set, then pipe a ring of orange gel icing around the base of each kiss as the hat band. Add a dot of edible glitter as a buckle and let set 10 minutes before serving.
10. Meringue Ghosts

Light, crisp, and nearly weightless, these piped meringues practically dissolve on the tongue, a nice contrast after a table full of chocolate and caramel.
Time: 2 hr 35 min | Makes: 20 ghosts
You’ll need: egg whites, cream of tartar, salt, superfine sugar, vanilla extract, mini chocolate chips
Quick Method
Preheat the oven to 200°F. Beat egg whites, cream of tartar, and salt until foamy, then gradually add sugar and beat to stiff, glossy peaks, about 5-7 minutes. Fold in vanilla, pipe teardrop-shaped ghosts onto parchment, and press in chocolate chip eyes. Bake 1 hour 15 minutes until dry, then cool inside the closed oven for 1 hour before removing.
11. Chocolate Spiderweb Cupcakes
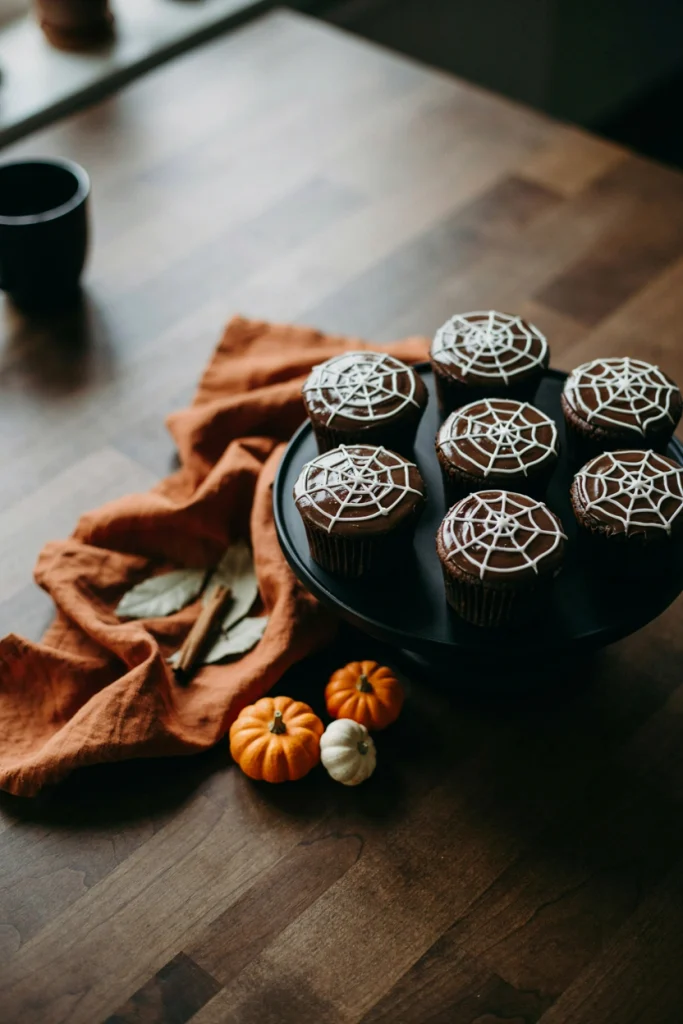
Rich chocolate cupcakes get a glossy ganache top and a hand-piped web that looks intricate but takes about thirty seconds per cupcake.
Time: 45 min | Makes: 12 cupcakes
You’ll need: flour, cocoa powder, sugar, eggs, buttermilk, oil, baking soda, chocolate ganache, white icing
Quick Method
Preheat the oven to 350°F. Whisk flour, cocoa, sugar, and baking soda, then add eggs, buttermilk, and oil and mix until smooth. Divide into a lined muffin tin and bake 18-20 minutes until a toothpick comes out clean. Cool, spread with ganache, then pipe white icing in concentric circles and drag a toothpick outward to form a web.
12. Frankenstein Rice Krispie Treats
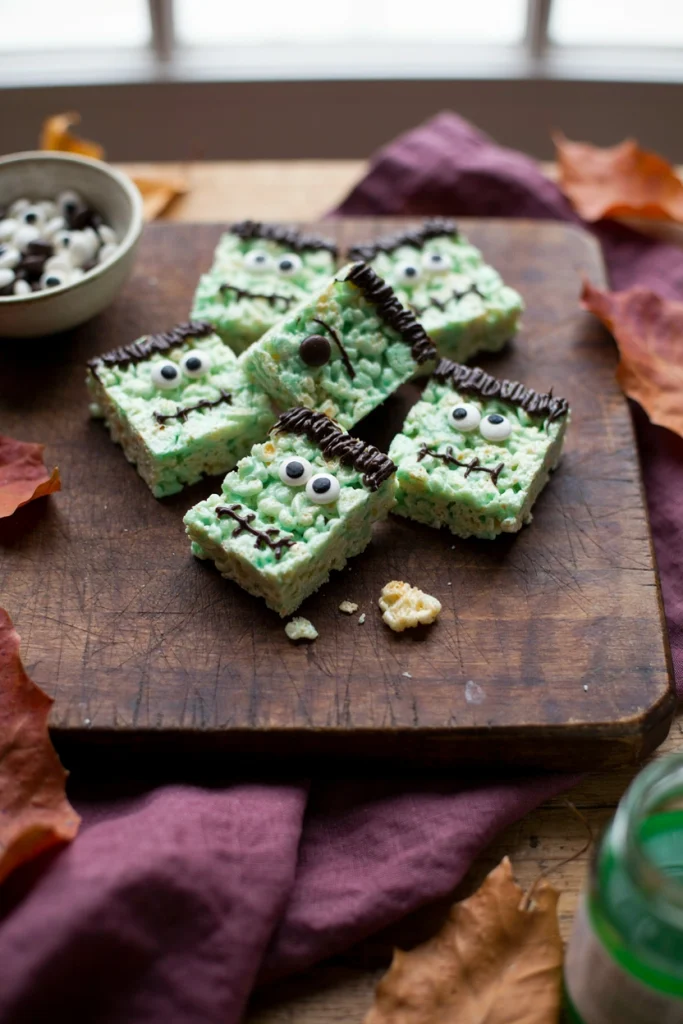
The classic marshmallow treat gets tinted green and dressed up as Frankenstein’s monster, sticky and crisp with a fun costume on top.
Time: 25 min | Makes: 12 bars
You’ll need: butter, mini marshmallows, rice cereal, green gel food coloring, black icing, candy eyes
Quick Method
Melt butter and marshmallows over low heat until smooth, then stir in a few drops of green food coloring. Fold in rice cereal until evenly coated, press into a greased 9×13-inch pan, and let cool 15 minutes. Cut into rectangles, then pipe black icing hair and jagged mouths, and press on candy eyes.
13. Eyeball Cake Pops

Crumbled cake and frosting roll into balls, dip in white chocolate, and get hand-painted red veins for a creepy, bite-sized showstopper.
Time: 1 hr 30 min | Makes: 20 pops
You’ll need: baked cake, frosting, white chocolate melting wafers, red gel food coloring, black candy melts, lollipop sticks
Quick Method
Crumble cake into a bowl and mix with frosting until it holds together, then roll into 1.5-inch balls and freeze 20 minutes. Dip a stick in melted chocolate and insert into each ball, then dip the whole pop in melted white chocolate and let set upright. Paint on thin red gel lines with a toothpick and add a small black candy melt pupil to finish.
14. Pumpkin Spice Whoopie Pies

Two soft, cakey pumpkin cookies sandwich a tangy cream cheese filling for a treat that’s basically pumpkin pie you can hold in one hand.
Time: 40 min | Makes: 12 whoopie pies
You’ll need: pumpkin puree, brown sugar, oil, egg, flour, pumpkin pie spice, baking soda, cream cheese, powdered sugar, butter
Quick Method
Preheat the oven to 350°F. Whisk pumpkin, brown sugar, oil, and egg, then fold in flour, spice, and baking soda. Drop rounded scoops onto a parchment-lined sheet and bake 11-13 minutes until they spring back. Cool completely, beat cream cheese, butter, and powdered sugar until fluffy, and sandwich between two cookies.
15. Bat Wing Sugar Cookies

A classic rolled sugar cookie cut into bat shapes and flooded with jet black icing makes for a dramatic, easy-to-batch Halloween platter piece.
Time: 1 hr 15 min | Makes: 18 cookies
You’ll need: butter, sugar, egg, vanilla extract, flour, baking powder, black gel food coloring, royal icing
Quick Method
Cream butter and sugar, beat in egg and vanilla, then mix in flour and baking powder to form a stiff dough. Chill 30 minutes, roll to 1/4-inch thick, and cut into bat shapes. Bake at 350°F for 9-10 minutes until edges are just set. Cool completely, then flood with black-tinted royal icing and let dry 1 hour before stacking.
16. Graveyard Dirt Pudding Cups
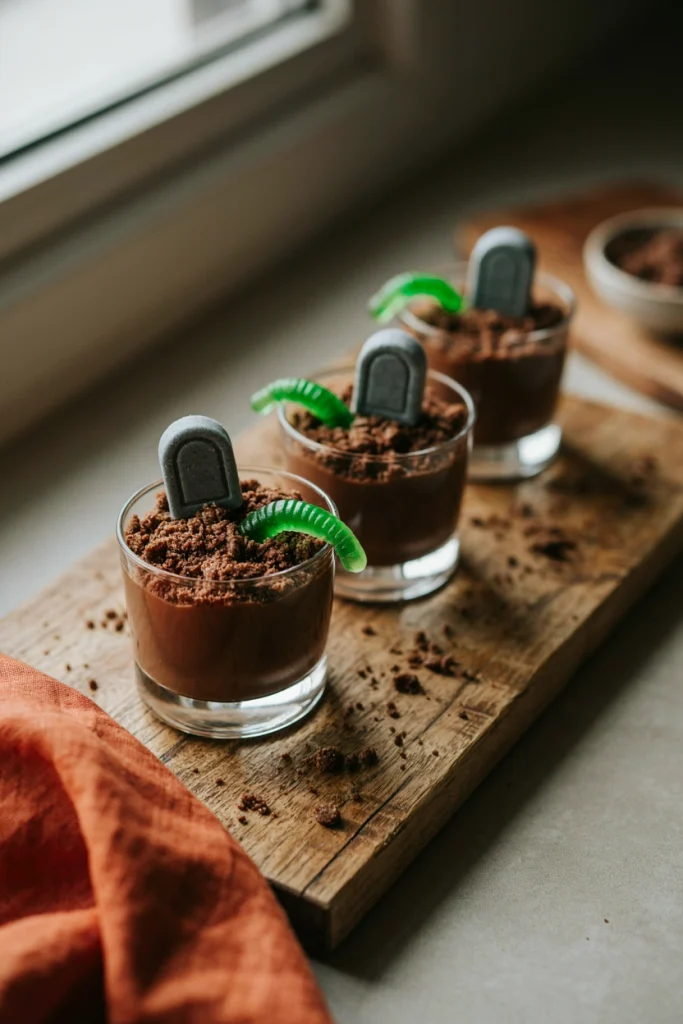
Silky chocolate pudding layers with crushed cookie dirt and a leaning candy tombstone for a no-bake dessert that’s pure Halloween theater.
Time: 20 min | Makes: 8 cups
You’ll need: instant chocolate pudding mix, milk, chocolate sandwich cookies, gummy worms, mini pretzel sticks
Quick Method
Whisk pudding mix with milk until thickened, about 2 minutes, then chill 10 minutes. Crush chocolate sandwich cookies into fine crumbs. Layer pudding and crumbs in cups, top with a final layer of crumbs, and stick a gummy worm halfway in. Press two crossed pretzel sticks into the top to look like a tombstone.
17. Skeleton Cutout Cookies
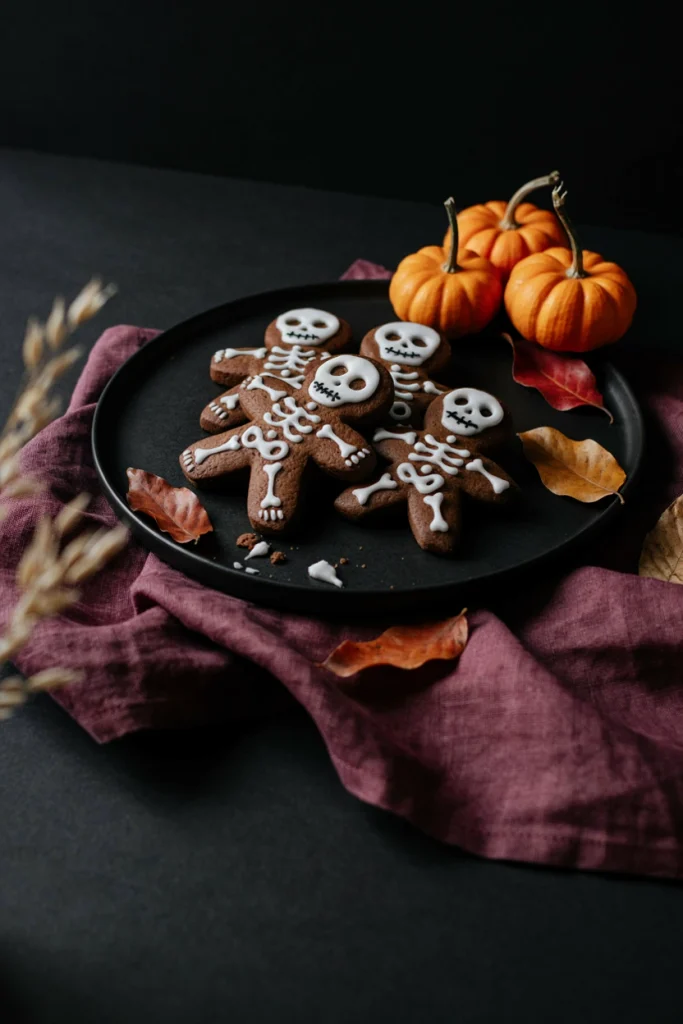
Black cocoa dough cut into simple humanoid shapes and piped with white bone lines turns an easy cutout cookie into a full skeleton crew.
Time: 1 hr 20 min | Makes: 16 cookies
You’ll need: butter, sugar, egg, vanilla extract, flour, black cocoa powder, baking powder, white royal icing
Quick Method
Cream butter and sugar, beat in egg and vanilla, then mix in flour, black cocoa, and baking powder. Chill the dough 30 minutes, roll to 1/4-inch, and cut into simple figure shapes. Bake at 350°F for 9-10 minutes. Cool completely, then pipe white royal icing bone outlines across the arms, legs, ribs, and skull.
18. Vampire Fang Marshmallow Pops

A plain marshmallow gets a bloody dip and two pointed candy fangs for a joke-shop dessert that takes minutes and gets every laugh.
Time: 25 min | Makes: 16 pops
You’ll need: large marshmallows, lollipop sticks, white chocolate melting wafers, red gel food coloring, white candy melts
Quick Method
Insert a lollipop stick into each marshmallow. Melt white chocolate and tint half of it deep red, then dip each marshmallow partway so red drips down like blood. Let set 5 minutes, then use melted white candy melts piped into two small points to attach fang shapes near the base of the dip. Chill 10 minutes to set fully.
19. Zombie Brain Jello Cups
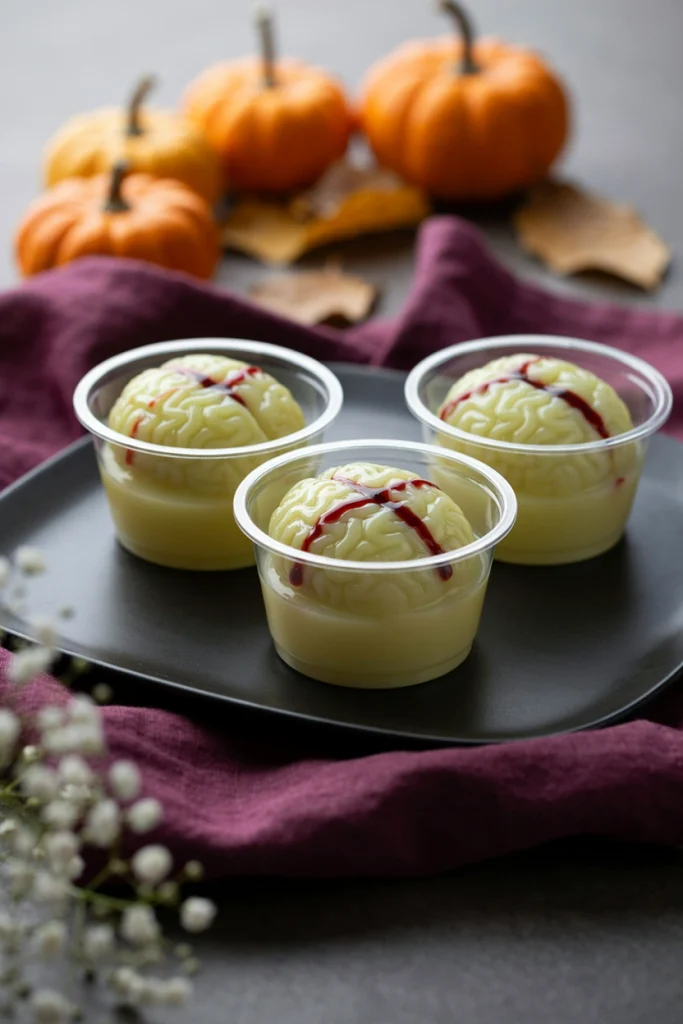
Lime jello sets in a brain-shaped mold for a wobbly, slightly gross centerpiece that’s really just a fun way to serve gelatin dessert.
Time: 4 hr 15 min | Makes: 8 cups
You’ll need: lime gelatin, boiling water, cold water, sweetened condensed milk, brain-shaped silicone mold, red decorating gel
Quick Method
Dissolve gelatin in boiling water, then stir in cold water and sweetened condensed milk until smooth. Pour into a brain-shaped mold and chill at least 4 hours until fully set. Unmold onto plates or into cups and drizzle with red decorating gel for a gory finish.
20. Layered Candy Corn Rice Krispie Bars
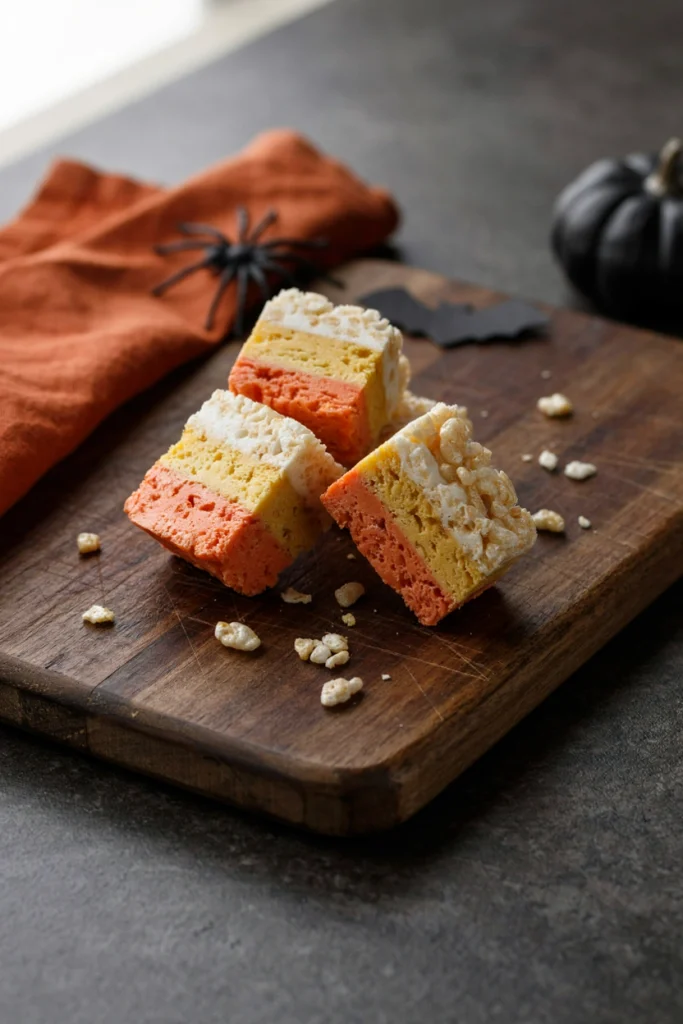
The same tinted-layer trick from the bark, but chewy and marshmallowy instead of chocolate, cut into little candy corn triangles.
Time: 35 min | Makes: 16 bars
You’ll need: butter, mini marshmallows, rice cereal, orange gel food coloring, yellow gel food coloring
Quick Method
Melt one third of the butter and marshmallows, tint orange, fold in a third of the cereal, and press into a lined pan. Repeat with a yellow layer on top, then a final untinted white layer, pressing each firmly before adding the next. Cool 20 minutes, then cut into triangles.
21. Salted Caramel Pumpkin Blondies
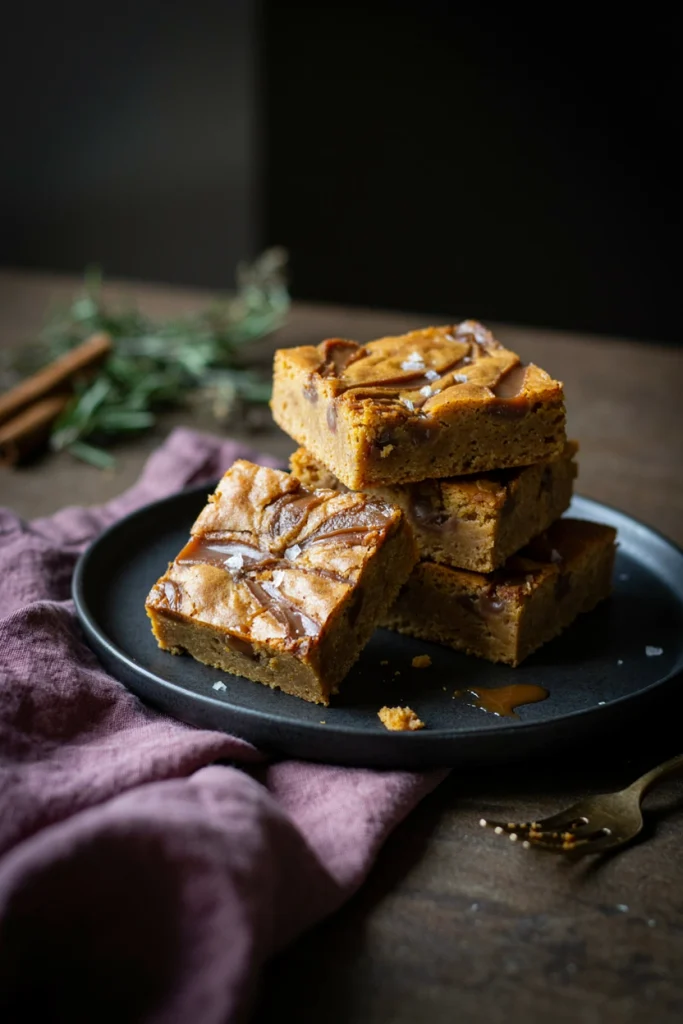
A chewy brown-sugar blondie base gets a swirl of pumpkin puree and caramel, finished with flaky salt for a sweet-salty edge.
Time: 50 min | Makes: 16 blondies
You’ll need: butter, brown sugar, egg, vanilla extract, flour, baking powder, pumpkin puree, pumpkin pie spice, caramel sauce, flaky salt
Quick Method
Preheat the oven to 350°F. Melt butter and whisk with brown sugar, egg, and vanilla, then fold in flour, baking powder, pumpkin, and spice. Spread into a lined 9×9-inch pan, swirl in caramel sauce with a knife, and bake 28-30 minutes until the center is just set. Sprinkle with flaky salt while warm and cool before cutting.
22. Dark Chocolate Orange Fudge
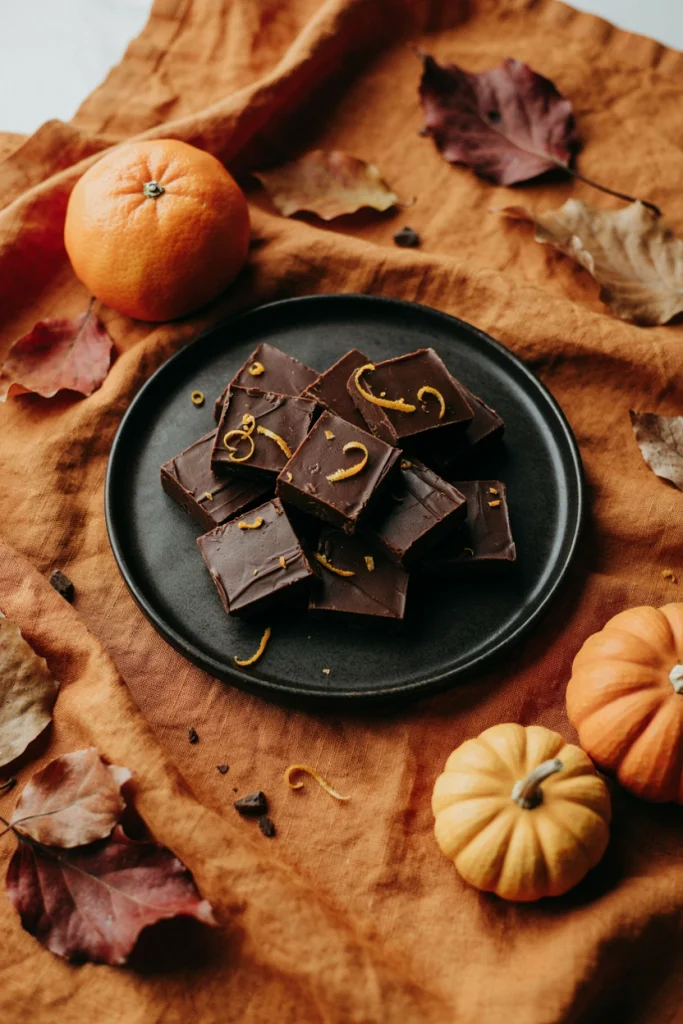
Rich, dense chocolate fudge gets a bright citrus lift from orange zest and extract, a grown-up flavor pairing that still feels festive.
Time: 2 hr 15 min | Makes: 24 pieces
You’ll need: dark chocolate chips, sweetened condensed milk, butter, orange zest, orange extract, orange sprinkles
Quick Method
Melt chocolate chips, sweetened condensed milk, and butter together over low heat, stirring until smooth. Remove from heat and stir in orange zest and extract. Pour into a lined 8×8-inch pan, top with orange sprinkles, and chill at least 2 hours until firm before cutting into squares.
23. Skillet M&M Cookie
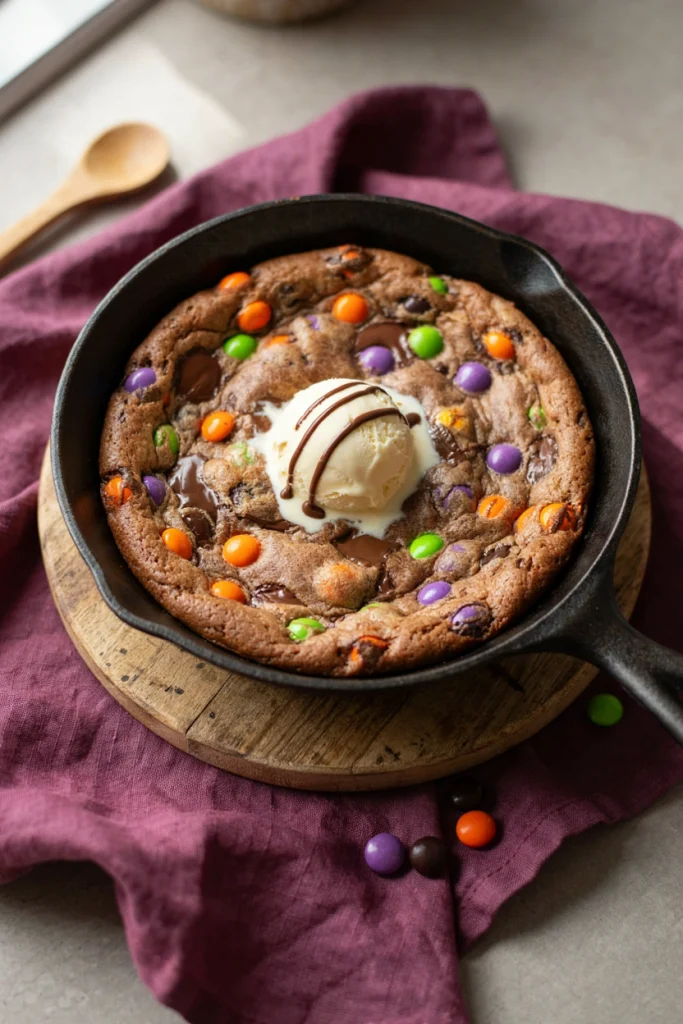
One giant cookie baked right in a skillet, crisp on the edges and gooey in the middle, meant to be scooped straight from the pan.
Time: 35 min | Makes: 8 servings
You’ll need: butter, brown sugar, granulated sugar, egg, vanilla extract, flour, baking soda, salt, Halloween M&Ms
Quick Method
Preheat the oven to 350°F. Cream butter and both sugars, beat in egg and vanilla, then mix in flour, baking soda, and salt. Fold in most of the M&Ms, press into a greased 10-inch skillet, and scatter the rest on top. Bake 22-25 minutes until the edges are golden and the center is just set. Serve warm.
24. Ghost Pretzel Bark
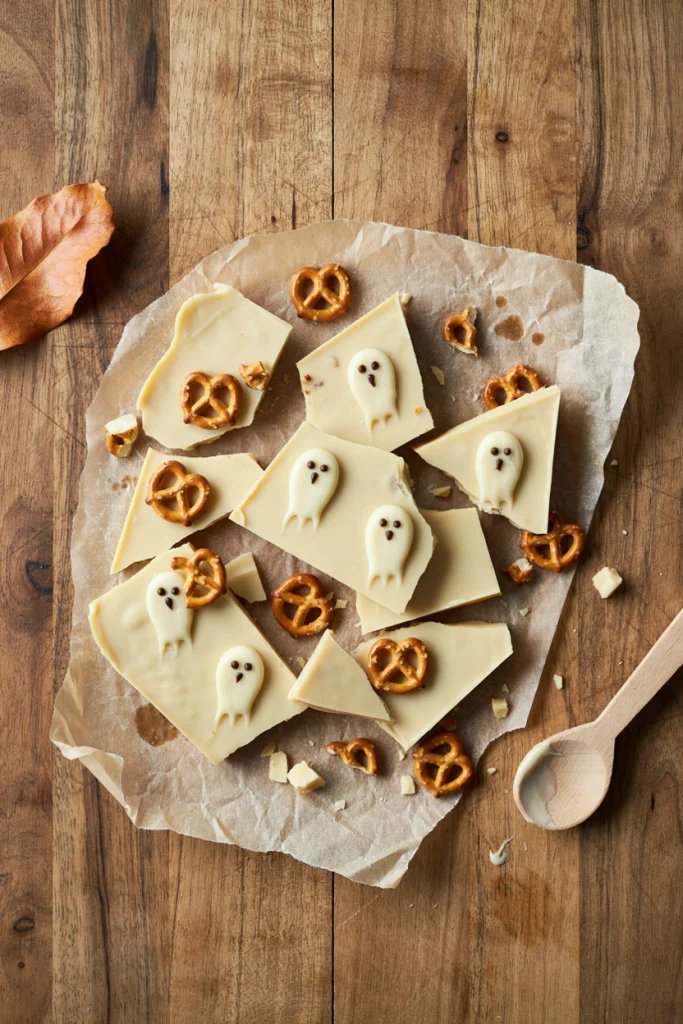
Salty pretzel pieces suspended in a sheet of white chocolate, with a few piped ghost faces scattered across the top for a spooky finish.
Time: 40 min | Makes: 16 pieces
You’ll need: white chocolate melting wafers, mini pretzels, black candy melts
Quick Method
Melt white chocolate and spread it in an even layer on a parchment-lined sheet. Immediately scatter broken pretzel pieces over the top, pressing gently to adhere. While the chocolate is still soft, pipe a few small ghost outlines with melted black candy melts for faces. Chill 20 minutes until set, then break into pieces.
25. Spiderweb Cheesecake Brownies
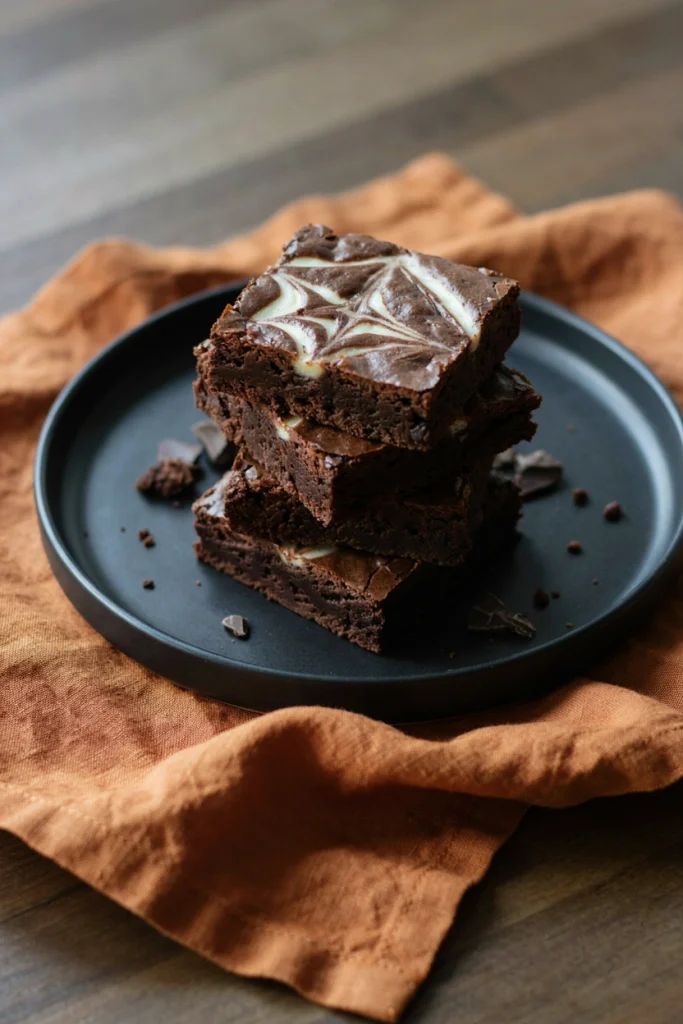
Two batters, fudgy chocolate and tangy cheesecake, swirl together into a web pattern that bakes up rich, dense, and genuinely impressive.
Time: 1 hr | Makes: 16 brownies
You’ll need: butter, sugar, eggs, cocoa powder, flour, cream cheese, vanilla extract
Quick Method
Preheat the oven to 350°F. Melt butter, whisk in sugar and eggs, then fold in cocoa and flour for the brownie batter. Beat cream cheese, an egg, and vanilla until smooth for the cheesecake batter. Spread brownie batter into a lined 9×9-inch pan, dollop cheesecake batter on top, then drag a toothpick in circles outward to create a web. Bake 32-35 minutes until the center is just set.
26. Candy Eye Chocolate Clusters
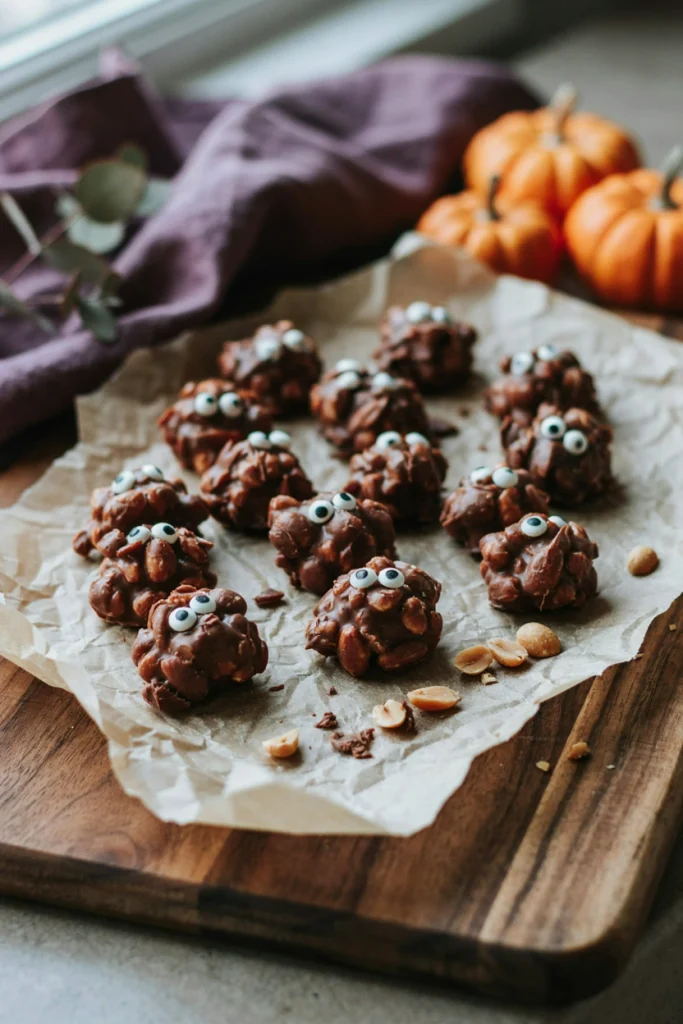
Melted chocolate studded with roasted peanuts sets into easy clusters, then a candy eye on top turns each one into a tiny creature.
Time: 30 min | Makes: 20 clusters
You’ll need: milk chocolate melting wafers, roasted peanuts, candy eyes
Quick Method
Melt the chocolate in 20-second microwave bursts, stirring between each, until smooth. Stir in the peanuts, then drop tablespoon-sized mounds onto parchment paper. Press a candy eye into each cluster while the chocolate is still wet, and chill 15 minutes until set.
27. Pumpkin Spice Cake Roll
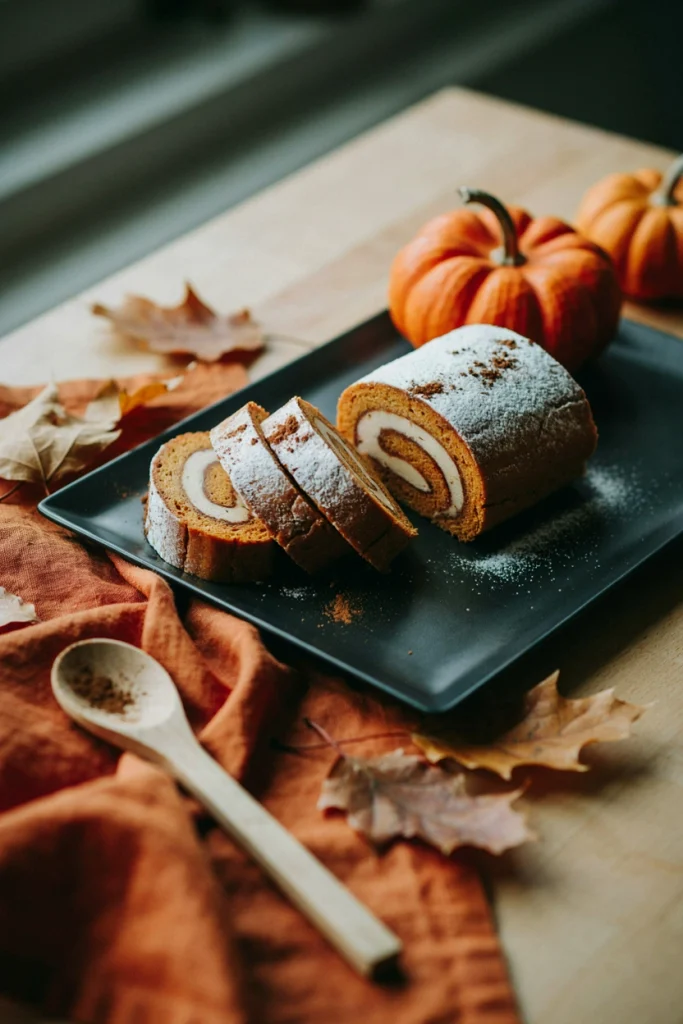
A thin, spiced pumpkin sponge rolls around a tangy cream cheese filling for a slice that looks like a bakery item but comes together in one pan.
Time: 1 hr 30 min | Makes: 10 slices
You’ll need: eggs, sugar, pumpkin puree, flour, pumpkin pie spice, baking powder, cream cheese, powdered sugar, butter
Quick Method
Preheat the oven to 375°F and line a jelly roll pan. Beat eggs and sugar until pale, then fold in pumpkin, flour, spice, and baking powder. Spread thin and bake 12-13 minutes until it springs back. Roll the warm cake up in a towel dusted with powdered sugar and cool completely. Unroll, spread with a beaten cream cheese, butter, and powdered sugar filling, then re-roll and chill 30 minutes before slicing.
28. Almond Witch Finger Cookies

A simple shortbread dough shapes into knobby fingers with an almond nail and a smear of red jam that makes the whole platter feel deliciously grim.
Time: 50 min | Makes: 24 cookies
You’ll need: butter, powdered sugar, egg, almond extract, flour, salt, sliced almonds, red jam
Quick Method
Preheat the oven to 325°F. Cream butter and powdered sugar, beat in egg and almond extract, then mix in flour and salt. Roll tablespoons of dough into finger shapes, pinching a knuckle line with a knife. Press a sliced almond into the tip as a nail and bake 18-20 minutes until pale gold. While warm, dab red jam under each almond nail to look like blood.
29. Owl Oreo Truffle Pops
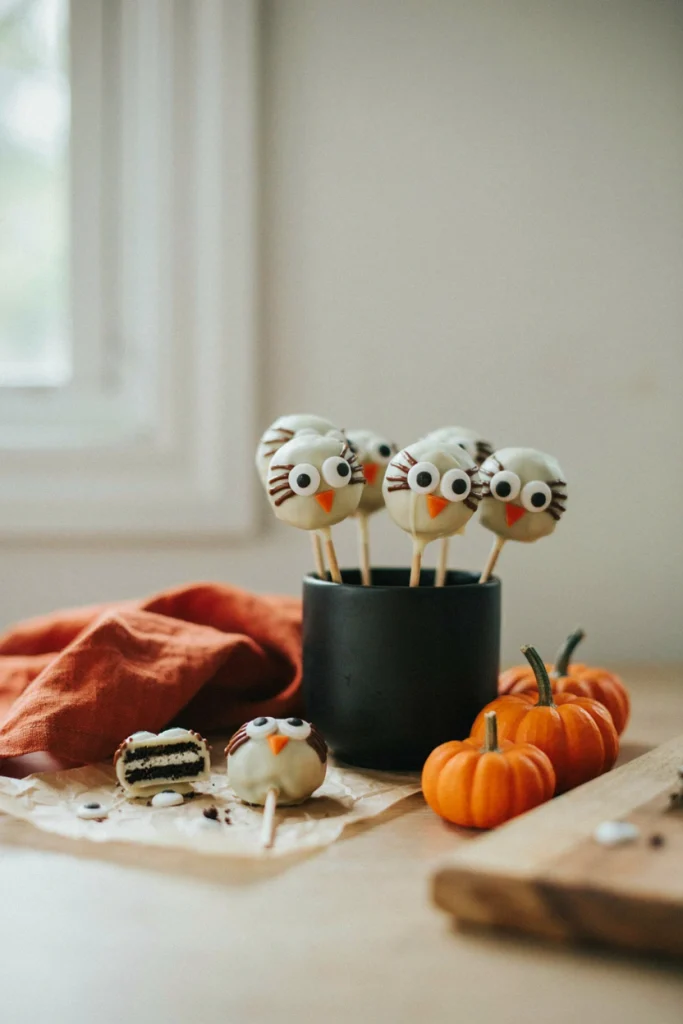
The same Oreo truffle base as the witch’s brew version, but shaped round and dressed up as owl faces for a totally different look.
Time: 1 hr | Makes: 16 pops
You’ll need: Oreo cookies, cream cheese, white chocolate melting wafers, brown candy melts, candy eyes, orange candy melts, lollipop sticks
Quick Method
Pulse Oreos into crumbs and mix with cream cheese into a paste. Roll into balls, insert a stick dipped in melted chocolate into each, and freeze 20 minutes. Dip in melted white chocolate, then use a toothpick to add brown candy melt wing markings, candy eyes, and a small orange triangle beak while the coating is wet.
30. Monster Muddy Buddies

Crunchy cereal squares get coated in chocolate and peanut butter, dusted green instead of white, and mixed with candy eyes for a snackable party mix.
Time: 20 min | Makes: 8 cups
You’ll need: rice cereal squares, chocolate chips, peanut butter, butter, powdered sugar, green gel food coloring, candy eyes
Quick Method
Melt chocolate chips, peanut butter, and butter together until smooth. Pour over the cereal squares and toss gently to coat. Tint a bag of powdered sugar green, add the coated cereal, and shake until fully covered. Spread out to cool, then toss in candy eyes just before serving.
31. Peanut Butter Chocolate Spiders

A store-bought peanut butter cup gets piped chocolate legs and candy eyes for a no-bake candy that takes about a minute to assemble.
Time: 20 min | Makes: 16 spiders
You’ll need: mini peanut butter cups, dark chocolate melting wafers, candy eyes
Quick Method
Unwrap the peanut butter cups and place them upside down on parchment. Melt the dark chocolate and pipe eight thin legs radiating out from the base of each cup. Immediately press two candy eyes onto the top edge while the chocolate is still wet, then let set 15 minutes.
32. Baked Pumpkin Donut Holes
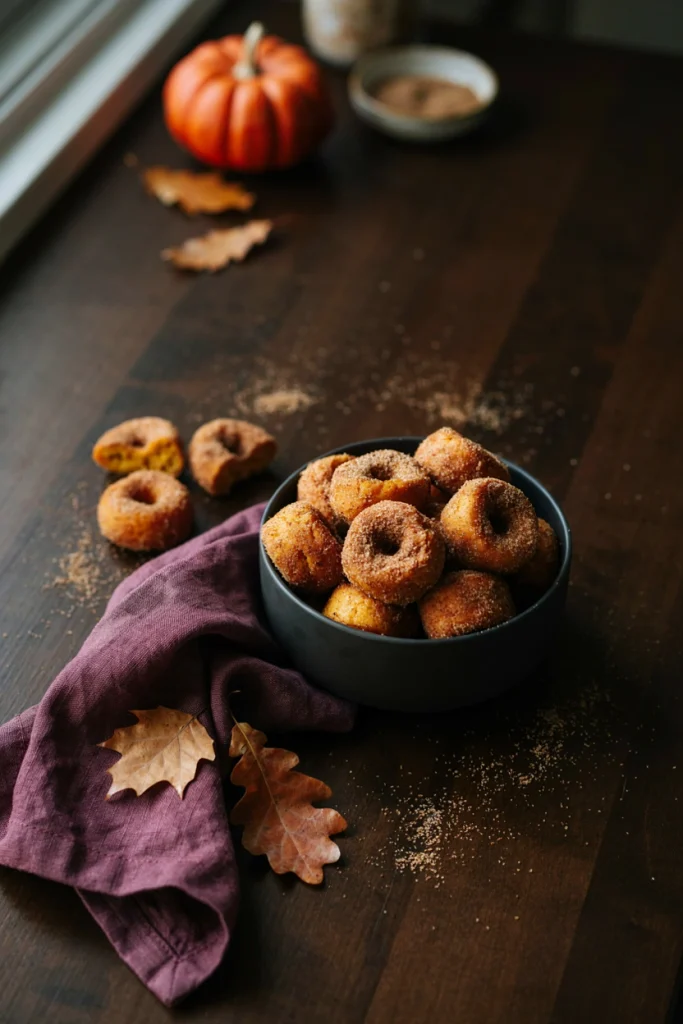
A soft, spiced dough bakes instead of fries, then rolls in cinnamon sugar while warm for that classic donut hole texture without the mess of oil.
Time: 35 min | Makes: 24 donut holes
You’ll need: flour, baking powder, pumpkin pie spice, pumpkin puree, sugar, egg, milk, melted butter, cinnamon sugar
Quick Method
Preheat the oven to 350°F. Whisk flour, baking powder, and spice, then stir in pumpkin, sugar, egg, and milk until just combined. Fill a greased mini muffin tin two-thirds full and bake 10-12 minutes until springy. While still warm, brush each with melted butter and roll in cinnamon sugar.
33. Black Velvet Cupcakes
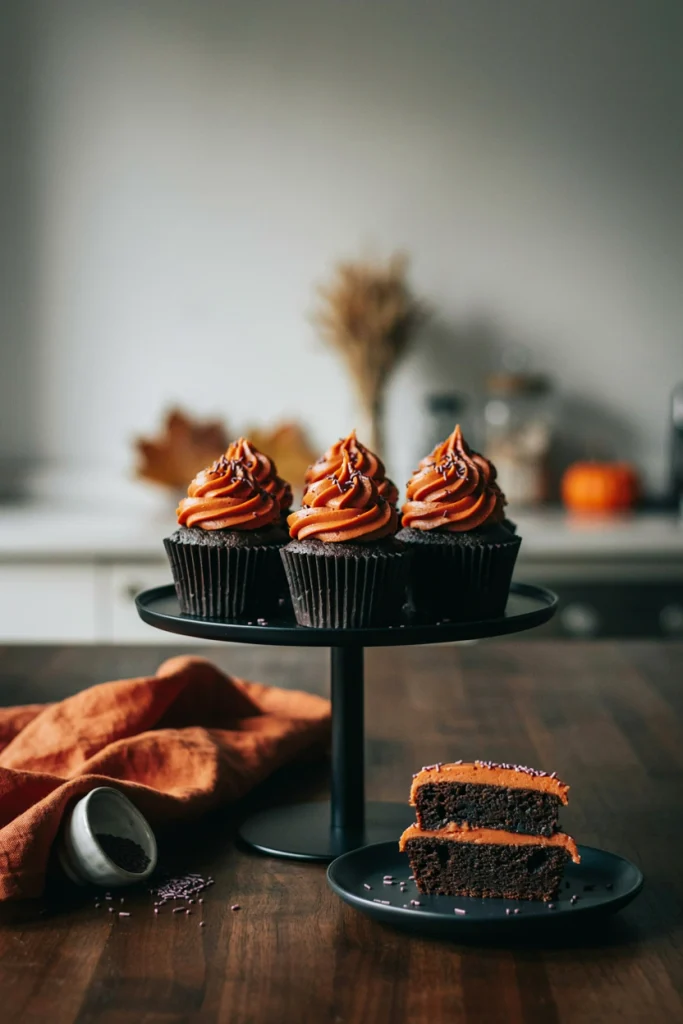
A classic red velvet base gets tinted black instead, with a bright orange cream cheese frosting swirl for a color combo that pops on any table.
Time: 45 min | Makes: 12 cupcakes
You’ll need: flour, cocoa powder, sugar, eggs, buttermilk, oil, black gel food coloring, baking soda, cream cheese, butter, powdered sugar, orange gel food coloring
Quick Method
Preheat the oven to 350°F. Whisk flour, cocoa, sugar, and baking soda, then mix in eggs, buttermilk, oil, and black food coloring until deeply colored. Divide into a lined muffin tin and bake 18-20 minutes. Cool completely, then beat cream cheese, butter, and powdered sugar with orange food coloring and pipe onto each cupcake.
34. Chocolate Dipped Broomstick Pretzels
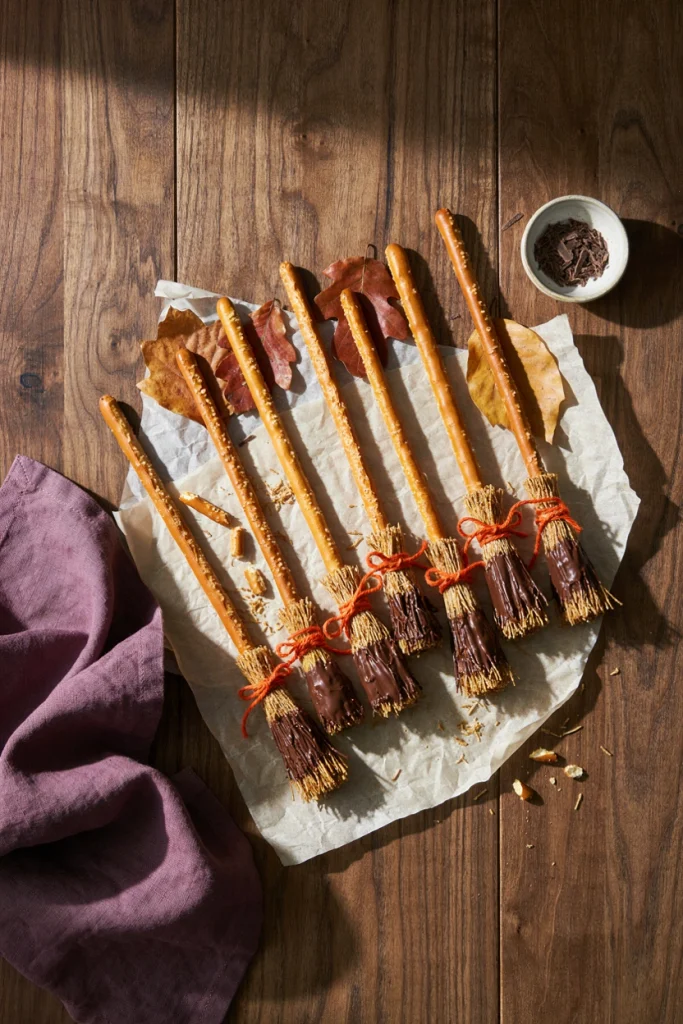
A pretzel rod becomes a broom handle once it’s dipped in chocolate and wrapped with crushed shredded wheat bristles, tied off with a bit of ribbon.
Time: 30 min | Makes: 12 brooms
You’ll need: pretzel rods, chocolate melting wafers, shredded wheat cereal, orange ribbon or twine
Quick Method
Crush shredded wheat cereal into fine strands and spread on a plate. Dip the bottom third of each pretzel rod in melted chocolate, then immediately roll it in the crushed cereal to form broom bristles. Let set 15 minutes on parchment, then tie a small piece of ribbon just above the bristles.
35. Warm Pumpkin Spice Rice Pudding
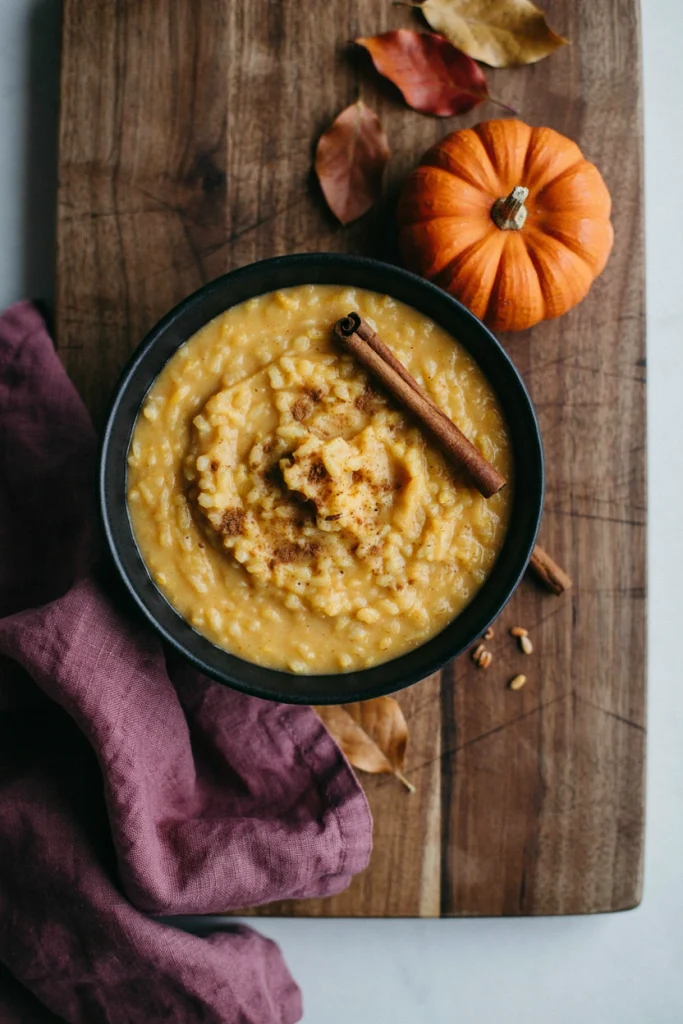
Creamy stovetop rice pudding gets a swirl of pumpkin puree and warm spice, the kind of cozy dessert that feels like fall in a bowl.
Time: 40 min | Makes: 6 servings
You’ll need: cooked rice, milk, sugar, pumpkin puree, pumpkin pie spice, vanilla extract, egg yolk
Quick Method
Combine cooked rice and milk in a saucepan over medium heat and simmer, stirring often, for 15 minutes until thickened. Stir in sugar, pumpkin puree, and spice. Whisk a small amount of the hot mixture into the egg yolk, then stir it back into the pot and cook 2 more minutes. Remove from heat, stir in vanilla, and serve warm.
36. Candy Corn Layer Cupcakes
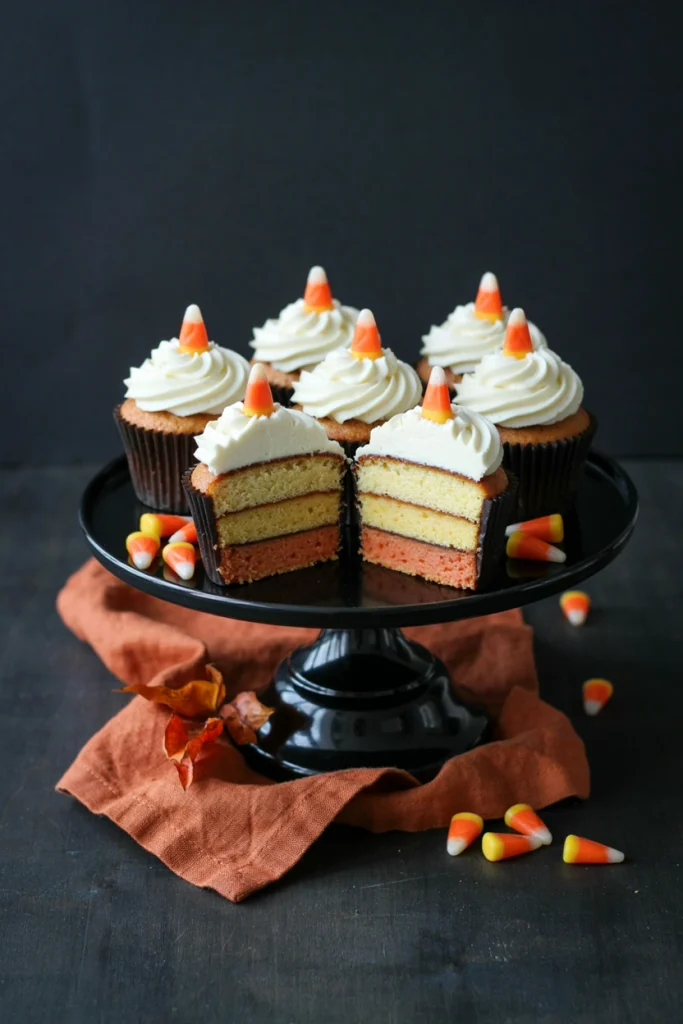
Tinted batter layers into each liner before baking so every slice reveals a striped candy corn effect once you bite in.
Time: 45 min | Makes: 12 cupcakes
You’ll need: vanilla cake batter, orange gel food coloring, yellow gel food coloring, vanilla frosting, candy corn
Quick Method
Preheat the oven to 350°F. Divide vanilla cake batter into three bowls and tint one orange, one yellow, and leave one plain. Spoon orange into the bottom of each liner, then yellow, then white, without mixing the layers. Bake 18-20 minutes until a toothpick comes out clean. Cool completely, pipe on vanilla frosting, and top with a candy corn.
37. Spooky S’mores Bars
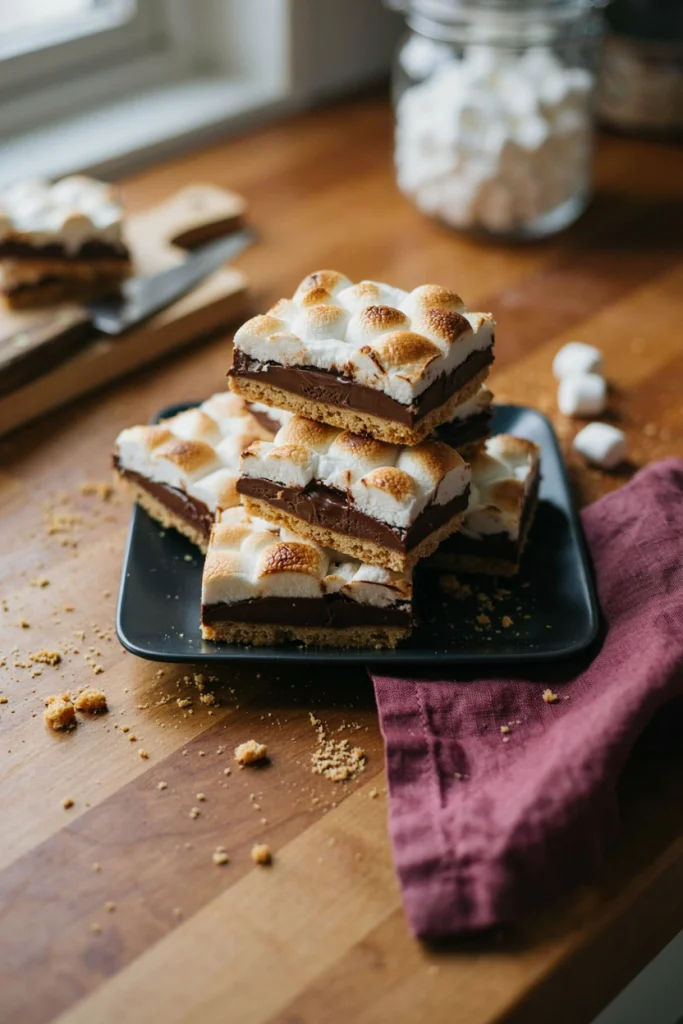
A graham cracker crust holds a chocolate layer and a blanket of toasted marshmallow, all the campfire flavor of s’mores without the sticks.
Time: 40 min | Makes: 16 bars
You’ll need: graham cracker crumbs, butter, chocolate bars, mini marshmallows
Quick Method
Preheat the oven to 350°F. Mix graham crumbs with melted butter and press firmly into a lined 9×9-inch pan. Bake 8 minutes, then layer chocolate bars over the warm crust so they start to melt. Top with an even layer of mini marshmallows and broil 1-2 minutes, watching closely, until golden. Cool completely before cutting.
38. Mini Caramel Apple Pops
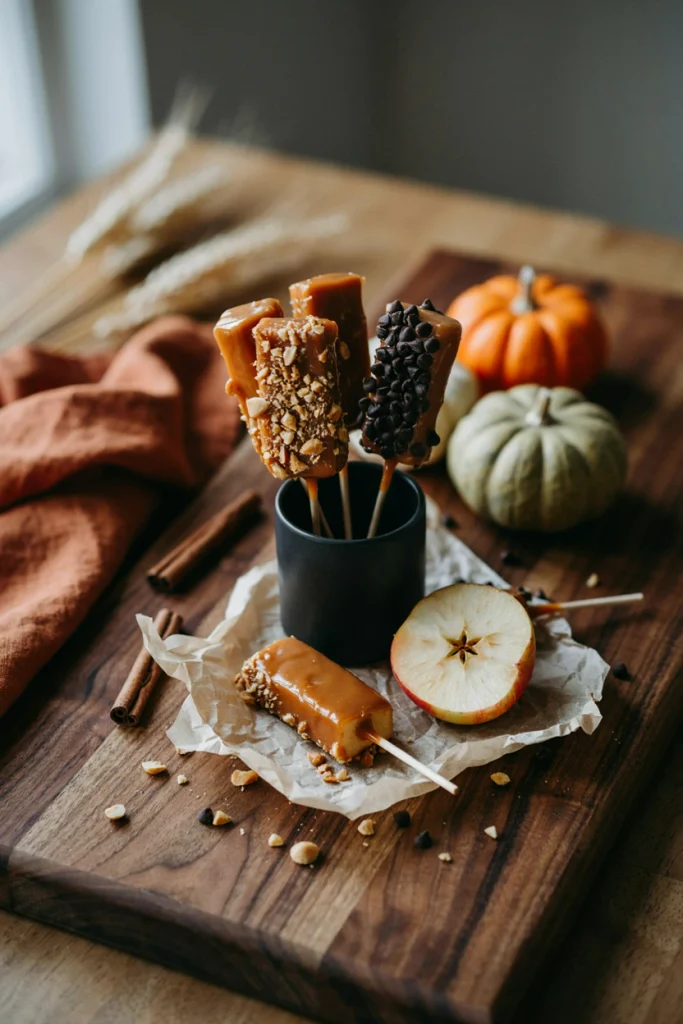
Bite-sized apple chunks on skewers get the caramel apple treatment without the awkward eating, dipped and rolled in crunchy toppings.
Time: 25 min | Makes: 16 pops
You’ll need: apples, lollipop sticks, soft caramel candies, heavy cream, crushed peanuts, mini chocolate chips
Quick Method
Cut apples into 1.5-inch chunks and insert a stick into each piece. Melt caramels with a splash of heavy cream over low heat until smooth, then dip each apple chunk to coat. Immediately roll in crushed peanuts or mini chocolate chips, then set on parchment to firm up for about 10 minutes.
39. Black Cat Chocolate Cutout Cookies
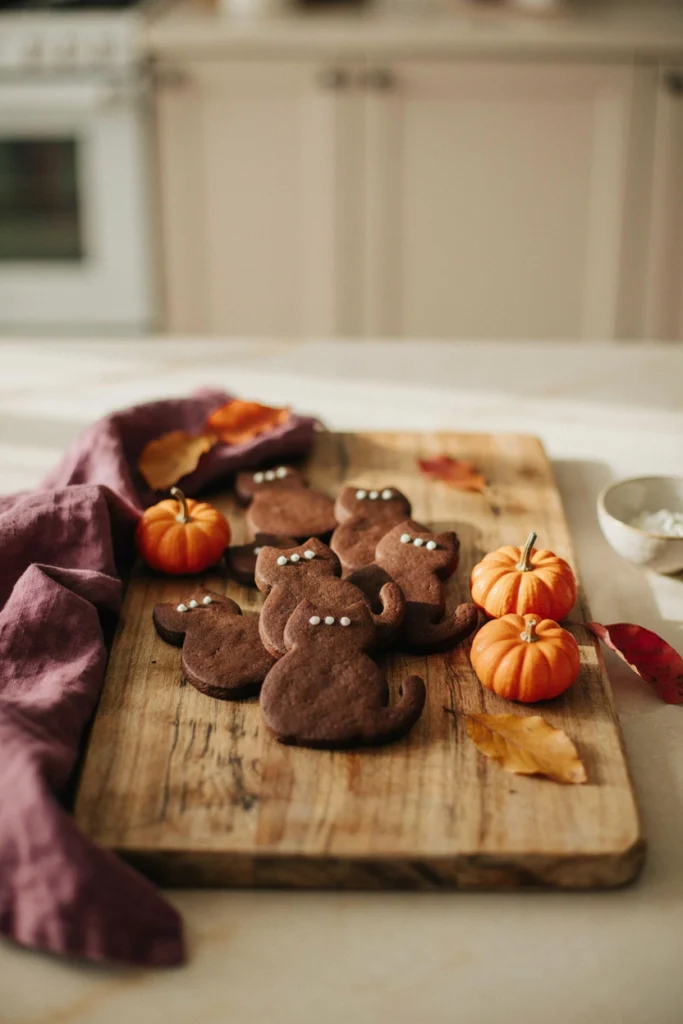
A chocolate cutout cookie in a simple sitting-cat shape, finished with two dots of white icing eyes, comes together fast for a big platter.
Time: 1 hr 10 min | Makes: 18 cookies
You’ll need: butter, sugar, egg, vanilla extract, flour, cocoa powder, baking powder, white royal icing
Quick Method
Cream butter and sugar, beat in egg and vanilla, then mix in flour, cocoa powder, and baking powder. Chill the dough 30 minutes, roll to 1/4-inch thick, and cut into cat shapes. Bake at 350°F for 9-10 minutes. Cool completely, then pipe two small white icing dots for eyes on each cat.
40. Pumpkin Cream Cheese Muffins

A moist pumpkin muffin hides a tangy cream cheese center under a crumbly streusel top, the kind of bake that disappears from a breakfast table fast.
Time: 45 min | Makes: 12 muffins
You’ll need: flour, pumpkin pie spice, baking soda, pumpkin puree, sugar, eggs, oil, cream cheese, powdered sugar, brown sugar, cinnamon
Quick Method
Preheat the oven to 375°F. Whisk flour, spice, and baking soda, then stir in pumpkin, sugar, eggs, and oil. Beat cream cheese with a bit of powdered sugar until smooth. Fill muffin liners halfway, add a spoonful of the cream cheese mixture, then top with more batter. Sprinkle with a brown sugar and cinnamon streusel and bake 20-22 minutes until set.
41. Halloween Fudge Pretzel Bites
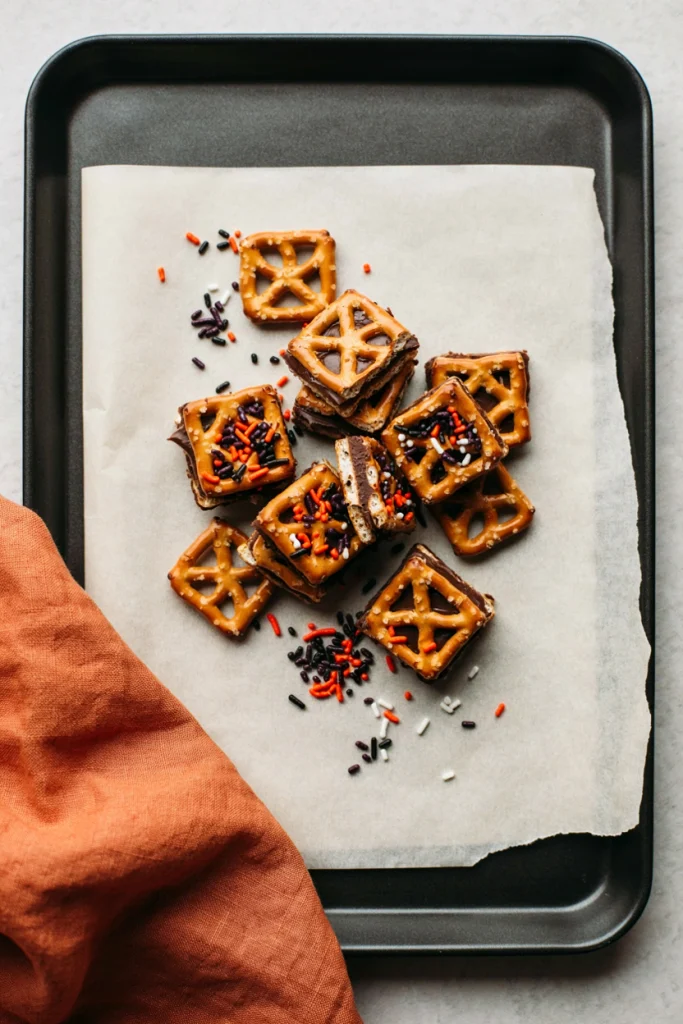
A square pretzel gets a dollop of melted fudge and a second pretzel pressed on top, sweet and salty in one two-second assembly.
Time: 20 min | Makes: 24 bites
You’ll need: square pretzel snaps, chocolate fudge or ganache, Halloween sprinkles
Quick Method
Melt fudge or ganache until smooth and pourable. Spoon a small dollop onto half of the pretzel snaps, then press a second pretzel on top to sandwich. Immediately dip the exposed edge in sprinkles, then chill 10 minutes until set.
42. Orange Creamsicle Fudge
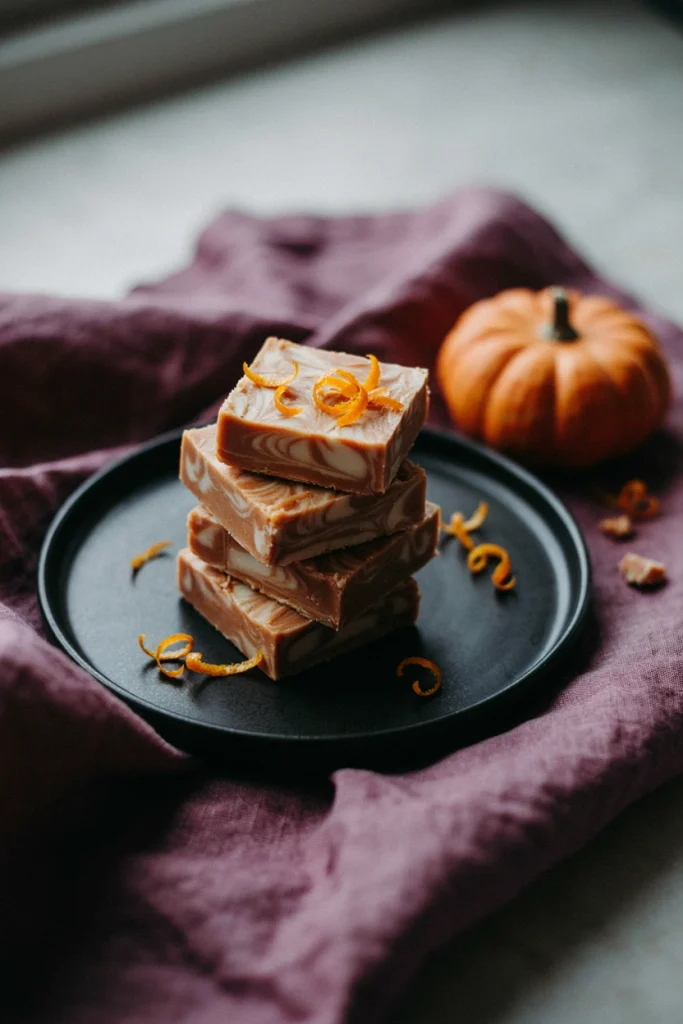
White chocolate fudge splits into orange and vanilla halves and gets swirled together for a creamsicle flavor with a striking marbled look.
Time: 2 hr 10 min | Makes: 24 pieces
You’ll need: white chocolate chips, sweetened condensed milk, orange extract, orange gel food coloring, vanilla extract
Quick Method
Melt white chocolate chips with sweetened condensed milk over low heat until smooth. Divide into two bowls, stirring orange extract and food coloring into one and vanilla extract into the other. Pour both into a lined 8×8-inch pan in alternating spoonfuls, then swirl with a knife. Chill at least 2 hours until firm before cutting.
43. Mini Pumpkin Hand Pies

Flaky pie crust folds around a spiced pumpkin filling for a portable, crimped-edge treat that’s easier to serve than a full pie.
Time: 1 hr | Makes: 12 hand pies
You’ll need: refrigerated pie crust, pumpkin puree, brown sugar, pumpkin pie spice, egg, coarse sugar
Quick Method
Preheat the oven to 375°F. Mix pumpkin puree, brown sugar, and spice into a thick filling. Cut circles from rolled pie crust, spoon filling onto half of each circle, fold over, and crimp the edges with a fork. Cut a small vent in the top, brush with beaten egg, and sprinkle with coarse sugar. Bake 18-20 minutes until golden.
44. Cauldron Brownie Trifle Cups
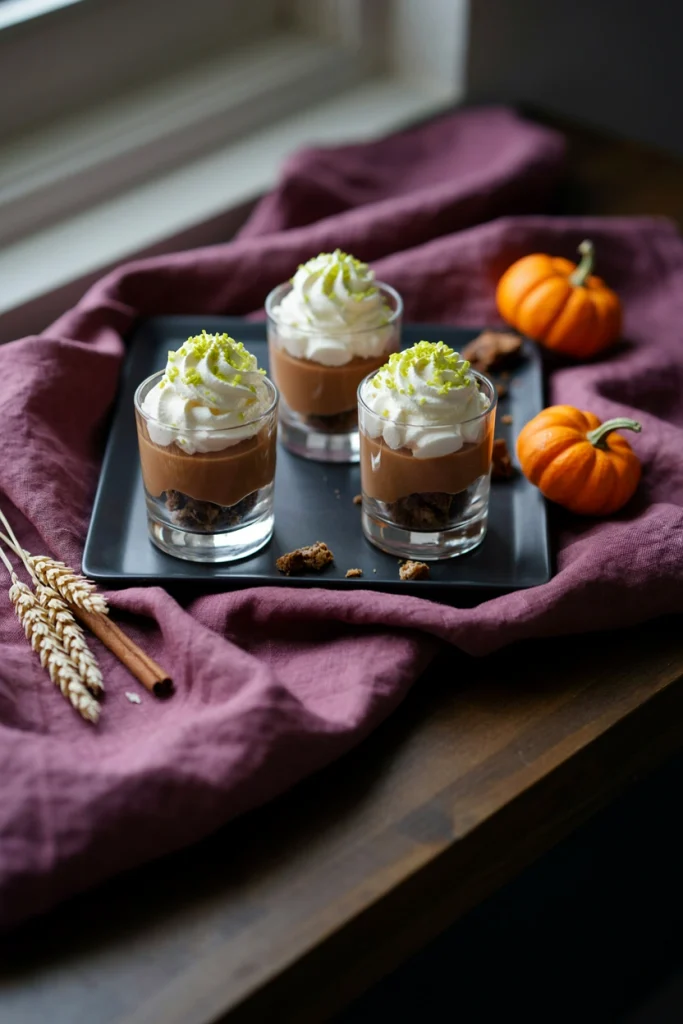
Cubed brownies, pudding, and whipped cream layer into little cups for a bubbling cauldron effect, rich and gooey with plenty of textures in every spoonful.
Time: 45 min | Makes: 8 cups
You’ll need: baked brownies, instant chocolate pudding, milk, whipped cream, green sprinkles
Quick Method
Cut cooled brownies into small cubes. Whisk pudding mix with milk until thickened, about 2 minutes. Layer brownie cubes, pudding, and a dollop of whipped cream in clear cups, repeating once more. Top with a swirl of whipped cream and a few green sprinkles, then chill 15 minutes before serving.
45. Spiced Apple Cider Donuts

A baked donut soaked in cinnamon sugar carries all the warm apple cider flavor of a fall festival treat without needing a deep fryer.
Time: 40 min | Makes: 12 donuts
You’ll need: flour, baking powder, cinnamon, apple cider, sugar, egg, melted butter, cinnamon sugar for coating
Quick Method
Preheat the oven to 350°F. Simmer apple cider in a small pot until reduced by half, then let cool. Whisk flour, baking powder, and cinnamon, then stir in the reduced cider, sugar, egg, and melted butter. Pipe into a greased donut pan and bake 10-12 minutes until springy. While warm, brush with melted butter and roll in cinnamon sugar.
46. Candy Corn Marshmallow Fudge
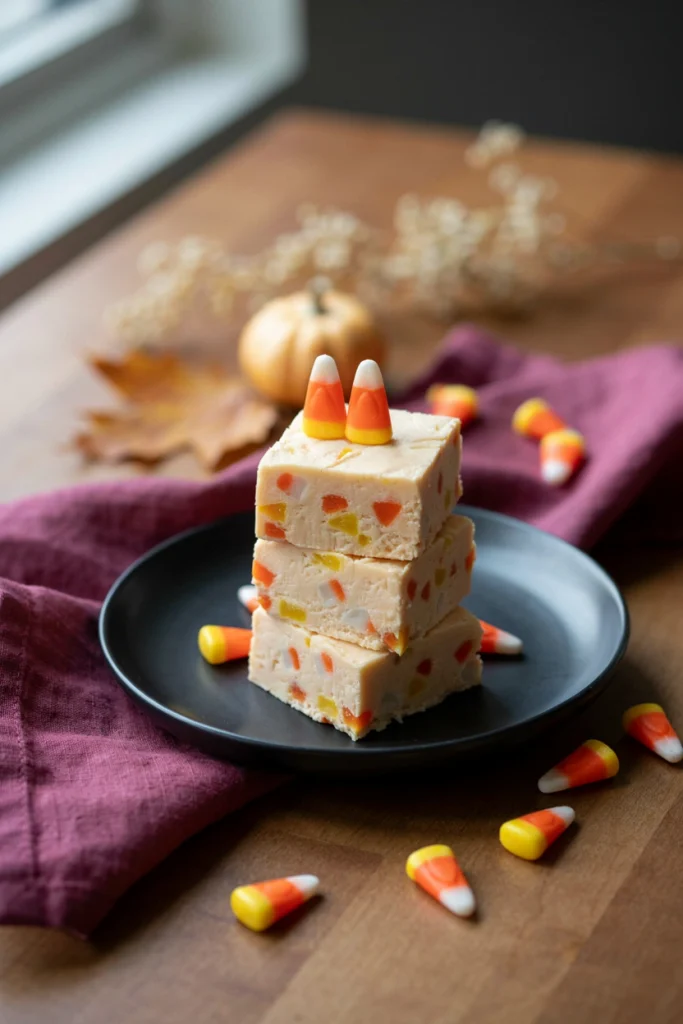
A soft, marshmallow-enriched fudge folds in chopped candy corn for extra crunch and a color that matches the mix-in perfectly.
Time: 2 hr 20 min | Makes: 24 pieces
You’ll need: white chocolate chips, sweetened condensed milk, marshmallow creme, orange gel food coloring, candy corn
Quick Method
Melt white chocolate chips, sweetened condensed milk, and marshmallow creme together over low heat until smooth. Tint pale orange with gel food coloring and fold in roughly chopped candy corn. Pour into a lined 8×8-inch pan and chill at least 2 hours until fully set before cutting into squares.
47. Mini Skeleton Meringue Bones

The same crisp meringue base as the ghosts, piped into long bone shapes instead, that snap satisfyingly and look great arranged into a full skeleton.
Time: 2 hr 30 min | Makes: 20 bones
You’ll need: egg whites, cream of tartar, salt, superfine sugar, vanilla extract
Quick Method
Preheat the oven to 200°F. Beat egg whites, cream of tartar, and salt to foamy, then gradually add sugar, beating to stiff, glossy peaks. Fold in vanilla, then pipe long bone shapes onto parchment, piping a small round bulb at each end. Bake 1 hour 15 minutes until dry, then cool inside the closed oven for 1 hour.
48. Black Cocoa Sandwich Cookies
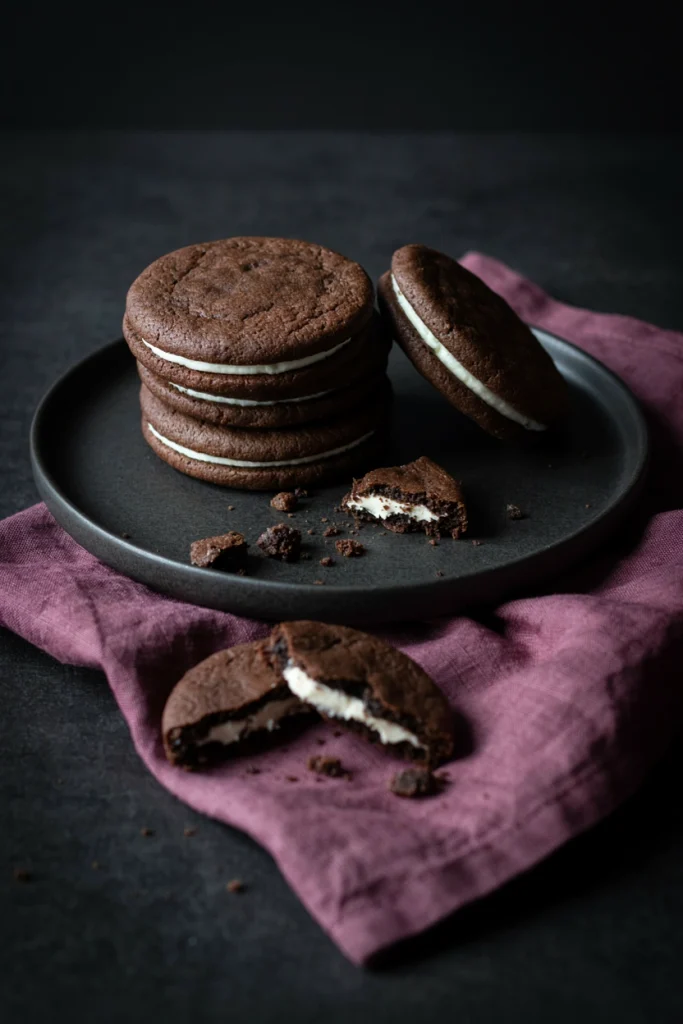
A homemade take on the classic sandwich cookie, using black cocoa powder for a color and depth of flavor darker than any store version.
Time: 55 min | Makes: 20 sandwich cookies
You’ll need: butter, sugar, egg, flour, black cocoa powder, baking soda, salt, powdered sugar, vegetable shortening, vanilla extract
Quick Method
Preheat the oven to 350°F. Cream butter and sugar, beat in egg, then mix in flour, black cocoa, baking soda, and salt. Roll into balls, flatten slightly, and bake 9-10 minutes until just set. Cool completely, then beat powdered sugar, shortening, and vanilla into a fluffy filling and sandwich between two cookies.
49. Toffee Popcorn Bat Mix

Popcorn coated in a buttery toffee glaze and baked until crisp, then tossed with chocolate bat candies for crunch and a little theater.
Time: 50 min | Makes: 10 cups
You’ll need: popped popcorn, butter, brown sugar, corn syrup, baking soda, chocolate bat candies
Quick Method
Preheat the oven to 250°F and spread popcorn on a large baking sheet. Melt butter, brown sugar, and corn syrup together, boil 4 minutes, then stir in baking soda off heat until foamy. Pour over the popcorn and toss to coat evenly. Bake 45 minutes, stirring every 15 minutes, then cool completely and toss in chocolate bat candies.
50. Chocolate Raspberry “Bloody” Tart Bites
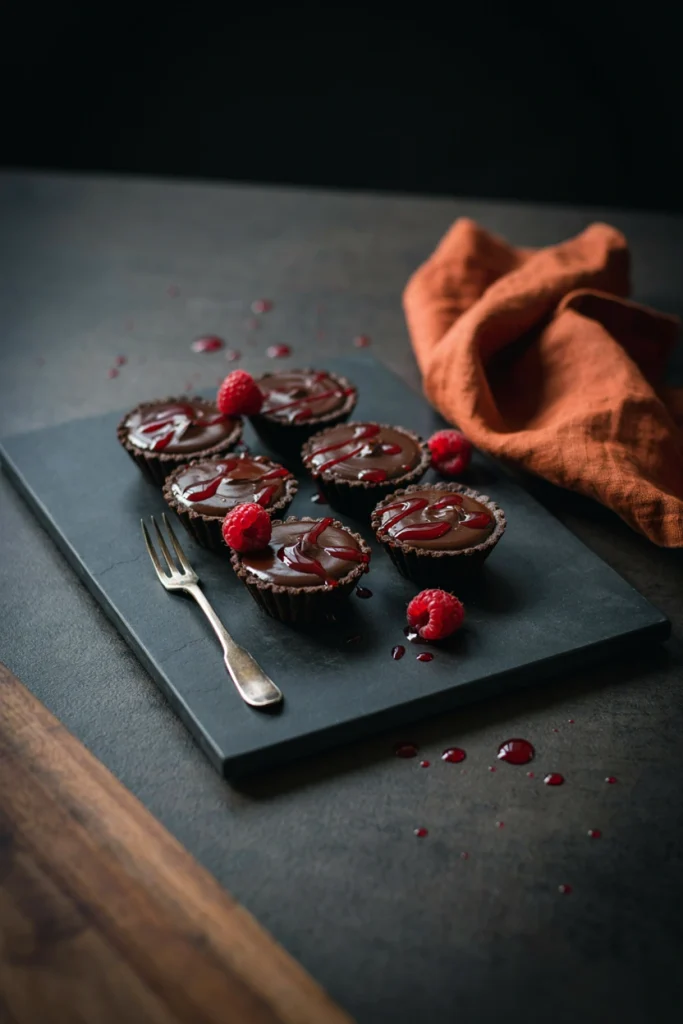
A small chocolate tart shell holds a rich ganache center, finished with a drizzle of raspberry sauce that looks unmistakably like a horror movie prop.
Time: 1 hr | Makes: 12 tart bites
You’ll need: mini chocolate tart shells, heavy cream, dark chocolate, fresh or frozen raspberries, sugar
Quick Method
Heat heavy cream just to a simmer, pour over chopped dark chocolate, and let sit 2 minutes before stirring smooth for the ganache. Fill each tart shell and chill 30 minutes until set. Simmer raspberries with a little sugar and mash until saucy, then strain and drizzle over the set tarts just before serving so it drips down the sides.
51. Candy Corn Sugar Cookie Bars

A thick, soft sugar cookie bar gets frosted in candy corn stripes instead of one solid color, an easy way to make a crowd-size batch look intentional.
Time: 50 min | Makes: 20 bars
You’ll need: butter, sugar, egg, vanilla extract, flour, baking powder, vanilla frosting, orange gel food coloring, yellow gel food coloring
Quick Method
Preheat the oven to 350°F. Cream butter and sugar, beat in egg and vanilla, then mix in flour and baking powder. Press into a lined 9×13-inch pan and bake 18-20 minutes until pale gold. Cool completely, then divide frosting into three bowls, tint one orange and one yellow, and spread in horizontal stripes across the bar before slicing.
52. Mini Pecan Pie Bites

A classic gooey pecan pie filling bakes in mini tart shells for individual, no-slicing portions, topped with a small chocolate spider for the holiday.
Time: 45 min | Makes: 12 bites
You’ll need: mini phyllo or tart shells, brown sugar, corn syrup, egg, butter, vanilla extract, chopped pecans, chocolate spider candies
Quick Method
Preheat the oven to 350°F. Whisk brown sugar, corn syrup, egg, melted butter, and vanilla until smooth, then stir in chopped pecans. Spoon into mini tart shells set on a baking sheet and bake 15-18 minutes until set and slightly puffed. Cool completely, then top each with a small chocolate spider candy.
53. Vanilla Bean Panna Cotta Ghosts

A silky, barely-set vanilla panna cotta unmolds into a smooth dome, and two candy eyes instantly turn the elegant dessert into a friendly ghost.
Time: 4 hr 20 min | Makes: 6 ghosts
You’ll need: heavy cream, milk, sugar, vanilla bean paste, gelatin, candy eyes
Quick Method
Sprinkle gelatin over a few tablespoons of cold milk and let bloom 5 minutes. Heat heavy cream, remaining milk, sugar, and vanilla bean paste until just steaming, then whisk in the bloomed gelatin until dissolved. Pour into dome-shaped molds and chill at least 4 hours until fully set. Unmold onto plates and press on candy eyes.
54. Chocolate Orange Truffle Pumpkins

A ganache truffle center, rolled in orange-tinted cocoa instead of the usual plain cocoa, with a broken pretzel stick pressed in as a stem.
Time: 1 hr 15 min | Makes: 18 truffles
You’ll need: heavy cream, dark chocolate, orange extract, cocoa powder, orange gel food coloring, pretzel sticks
Quick Method
Heat heavy cream to a simmer, pour over chopped dark chocolate, and stir in orange extract until smooth. Chill 1 hour until firm enough to scoop, then roll into balls. Mix cocoa powder with a touch of orange food coloring and roll each truffle to coat. Press a small pretzel piece into the top as a stem.
55. Cinnamon Sugar Pumpkin Churros

A pumpkin-spiced churro dough fries up crisp on the outside and soft inside, rolled in cinnamon sugar while hot for that classic churro crunch.
Time: 45 min | Makes: 16 churros
You’ll need: water, butter, sugar, flour, eggs, pumpkin puree, pumpkin pie spice, oil for frying, cinnamon sugar, chocolate sauce
Quick Method
Bring water, butter, and sugar to a boil, then stir in flour off heat until a smooth dough forms. Beat in eggs one at a time, then stir in pumpkin puree and spice. Pipe strips directly into 350°F oil and fry 2-3 minutes per side until golden. Roll immediately in cinnamon sugar and serve with warm chocolate sauce for dipping.
56. Caramel Popcorn Cake Balls
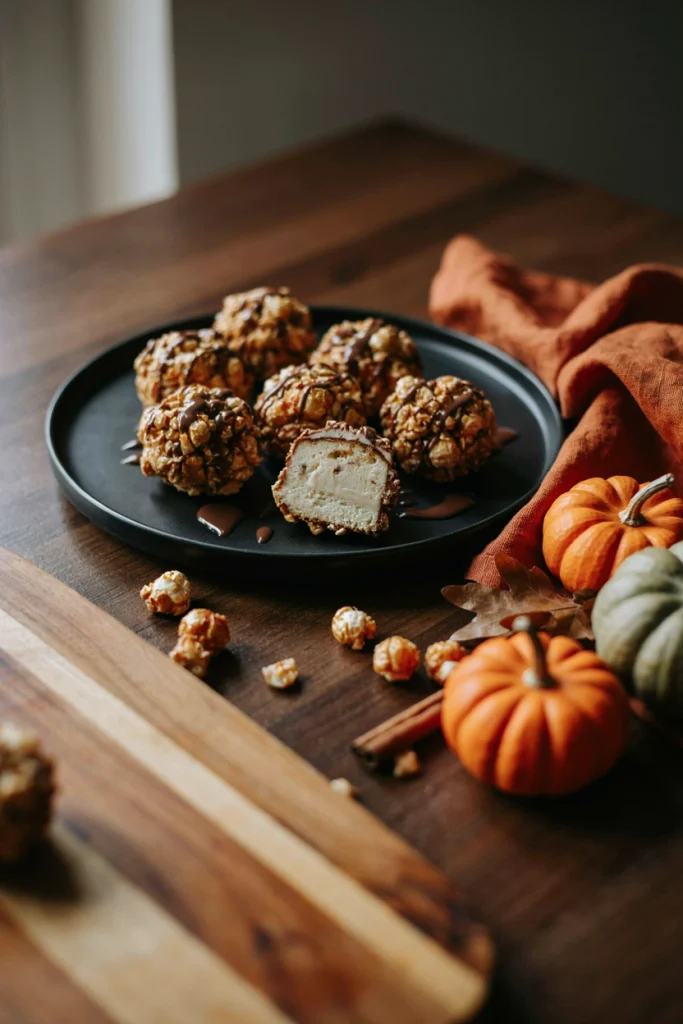
Crumbled cake and frosting roll into balls, then get pressed into crushed caramel popcorn for a sweet, crunchy shell that’s genuinely addictive.
Time: 1 hr 10 min | Makes: 18 cake balls
You’ll need: baked cake, frosting, caramel popcorn, chocolate melting wafers
Quick Method
Crumble cake into a bowl, mix with frosting until it holds together, and roll into 1.5-inch balls. Chill 20 minutes, then roll each ball in crushed caramel popcorn, pressing gently so it sticks. Drizzle with melted chocolate and let set 15 minutes before serving.
57. Mini Chocolate Cauldron Cupcakes
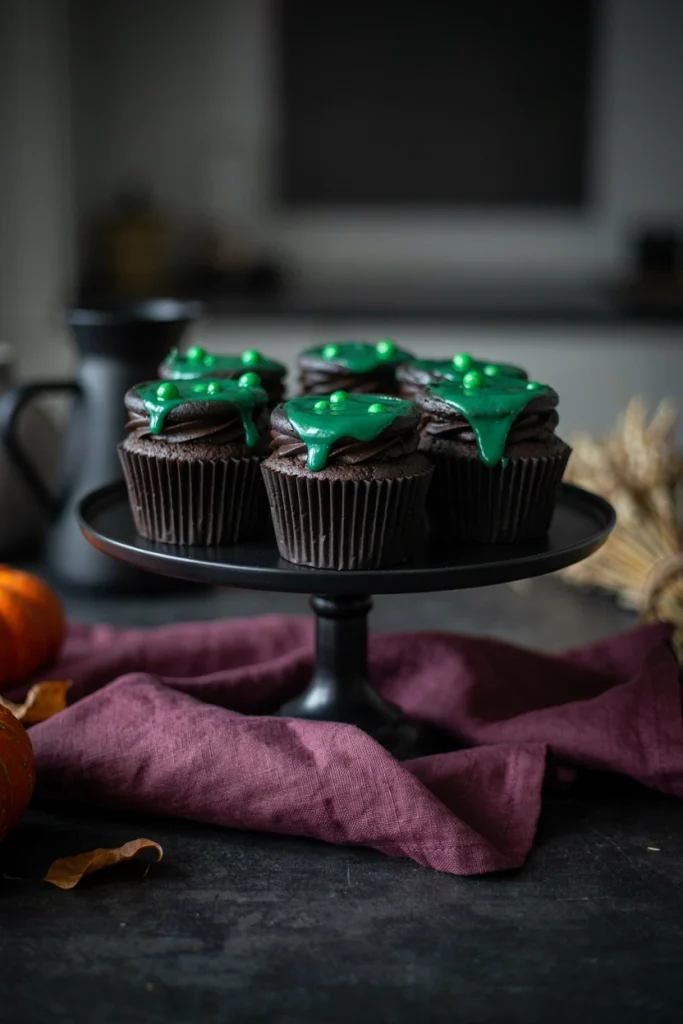
A rich chocolate cupcake gets a black frosting swirl and a drip of green candy melts spilling over the edge like a bubbling potion.
Time: 45 min | Makes: 12 cupcakes
You’ll need: flour, cocoa powder, sugar, eggs, buttermilk, oil, baking soda, black buttercream, green candy melts
Quick Method
Preheat the oven to 350°F. Whisk flour, cocoa, sugar, and baking soda, then mix in eggs, buttermilk, and oil. Divide into a lined muffin tin and bake 18-20 minutes until a toothpick comes out clean. Cool, pipe black buttercream in a swirl leaving a slight well in the center, then spoon melted green candy melts into the well so it drips down the sides.
58. Pistachio White Chocolate Bark with Candy Eyes
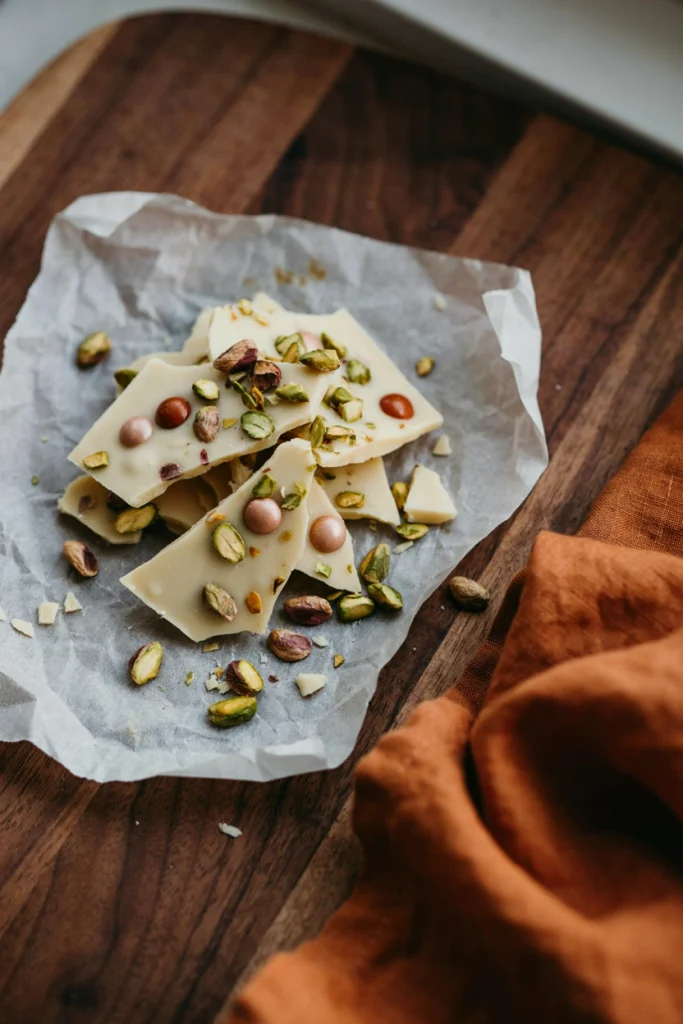
Chopped pistachios add color, crunch, and a slightly savory edge to a simple white chocolate bark, with candy eyes scattered on top for a playful finish.
Time: 35 min | Makes: 16 pieces
You’ll need: white chocolate melting wafers, shelled pistachios, candy eyes
Quick Method
Melt the white chocolate and spread it in an even layer on a parchment-lined sheet. Scatter chopped pistachios evenly over the top, pressing gently so they adhere, then add candy eyes scattered throughout while the chocolate is still wet. Chill 20 minutes until fully set, then break into pieces.
59. Salted Caramel Apple Hand Pies

A flaky crust wraps around cinnamon-spiced apples and a spoonful of caramel, finished with a caramel drizzle and flaky salt for a sweet-salty crust on crust.
Time: 1 hr 10 min | Makes: 10 hand pies
You’ll need: refrigerated pie crust, apples, brown sugar, cinnamon, cornstarch, caramel sauce, egg, coarse sugar, flaky salt
Quick Method
Preheat the oven to 375°F. Toss diced apples with brown sugar, cinnamon, and cornstarch. Cut circles from rolled pie crust, spoon apple filling and a small drizzle of caramel onto half of each, fold over, and crimp with a fork. Vent the tops, brush with egg, and sprinkle with coarse sugar. Bake 20-22 minutes until golden, then drizzle with more caramel and a pinch of flaky salt.
60. Halloween Trail Mix Bark
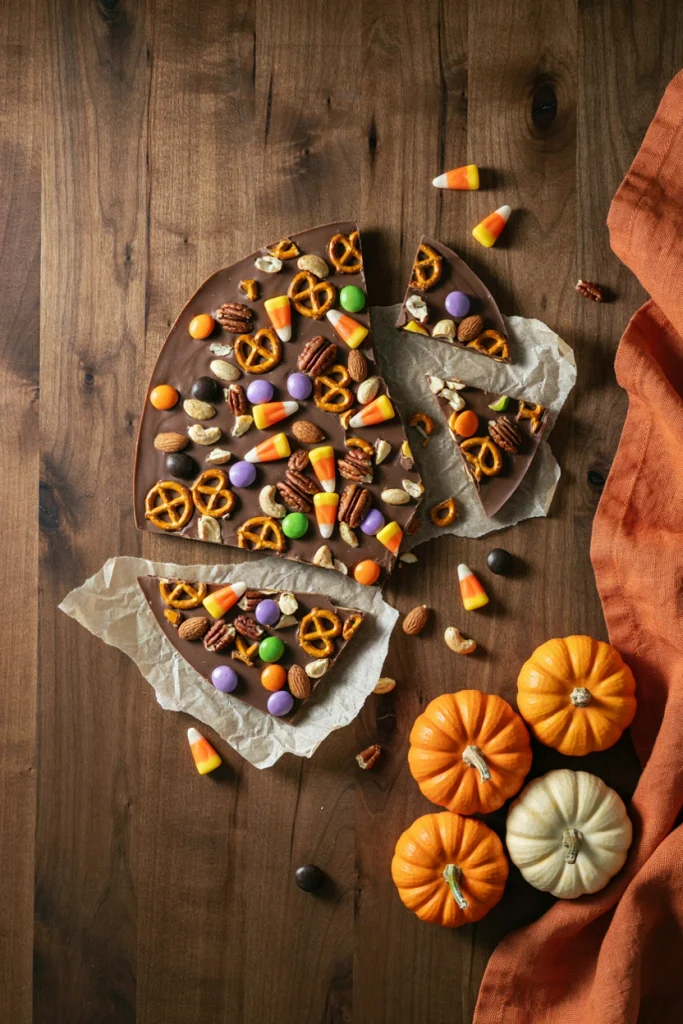
Everything in the Halloween candy bowl gets pressed into one giant sheet of chocolate, an easy way to use up leftover mix-ins into something new.
Time: 35 min | Makes: 20 pieces
You’ll need: milk chocolate melting wafers, pretzels, candy corn, mixed nuts, Halloween M&Ms
Quick Method
Melt the chocolate and spread it into an even layer on a parchment-lined sheet. Scatter broken pretzels, candy corn, nuts, and M&Ms evenly across the top, pressing gently to adhere. Chill 20 minutes until fully set, then break into rustic pieces.
Halloween Dessert Cheat Sheet
Short on time or trying to pick just a few? Here’s a quick comparison of standout options from the list.
| Recipe | Best For | Difficulty | Time |
|---|---|---|---|
| Caramel Apple Nachos | Last-minute gatherings | Easy | 10 min |
| Ghost Pretzel Bark | No-fuss crowd pleaser | Easy | 40 min |
| Mini Pumpkin Cheesecake Bites | Elegant, portioned dessert | Medium | 2 hr 40 min |
| Skillet M&M Cookie | Warm, shareable dessert | Easy | 35 min |
| Eyeball Cake Pops | Show-stopping party centerpiece | Medium | 1 hr 30 min |
Shop This Post
A handful of tools make this whole list easier to pull off. Here’s what’s worth having on hand.
- Stand mixer for creaming butter and sugar in bars, blondies, and cookie dough
- Food processor for crushing Oreos into fine crumbs for truffles and pops
- Parchment paper sheets for bark, clusters, and any no-stick baking
- Cooling rack to keep bars and cookies from getting soggy on the bottom
- Piping bags and tips for spiderwebs, bone details, and frosting swirls
- Cake pop sticks for eyeball pops, owl truffle pops, and caramel apple pops
- Mini tart pans for pecan pie bites and chocolate raspberry tart bites
- Cast-iron skillet for the skillet M&M cookie
- Donut pan for apple cider donuts and pumpkin donut holes
- Silicone dome molds for the panna cotta ghosts
- Edible glitter and Halloween sprinkle mixes for finishing touches across the list
- Cookie storage tins and an airtight carrier for keeping everything fresh once it’s made
Common Mistakes to Avoid
- Dipping warm centers: Truffles, cake pops, and caramel apples all need a chill in the freezer or fridge first, or the coating slides right off.
- Overbaking meringues: Pulling them early or baking too hot leaves the inside chewy instead of crisp. Low and slow is non-negotiable.
- Rushing layered bark or bars: Adding a new tinted layer before the one below has chilled causes the colors to blend into a muddy mess.
- Slicing apples too far ahead: Even with lemon juice, apple slices start browning within the hour, so cut close to serving time.
- Skipping parchment paper: Bark, bars, and clusters all need a nonstick surface to release cleanly.
How to Store These Halloween Desserts
Bars, brownies, cookies, and fudge keep well at room temperature in an airtight container for up to a week. Truffles, cake pops, cheesecake bites, and anything with cream cheese or fresh fruit belong in the fridge and are best within 3-4 days. Meringues need a dry environment, so skip the fridge for those, and unbaked cookie dough or muffin batter can be frozen for up to 2 months and baked straight from frozen with a few extra minutes. Store finished treats in cookie storage tins or an airtight carrier if you’re transporting them.
Frequently Asked Questions
What’s the easiest recipe on this list to start with?
Caramel Apple Nachos and Ghost Pretzel Bark are both no-bake, take under an hour, and need zero decorating skill. For more grab-and-go ideas, check out our leftover Halloween candy treats.
Can I make these desserts ahead of a party?
Yes. Bars, fudge, bark, and truffles all hold up for several days when stored properly, so you can spread the baking out across the week.
What are the best options for a kids’ Halloween party?
Peanut Butter Spider Cookies, Witch Hat Cookie Caramels, and Black Cat Popcorn Balls all have simple, hands-on decorating steps that kids genuinely enjoy.
Do any of these work well for a bake sale?
Bars, cookies, and fudge travel and hold up the best for bake sales since they don’t need refrigeration and slice or wrap easily. Our fall bake sale treats roundup has more crowd-tested options.
What if I need a nut-free option?
Swap peanut butter for sunflower seed butter in the spider cookies and monster bars, and skip any recipe that calls for peanuts, pecans, or pistachios directly.