
Lazy Easy No Bake Desserts That Feel Effortless
The oven is not invited to this party.
No bake desserts are the secret weapon of smart home bakers—the ones who want something creamy, layered, and just indulgent enough without heating up the kitchen or committing to a full baking project.
These are the desserts you make when it’s too hot to function, when guests are coming in an hour, or when you simply want something that feels impressive but quietly effortless. From silky chocolate pies to nostalgic banana pudding and showstopping trifles, no bake desserts prove that patience (and a good chill time) can be just as powerful as a preheated oven.
This post may contain affiliate links which helps me keep this blog alive, questions? View the privacy policy.
Creamy No Bake Pie Classics
If there’s one category that proves no bake desserts can hold their own against any bakery case, it’s the chilled pie. A crisp cookie crust, a cloud-like filling, and a few hours in the refrigerator are all it takes to create something sliceable, rich, and quietly impressive. These pies rely on whipped cream, cream cheese, peanut butter, or chocolate to set into that perfect fork-glide texture—no oven required.
No Bake Chocolate Pie
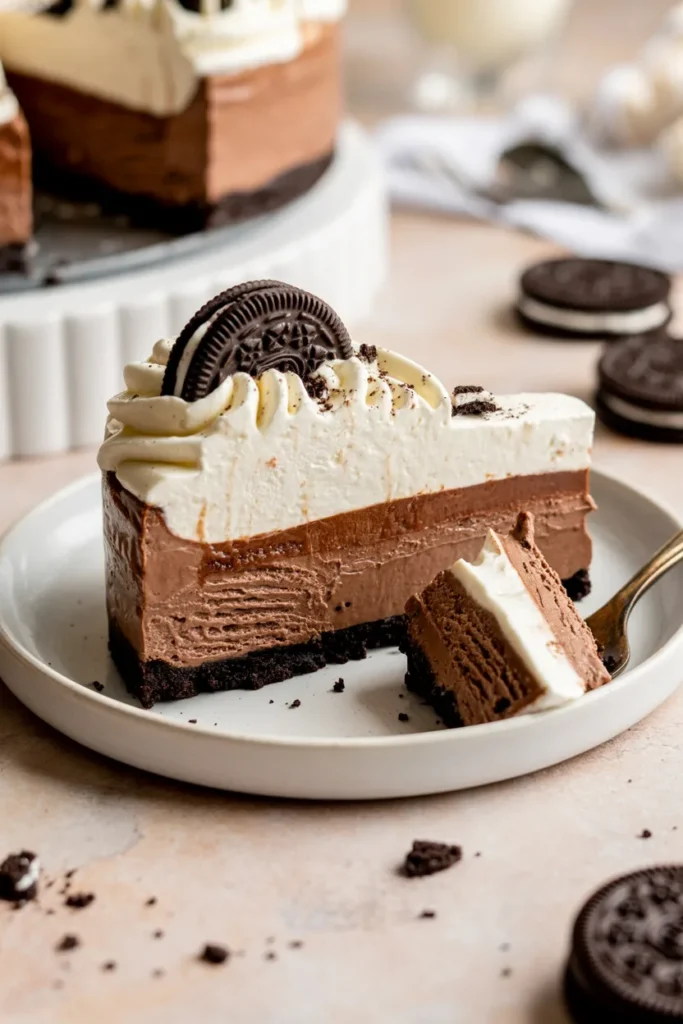
This pie is pure silk. A chocolate cookie crust anchors a smooth, mousse-like filling that firms up beautifully in the fridge. The key is properly whipped cream—soft peaks folded gently into melted chocolate for structure without heaviness. For a bakery-style finish, pipe a border of whipped cream using a Wilton 1M piping tip and let the chocolate curls fall where they may. It looks dramatic, but it’s surprisingly simple.
A hand mixer makes quick work of whipping and blending, and giving the pie a full chill time ensures clean slices. The result is rich without being dense, chocolate-forward without being overwhelming. It’s the kind of dessert that disappears quietly at gatherings.
Prep Time: 20 min | Chill Time: 4 hours | Total Time: 4 hours 20 min | Servings: 8 | Difficulty: Easy
Ingredients
- 24 chocolate sandwich cookies, crushed
- 5 tablespoons unsalted butter, melted
- 8 oz semi-sweet chocolate, finely chopped
- 2 cups heavy whipping cream, divided
- 1/4 cup powdered sugar
- 1 teaspoon vanilla extract
- Chocolate curls, for garnish
Instructions
- Stir the crushed cookies and melted butter together until evenly moistened, then press firmly into the bottom and up the sides of a 9-inch pie dish. Chill for 15 minutes while you make the filling.
- Place the chopped chocolate in a heatproof bowl. Heat 3/4 cup of the heavy cream just until it simmers, then pour over the chocolate and let sit for 2 minutes before whisking until smooth. Let cool to room temperature, about 15 minutes.
- In a separate bowl, whip the remaining 1 1/4 cups heavy cream with the powdered sugar and vanilla to soft peaks, about 3 minutes with a hand mixer.
- Fold one-third of the whipped cream into the cooled chocolate mixture to lighten it, then gently fold in the rest until no streaks remain.
- Spread the filling into the chilled crust and smooth the top with an offset spatula. Refrigerate uncovered for at least 4 hours, or until fully set.
- Pipe any reserved whipped cream around the border using a Wilton 1M tip, top with chocolate curls, and slice with a warm, clean knife.
No Bake Peanut Butter Pie
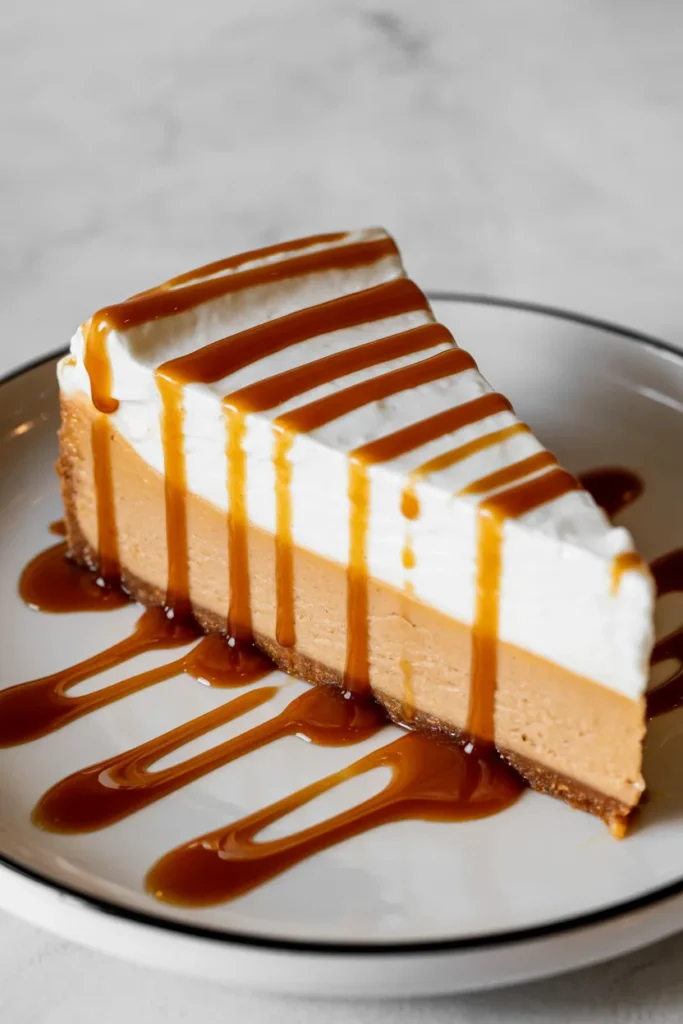
Sweet, salty, and unapologetically creamy, this peanut butter pie leans into comfort. Cream cheese and peanut butter whip together into a filling that’s fluffy yet structured, while a cookie crust adds just enough crunch. A drizzle of chocolate over the top balances the sweetness and adds contrast.
This pie sets beautifully in the refrigerator but can also firm up faster in the freezer if you’re short on time. Let it sit at room temperature for a few minutes before slicing for the cleanest cut. It’s simple, nostalgic, and proof that sometimes the most satisfying desserts are the least complicated.
Prep Time: 20 min | Chill Time: 3 hours | Total Time: 3 hours 20 min | Servings: 8 | Difficulty: Easy
Ingredients
- 2 cups graham cracker crumbs
- 6 tablespoons unsalted butter, melted
- 8 oz cream cheese, softened
- 1 cup creamy peanut butter
- 3/4 cup powdered sugar
- 1 1/2 cups heavy whipping cream
- 1/3 cup semi-sweet chocolate chips
- 2 tablespoons heavy cream (for drizzle)
Instructions
- Combine the graham cracker crumbs and melted butter, then press into a 9-inch pie dish and freeze for 10 minutes to set.
- Beat the cream cheese and peanut butter together until smooth and fluffy, about 2 minutes. Add the powdered sugar and beat until fully combined.
- In a separate bowl, whip the heavy cream to stiff peaks, about 3–4 minutes.
- Fold the whipped cream into the peanut butter mixture in two additions until light and airy.
- Spread the filling into the crust, smoothing the top, and refrigerate for at least 3 hours, or freeze for 45 minutes if short on time.
- Melt the chocolate chips with the 2 tablespoons of heavy cream in 20-second microwave bursts, stirring between each, until smooth. Drizzle over the chilled pie and let set for 5 minutes before slicing.
No Bake Cheesecakes & Creamy Layered Showstoppers
This is where no bake desserts really start to flex. Cheesecakes that set without a water bath. Trifles that look like they came from a pastry shop window. Layered desserts that feel architectural but require nothing more than patience and a refrigerator. These recipes lean into contrast—creamy against crunchy, sweet against fresh—and the result is dramatic without being difficult.
Fruity Pebbles No Bake Cheesecake
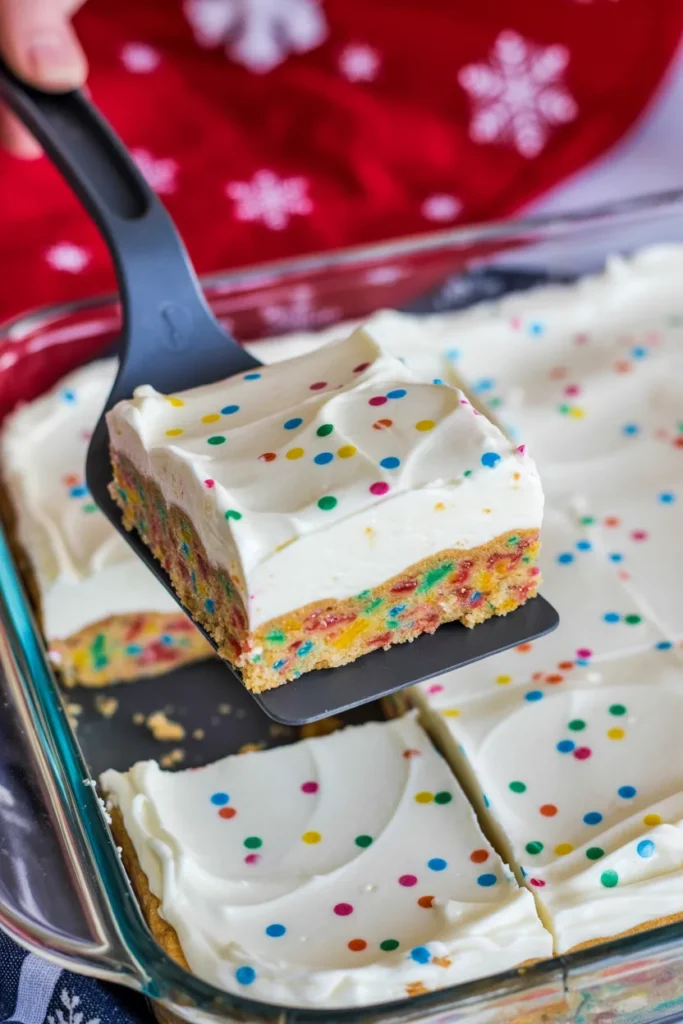
Bright, playful, and unapologetically nostalgic, this cheesecake proves that no bake doesn’t mean neutral. A cereal-studded crust adds crunch and color, while the creamy filling sets into a smooth, sliceable texture after a few hours of chilling. For parties, consider making mini versions in a muffin tin lined with spring-themed cupcake liners—they’re easier to serve and instantly festive.
The key to structure here is properly whipped cream folded gently into the cream cheese mixture. Overmixing deflates it; patience preserves that airy texture. Once chilled, the slices hold clean edges while still tasting soft and luscious.
Prep Time: 25 min | Chill Time: 4 hours | Total Time: 4 hours 25 min | Servings: 10 | Difficulty: Easy
Ingredients
- 3 cups Fruity Pebbles cereal, divided
- 6 tablespoons unsalted butter, melted
- 16 oz cream cheese, softened
- 1 cup powdered sugar
- 1 teaspoon vanilla extract
- 1 1/2 cups heavy whipping cream
- 1/2 cup mini marshmallows, for topping
Instructions
- Pulse 2 1/2 cups of the cereal in a food processor until finely crushed, then mix with the melted butter until evenly coated. Press into the bottom of a 9-inch springform pan and chill for 15 minutes.
- Beat the cream cheese, powdered sugar, and vanilla together until smooth and fluffy, about 2 minutes.
- In a separate bowl, whip the heavy cream to soft peaks, about 3 minutes.
- Gently fold the whipped cream into the cream cheese mixture in two additions, stopping as soon as no streaks remain.
- Spread the filling evenly over the crust, smoothing the top with an offset spatula. Refrigerate uncovered for at least 4 hours, or until firm.
- Release the springform ring, top with the remaining 1/2 cup cereal and mini marshmallows, and slice with a warm knife.
Berry Tiramisu
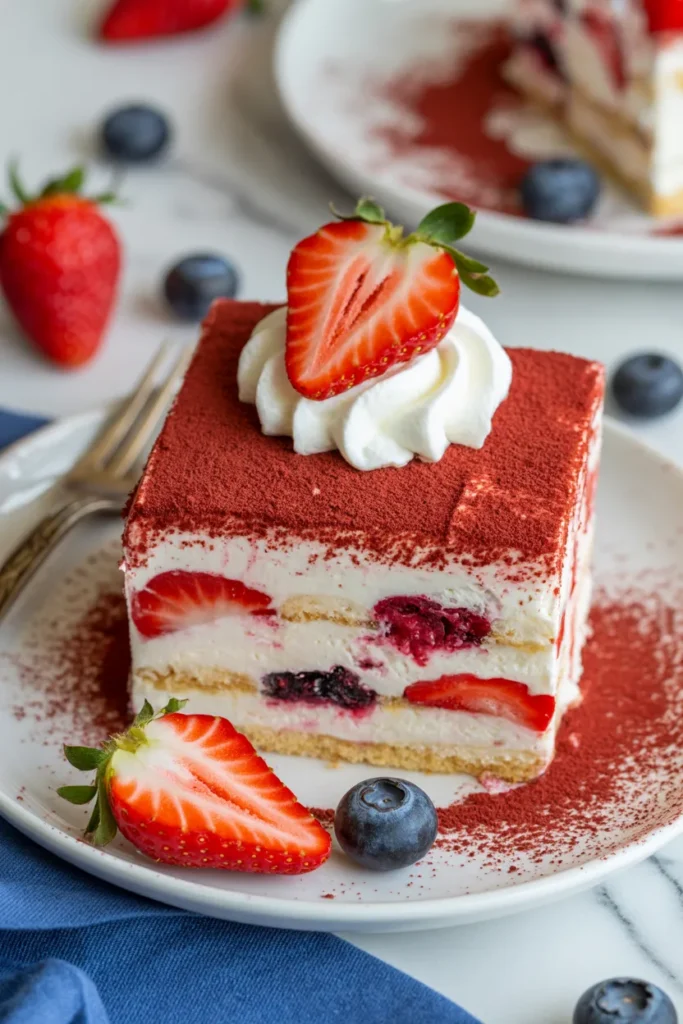
This version of tiramisu skips the espresso and leans into fresh berries for a lighter, brighter finish. Ladyfingers soften as they absorb juice, transforming into cake-like layers beneath mascarpone cream. It’s proof that refrigeration can do what heat often does—create cohesion and tenderness.
Use an offset spatula to spread each mascarpone layer evenly for clean lines when sliced. The longer it chills, the better it slices. Fresh berries on top add texture and color, turning a simple assembly into a centerpiece dessert.
Prep Time: 30 min | Chill Time: 6 hours | Total Time: 6 hours 30 min | Servings: 9 | Difficulty: Medium
Ingredients
- 2 cups fresh strawberries, hulled and pureed
- 1 cup fresh mixed berries, plus extra for topping
- 2 tablespoons granulated sugar (for the berry soak)
- 8 oz mascarpone cheese, softened
- 1 cup heavy whipping cream
- 1/3 cup powdered sugar
- 1 teaspoon vanilla extract
- 24 ladyfinger cookies
- Fresh mint, for garnish
Instructions
- Stir the pureed strawberries with the granulated sugar and let sit for 10 minutes to release extra juice; this is your dipping liquid.
- Beat the mascarpone until smooth, about 1 minute. In a separate bowl, whip the heavy cream, powdered sugar, and vanilla to stiff peaks, about 3 minutes, then fold into the mascarpone until combined.
- Dip each ladyfinger into the strawberry mixture for 2–3 seconds per side (do not soak, or they’ll turn mushy) and arrange in a single layer in a 9×9-inch dish.
- Spread half of the mascarpone cream over the ladyfingers, then scatter with half of the mixed berries.
- Repeat with a second layer of dipped ladyfingers, remaining cream, and remaining berries.
- Cover and refrigerate for at least 6 hours, or overnight for the cleanest slices. Garnish with fresh mint before serving.
Strawberry Trifle
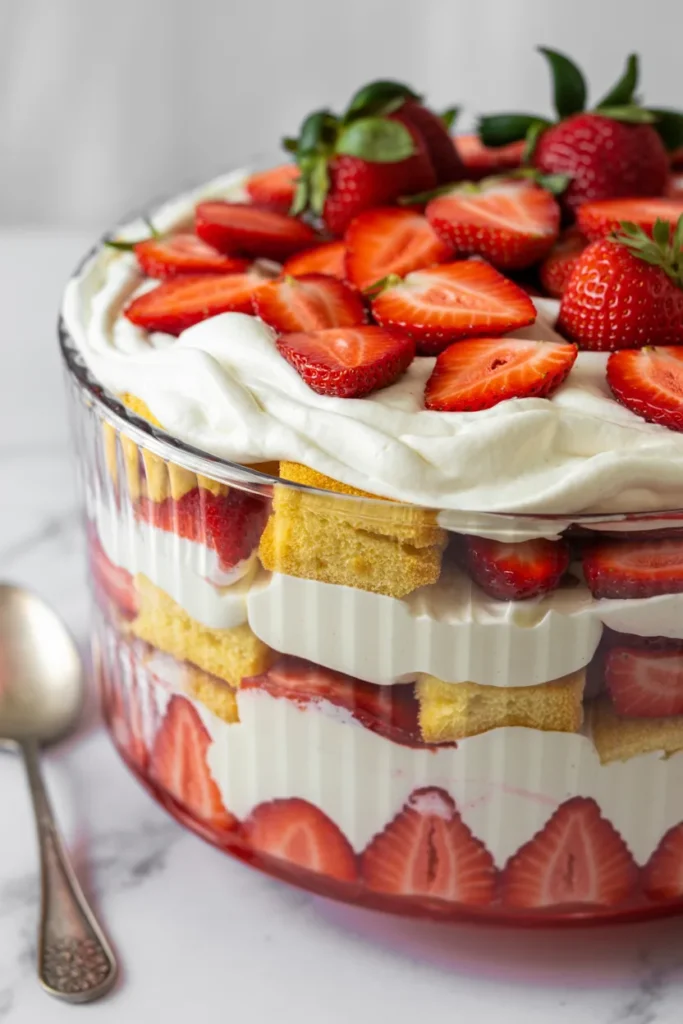
Trifles are the quiet show-offs of the dessert table. Layers of cake, cream, and fruit stack up in a clear bowl, creating a visual map of flavor. The beauty here is flexibility—you can use pound cake, sponge cake, or even leftover cupcakes as your base.
As it chills, the layers settle into one another, softening just enough while keeping their structure. The result is spoonable, balanced, and ideal for feeding a crowd. It’s a dessert that invites seconds without demanding effort.
Prep Time: 25 min | Chill Time: 2 hours | Total Time: 2 hours 25 min | Servings: 12 | Difficulty: Easy
Ingredients
- 1 store-bought or homemade pound cake, cut into 1-inch cubes
- 4 cups fresh strawberries, hulled and sliced
- 1/4 cup granulated sugar
- 2 cups heavy whipping cream
- 1/2 cup powdered sugar
- 1 teaspoon vanilla extract
- 8 oz cream cheese, softened
- 1/4 cup strawberry jam, warmed slightly
Instructions
- Toss the sliced strawberries with the granulated sugar and let macerate for 15 minutes, releasing their juices.
- Beat the cream cheese until smooth, then beat in the warmed strawberry jam until fully incorporated.
- In a separate bowl, whip the heavy cream, powdered sugar, and vanilla to stiff peaks, about 3–4 minutes. Fold one-third into the cream cheese mixture to lighten it, then fold in the rest.
- In a trifle bowl or large glass dish, layer one-third of the cake cubes, followed by one-third of the strawberries with their juices, then one-third of the cream mixture. Repeat two more times, finishing with cream on top.
- Cover and refrigerate for at least 2 hours before serving to let the layers settle. Top with a few extra strawberry slices to garnish.
Magnolia Bakery-Style Banana Pudding
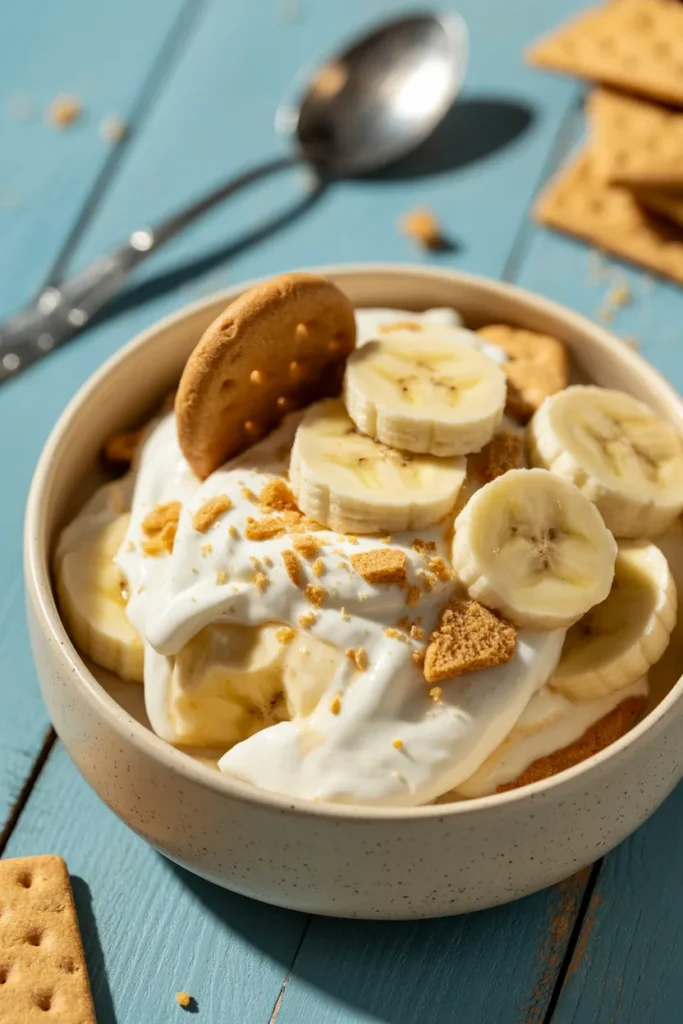
Few no bake desserts carry as much nostalgic weight as banana pudding. Vanilla wafers soften overnight, turning almost cake-like between layers of creamy pudding and fresh bananas. It’s simple assembly, but the transformation after chilling is what makes it special.
The trick is restraint—don’t rush it. An overnight rest allows the cookies to soften properly while the flavors meld. Serve it in a large dish for family-style gatherings or portion it into individual cups for easy entertaining. It’s comfort food, elevated by patience.
Prep Time: 20 min | Chill Time: 8 hours | Total Time: 8 hours 20 min | Servings: 10 | Difficulty: Easy
Ingredients
- 14 oz sweetened condensed milk
- 1 1/2 cups cold water
- 1 (3.4 oz) box instant vanilla pudding mix
- 16 oz cream cheese, softened
- 12 oz frozen whipped topping, thawed, divided
- 1 (11 oz) box vanilla wafer cookies
- 6 ripe bananas, sliced
Instructions
- Whisk the sweetened condensed milk, cold water, and pudding mix together until thickened, about 2 minutes. Refrigerate for 10 minutes.
- Beat the cream cheese until smooth, then beat in the chilled pudding mixture until fully combined.
- Fold in 8 oz of the whipped topping until light and no streaks remain.
- In a trifle dish or 9×13-inch pan, layer one-third of the vanilla wafers, followed by one-third of the banana slices, then one-third of the pudding mixture. Repeat two more times.
- Top with the remaining 4 oz of whipped topping and a few crushed wafers for garnish.
- Cover and refrigerate for at least 8 hours, or overnight, to let the wafers soften fully before serving.
Chocolate Lovers’ No Bake Indulgences
Chocolate behaves beautifully without heat. Melt it, fold it, chill it—and it transforms into fudge, mousse, ganache, or something sliceable and deeply satisfying. These are the desserts for when you want intensity without turning on the oven. They’re rich, structured by refrigeration, and often even better the next day.
Chocolate Fudge
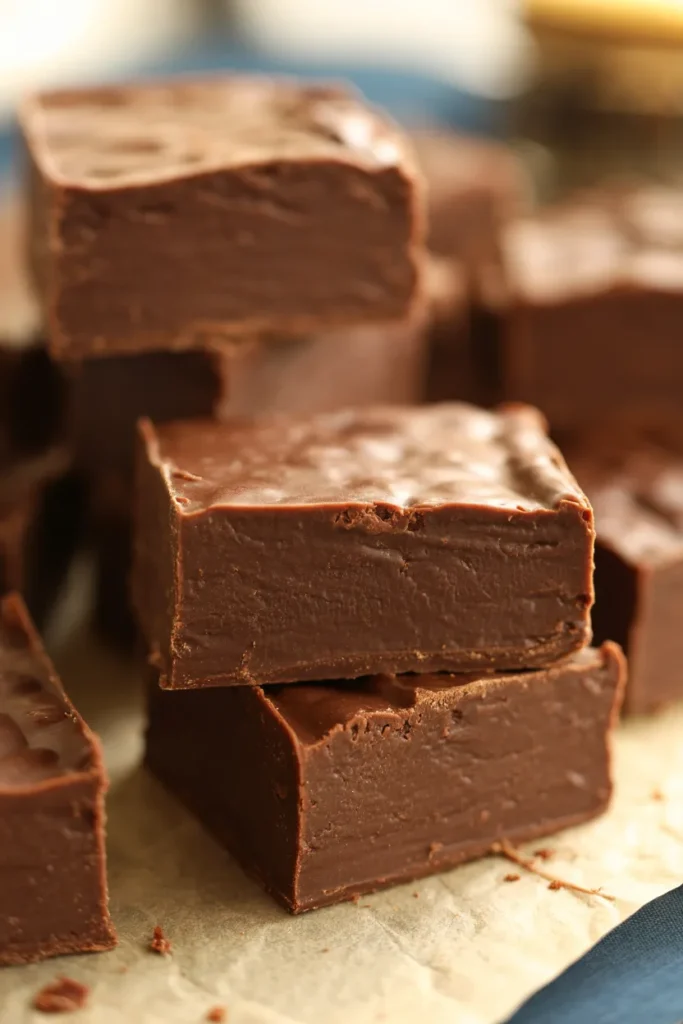
Fudge is essentially controlled decadence. Melted chocolate and sweetened condensed milk come together into a glossy mixture that firms into dense, bite-sized squares once chilled. The key is even melting and patience—stir gently, pour smoothly, and let the refrigerator handle the rest.
For clean cuts, line your pan with parchment and chill until fully set before slicing with a sharp knife wiped clean between cuts. Add-ins like chopped nuts or sea salt flakes create contrast, but even in its simplest form, this is chocolate doing what chocolate does best.
Prep Time: 10 min | Chill Time: 3 hours | Total Time: 3 hours 10 min | Servings: 16 squares | Difficulty: Easy
Ingredients
- 18 oz semi-sweet chocolate chips
- 14 oz sweetened condensed milk
- 2 tablespoons unsalted butter
- 1 teaspoon vanilla extract
- 1/4 teaspoon fine sea salt
- 1/2 cup chopped walnuts (optional)
- Flaky sea salt, for topping
Instructions
- Line an 8×8-inch pan with parchment paper, leaving overhang on two sides.
- Combine the chocolate chips, sweetened condensed milk, and butter in a heatproof bowl. Microwave in 30-second bursts, stirring after each, until fully melted and smooth, about 90 seconds total.
- Stir in the vanilla and fine sea salt until glossy.
- Fold in the chopped walnuts, if using, then pour the mixture into the prepared pan and spread evenly with an offset spatula.
- Sprinkle with flaky sea salt and refrigerate for at least 3 hours, or until firm to the touch.
- Lift the fudge out using the parchment overhang and cut into 16 squares with a sharp knife, wiping the blade clean between cuts.
Mocha Chocolate Icebox Cake
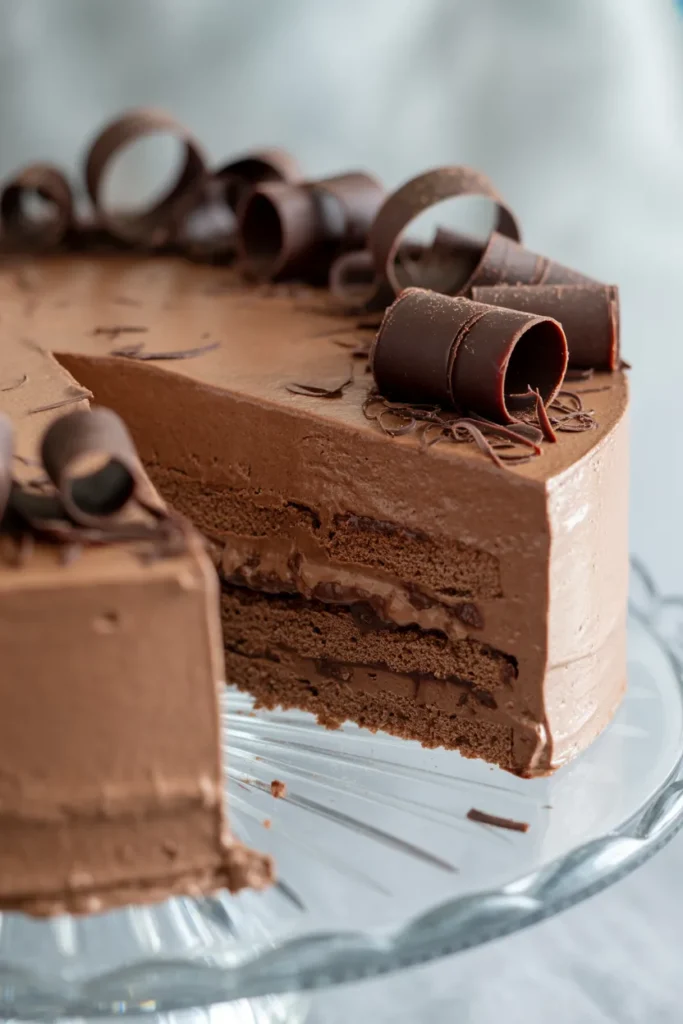
Icebox cakes are quiet alchemy. Crisp cookies layered with whipped cream soften overnight into something that tastes unmistakably like cake. The mocha element deepens the chocolate flavor without overwhelming it, making this one feel slightly grown-up but still comforting.
Layer evenly, spread gently, and allow a full chill so the cookies have time to absorb moisture. When sliced, the layers reveal clean stripes that look far more complicated than they are. It’s elegant, effortless, and perfect for dinner parties.
Prep Time: 20 min | Chill Time: 8 hours | Total Time: 8 hours 20 min | Servings: 10 | Difficulty: Easy
Ingredients
- 2 1/2 cups heavy whipping cream
- 1/2 cup powdered sugar
- 3 tablespoons unsweetened cocoa powder
- 1 tablespoon instant espresso powder, dissolved in 2 tablespoons hot water
- 1 teaspoon vanilla extract
- 2 (9 oz) boxes chocolate wafer cookies
- Chocolate shavings, for garnish
Instructions
- Whip the heavy cream, powdered sugar, and cocoa powder together on medium-high speed until soft peaks form, about 3 minutes.
- Add the dissolved espresso and vanilla, then continue whipping to stiff peaks, about 1 more minute.
- Spread a thin layer of the mocha cream on the bottom of a 9×5-inch loaf pan or serving platter to anchor the first layer.
- Dip each cookie briefly into a shallow dish of milk if you’d like extra-quick softening, or use them dry for a firmer layer. Arrange a single layer of cookies over the cream.
- Spread a thin, even layer of mocha cream over the cookies using an offset spatula. Repeat layering cookies and cream until you’ve used all the cookies, finishing with a cream layer on top.
- Cover and refrigerate for at least 8 hours, or overnight, until the cookies have softened to a cake-like texture. Garnish with chocolate shavings before slicing.
Chocolate Covered Strawberries

Sometimes the simplest no bake desserts are the most impressive. Fresh strawberries dipped in melted chocolate feel classic for a reason. The contrast between crisp chocolate shell and juicy fruit is immediate and satisfying.
Dry the berries thoroughly before dipping to help the chocolate adhere properly. Let them set at room temperature or chill briefly to firm up. A drizzle of white chocolate or a sprinkle of flaky salt elevates them from simple to celebratory without adding complexity.
Prep Time: 15 min | Set Time: 20 min | Total Time: 35 min | Servings: 20 strawberries | Difficulty: Easy
Ingredients
- 20 large fresh strawberries, with stems
- 10 oz semi-sweet chocolate, chopped
- 1 teaspoon coconut oil
- 2 oz white chocolate, chopped (optional, for drizzle)
- Flaky sea salt, for finishing (optional)
Instructions
- Line a baking sheet with parchment paper. Wash the strawberries and pat completely dry with paper towels—any moisture will keep the chocolate from sticking.
- Melt the semi-sweet chocolate and coconut oil together in a heatproof bowl in 30-second microwave bursts, stirring between each, until smooth, about 90 seconds total.
- Holding each strawberry by the stem, dip it into the melted chocolate, twisting gently to coat about three-quarters of the berry. Let excess drip off before placing on the parchment.
- Repeat with the remaining strawberries, then let sit at room temperature for 15–20 minutes, or refrigerate for 10 minutes, until the chocolate is fully set.
- If using, melt the white chocolate in 20-second bursts and drizzle over the set strawberries with a spoon. Sprinkle with flaky sea salt while the drizzle is still wet.
Quick Salted Caramel Sauce
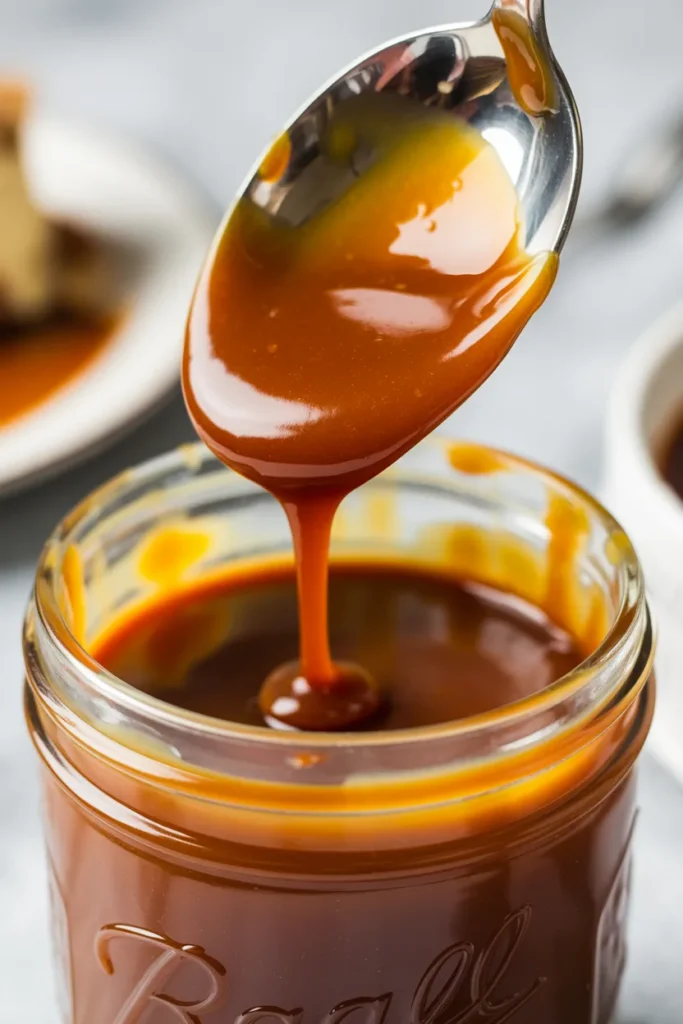
A good salted caramel sauce isn’t just a topping—it’s an upgrade. Drizzle it over pies, cheesecakes, icebox cakes, or even fresh fruit, and suddenly the dessert feels layered and intentional. The balance of sweetness and salt sharpens flavors and adds depth.
Make a batch ahead of time and store it in the refrigerator. Gently warm before using so it pours smoothly. A spoonful over a chilled dessert is often all it takes to transform something simple into something memorable.
Prep Time: 5 min | Cook Time: 10 min | Total Time: 15 min | Servings: Makes about 1 1/2 cups | Difficulty: Medium
Ingredients
- 1 cup granulated sugar
- 6 tablespoons unsalted butter, cubed, room temperature
- 1/2 cup heavy cream, room temperature
- 1 teaspoon flaky sea salt
- 1/2 teaspoon vanilla extract
Instructions
- Heat the sugar in a light-colored medium saucepan over medium heat, stirring constantly with a heatproof spatula, until it melts into an amber liquid, about 5–7 minutes. Watch closely in the final minute to avoid burning.
- Immediately add the cubed butter, whisking constantly—the mixture will bubble vigorously. Whisk until the butter is fully melted, about 1 minute.
- Remove from heat and slowly stream in the heavy cream while whisking continuously. The mixture will bubble again; keep whisking until smooth.
- Stir in the flaky sea salt and vanilla extract.
- Let cool for 10 minutes, then transfer to a jar. The sauce will thicken further as it cools. Store in the refrigerator for up to 2 weeks and gently rewarm before drizzling.
Nostalgic & Crowd-Pleasing No Bake Treats
Some no bake desserts don’t just satisfy a sweet tooth—they unlock a memory. These are the layered cups, chilled squares, and creamy creations that show up at birthdays, potlucks, and holiday tables year after year. They’re approachable, easy to assemble, and almost always better after a few hours in the refrigerator.
Dirt Cups
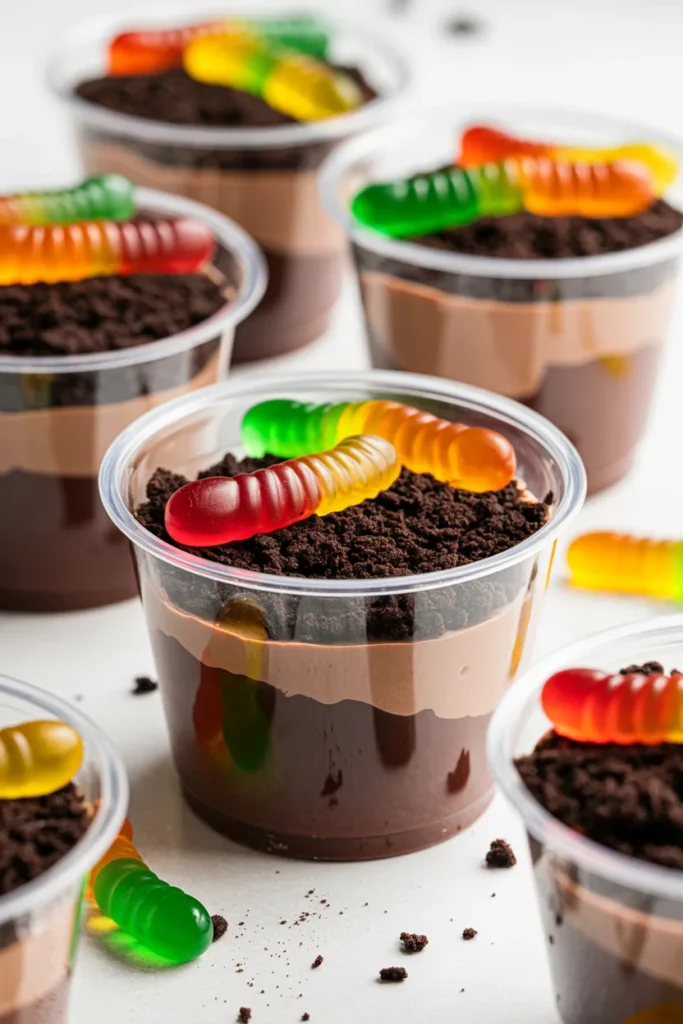
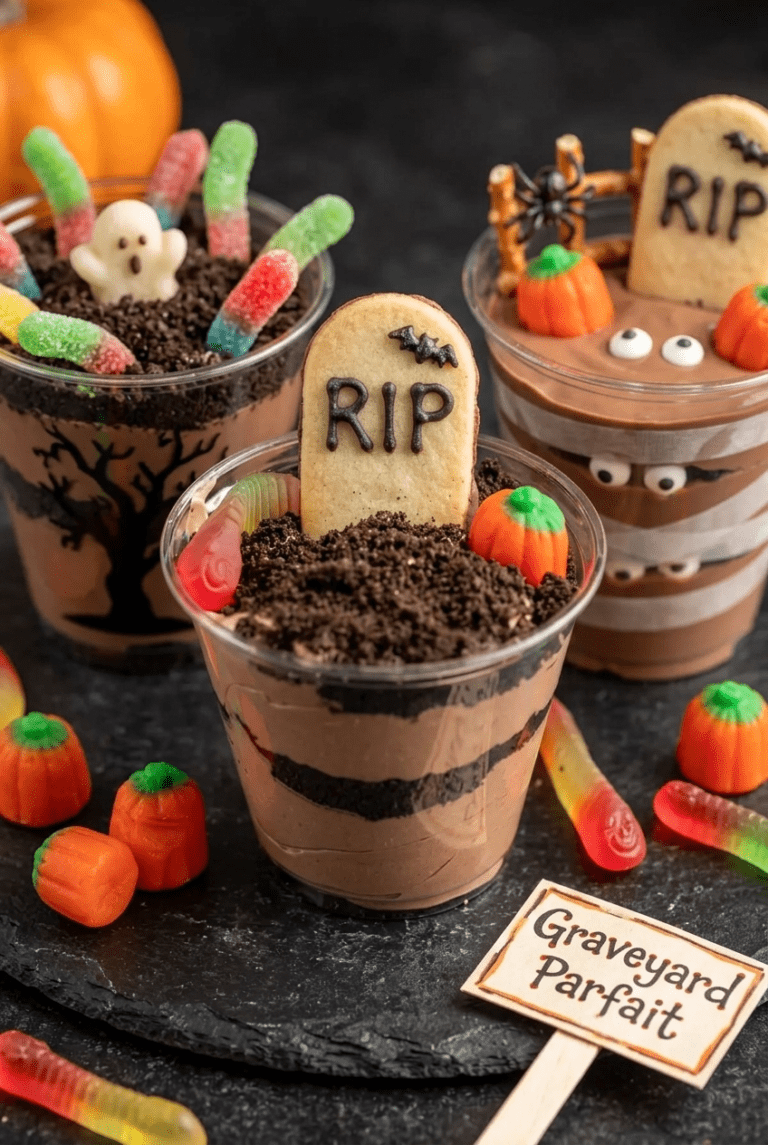
Layered with crushed cookies, chocolate pudding, and whipped topping, Dirt Cups are playful, nostalgic, and wildly easy to customize. Serve them in clear cups to show off the layers, and top with gummy worms for that classic finish. The textures soften slightly as they chill, creating a creamy-meets-cookie contrast that makes them irresistible for kids and adults alike.
Prep Time: 15 min | Chill Time: 1 hour | Total Time: 1 hour 15 min | Servings: 8 | Difficulty: Easy
Ingredients
- 3 cups cold milk
- 1 (3.9 oz) box instant chocolate pudding mix
- 8 oz frozen whipped topping, thawed
- 20 chocolate sandwich cookies, crushed
- 16 gummy worms
Instructions
- Whisk the cold milk and pudding mix together for 2 minutes, until thickened. Refrigerate for 10 minutes to set fully.
- Fold the whipped topping into the pudding until smooth and no streaks remain.
- Spoon a thin layer of crushed cookies into the bottom of 8 clear cups.
- Top with a layer of pudding mixture, then another layer of crushed cookies, then more pudding, finishing with a layer of crushed cookies on top.
- Refrigerate for at least 1 hour to let the layers set. Just before serving, press 2 gummy worms into the top of each cup.
No Bake Oatmeal Apple Pie Lasagna
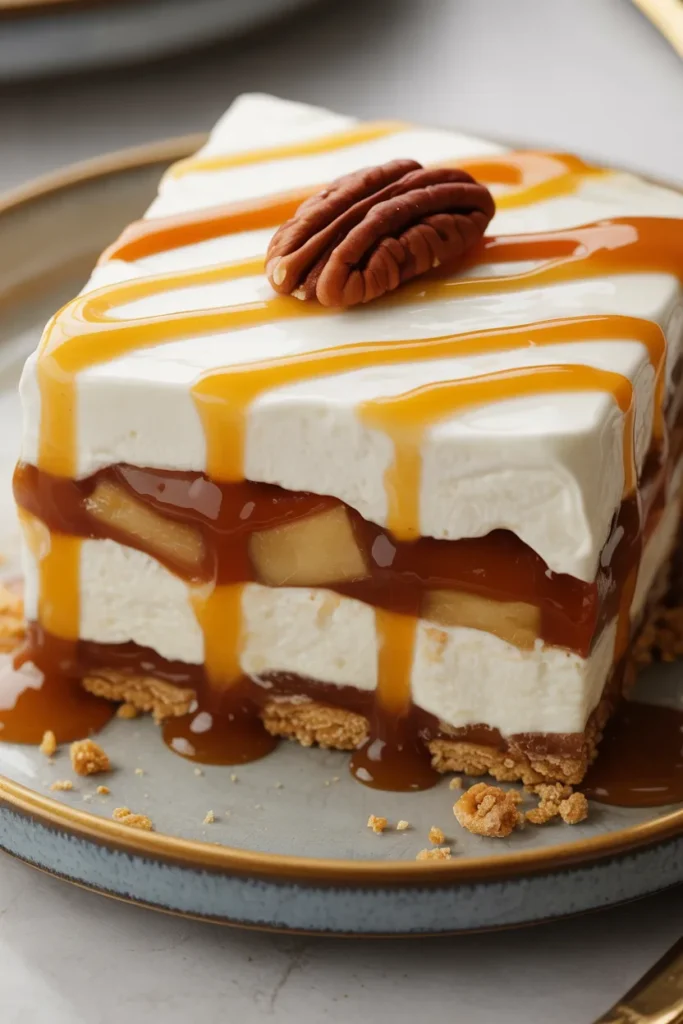
This layered dessert—No Bake Oatmeal Apple Pie Lasagna—brings together creamy filling, spiced apple layers, and soft cookie elements in one chilled pan. It’s assembled in stages, then left to set until the layers slice cleanly. The structure feels impressive, but the process is straightforward: build, chill, slice, serve. It’s especially ideal for gatherings because it can be made completely ahead of time.
Prep Time: 25 min | Cook Time: 10 min | Chill Time: 4 hours | Total Time: 4 hours 35 min | Servings: 12 | Difficulty: Medium
Ingredients
- 24 oatmeal cookies, divided
- 5 tablespoons unsalted butter, melted
- 4 cups peeled, diced apples (about 4 medium)
- 1/3 cup brown sugar
- 1 teaspoon ground cinnamon
- 1 tablespoon lemon juice
- 1 tablespoon cornstarch mixed with 2 tablespoons water
- 8 oz cream cheese, softened
- 1/2 cup powdered sugar
- 1 1/2 cups heavy whipping cream
- Caramel sauce, for drizzling
Instructions
- Pulse 16 of the oatmeal cookies into fine crumbs, mix with the melted butter, and press into the bottom of a 9×9-inch pan. Chill while you make the apple layer.
- Combine the diced apples, brown sugar, cinnamon, and lemon juice in a saucepan over medium heat. Cook, stirring occasionally, for 6–8 minutes, until the apples soften slightly.
- Stir in the cornstarch slurry and cook for 1–2 more minutes, until the mixture thickens into a glossy sauce. Remove from heat and let cool completely, about 20 minutes.
- Beat the cream cheese and powdered sugar together until smooth. In a separate bowl, whip the heavy cream to stiff peaks, about 3 minutes, then fold into the cream cheese mixture.
- Spread the cooled apple filling over the crust in an even layer. Top with the cream cheese mixture, smoothing with an offset spatula.
- Crumble the remaining 8 oatmeal cookies over the top. Refrigerate for at least 4 hours, or until fully set, and drizzle with caramel sauce just before slicing.
Final Thoughts: Why No Bake Desserts Work
No bake desserts succeed because they rely on fundamentals—fat for structure, air for lightness, chill time for stability. They invite creativity without demanding precision baking skills. And they reward patience more than perfection.
When the kitchen feels too warm, the schedule feels too full, or you simply want something indulgent without complication, these desserts deliver. Let the refrigerator handle the chemistry. You get the credit.
Related Posts You’ll Love
- 5-Minute Desserts — For those nights when you need something sweet right now.
- Thanksgiving Desserts — Big-batch sweets that double as holiday showpieces.
- Thanksgiving Cookie Ideas — Quick, easy, and festive bakes that travel well.
- Chocolate Desserts — Decadent favorites for chocoholics and party planners alike.
- Mini Desserts That Freeze — Make-ahead magic for stress-free entertaining.



5 Comments