40 No Bake Peanut Butter Desserts
These 40 no bake peanut butter desserts include bars, fudge, pies, cheesecakes, mousse, and frozen treats that all come together without an oven. Every recipe has exact ingredients and steps, so you can pick one and make it tonight.
This post may contain affiliate links which helps me keep this blog alive, questions? View the privacy policy.
Yummy No Bake Peanut Butter Desserts
1. No Bake Chocolate Peanut Butter Bars

These bars are seriously hard to stop eating. The layers set up beautifully in the fridge, so when you slice them you get those thick, clean peanut butter and chocolate layers that look almost too good to mess up. They’re rich, creamy, and perfectly sweet, the kind of dessert where a small square feels like a treat, but somehow you end up going back for another one anyway.
Prep Time: 20 min | Chill Time: 1 hr | Total Time: 1 hr 20 min | Servings: 16 bars | Difficulty: Easy
Ingredients
- 1 cup graham cracker crumbs
- 2 cups powdered sugar
- 1 cup creamy peanut butter
- 1/2 cup unsalted butter, melted
- 1 tsp vanilla extract
- 1 1/2 cups semisweet chocolate chips
- 2 tbsp creamy peanut butter, for the topping
Instructions
- Line an 8×8-inch pan with parchment paper, leaving overhang on two sides.
- In a large bowl, stir together the graham cracker crumbs, powdered sugar, 1 cup peanut butter, melted butter, and vanilla until a thick dough forms.
- Press the mixture firmly and evenly into the bottom of the prepared pan.
- In a microwave-safe bowl, melt the chocolate chips and 2 tablespoons peanut butter in 30-second bursts, stirring between each, until smooth (about 90 seconds total).
- Pour the chocolate mixture over the peanut butter layer and spread evenly to the edges.
- Refrigerate uncovered for at least 1 hour, until the chocolate is fully set.
- Lift the bars out using the parchment overhang, then slice into 16 squares with a warm knife.
2. Peanut Butter Chocolate Brownie Bites
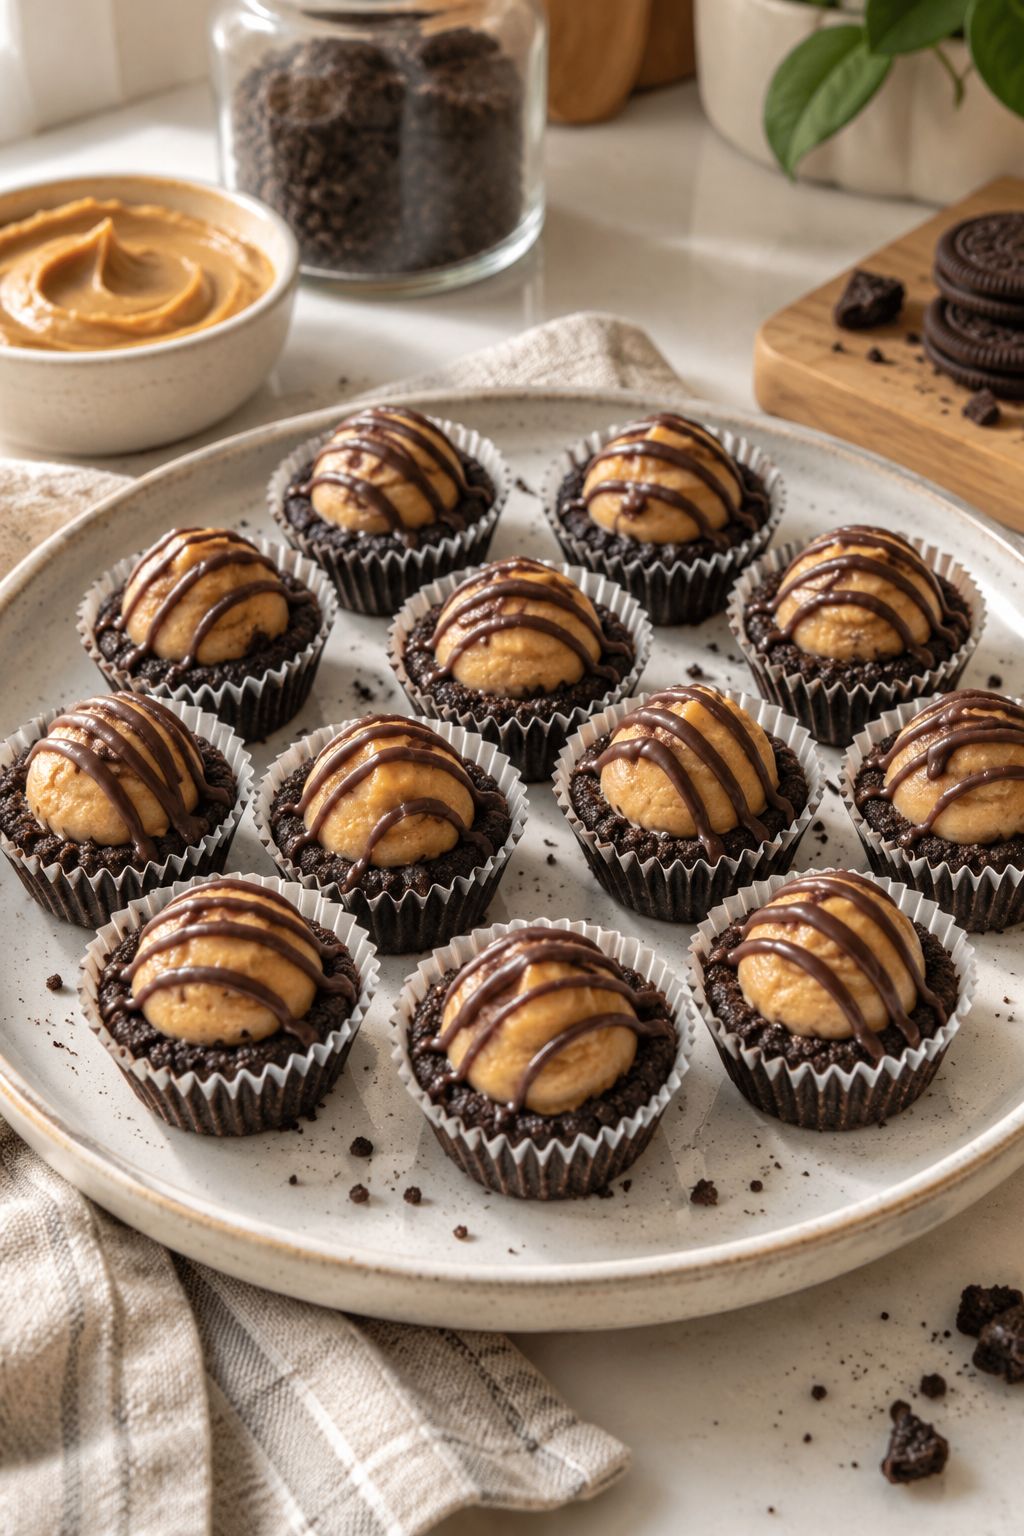
These are basically a mash-up of fudgy brownies and peanut butter cups, and that combination is very hard to mess up. The brownie base is soft and chocolatey, then you get a creamy peanut butter center in the middle with a little drizzle of chocolate on top.
Prep Time: 25 min | Chill Time: 30 min | Total Time: 55 min | Servings: 12 bites | Difficulty: Easy
Ingredients
- 1 1/4 cups chocolate cookie crumbs (about 12 chocolate sandwich cookies, finely crushed)
- 3 tbsp unsalted butter, melted
- 3/4 cup creamy peanut butter
- 1/4 cup powdered sugar
- 1/2 tsp vanilla extract
- 1/2 cup chocolate chips
- 1 tsp coconut oil
Instructions
- Line a 12-cup muffin tin with paper liners.
- Stir the cookie crumbs and melted butter together, then press about 1 tablespoon into the bottom of each liner to form a base.
- In a separate bowl, mix the peanut butter, powdered sugar, and vanilla until smooth and thick.
- Roll the peanut butter mixture into 12 small balls and press one onto each cookie base.
- Melt the chocolate chips and coconut oil together in the microwave in 20-second bursts, stirring until smooth.
- Spoon or drizzle the melted chocolate over each peanut butter bite.
- Refrigerate for 30 minutes, until the chocolate is firm, before serving.
3. No Bake Peanut Butter Chocolate Cheesecake Cups

If you love peanut butter cheesecake, these little cups are about to become a favorite. The filling is smooth and rich, layered with chocolate for that classic peanut butter-and-chocolate combo, and since they’re no bake, they come together without much effort at all.
Prep Time: 20 min | Chill Time: 2 hrs | Total Time: 2 hr 20 min | Servings: 8 cups | Difficulty: Easy
Ingredients
- 1 cup graham cracker crumbs
- 4 tbsp unsalted butter, melted
- 8 oz cream cheese, softened
- 1/2 cup creamy peanut butter
- 1/2 cup powdered sugar
- 1 cup heavy cream, cold
- 1/2 cup chocolate chips, melted and slightly cooled
Instructions
- Line 8 cups of a muffin tin with paper liners.
- Mix the graham cracker crumbs with melted butter and press about 1 tablespoon into the bottom of each liner.
- Beat the cream cheese, peanut butter, and powdered sugar together until smooth and fluffy, about 2 minutes.
- In a separate bowl, whip the heavy cream to stiff peaks, then fold it gently into the peanut butter mixture.
- Divide half the peanut butter filling among the cups, then spoon a thin layer of melted chocolate over each.
- Top with the remaining peanut butter filling, smoothing the tops.
- Refrigerate for at least 2 hours, until fully set, before serving.
4. Peanut Butter Rice Krispie Treats
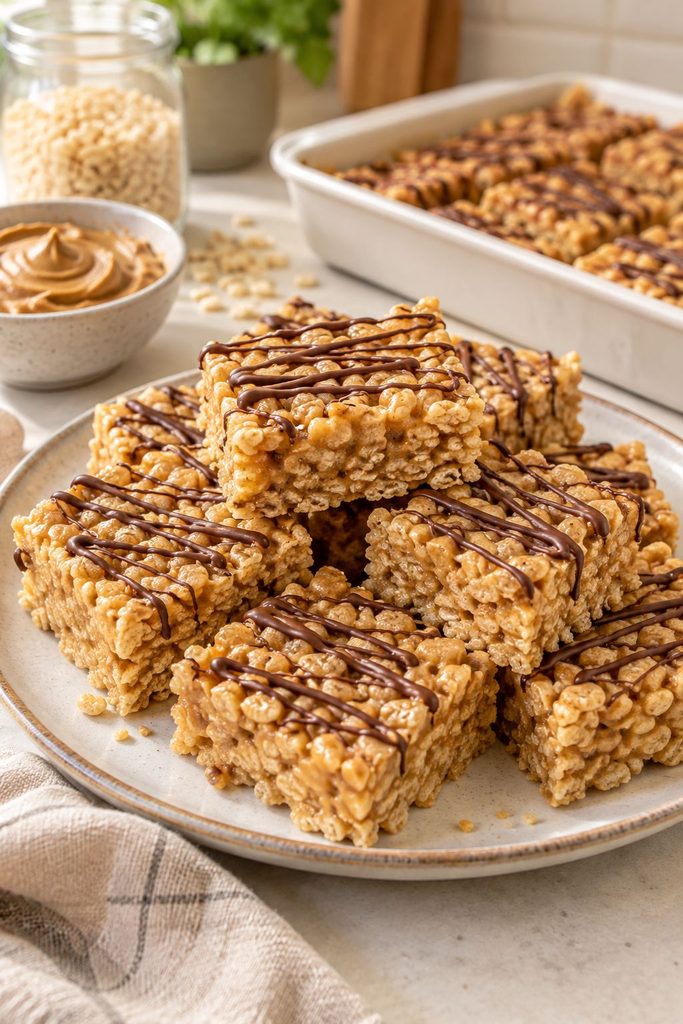
If you grew up loving Rice Krispie treats, these are the upgraded version. They’ve got that same crunchy cereal texture, but everything is coated in a sweet peanut butter mixture that makes them extra rich and satisfying.
Prep Time: 10 min | Cook Time: 10 min | Total Time: 20 min | Servings: 16 bars | Difficulty: Easy
Ingredients
- 1/2 cup unsalted butter
- 1 cup creamy peanut butter
- 1 cup light corn syrup
- 1 cup granulated sugar
- 6 cups crisp rice cereal
- 1 cup chocolate chips, melted, for topping
Instructions
- Grease a 9×13-inch pan.
- In a large saucepan over medium heat, combine the butter, corn syrup, and sugar. Stir constantly until melted and smooth, about 4 minutes, without letting it boil hard.
- Remove from heat and stir in the peanut butter until fully combined.
- Add the rice cereal and fold gently until evenly coated.
- Press the mixture firmly into the prepared pan using a greased spatula or your hands.
- Spread the melted chocolate evenly over the top.
- Let cool at room temperature for at least 30 minutes before slicing into squares.
5. Peanut Butter Oreo Balls (Acorns)
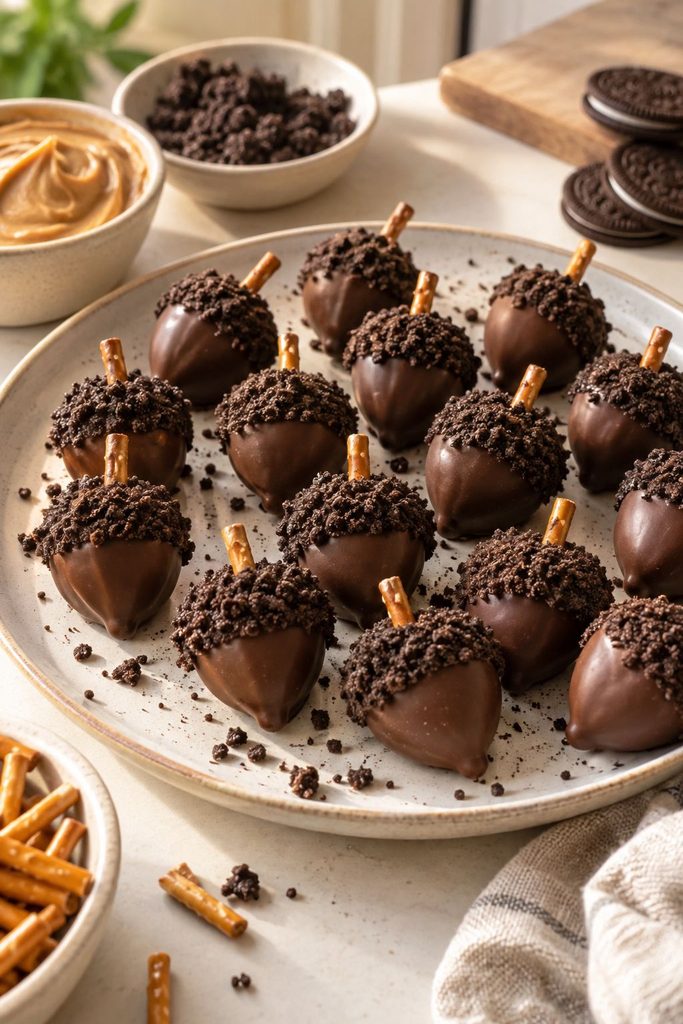
These little peanut butter acorns are almost too adorable to eat. They’re made with a soft, sweet peanut butter center and topped with chocolate to create that classic peanut butter cup flavor, but shaped like tiny fall acorns.
Prep Time: 30 min | Chill Time: 30 min | Total Time: 1 hr | Servings: 20 acorns | Difficulty: Medium
Ingredients
- 1 cup creamy peanut butter
- 1/4 cup unsalted butter, softened
- 1 3/4 cups powdered sugar
- 1 cup chocolate chips
- 1 tsp shortening
- 20 chocolate wafer cookies, broken into small pieces (for the “caps”)
- 20 mini pretzel sticks, broken in half (for the “stems”)
Instructions
- Beat the peanut butter, butter, and powdered sugar together until a thick, moldable dough forms.
- Roll the dough into 20 acorn-shaped ovals, about 1 tablespoon each, and place on a parchment-lined tray. Freeze for 15 minutes.
- Melt the chocolate chips and shortening together in the microwave in 20-second bursts, stirring until smooth.
- Dip the rounded end of each peanut butter shape into the melted chocolate, leaving the pointed top exposed.
- While the chocolate is still wet, press a broken wafer cookie piece onto the top as the acorn “cap.”
- Insert a pretzel piece into the top for the stem.
- Refrigerate for 15 minutes, until set, before serving.
6. Peanut Butter Pretzel Bars

These bars disappear fast. You get a thick, creamy peanut butter base with a smooth chocolate layer on top, and the crunch from the pretzels takes them over the top. They’re sweet, salty, and just the right amount of rich in one bite.
Prep Time: 15 min | Chill Time: 1 hr | Total Time: 1 hr 15 min | Servings: 16 bars | Difficulty: Easy
Ingredients
- 2 cups crushed pretzels, divided
- 1/2 cup unsalted butter, melted
- 1 cup creamy peanut butter
- 1 cup powdered sugar
- 1 1/2 cups semisweet chocolate chips
- 1/4 cup heavy cream
Instructions
- Line an 8×8-inch pan with parchment paper.
- Mix 1 1/2 cups crushed pretzels with the melted butter and press into the bottom of the pan to form the crust.
- Beat the peanut butter and powdered sugar together until smooth, then spread evenly over the pretzel crust.
- Warm the chocolate chips and heavy cream together in the microwave in 20-second bursts, stirring until smooth and glossy.
- Pour the chocolate over the peanut butter layer and spread to the edges.
- Sprinkle the remaining 1/2 cup crushed pretzels over the top and press gently so they stick.
- Refrigerate for at least 1 hour before slicing into bars.
7. No Bake Peanut Butter Cornflake Clusters
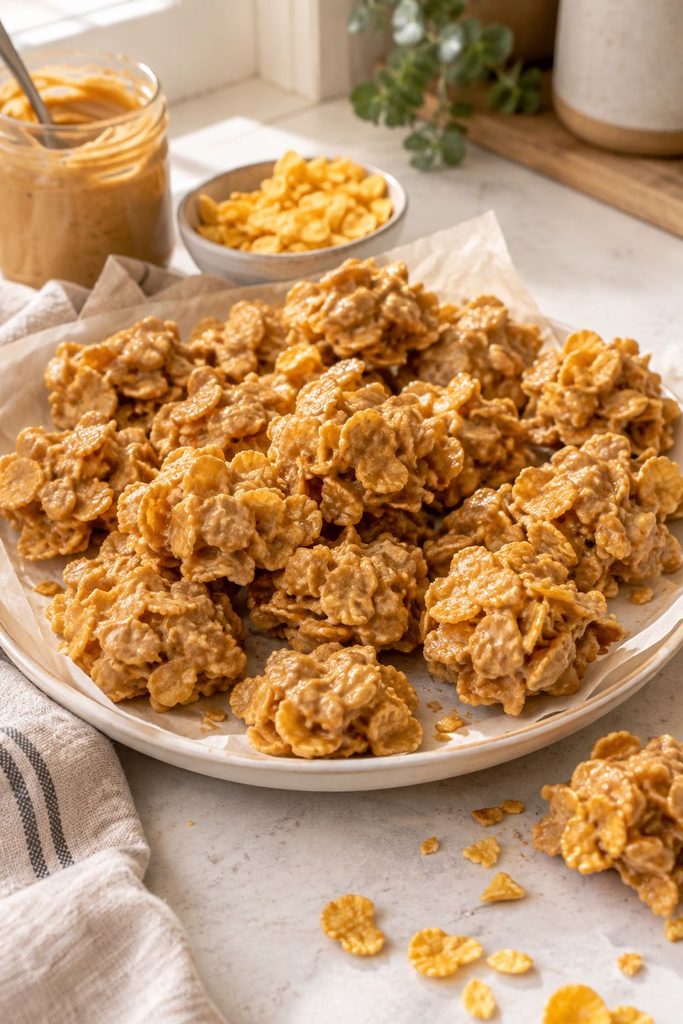
These old-school treats never go out of style. They’ve got a crispy cornflake crunch mixed with a sweet, creamy peanut butter coating, and they come together on the stovetop with just a handful of ingredients.
Prep Time: 10 min | Cook Time: 5 min | Total Time: 15 min | Servings: 18 clusters | Difficulty: Easy
Ingredients
- 1 cup granulated sugar
- 1 cup light corn syrup
- 1 1/2 cups creamy peanut butter
- 1 tsp vanilla extract
- 6 cups cornflakes
Instructions
- Line two baking sheets with parchment paper.
- In a large saucepan over medium heat, combine the sugar and corn syrup, stirring until it just reaches a boil, about 3 minutes.
- Remove from heat and stir in the peanut butter and vanilla until smooth.
- Add the cornflakes and fold gently until fully coated, taking care not to crush them.
- Drop the mixture by heaping spoonfuls onto the prepared baking sheets.
- Let cool at room temperature for about 20 minutes, until firm, before serving.
8. Peanut Butter Oatmeal No Bake Cookies

These are for the true peanut butter lovers. No chocolate, no distractions, just that rich, nutty flavor front and center. The texture is soft and chewy with just enough crunch from the oats, and they get even fudgier as they sit.
Prep Time: 10 min | Cook Time: 5 min | Total Time: 15 min | Servings: 20 cookies | Difficulty: Easy
Ingredients
- 1/2 cup unsalted butter
- 2 cups granulated sugar
- 1/2 cup milk
- 1 cup creamy peanut butter
- 1 tsp vanilla extract
- 3 cups quick-cooking oats
- 1/4 tsp salt
Instructions
- Line two baking sheets with parchment paper.
- In a medium saucepan over medium heat, melt the butter with the sugar and milk, stirring constantly until it reaches a full rolling boil.
- Boil for exactly 1 minute, stirring the entire time, then remove from heat.
- Stir in the peanut butter and vanilla until smooth and fully melted in.
- Add the oats and salt, folding until evenly coated.
- Drop the mixture by rounded tablespoons onto the prepared baking sheets.
- Let cool at room temperature for about 20 minutes, until set, before serving.
9. Peanut Butter Chocolate Energy Bites
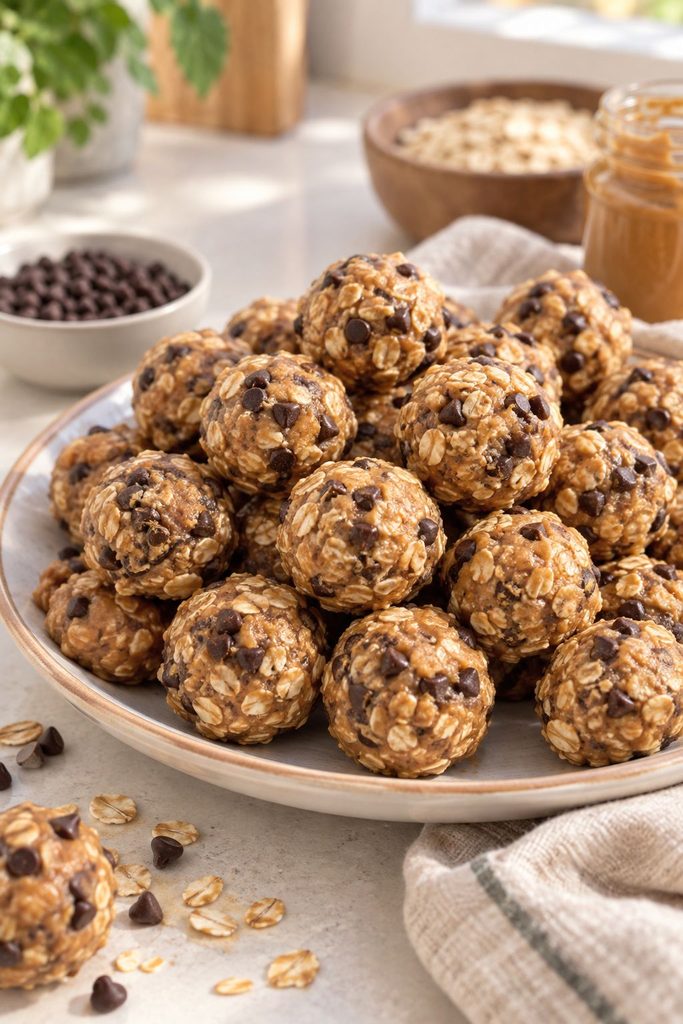
These are one of those “healthy” treats that don’t actually taste healthy, which is exactly what we want. They’re rich and chocolatey with a soft, fudgy texture, and the mix of dates, cocoa, and peanut butter gives them a naturally sweet, chewy bite.
Prep Time: 15 min | Chill Time: 15 min | Total Time: 30 min | Servings: 16 bites | Difficulty: Easy
Ingredients
- 1 cup pitted dates, packed
- 1/2 cup creamy peanut butter
- 1/4 cup unsweetened cocoa powder
- 1 cup rolled oats
- 2 tbsp honey
- 1 tbsp water, if needed
- 2 tbsp mini chocolate chips
Instructions
- Pulse the dates in a food processor until they form a sticky paste, about 30 seconds.
- Add the peanut butter, cocoa powder, oats, and honey, and pulse until a thick, uniform dough forms, about 1 minute. Add water 1 teaspoon at a time if the mixture is too dry to hold together.
- Stir in the mini chocolate chips by hand.
- Roll the mixture into 16 balls, about 1 tablespoon each.
- Refrigerate for 15 minutes, until firm, before serving.
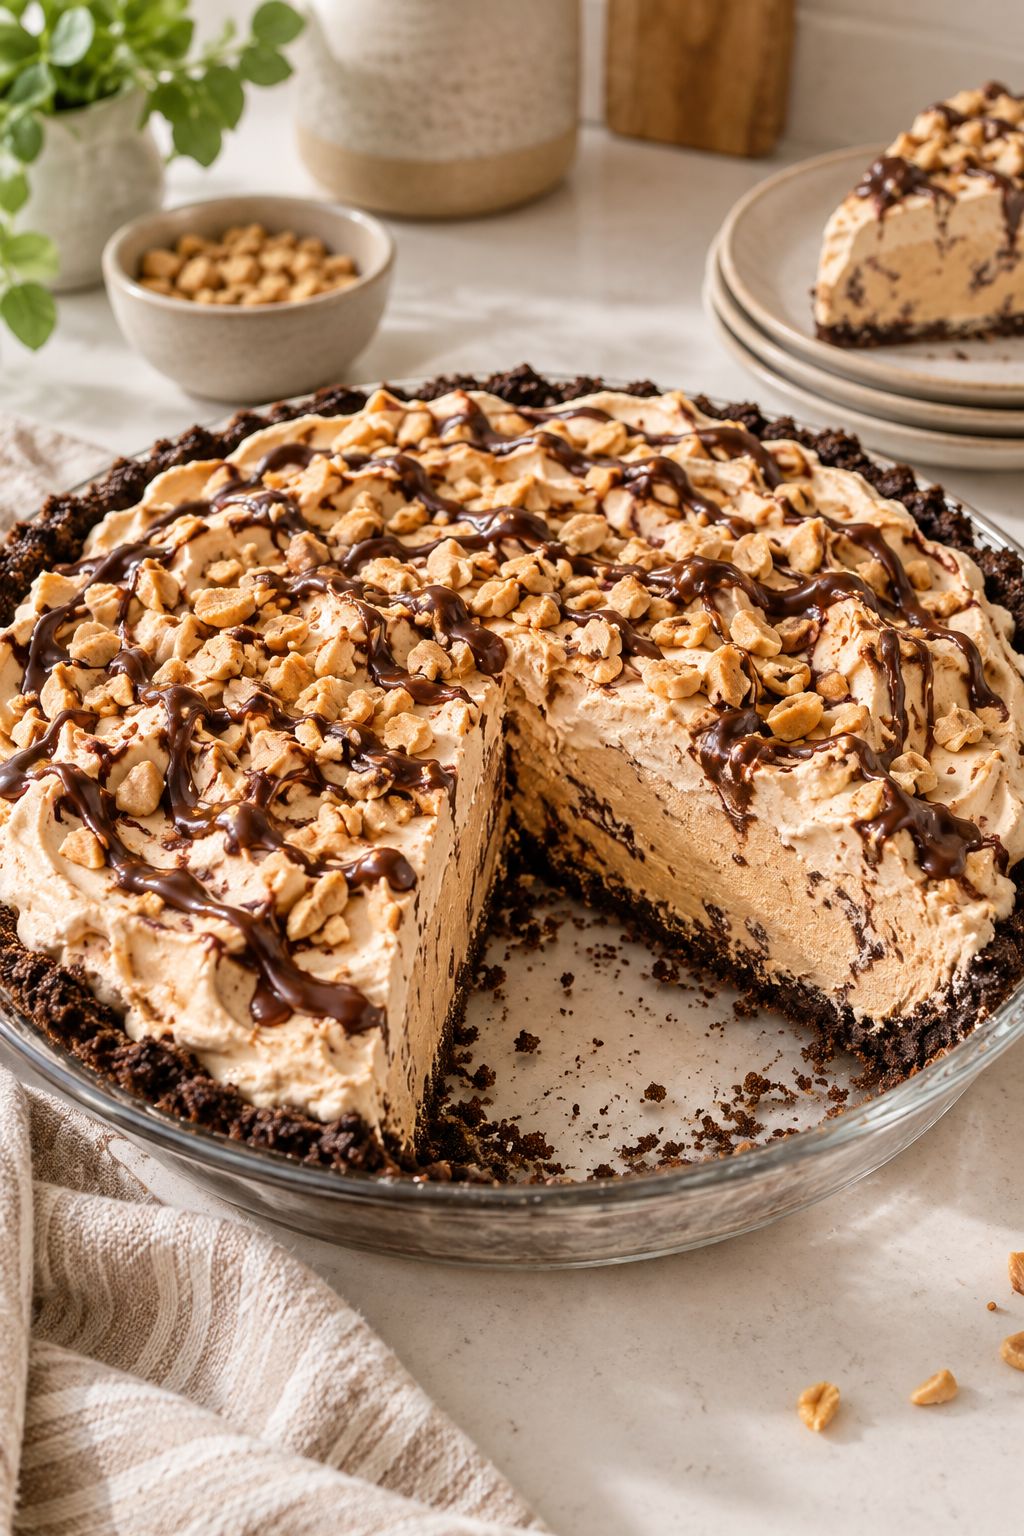
10. No Bake Peanut Butter Pie
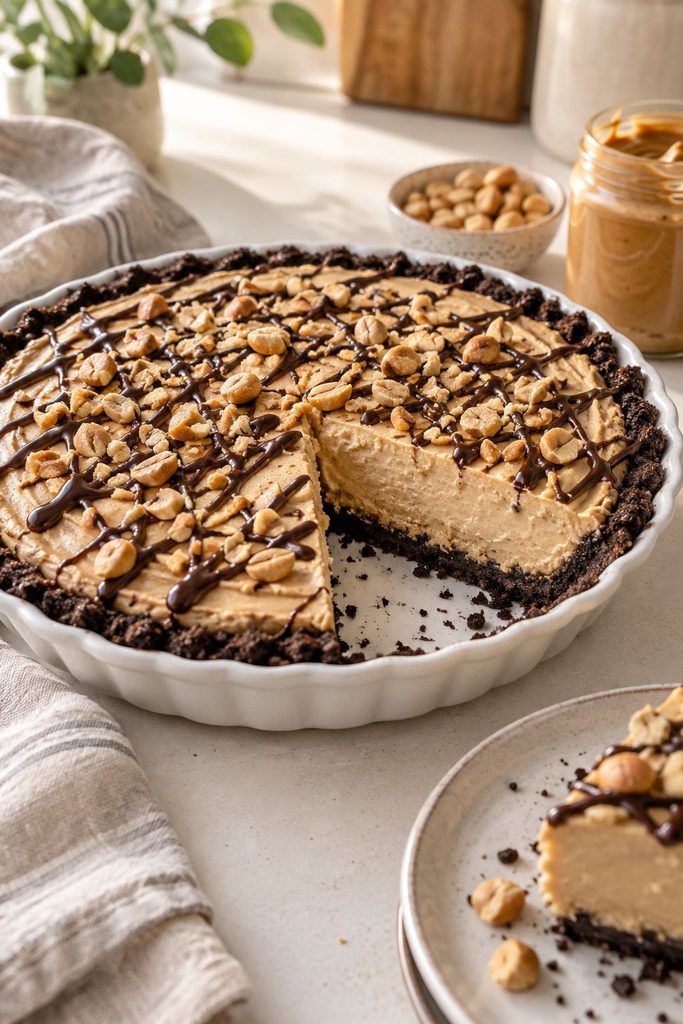
This is the kind of dessert that instantly feels like a classic. One bite in and you get that cool, creamy peanut butter filling with a buttery graham cracker crust that just melts together perfectly.
Prep Time: 20 min | Chill Time: 4 hrs | Total Time: 4 hr 20 min | Servings: 8 slices | Difficulty: Easy
Ingredients
- 1 1/2 cups graham cracker crumbs
- 6 tbsp unsalted butter, melted
- 8 oz cream cheese, softened
- 1 cup creamy peanut butter
- 1 cup powdered sugar
- 1 1/2 cups heavy cream, cold
- 1/4 cup chocolate chips, melted, for drizzling
Instructions
- Mix the graham cracker crumbs with the melted butter, then press into the bottom and up the sides of a 9-inch pie dish. Refrigerate while you make the filling.
- Beat the cream cheese, peanut butter, and powdered sugar together until smooth and creamy, about 2 minutes.
- In a separate bowl, whip the heavy cream to stiff peaks.
- Gently fold the whipped cream into the peanut butter mixture in two additions, until no white streaks remain.
- Pour the filling into the chilled crust and smooth the top.
- Drizzle the melted chocolate over the top in a zigzag pattern.
- Refrigerate for at least 4 hours, or until fully set, before slicing.
11. Peanut Butter Mousse Cups

If you love peanut butter cups, these are about to be your new obsession. They’ve got a rich chocolate shell on the outside with a light, fluffy peanut butter mousse tucked inside. It’s like your favorite candy, but upgraded.
Prep Time: 25 min | Chill Time: 1 hr | Total Time: 1 hr 25 min | Servings: 12 cups | Difficulty: Medium
Ingredients
- 1 1/2 cups chocolate chips, divided
- 1 tsp coconut oil
- 3/4 cup creamy peanut butter
- 4 oz cream cheese, softened
- 1/2 cup powdered sugar
- 1 cup heavy cream, cold
Instructions
- Line a 12-cup muffin tin with paper liners.
- Melt 1 cup of the chocolate chips with the coconut oil in the microwave in 20-second bursts, stirring until smooth.
- Brush a thin, even layer of melted chocolate up the sides and across the bottom of each liner. Freeze for 10 minutes, then repeat with a second coat. Freeze again until firm, about 10 minutes.
- Beat the peanut butter, cream cheese, and powdered sugar together until smooth.
- Whip the heavy cream to stiff peaks in a separate bowl, then fold it into the peanut butter mixture until light and fluffy.
- Carefully peel the paper liners off the chocolate shells and pipe or spoon the mousse into each shell.
- Melt the remaining 1/2 cup chocolate chips and drizzle over the tops.
- Refrigerate for at least 1 hour before serving.
12. No Bake Peanut Butter Cheesecake
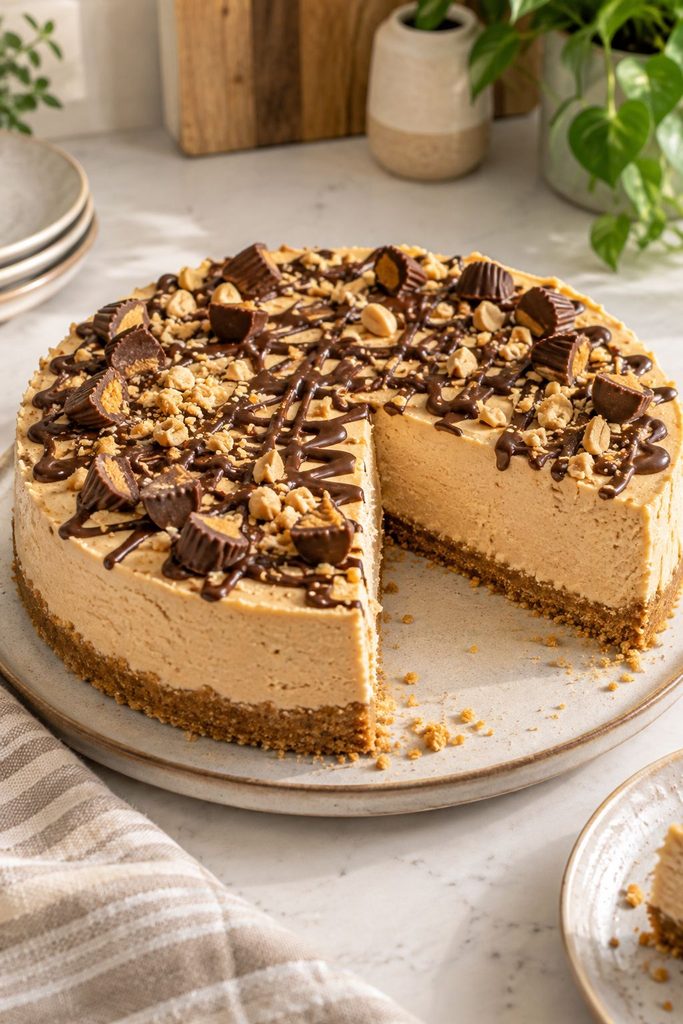
This is the kind of dessert that feels a little fancy but is secretly so easy to make. It’s got a buttery cookie base, a thick and ultra-creamy peanut butter cheesecake layer, and a smooth chocolate topping that ties everything together.
Prep Time: 25 min | Chill Time: 6 hrs | Total Time: 6 hr 25 min | Servings: 10 slices | Difficulty: Medium
Ingredients
- 2 cups chocolate cookie crumbs
- 6 tbsp unsalted butter, melted
- 16 oz cream cheese, softened
- 1 1/4 cups creamy peanut butter
- 1 cup powdered sugar
- 1 tsp vanilla extract
- 1 1/2 cups heavy cream, cold
- 1/2 cup chocolate chips, melted
- 2 tbsp heavy cream, for the topping
Instructions
- Mix the cookie crumbs with the melted butter and press into the bottom of a 9-inch springform pan. Refrigerate while you make the filling.
- Beat the cream cheese, peanut butter, powdered sugar, and vanilla together until completely smooth, about 3 minutes.
- Whip the 1 1/2 cups heavy cream to stiff peaks in a separate bowl.
- Fold the whipped cream into the peanut butter mixture in two additions, until fully combined and no streaks remain.
- Spread the filling evenly into the crust and smooth the top with an offset spatula.
- Warm the melted chocolate with the 2 tablespoons heavy cream until pourable, then spread it over the top of the cheesecake.
- Refrigerate for at least 6 hours, or overnight, before releasing the springform ring and slicing.
13. No Bake Peanut Butter Cup Pie

This is the kind of dessert that peanut butter lovers dream about. It’s packed with creamy peanut butter filling, chunks of peanut butter cups, and all tucked into a chocolate cookie crust.
Prep Time: 20 min | Chill Time: 4 hrs | Total Time: 4 hr 20 min | Servings: 8 slices | Difficulty: Easy
Ingredients
- 1 1/2 cups chocolate cookie crumbs
- 5 tbsp unsalted butter, melted
- 8 oz cream cheese, softened
- 3/4 cup creamy peanut butter
- 3/4 cup powdered sugar
- 1 1/2 cups heavy cream, cold
- 10 mini peanut butter cups, roughly chopped, divided
Instructions
- Mix the cookie crumbs with the melted butter and press into a 9-inch pie dish. Refrigerate while you make the filling.
- Beat the cream cheese, peanut butter, and powdered sugar together until smooth.
- Whip the heavy cream to stiff peaks in a separate bowl, then fold it into the peanut butter mixture.
- Fold in three-quarters of the chopped peanut butter cups, reserving the rest for topping.
- Pour the filling into the chilled crust and smooth the top.
- Scatter the remaining chopped peanut butter cups over the top.
- Refrigerate for at least 4 hours, or until set, before slicing.
14. Butterfinger Pie

This is not a subtle dessert, and that’s the whole point. It’s packed with creamy peanut butter filling, crushed Butterfinger candy bars, and a rich chocolatey crust that all come together in the most over-the-top way.
Prep Time: 20 min | Chill Time: 4 hrs | Total Time: 4 hr 20 min | Servings: 8 slices | Difficulty: Easy
Ingredients
- 1 1/2 cups chocolate cookie crumbs
- 5 tbsp unsalted butter, melted
- 8 oz cream cheese, softened
- 3/4 cup creamy peanut butter
- 3/4 cup powdered sugar
- 1 1/2 cups heavy cream, cold
- 4 fun-size Butterfinger bars, crushed, divided
Instructions
- Mix the cookie crumbs with the melted butter and press into a 9-inch pie dish.
- Beat the cream cheese, peanut butter, and powdered sugar together until smooth and fluffy.
- Whip the heavy cream to stiff peaks, then fold it into the peanut butter mixture.
- Fold in three-quarters of the crushed Butterfinger, reserving the rest for topping.
- Spread the filling into the crust and smooth the top.
- Sprinkle the remaining crushed Butterfinger over the top.
- Refrigerate for at least 4 hours before slicing.
15. Peanut Butter Cookie Dessert
This is one of those desserts where every layer keeps getting better. You’ve got peanut butter cookies, creamy peanut butter, smooth pudding, fluffy whipped topping, and little bites of peanut butter cups all stacked together in one pan.
Prep Time: 25 min | Chill Time: 3 hrs | Total Time: 3 hr 25 min | Servings: 12 | Difficulty: Easy
Ingredients
- 24 store-bought peanut butter cookies
- 3/4 cup creamy peanut butter
- 2 (3.4 oz) boxes instant vanilla pudding mix
- 3 cups cold milk
- 8 oz whipped topping, thawed, divided
- 8 mini peanut butter cups, chopped
Instructions
- Arrange the peanut butter cookies in a single layer across the bottom of a 9×13-inch pan.
- Warm the peanut butter slightly in the microwave (about 15 seconds) so it’s spreadable, then dollop and spread it evenly over the cookie layer.
- Whisk the pudding mix with the cold milk until it begins to thicken, about 2 minutes, then let it sit for 5 minutes to set fully.
- Spread the pudding evenly over the peanut butter layer.
- Fold half of the whipped topping over the pudding layer, spreading it smooth.
- Spread the remaining whipped topping over the top as the final layer.
- Scatter the chopped peanut butter cups over the top.
- Refrigerate for at least 3 hours, until the layers set, before serving.
16. Peanut Butter Mousse

This is one of those desserts that feels fancy but takes almost no effort. You’ve got a buttery Oreo crumble on the bottom and a light, fluffy peanut butter mousse on top that’s smooth, creamy, and seriously hard to stop eating.
Prep Time: 20 min | Chill Time: 2 hrs | Total Time: 2 hr 20 min | Servings: 8 | Difficulty: Easy
Ingredients
- 20 chocolate sandwich cookies, crushed
- 3 tbsp unsalted butter, melted
- 8 oz cream cheese, softened
- 3/4 cup creamy peanut butter
- 3/4 cup powdered sugar
- 1 1/2 cups heavy cream, cold
Instructions
- Mix the crushed cookies with the melted butter and press into the bottom of an 8×8-inch dish or divide among 8 individual glasses.
- Beat the cream cheese, peanut butter, and powdered sugar together until smooth, about 2 minutes.
- Whip the heavy cream to stiff peaks in a separate bowl.
- Fold the whipped cream into the peanut butter mixture gently, in two additions, until light and airy.
- Spoon or pipe the mousse over the cookie base.
- Refrigerate for at least 2 hours before serving.
17. No Bake Banana Split Dessert

This is like your favorite banana split, but in dessert bar form. No melting, no scooping, just layers of goodness you can slice and serve. It’s got a buttery graham cracker crust, a creamy cheesecake-style layer, fresh bananas, sweet pineapple, and fluffy whipped topping, all finished with classic banana split toppings.
Prep Time: 25 min | Chill Time: 3 hrs | Total Time: 3 hr 25 min | Servings: 12 | Difficulty: Easy
Ingredients
- 2 cups graham cracker crumbs
- 1/2 cup unsalted butter, melted
- 8 oz cream cheese, softened
- 1 cup powdered sugar
- 2 medium bananas, sliced
- 1 (20 oz) can crushed pineapple, well drained
- 8 oz whipped topping, thawed
- 1/2 cup chopped walnuts
- 1/4 cup chocolate syrup
- 8 maraschino cherries
Instructions
- Mix the graham cracker crumbs with the melted butter and press into the bottom of a 9×13-inch pan. Refrigerate for 10 minutes.
- Beat the cream cheese and powdered sugar together until smooth and fluffy, then spread over the crust.
- Arrange the sliced bananas evenly over the cream cheese layer.
- Spread the drained crushed pineapple over the bananas.
- Spread the whipped topping evenly over the pineapple layer.
- Sprinkle the chopped walnuts over the top, then drizzle with chocolate syrup.
- Top with maraschino cherries, spaced evenly for slicing.
- Refrigerate for at least 3 hours before cutting into squares.
18. Reese’s Butterfinger Cream Cheese Trifle

This is the kind of dessert you bring out and people immediately hover around. It’s loaded with layers of chocolate cake, fluffy peanut butter cream cheese filling, whipped topping, and chunks of Reese’s and Butterfinger candy all stacked into one over-the-top trifle.
Prep Time: 30 min | Chill Time: 2 hrs | Total Time: 2 hr 30 min | Servings: 14 | Difficulty: Medium
Ingredients
- 1 baked 9×13-inch chocolate cake, cubed (store-bought or homemade, cooled completely)
- 8 oz cream cheese, softened
- 1 cup creamy peanut butter
- 1 cup powdered sugar
- 2 cups heavy cream, cold
- 6 mini Reese’s peanut butter cups, chopped
- 3 fun-size Butterfinger bars, crushed
Instructions
- Beat the cream cheese, peanut butter, and powdered sugar together until smooth.
- Whip the heavy cream to stiff peaks in a separate bowl, then fold it into the peanut butter mixture until light and fluffy.
- In a large trifle bowl, layer one-third of the cubed cake across the bottom.
- Spread one-third of the peanut butter cream mixture over the cake, then scatter a portion of the chopped Reese’s and crushed Butterfinger over the top.
- Repeat the layers two more times, ending with a layer of peanut butter cream and the remaining candy on top.
- Refrigerate for at least 2 hours before serving, to let the layers settle.
19. Peanut Butter Cup Fudge

This fudge tastes exactly like a giant peanut butter cup, and it takes about ten minutes of actual work. The bottom is thick and fudgy chocolate, the top is creamy peanut butter, and it slices into neat little squares that vanish from the pan. Want more where that came from? Try these chocolate fudge recipes next.
Prep Time: 10 min | Chill Time: 2 hrs | Total Time: 2 hr 10 min | Servings: 36 squares | Difficulty: Easy
Ingredients
- 2 cups semisweet chocolate chips
- 1 (14 oz) can sweetened condensed milk, divided
- 1 tsp vanilla extract, divided
- 1 cup peanut butter chips
- 1/2 cup creamy peanut butter
- 1/4 cup chopped peanuts, optional
Instructions
- Line an 8×8-inch pan with parchment paper, leaving overhang on two sides.
- Melt the chocolate chips with half of the sweetened condensed milk in a saucepan over low heat, stirring until smooth. Stir in 1/2 tsp vanilla.
- Spread the chocolate layer into the pan and smooth the top. Refrigerate for 20 minutes while you make the next layer.
- Melt the peanut butter chips, creamy peanut butter, and remaining condensed milk together over low heat, stirring until smooth. Stir in the remaining 1/2 tsp vanilla.
- Spread the peanut butter layer over the set chocolate layer and sprinkle with chopped peanuts if using.
- Refrigerate for at least 2 hours, until firm, then lift out and cut into 36 squares.
20. Peanut Butter Oreo Icebox Cake
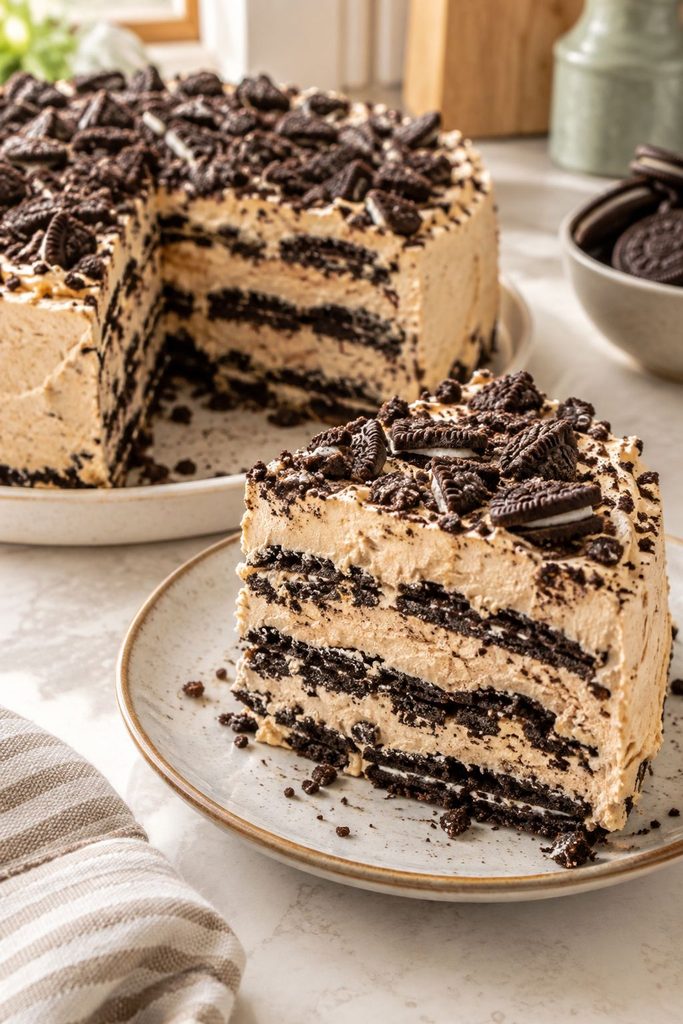
Icebox cakes are the ultimate lazy dessert, and this one is the best of the bunch. Whipped peanut butter cream soaks into Oreos overnight until they turn into soft, cakey layers, so you get that cookies-and-cream magic with zero baking.
Prep Time: 20 min | Chill Time: 6 hrs | Total Time: 6 hr 20 min | Servings: 12 slices | Difficulty: Easy
Ingredients
- 2 cups heavy cream, cold
- 1 cup creamy peanut butter
- 1/2 cup powdered sugar
- 1 tsp vanilla extract
- 36 chocolate sandwich cookies
- 1/2 cup chocolate syrup
- 1/4 cup crushed peanuts, for topping
Instructions
- Line a 9×5-inch loaf pan with plastic wrap, leaving overhang on all sides.
- Whip the heavy cream, powdered sugar, and vanilla to soft peaks. Add the peanut butter and whip until stiff peaks form.
- Spread a thin layer of cream on the bottom of the pan and top with a layer of Oreos, breaking some to fit.
- Repeat the layers of cream and cookies, drizzling a little chocolate syrup over every second layer, until you run out of ingredients. End with a layer of cream.
- Fold the plastic wrap over the top and refrigerate for at least 6 hours, or overnight, so the cookies soften.
- Unwrap, flip onto a platter, drizzle with the remaining chocolate syrup, and top with crushed peanuts. Slice with a warm knife.
21. Peanut Butter Banana Pudding Cups

Banana pudding gets a peanut butter glow-up here, and honestly, it’s a little dangerous. Creamy pudding, sliced bananas, and crunchy vanilla wafers layer up in individual cups, so everyone gets their own and nobody has to share.
Prep Time: 20 min | Chill Time: 1 hr | Total Time: 1 hr 20 min | Servings: 6 cups | Difficulty: Easy
Ingredients
- 1 (3.4 oz) box instant vanilla pudding mix
- 1 1/2 cups cold milk
- 1/2 cup creamy peanut butter
- 1 cup whipped topping, thawed
- 2 large bananas, sliced
- 18 vanilla wafers, plus extra for topping
- 2 tbsp chopped peanuts, optional
Instructions
- Whisk the pudding mix and cold milk for 2 minutes, until it starts to thicken. Let it sit for 5 minutes.
- Whisk the peanut butter into the pudding until completely smooth, then fold in the whipped topping.
- Crush 12 of the vanilla wafers into coarse crumbs.
- Layer the crumbs, banana slices, and peanut butter pudding in 6 small glasses, repeating until the glasses are full.
- Top each cup with a whole vanilla wafer, a few banana slices, and chopped peanuts.
- Refrigerate for at least 1 hour before serving.
22. Peanut Butter Cookie Dough Dip

This is basically edible cookie dough you can scoop with a graham cracker, and it tastes like you got away with something. It’s soft, sweet, and studded with mini chocolate chips, and it’s the fastest way to look like a dessert genius at a party.
Prep Time: 10 min | Chill Time: 30 min | Total Time: 40 min | Servings: 10 | Difficulty: Easy
Ingredients
- 4 oz cream cheese, softened
- 1/2 cup creamy peanut butter
- 1/4 cup unsalted butter, softened
- 1/2 cup brown sugar, packed
- 1/2 cup powdered sugar
- 1 tsp vanilla extract
- 1/4 tsp salt
- 3/4 cup mini chocolate chips
- Graham crackers, pretzels, or apple slices, for dipping
Instructions
- Beat the cream cheese, peanut butter, and butter together until smooth and creamy, about 2 minutes.
- Add the brown sugar, powdered sugar, vanilla, and salt, and beat until fluffy.
- Fold in 1/2 cup of the mini chocolate chips.
- Transfer to a serving bowl and sprinkle the remaining 1/4 cup chocolate chips on top.
- Refrigerate for 30 minutes so the dip firms up slightly, then serve with graham crackers, pretzels, or apple slices.
23. Peanut Butter Buckeyes

Buckeyes are the classic Ohio candy, and one bite explains why. A smooth, sweet peanut butter ball gets dipped in chocolate with a little circle left exposed, so it looks just like the nut it’s named after.
Prep Time: 30 min | Chill Time: 30 min | Total Time: 1 hr | Servings: 30 buckeyes | Difficulty: Medium
Ingredients
- 1 1/2 cups creamy peanut butter
- 1/2 cup unsalted butter, softened
- 3 cups powdered sugar
- 1 tsp vanilla extract
- 2 cups semisweet chocolate chips
- 1 tbsp shortening
Instructions
- Line a baking sheet with parchment paper.
- Beat the peanut butter and butter together until smooth. Mix in the powdered sugar and vanilla until a thick dough forms.
- Roll the dough into 30 balls, about 1 tablespoon each, and place them on the baking sheet. Freeze for 20 minutes.
- Melt the chocolate chips and shortening together in the microwave in 20-second bursts, stirring until smooth.
- Insert a toothpick into each ball and dip it into the chocolate, leaving a small circle of peanut butter showing at the top.
- Return to the baking sheet, smooth over the toothpick hole with your finger, and refrigerate for 10 minutes until set.
24. Peanut Butter Eclair Cake

Eclair cake is the dessert your grandma made for every potluck, and this peanut butter version deserves the same fame. Graham crackers soften into cake as they sit under layers of peanut butter pudding, whipped topping, and a glossy chocolate glaze.
Prep Time: 25 min | Chill Time: 8 hrs | Total Time: 8 hr 25 min | Servings: 15 slices | Difficulty: Easy
Ingredients
- 2 (3.4 oz) boxes instant vanilla pudding mix
- 3 cups cold milk
- 3/4 cup creamy peanut butter
- 12 oz whipped topping, thawed, divided
- 1 (14.4 oz) box graham crackers (about 3 sleeves)
- 1 cup chocolate chips
- 1/4 cup heavy cream
- 2 tbsp unsalted butter
Instructions
- Whisk the pudding mix and cold milk for 2 minutes, then let it thicken for 5 minutes.
- Whisk in the peanut butter until smooth, then fold in 8 oz of the whipped topping.
- Line the bottom of a 9×13-inch pan with a single layer of graham crackers, breaking them to fit.
- Spread half of the pudding over the crackers, add another layer of crackers, then spread the rest of the pudding on top.
- Finish with a final layer of crackers and spread the remaining 4 oz whipped topping over them.
- Heat the chocolate chips, heavy cream, and butter in the microwave in 20-second bursts, stirring until smooth. Cool for 5 minutes, then spread over the top.
- Cover and refrigerate for at least 8 hours, or overnight, until the crackers are soft and cakey.
25. Peanut Butter Ice Cream Pie
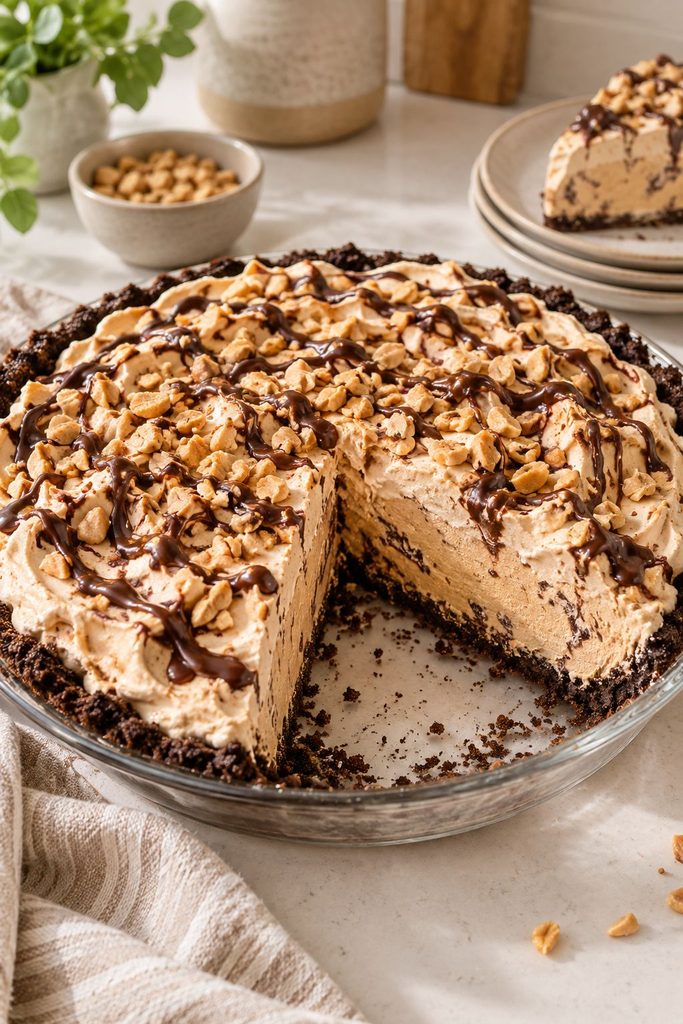
When it’s too hot to think about the oven, this frozen pie is the answer. A crunchy chocolate cookie crust holds a thick layer of peanut butter ice cream, and a fudgy drizzle on top makes it look like it came from a fancy ice cream shop.
Prep Time: 20 min | Freeze Time: 4 hrs | Total Time: 4 hr 20 min | Servings: 8 slices | Difficulty: Easy
Ingredients
- 1 1/2 cups chocolate cookie crumbs
- 5 tbsp unsalted butter, melted
- 1/2 cup creamy peanut butter
- 1/2 cup hot fudge sauce, divided
- 1 1/2 quarts vanilla ice cream, softened
- 8 mini peanut butter cups, chopped
Instructions
- Mix the cookie crumbs and melted butter, then press into a 9-inch pie dish. Freeze for 10 minutes.
- Warm the peanut butter for 15 seconds in the microwave, then swirl it into the softened ice cream until streaky.
- Spread 1/4 cup of the hot fudge sauce over the crust.
- Spoon the ice cream mixture over the fudge and smooth the top with a spatula.
- Sprinkle the chopped peanut butter cups over the top and press in gently.
- Freeze for at least 4 hours, until solid. Drizzle with the remaining fudge sauce and let sit for 5 minutes before slicing.
26. Peanut Butter S’mores Bars

These bars have all the campfire flavor with none of the smoke. A graham cracker peanut butter base gets covered in melty chocolate and gooey marshmallow, so every bite is sticky, chewy, and impossible to eat neatly. If you like these, you’ll love the gooey s’mores bars too.
Prep Time: 15 min | Chill Time: 1 hr | Total Time: 1 hr 15 min | Servings: 16 bars | Difficulty: Easy
Ingredients
- 2 cups graham cracker crumbs
- 3/4 cup creamy peanut butter
- 1/2 cup unsalted butter, melted
- 1 cup powdered sugar
- 1 1/2 cups milk chocolate chips
- 2 cups mini marshmallows, divided
- 1 tbsp coconut oil
Instructions
- Line an 8×8-inch pan with parchment paper.
- Mix the graham cracker crumbs, peanut butter, melted butter, and powdered sugar until it holds together when squeezed. Press firmly into the pan.
- Melt the chocolate chips and coconut oil together in the microwave in 30-second bursts, stirring until smooth.
- Stir 1 cup of the mini marshmallows into the melted chocolate and spread over the crust right away.
- Press the remaining 1 cup marshmallows into the top.
- Refrigerate for at least 1 hour, until set, then cut into 16 bars.
27. Peanut Butter Cheesecake Parfaits

Think of these as cheesecake you can eat with a spoon while walking around a party. Creamy peanut butter filling layers with crunchy graham crumbs and chocolate sauce in little glasses, and they look way more impressive than the effort behind them.
Prep Time: 20 min | Chill Time: 1 hr | Total Time: 1 hr 20 min | Servings: 6 parfaits | Difficulty: Easy
Ingredients
- 8 oz cream cheese, softened
- 1/2 cup creamy peanut butter
- 1/2 cup powdered sugar
- 1 tsp vanilla extract
- 1 cup heavy cream, cold
- 1 cup graham cracker crumbs
- 3 tbsp unsalted butter, melted
- 1/3 cup chocolate sauce
Instructions
- Stir the graham cracker crumbs and melted butter together until sandy.
- Beat the cream cheese, peanut butter, powdered sugar, and vanilla until smooth.
- Whip the heavy cream to stiff peaks in a separate bowl, then fold it into the peanut butter mixture.
- Spoon 2 tablespoons of crumbs into the bottom of each of 6 glasses.
- Add a layer of peanut butter filling, a drizzle of chocolate sauce, then another layer of crumbs. Repeat once more.
- Finish with filling and a final drizzle of chocolate sauce.
- Refrigerate for at least 1 hour before serving.
28. Peanut Butter Truffles

These truffles feel like something you’d buy in a pretty gift box, but they’re just three simple steps. The centers are smooth and creamy, the chocolate coating cracks a little when you bite in, and a pinch of flaky salt on top makes them taste even better.
Prep Time: 25 min | Chill Time: 1 hr | Total Time: 1 hr 25 min | Servings: 24 truffles | Difficulty: Medium
Ingredients
- 1 cup creamy peanut butter
- 1/2 cup powdered sugar
- 2 tbsp unsalted butter, softened
- 1/2 cup graham cracker crumbs
- 1 1/2 cups dark chocolate chips
- 1 tbsp coconut oil
- Flaky sea salt, for sprinkling
Instructions
- Line a baking sheet with parchment paper.
- Mix the peanut butter, powdered sugar, butter, and graham cracker crumbs until a soft dough forms.
- Roll into 24 balls, about 1 tablespoon each, and place on the baking sheet. Refrigerate for 30 minutes.
- Melt the chocolate chips and coconut oil together in the microwave in 20-second bursts, stirring until smooth.
- Dip each ball into the chocolate using a fork, tap off the excess, and set back on the parchment.
- Sprinkle each truffle with a pinch of flaky sea salt right away.
- Refrigerate for 30 minutes, until the coating is set.
29. Peanut Butter Chocolate Lasagna
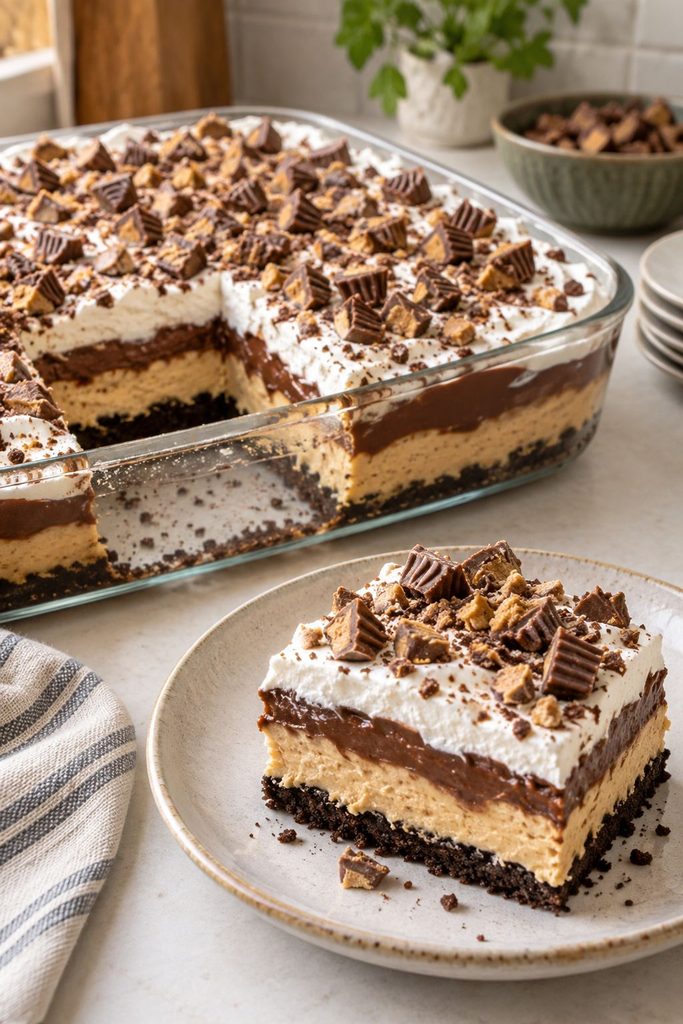
No pasta, no sauce, and definitely no dinner involved. Chocolate lasagna is a layered dessert with a cookie crust, a peanut butter cream cheese layer, chocolate pudding, and whipped topping, and it’s a total crowd-pleaser.
Prep Time: 30 min | Chill Time: 4 hrs | Total Time: 4 hr 30 min | Servings: 15 slices | Difficulty: Easy
Ingredients
- 24 chocolate sandwich cookies, crushed
- 4 tbsp unsalted butter, melted
- 8 oz cream cheese, softened
- 1/2 cup creamy peanut butter
- 1/4 cup powdered sugar
- 12 oz whipped topping, thawed, divided
- 2 (3.9 oz) boxes instant chocolate pudding mix
- 3 cups cold milk
- 1/2 cup mini peanut butter cups, chopped
Instructions
- Mix the crushed cookies with the melted butter and press into the bottom of a 9×13-inch pan.
- Beat the cream cheese, peanut butter, and powdered sugar until smooth. Fold in 1 cup of the whipped topping.
- Spread the peanut butter layer over the crust.
- Whisk the pudding mix and cold milk for 2 minutes, let it thicken for 5 minutes, then spread it over the peanut butter layer.
- Spread the remaining whipped topping over the pudding.
- Scatter the chopped peanut butter cups over the top.
- Refrigerate for at least 4 hours before cutting into squares.
30. No Bake Peanut Butter Granola Bars

These chewy, homemade granola bars beat the store-bought kind by a mile. They’re sweet, nutty, and full of oats and mini chocolate chips, so they work as a snack, a lunchbox treat, or an emergency dessert.
Prep Time: 10 min | Cook Time: 5 min | Chill Time: 1 hr | Total Time: 1 hr 15 min | Servings: 12 bars | Difficulty: Easy
Ingredients
- 2 cups rolled oats
- 1 cup crisp rice cereal
- 1/2 cup creamy peanut butter
- 1/3 cup honey
- 1/4 cup brown sugar, packed
- 2 tbsp unsalted butter
- 1 tsp vanilla extract
- 1/4 tsp salt
- 1/2 cup mini chocolate chips
Instructions
- Line an 8×8-inch pan with parchment paper.
- Combine the oats and rice cereal in a large bowl.
- In a small saucepan over medium heat, stir the peanut butter, honey, brown sugar, and butter until melted and bubbling gently, about 3 minutes.
- Remove from heat and stir in the vanilla and salt.
- Pour over the oat mixture and stir until evenly coated. Let it cool for 5 minutes, then fold in the chocolate chips.
- Press the mixture very firmly into the pan, using the bottom of a measuring cup to pack it down.
- Refrigerate for at least 1 hour, until firm, then cut into 12 bars.
31. Peanut Butter Haystacks
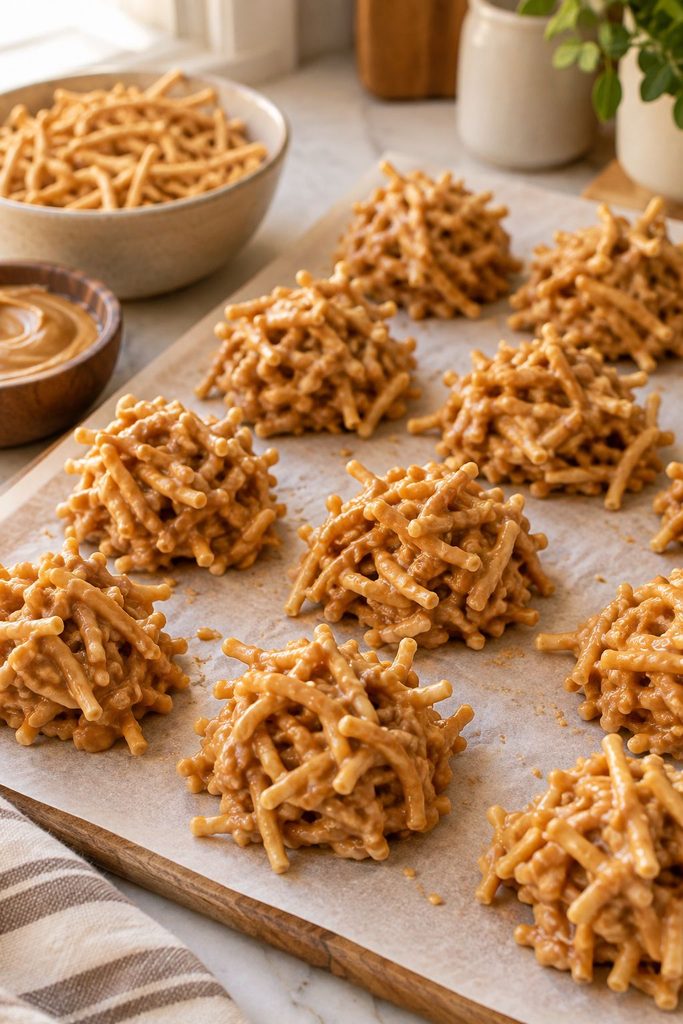
Haystacks are one of those retro treats that deserve a comeback. Crunchy chow mein noodles get coated in a sweet, salty peanut butter and butterscotch mixture, and the little nests set up in minutes.
Prep Time: 10 min | Cook Time: 5 min | Total Time: 15 min | Servings: 24 haystacks | Difficulty: Easy
Ingredients
- 1 cup butterscotch chips
- 1 cup creamy peanut butter
- 3 cups chow mein noodles
- 1 cup salted peanuts
- 1/2 tsp vanilla extract
Instructions
- Line two baking sheets with parchment paper.
- Melt the butterscotch chips and peanut butter together in a large saucepan over low heat, stirring until smooth.
- Remove from heat and stir in the vanilla.
- Add the chow mein noodles and peanuts and fold gently until everything is coated.
- Drop heaping tablespoons of the mixture onto the baking sheets.
- Let set at room temperature for about 20 minutes, or refrigerate for 10 minutes to speed things up.
32. Frozen Peanut Butter Banana Bites
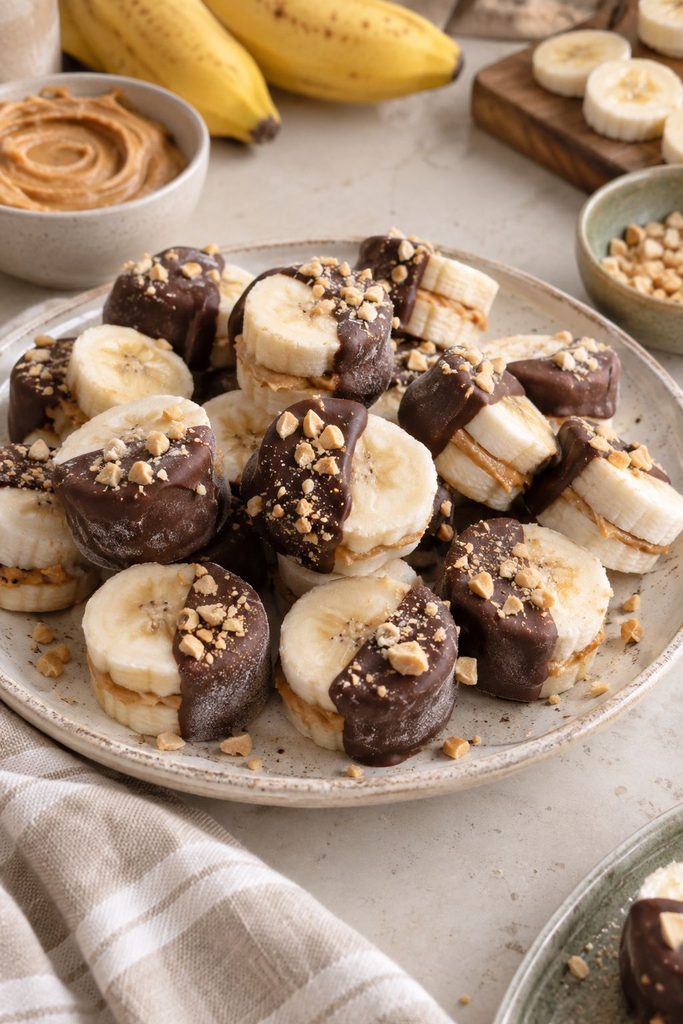
These are the treat you make when you want something cold, sweet, and a little bit virtuous. Banana slices get sandwiched with peanut butter, dipped in chocolate, and frozen into bite-sized snacks that taste like a frozen candy bar. For a bigger batch, check out these frozen chocolate banana pops.
Prep Time: 20 min | Freeze Time: 2 hrs | Total Time: 2 hr 20 min | Servings: 20 bites | Difficulty: Easy
Ingredients
- 3 firm bananas, cut into 40 slices
- 1/2 cup creamy peanut butter
- 1 cup dark chocolate chips
- 2 tsp coconut oil
- 2 tbsp chopped peanuts, optional
Instructions
- Line a baking sheet with parchment paper.
- Spread a small dab of peanut butter onto 20 banana slices, then top each with another slice to make a sandwich.
- Place the sandwiches on the baking sheet and freeze for 30 minutes.
- Melt the chocolate chips and coconut oil together in the microwave in 20-second bursts, stirring until smooth.
- Dip each frozen bite halfway into the chocolate, or drizzle it over the top, and sprinkle with chopped peanuts.
- Freeze for at least 1 more hour, until solid. Let sit for 2 minutes before eating.
33. Peanut Butter Chocolate Swirl Freezer Pops

Creamy, fudgy, and way more indulgent than a regular popsicle. Peanut butter and chocolate swirl together in each pop, and they taste like a milkshake on a stick. New to popsicles? Here’s how to make popsicles without a fuss.
Prep Time: 15 min | Freeze Time: 6 hrs | Total Time: 6 hr 15 min | Servings: 8 pops | Difficulty: Easy
Ingredients
- 1 1/2 cups whole milk
- 1/2 cup creamy peanut butter
- 1/4 cup honey
- 1/4 cup unsweetened cocoa powder
- 1/2 cup heavy cream
- 1 tsp vanilla extract
Instructions
- Blend 1 cup of the milk, the peanut butter, half of the honey, and half of the vanilla until smooth. Pour into a measuring cup with a spout.
- Blend the remaining 1/2 cup milk, the cocoa powder, the remaining honey, and the remaining vanilla until smooth. Pour into a second cup.
- Stir 1/4 cup of the heavy cream into each mixture.
- Pour the two mixtures alternately into 8 popsicle molds, then swirl once with a skewer.
- Insert popsicle sticks and freeze for at least 6 hours, until solid.
- Run the molds under warm water for 10 seconds to release the pops.
34. Peanut Butter Cheesecake Stuffed Strawberries
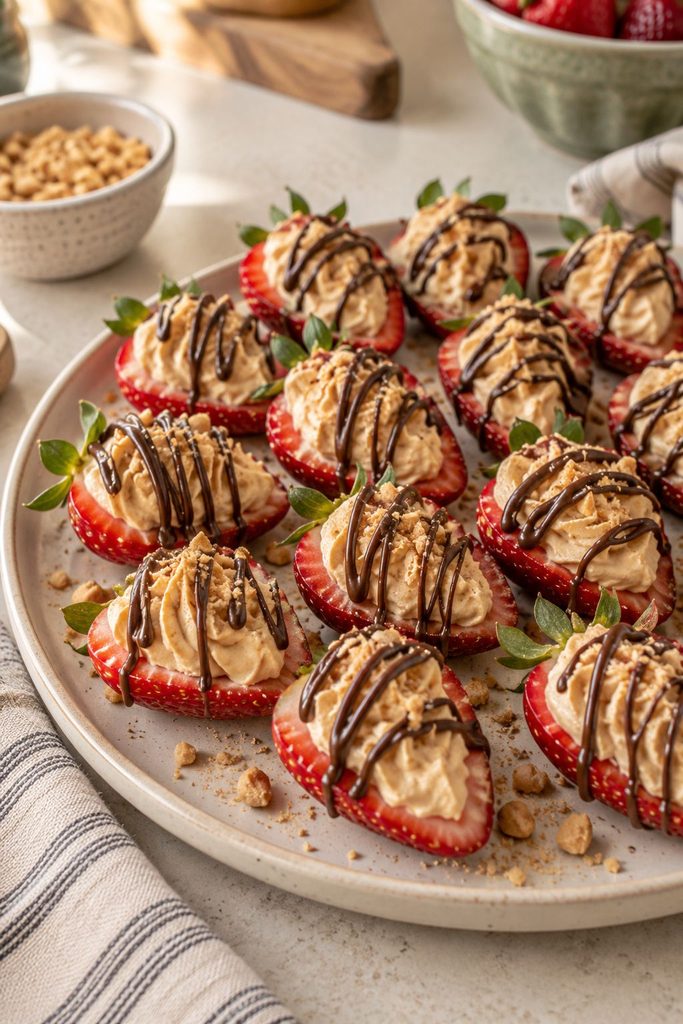
Fresh strawberries and peanut butter are a seriously underrated combo. Each berry gets hollowed out and piped full of creamy cheesecake filling, then finished with a chocolate drizzle, and they disappear off a party platter first.
Prep Time: 25 min | Chill Time: 30 min | Total Time: 55 min | Servings: 24 berries | Difficulty: Easy
Ingredients
- 24 large strawberries
- 4 oz cream cheese, softened
- 1/4 cup creamy peanut butter
- 1/4 cup powdered sugar
- 1/2 tsp vanilla extract
- 1/4 cup graham cracker crumbs
- 1/4 cup chocolate chips, melted
Instructions
- Cut the tops off the strawberries and slice a tiny piece off the bottom of each so they stand upright. Use a small spoon to hollow out the centers.
- Beat the cream cheese, peanut butter, powdered sugar, and vanilla until smooth and fluffy.
- Spoon the filling into a piping bag with a large star tip, or a zip-top bag with the corner snipped.
- Pipe the filling into each strawberry, mounding it slightly on top.
- Dip the tops lightly into the graham cracker crumbs.
- Drizzle with melted chocolate and refrigerate for 30 minutes before serving.
35. Peanut Butter Chocolate Bark
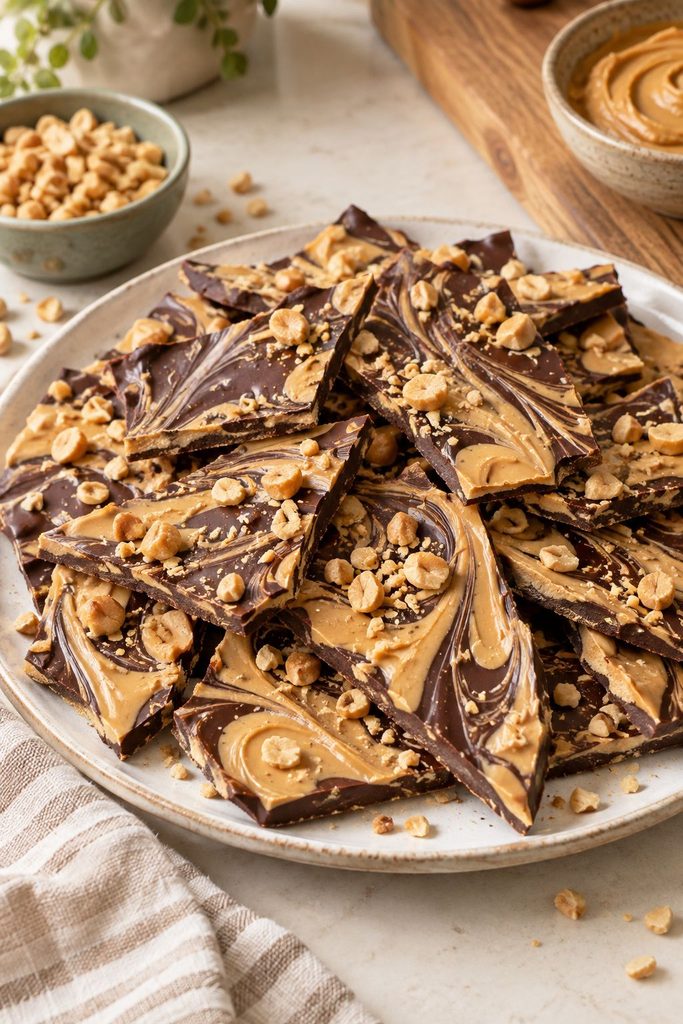
Bark is the lowest-effort dessert on the planet and it always looks impressive. A crunchy layer of chocolate gets swirled with peanut butter and scattered with pretzels and peanut butter cups, and you just break it into rough shards.
Prep Time: 10 min | Chill Time: 1 hr | Total Time: 1 hr 10 min | Servings: 20 pieces | Difficulty: Easy
Ingredients
- 2 cups semisweet chocolate chips
- 1 tsp coconut oil
- 1/3 cup creamy peanut butter
- 1/2 cup mini pretzels, roughly broken
- 1/2 cup mini peanut butter cups, halved
- 1/4 cup chopped peanuts
- Flaky sea salt, for sprinkling
Instructions
- Line a baking sheet with parchment paper.
- Melt the chocolate chips and coconut oil together in the microwave in 30-second bursts, stirring until smooth.
- Pour the chocolate onto the parchment and spread it into a rectangle about 1/4 inch thick.
- Warm the peanut butter for 15 seconds, then drop small spoonfuls over the chocolate and drag a knife through to swirl.
- Scatter the pretzels, peanut butter cups, and peanuts over the top and press in lightly. Finish with flaky salt.
- Refrigerate for 1 hour, until completely firm, then break into pieces.
36. Peanut Butter Chia Pudding Cups
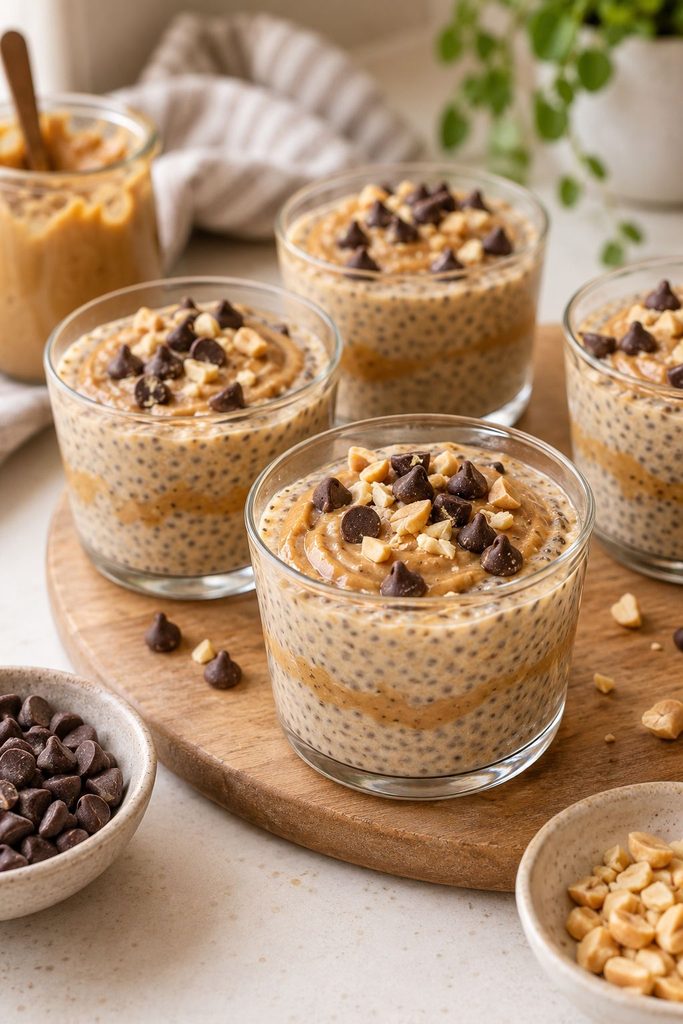
This is the dessert for the days you want something a little lighter that still tastes like a treat. Chia seeds soak up creamy peanut butter milk overnight and turn into a thick, spoonable pudding, and you can eat it for dessert or breakfast (no judgment).
Prep Time: 10 min | Chill Time: 4 hrs | Total Time: 4 hr 10 min | Servings: 4 cups | Difficulty: Easy
Ingredients
- 1/2 cup chia seeds
- 2 cups milk of choice
- 1/3 cup creamy peanut butter
- 3 tbsp maple syrup
- 1 tsp vanilla extract
- 1 banana, sliced
- 2 tbsp chocolate chips
- 2 tbsp chopped peanuts
Instructions
- Whisk the milk, peanut butter, maple syrup, and vanilla together until smooth.
- Stir in the chia seeds, then whisk again after 5 minutes to break up any clumps.
- Divide the mixture among 4 jars or cups.
- Cover and refrigerate for at least 4 hours, or overnight, until thick.
- Top each cup with banana slices, chocolate chips, and chopped peanuts just before serving.
37. Peanut Butter Chex Bars
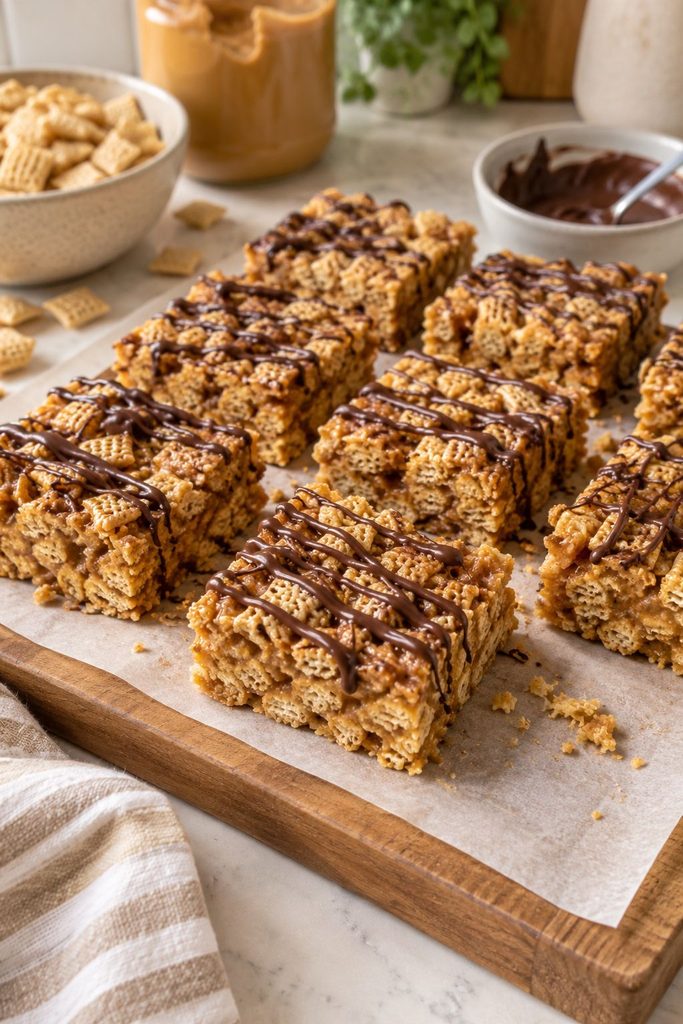
If you like Rice Krispie treats, meet their crunchier, more grown-up cousin. Chex cereal gets coated in a sticky peanut butter and marshmallow mixture and pressed into bars with a peanut butter chip topping.
Prep Time: 10 min | Cook Time: 5 min | Chill Time: 30 min | Total Time: 45 min | Servings: 16 bars | Difficulty: Easy
Ingredients
- 4 cups rice Chex cereal
- 1/2 cup creamy peanut butter
- 3 tbsp unsalted butter
- 1 (10 oz) bag mini marshmallows
- 1 tsp vanilla extract
- 1/2 cup peanut butter chips
- 1/2 cup chocolate chips
Instructions
- Grease a 9×9-inch pan.
- Melt the butter, peanut butter, and marshmallows together in a large saucepan over low heat, stirring until smooth.
- Remove from heat and stir in the vanilla.
- Fold in the Chex cereal until evenly coated.
- Press into the pan with a greased spatula, then scatter the peanut butter chips and chocolate chips over the top and press gently.
- Refrigerate for 30 minutes, until firm, then cut into 16 bars.
38. Peanut Butter Ice Cream Sandwiches
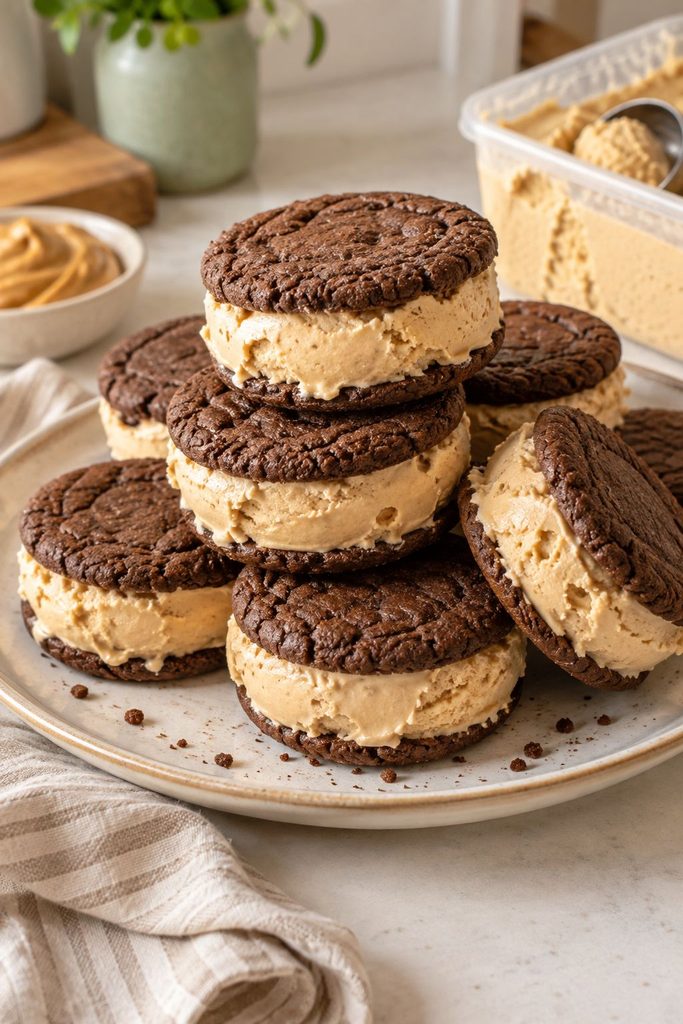
These are a summer classic with a peanut butter twist. Soft ice cream gets sandwiched between two peanut butter cookies, then rolled in mini chocolate chips, and you only need a freezer to make them.
Prep Time: 20 min | Freeze Time: 3 hrs | Total Time: 3 hr 20 min | Servings: 8 sandwiches | Difficulty: Easy
Ingredients
- 16 soft peanut butter cookies, store-bought or homemade
- 2 cups vanilla ice cream, softened
- 1/4 cup creamy peanut butter
- 1/2 cup mini chocolate chips
Instructions
- Line a baking sheet with parchment paper.
- Stir the peanut butter into the softened ice cream until swirled but still streaky.
- Flip 8 cookies upside down on the baking sheet and top each with about 1/4 cup of the ice cream mixture.
- Press a second cookie on top of each and gently squeeze until the ice cream reaches the edges.
- Roll the edges of each sandwich in the mini chocolate chips.
- Wrap each sandwich in plastic wrap and freeze for at least 3 hours, until firm.
39. Peanut Butter Tiramisu
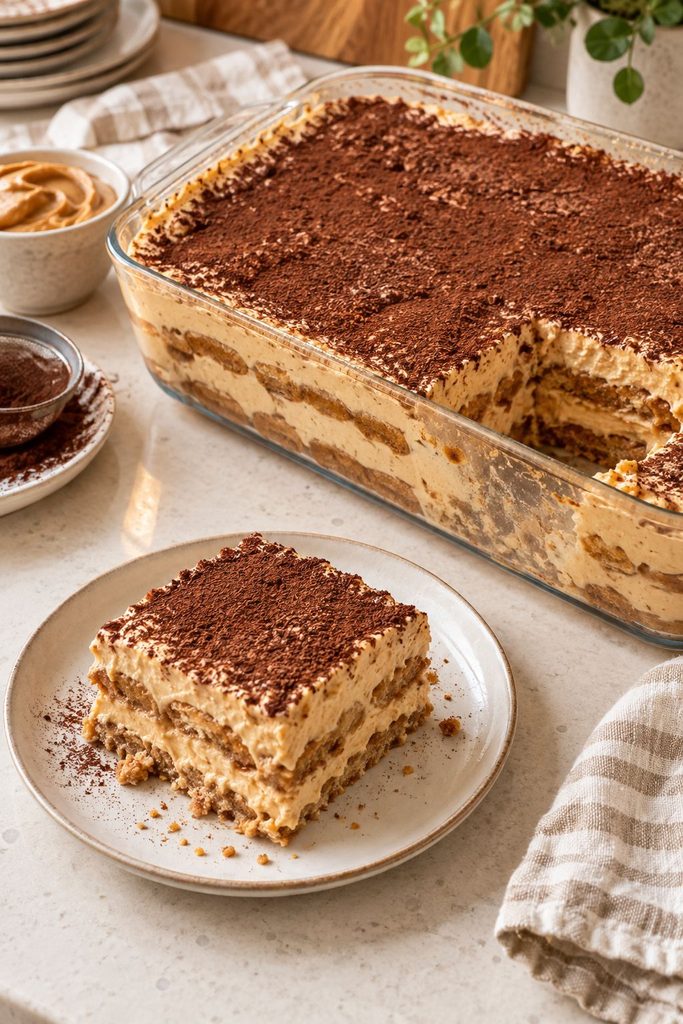
Tiramisu fans, come get this one. Ladyfingers dunked in coffee sit under a cloud of peanut butter mascarpone cream, and the whole thing gets dusted with cocoa for a dessert that feels fancy but has zero baking involved. Want a smaller version? Try these easy mini tiramisu cups.
Prep Time: 30 min | Chill Time: 6 hrs | Total Time: 6 hr 30 min | Servings: 12 slices | Difficulty: Medium
Ingredients
- 1 cup strong brewed coffee, cooled
- 2 tbsp coffee liqueur or milk
- 24 ladyfingers
- 8 oz mascarpone cheese, room temperature
- 3/4 cup creamy peanut butter
- 1/2 cup powdered sugar
- 1 1/2 cups heavy cream, cold
- 1 tsp vanilla extract
- 2 tbsp unsweetened cocoa powder
- 1/4 cup chopped peanuts
Instructions
- Stir the cooled coffee and coffee liqueur together in a shallow dish.
- Beat the mascarpone, peanut butter, powdered sugar, and vanilla until smooth.
- Whip the heavy cream to stiff peaks in a separate bowl, then fold it into the mascarpone mixture.
- Quickly dip 12 ladyfingers into the coffee, about 2 seconds per side, and arrange them in a single layer in an 8×8-inch dish.
- Spread half of the cream over the ladyfingers.
- Repeat with 12 more dipped ladyfingers and the remaining cream, smoothing the top.
- Refrigerate for at least 6 hours, or overnight. Dust with cocoa powder and sprinkle with chopped peanuts before serving.
40. Peanut Butter Pudding Dirt Cups

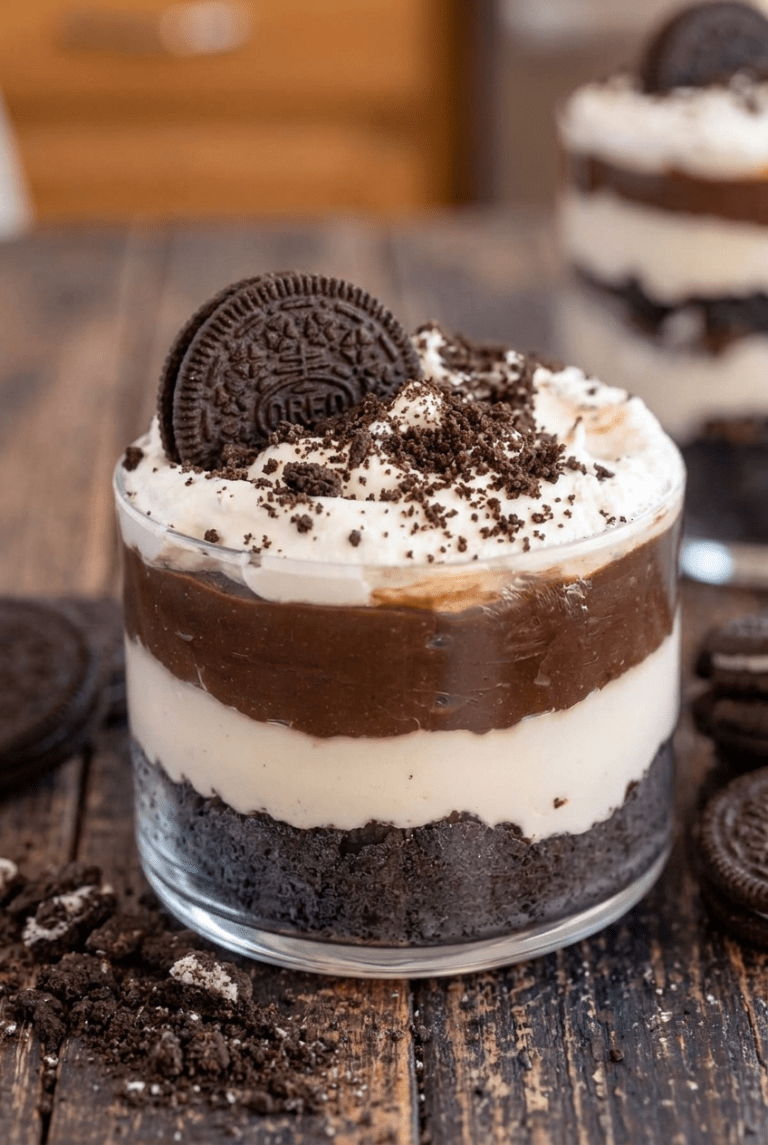
Dirt cups are the dessert kids beg for, and honestly the adults are all in too. Layers of peanut butter pudding and crushed Oreo crumbs make the dirt, and gummy worms on top make the whole thing ridiculous in the best way. Making these for October? See our Halloween dirt cups.
Prep Time: 20 min | Chill Time: 1 hr | Total Time: 1 hr 20 min | Servings: 8 cups | Difficulty: Easy
Ingredients
- 1 (3.4 oz) box instant vanilla pudding mix
- 2 cups cold milk
- 1/2 cup creamy peanut butter
- 1 cup whipped topping, thawed
- 20 chocolate sandwich cookies, finely crushed
- 8 gummy worms
Instructions
- Whisk the pudding mix and cold milk for 2 minutes, then let it sit for 5 minutes.
- Whisk in the peanut butter until smooth, then fold in the whipped topping.
- Spoon about 2 tablespoons of crushed cookies into the bottom of each of 8 clear cups.
- Add a layer of peanut butter pudding, then another layer of crushed cookies. Repeat once more.
- Finish with a generous layer of cookie crumbs and press a gummy worm into each cup.
- Refrigerate for at least 1 hour before serving.
Handy Tools for No Bake Desserts
You don’t need much, but these make the recipes above easier.
- Parchment paper sheets for lining pans and trays
- Muffin tin for cups, brownie bites, and mousse shells
- Hand mixer for fluffy cream cheese fillings
- Offset spatula set for smooth chocolate and pie tops
- Chocolate dipping tools for buckeyes and truffles
- Piping bags and decorating tips for stuffed strawberries and mousse
- Mini glass dessert cups for parfaits and pudding cups
- Small glass trifle bowls for the trifle and layered desserts
- Freezer-safe baking pans for the frozen pies and bars
- Food processor for the date-based energy bites
As an Amazon Associate, I earn from qualifying purchases.
More No-Bake Desserts You’ll Love
- No Bake Mini Dessert Cups
- Lazy Easy No Bake Desserts That Feel Effortless
- No Bake Valentine’s Desserts That Feel Special


One Comment