You can pull together a festive tray in about 45 minutes, with only 10 minutes of active prep, 5 minutes of quick cooking, and 30 minutes to set. This makes the dessert perfect for a busy summer holiday when you want tasty treats without fuss.
For one batch you get 12 squares that are easy to share at a picnic or block party. Use 6 cups of rice krispies for the ideal crunch and classic texture everyone loves.
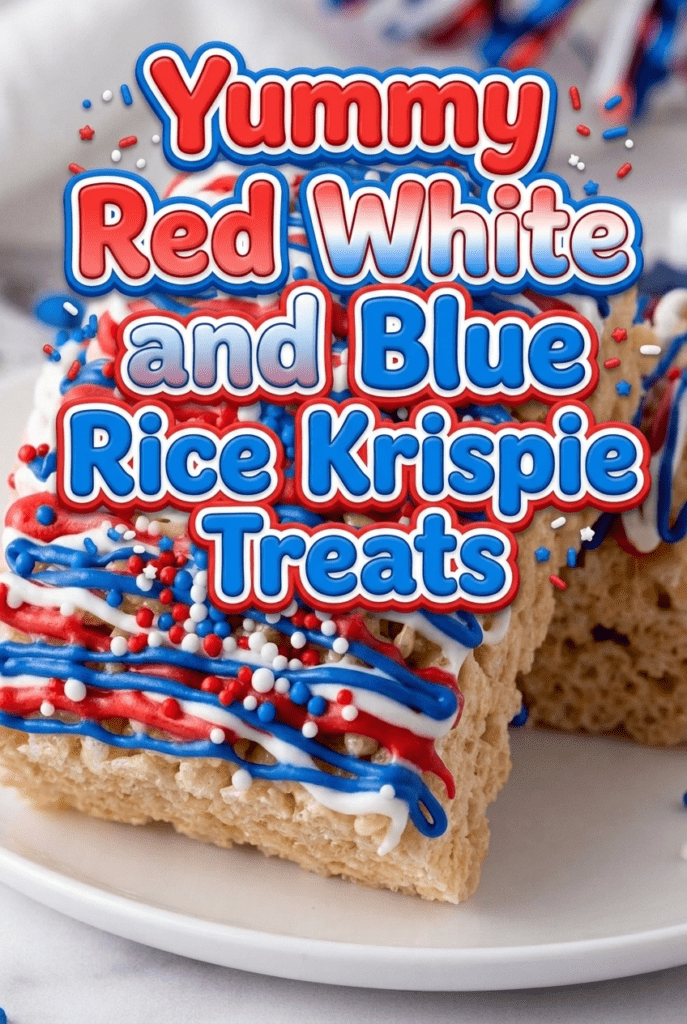
Follow clear steps and you’ll end up with professional-looking bars that double as decor on your 4th july spread. The colors pop, the flavor is timeless, and even a beginner baker can finish in under an hour.
Why this works: quick hands-on time, simple ingredients, and a crowd-pleasing result. You’ll spend less time in the kitchen and more time enjoying summer moments with family.
This post may contain affiliate links which helps me keep this blog alive, questions? View the privacy policy.
Why You Will Love This Red White and Blue Rice Krispie Recipe

Create a crowd-pleasing snack that looks like it came from a bakery but finishes in under an hour. These bars bring instant charm to your summer table and make hosting feel easy and joyful.
You’ll enjoy fresh flavor and control. Homemade versions beat store-bought options with softer texture and a taste you can tweak. Use slightly more butter for chew or less for a firmer bite.
Perfect for holidays. These treats shine at 4th july and memorial day gatherings. Kids and adults love the nostalgic crunch, while the colors lift the whole dessert spread.
- Fast to make with pantry staples you already have.
- Budget-friendly for large crowds and potlucks.
- Fun to assemble with family, great for summer days.
- Store in an airtight container and they stay good for two days.
Whether you call them rice krispie treats or krispie treats, this is a simple, festive treat that keeps your focus on celebrating the 4th and memorial day weekends with family.
Essential Ingredients for Your Patriotic Treats
Start with solid ingredients so your layered dessert holds its shape and looks bright on the table. Quality basics give you reliable texture and bold color in less time.
Choosing the Right Cereal
Use 6 cups Rice Krispies cereal to get the classic crunch and structure your layers need. Pick a fresh box from a trusted brand to keep the cereal crisp and the final bars light.
Quality Butter Matters
Always use 3 tablespoons butter, not margarine. Real butter gives a richer, creamier base that helps marshmallows melt smoothly and bind the cereal.
Other essentials:
- One 10 oz package of mini marshmallows melts faster and gives an even texture.
- Add ½ teaspoon vanilla for subtle flavor, if you like.
- Use a touch of food coloring and festive sprinkles to customize looks without losing taste.
Quick tip: Fresh marshmallows and crisp cereal make the difference between chewy, satisfying treats and a soggy batch. Measure cups rice and cups mini accurately for consistent results.
Preparing Your Kitchen and Workspace
A tidy workspace and a well-prepped pan make layering these treats simple. Gather all ingredients and tools before you melt marshmallows. This keeps your timing sharp and your layers neat.
Coat a 9×13 inch pan thoroughly with non-stick cooking spray so the marshmallow mixture slides out easily after it sets. You can also line the pan with parchment for a clean lift.
Use a clean, dry pan to keep the edges straight and the squares uniform. Arrange bowls for each color, a silicone spatula, and a greased measuring cup for pressing layers.
- Organize ingredients in the order you’ll add them to avoid pauses.
- Keep a damp cloth nearby to wipe sticky hands quickly.
- Check oven mitts, timer, and workspace lighting before you begin.
| Prep Step | Why It Helps | Tip |
|---|---|---|
| Coat pan with spray | Prevents sticking and eases removal | Spray evenly, then line with parchment |
| Gather ingredients | Saves time during melting | Measure cereal and marshmallows first |
| Set out tools | Keeps workflow smooth for layered work | Use silicone spatula and greased cup |
| Keep pan dry | Ensures crisp edges and firm shape | Wipe any moisture before adding mix |
When you prepare this way, layering rice krispie squares becomes calm and creative. Your final krispie treats will look polished and taste delightful.
Mastering the Marshmallow Mixture
Get the marshmallow base just right and the whole dessert comes together with ease. Your success depends on gentle heat, steady stirring, and quick timing once the marshmallows melt.
Achieving the Perfect Consistency
Start by melting 3 tablespoons butter over medium-low heat. Add a 10 oz package of mini marshmallows and warm slowly so nothing scorches.
Stir continuously until the marshmallows are completely smooth. This gives a glossy marshmallow mixture that binds the cereal without clumps.
Remove from heat, then fold in 6 cups rice krispies immediately. Work fast so every piece gets coated while the mix is warm and pliable.
- Use a few drops of food coloring at this stage for vivid layers.
- Test readiness: marshmallows should be fully melted and blended with the butter.
- Press gently into your pan with a greased cup to keep the texture soft but firm.
Tip: Maintain medium-low heat to protect flavor. With proper care, your marshmallow mixture becomes the secret to soft, chewy krispie treats that look polished on any summer table.
Creating the Perfect Patriotic Layers
Layering colors in a single pan turns simple ingredients into a striking summer centerpiece. This method gives clean stripes and firm edges when you follow a few careful steps.
The Red Layer
Work with your marshmallow mixture while it is warm. Add a few drops of red food coloring to the melted marshmallows before folding in the cereal.
Tip: Use two tablespoons butter per layer to help the mixture coat the cereal evenly and stay pliable for pressing.
The White Layer
Make the middle band without any coloring so the natural marshmallow hue stands out. Press this layer evenly to create a clear contrast between bands.
The Blue Layer
Mix blue food coloring into the melted marshmallows until you reach the shade you want. Fold in the cereal and press firmly to lock all three layers together.
Finish: Let the pan cool to room temperature for at least 30 minutes before cutting. Add sprinkles on top of the final layer for a festive touch.
- Work quickly to keep the marshmallow mixture workable.
- Press each layer with a greased cup for even thickness.
- Cool fully for clean, sharp squares.
| Layer | Coloring | Butter per Layer | Key Tip |
|---|---|---|---|
| Bottom | Red food coloring | 2 tablespoons | Press firmly to avoid gaps |
| Middle | No coloring | 2 tablespoons | Create even surface for contrast |
| Top | Blue food coloring | 2 tablespoons | Cool before slicing |
Tips for Achieving Vibrant Colors
Bright, even hues start in the pot—add color while marshmallows melt for the cleanest results.
Use high-quality liquid food coloring for the boldest shades in your layered treats. Liquid dye blends quickly into melted marshmallows, so colors stay vivid without streaks.
Add the food coloring to the warm marshmallow mixture before folding in the cereal. This helps every piece get coated and keeps the tint consistent across the layer.
- Begin with a few drops, then add more until you hit the look you want.
- Stir thoroughly to avoid streaks and to get uniform coloring throughout the batch.
- Save an uncolored middle band—the pale layer makes the hues pop visually.
Pro tip: test a small spoonful first. If the shade looks weak, add another drop and mix again. These steps help you make professional-looking rice krispie treats that guests will admire.
| Step | What to Use | Why It Works |
|---|---|---|
| Add dye to melted marshmallows | Liquid food coloring | Ensures full, even coverage before cereal is folded in |
| Start small | 1–2 drops | Prevents over-saturation and wasted color |
| Mix thoroughly | Silicone spatula | Removes streaks and creates a uniform layer |
| Keep a neutral band | No coloring | Creates contrast so colors appear brighter |
Storing Your Treats for Maximum Freshness
Keep your bars soft and ready to share by storing them properly after they cool. A little care right after cutting keeps texture and flavor at their best for your upcoming Memorial Day plans.
Use an airtight container to preserve chew and prevent air from drying the surface. Place the pieces in a single layer if you can.
Using Airtight Containers
When you must stack, add thin sheets of wax paper between layers in the container to stop the treats from sticking together. This simple step makes serving easier and keeps each piece neat.
Store the sealed container at room temperature for up to two days. Refrigeration can make the bars hard and less enjoyable, so avoid chilling unless you plan to heat briefly before serving.
- Pack in an airtight container to maintain softness for up to two days.
- Slide wax paper between stacked pieces to prevent sticking and tearing.
- Keep the container at room temperature to protect texture and flavor.
- Prep ahead for a holiday — store finished pieces and save time on the day.
For more tips on making and presenting festive bars, see this guide on patriotic layered treats. Proper storage lets you focus on guests while your dessert looks fresh all weekend.
Creative Ways to Serve Your Dessert
Make your platter a focal point for the 4th july gathering. Arrange squares on a decorative tray so guests see the red white blue layers at a glance.
Cut fun shapes with cookie cutters to add charm. Stars, circles, and hearts turn a simple treat into a festive bite for kids and adults alike.
Offer a variety of serving ideas so your spread feels complete. Pair rice krispie treats with fresh berries for a bright contrast. Place small plates near the fireworks viewing area so people can grab a quick dessert while they mingle.
- Centerpiece platter: makes your treat the star of the dessert table.
- Shaped pieces: use cutters to create themed bites for the 4th celebration.
- Pairings: serve with fresh fruit to balance sweetness.
- Patterned display: arrange squares in a red white pattern to highlight layers.
These simple touches turn homemade rice krispie bars into a memorable treat at your next summer party. Your presentation will invite smiles long after the last bite.
Customizing Your Rice Krispie Creations
You can transform plain layers into a festive showpiece with bright toppers and chocolate. Small finishes make a big difference and keep the process quick and fun for your next gathering.
Adding Festive Sprinkles
Work while the top is still slightly tacky. Sprinkle liberally so the decorations stick and set into the surface. This gives an instant pop and keeps the look neat after cutting.
Try mixing shapes and sizes to match your party theme. You can also press a few extra sprinkles into the edges for a bold finish.
Incorporating Chocolate
For a richer bite, drizzle melted chocolate over cooled bars or dip the corners for a professional touch. Use high-quality chocolate for a smooth sheen that snaps when set.
Stir in mini chocolate chips for texture, or make a thin ganache to brush across the top for a refined finish that turns this simple dessert into a centerpiece.
- Timing: add sprinkles while the top is tacky for best adhesion.
- Chocolate tip: temper or warm slowly for a glossy result.
- Variation: mix mini chips into the cereal before pressing for extra flavor.
| Decoration | When to Add | Why It Works |
|---|---|---|
| Sprinkles | While surface is tacky | Sticks in place and creates bright contrast |
| Drizzle | After bars cool slightly | Adds rich flavor and elegant look |
| Dip corners | When bars are fully set | Creates a clean, professional finish |
Conclusion
Put the finishing touch on your celebration table with an eye-catching tray of layered squares. You’ve learned simple steps to make festive treats that work for the 4th july and memorial day.
This dessert is quick, shareable, and kid-approved. The july rice method gives bright bands and easy serving. Store pieces in an airtight box to keep texture fresh for two days.
Customize with sprinkles or a chocolate drizzle to match your theme. These rice krispie treats and krispie treats bring a nostalgic smile to any cookout.
Enjoy making this recipe and the smiles it brings at your next big gathering.
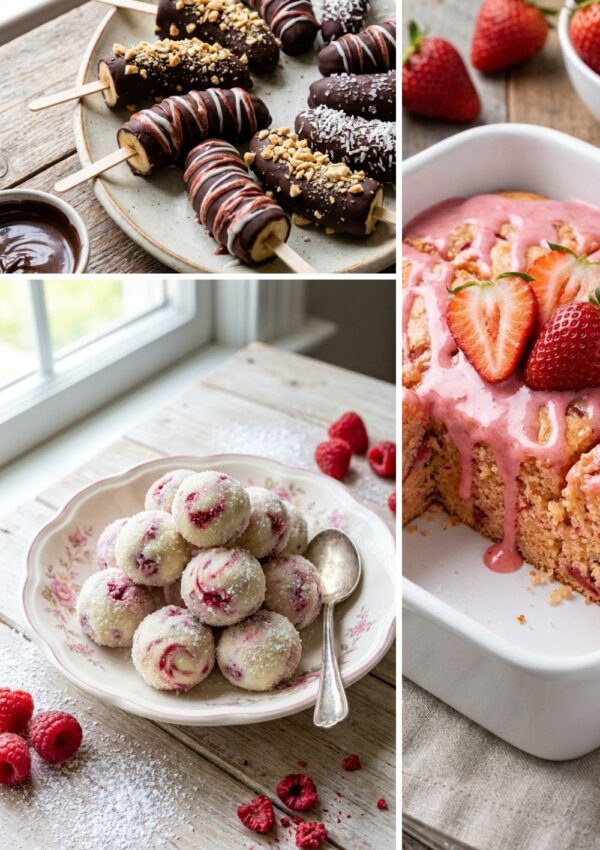
More Summer Desserts You’ll Love
- Easy Summer Dessert Ideas for Hot Days
- Fresh Strawberry Desserts That Taste Like Summer
- Best Summer Cookies for BBQs and Parties
FAQ
How long will this patriotic cereal treat take to make?
You can finish the whole process in about 45 minutes, including melting butter, mixing marshmallows, tinting each portion, layering in the pan, and letting it set. Work steadily and have your pans and utensils ready to move quickly between colors.
What cereal should you pick for the best texture?
Choose a light, puffed cereal like Kellogg’s Rice Krispies for an airy crunch that binds well with marshmallow. Avoid very sweet or heavily flavored alternatives; they can alter taste and color absorption.
How much butter and mini marshmallows do you need?
A common ratio is 3 tablespoons of butter to 10 ounces of mini marshmallows per 6 cups of cereal. Adjust slightly if you prefer firmer or softer bars. Melt butter first, add marshmallows until smooth, then fold in cereal.
How do you get vibrant color without changing the flavor?
Use gel food coloring for intense hues with minimal liquid. Add a small amount to the warmed marshmallow mixture and stir quickly. Gels give bold color while keeping the mixture thick and chewy.
What’s the best way to create distinct layers without bleeding?
Press each colored batch into the pan firmly and cool briefly before adding the next layer. Chill the first layer for 5–10 minutes so it firms slightly, then add the next. Work quickly to avoid melting the set layers.
Can you make the white layer brighter?
For a cleaner white, use plain marshmallows and avoid adding any tint. If the base cereal looks off-white, mix in a small amount of white chocolate or marshmallow fluff to boost brightness without changing texture.
How should you prepare the pan and tools?
Line your pan with wax paper and spray lightly with cooking spray to prevent sticking. Use buttered spatulas or use a piece of wax paper to press layers down evenly without tearing them.
Are there tips for achieving the perfect marshmallow consistency?
Melt butter over low heat to avoid burning, then add marshmallows gradually and stir constantly until fully smooth. Remove from heat right when smooth to keep a tacky, bindable texture that sets firm after cooling.
How long will these treats stay fresh, and how should you store them?
Store bars in an airtight container at room temperature for up to three days for best chewiness. For longer freshness, separate layers with wax paper and refrigerate up to a week, though refrigeration can firm them more than preferred.
Can you make variations with sprinkles or chocolate?
Absolutely. Add festive sprinkles on the top layer before it sets, or drizzle melted chocolate over cooled bars. For a richer twist, fold mini chocolate chips into one color layer for a surprise bite.
Will food coloring stain hands or surfaces?
Gel color can stain skin and countertops. Wear gloves, wipe spills quickly with a damp cloth, and protect surfaces with parchment or wax paper while mixing and pressing colored batches.
Can you prepare these ahead for a holiday gathering?
Yes. Make them a day ahead and store in an airtight container at room temperature. For large events, assemble the night before and keep them chilled briefly before serving to maintain clean slices.