Hot take: popsicles are one of the easiest “recipes” you’ll ever make—and somehow they still feel like a Pinterest win every single time.
If you’ve got a few ingredients and five minutes, you can turn juice, yogurt, or even leftover smoothies into colorful, homemade popsicles that taste better than anything from the store. No weird additives, no guessing what’s inside—just simple, fresh flavors you actually feel good about serving.
Whether you’re trying to use up fruit before it goes bad or just want a fun, low-effort summer treat, once you learn how to make popsicles at home, you’ll never go back to the boxed kind again.
This post may contain affiliate links which helps me keep this blog alive, questions? View the privacy policy.
Why DIY Frozen Treats Beat Store-Bought Options
Store popsicles often have bad stuff like artificial preservatives. Making your own diy popsicles means no bad stuff. You use only the best ingredients you trust.
Homemade ice pops taste better than store ones. You can make them just right, sweet or not. This small change makes a big difference in snack quality.
The Health Benefits of Controlling Your Ingredients
Controlling your kitchen is good for your family. Making healthy popsicles means adding real fruit, yogurt, or coconut water. These healthy summer snacks are full of good stuff and keep you cool.
You don’t have to worry about bad stuff in your homemade ice pops. You make healthy popsicles that are good for you and taste great. Making diy popsicles means your healthy summer snacks are both tasty and good for you.
These refreshing frozen treats show you can have flavor and health together. Start making them today. Your kitchen is the perfect place to make these colorful, icy treats.
Essential Tools for Your Popsicle Making Journey
Starting your popsicle journey needs a few key items. The right tools turn your kitchen into a creative space. Quality equipment makes making popsicles fun and easy.
Choosing the Right Popsicle Molds
The right mold is key for a great popsicle. Look for silicone molds for easy popsicle removal. They are flexible and make taking out popsicles simple.
Think about mold size and shape too. Choose molds that fit your style, from classic to modern. The right mold makes your popsicles look as good as they taste.
Must-Have Kitchen Gadgets for Smooth Blending
A good blender is essential. It makes your popsicle base smooth and consistent. This is important for a perfect texture.
High-speed blenders handle tough ingredients well. They make sure your popsicles are smooth, without icy bits. This gives your popsicles a professional feel.
Selecting Sticks and Reusable Handles
Choosing the right sticks or handles is the last step. Wooden sticks are classic, but reusable handles are eco-friendly. They also have a better grip, great for kids.
Using these tools well makes making popsicles easy. Soon, making popsicles will be a fun habit. Now, your blender popsicles are ready to freeze, and you’re on your way to being a popsicle expert.
Selecting the Best Ingredients for Flavorful Treats
Starting to make tasty frozen treats is easy. Just pick fresh, bright ingredients. The best treats come from using the best fruits and sweeteners.
Fresh Fruits and Natural Sweeteners
For the best fruit popsicles, use ripe, in-season fruits. Mix fresh strawberries or mangoes with a bit of honey or agave. These sweeteners make the fruit taste even better.
Dairy and Non-Dairy Liquid Bases
The liquid base makes your popsicles creamy or light. Use coconut milk or Greek yogurt for a rich feel. Or, try fruit juices or coconut water for something refreshing.
Adding Texture with Mix-ins and Herbs
Make your popsicles special with mix-ins. Add chopped mint, basil, or nuts for crunch and flavor. These extras make your popsicles look and taste amazing, whether they’re dairy-free or vegan.
How To Make Popsicles: A Step-by-Step Process

Start making your perfect homemade popsicle with these key steps. Making popsicles at home lets you pick your favorite flavors. Follow these steps for delicious and professional popsicles every time.
Preparing Your Base Mixture
First, blend your ingredients until smooth. If using fresh fruit, strain it to get rid of seeds or pulp. This makes your popsicle smooth and tasty.
Try your base before freezing. It should taste a bit stronger than you like. This trick makes your popsicles extra tasty.
Filling the Molds Correctly
Pour your mix into molds, but leave a bit of space at the top. Liquids grow when they freeze, so filling too much can cause spills. A little extra space is good.
Tap the molds on the counter after filling. This gets rid of air bubbles that could make holes. Your popsicles will look great and taste even better.
Inserting Sticks at the Perfect Time
When to put in the sticks is very important. If your mold has a lid, stick them in right away. But if it’s open, wait until it starts to freeze.
Freeze for 45 to 60 minutes until it’s slushy. Then, the sticks will stay straight and not fall. This trick makes your popsicles look like they’re from a fancy shop.
Mastering the Art of Freezing
The secret to a perfect popsicle is in your freezer. Learning to freeze popsicles right makes your hard work pay off. Your liquid mix turns into a cool treat.
Understanding How Long To Freeze Popsicles
Being patient is key when waiting for your popsicles to freeze. You need at least six to eight hours for them to be solid. Knowing how long helps avoid a soft or messy popsicle.
Optimizing Your Freezer Temperature
Make sure your freezer is as cold as it can go. A steady cold keeps the mix from melting. Use a power-chill setting if your freezer has one.
Preventing Ice Crystals During the Freezing Process
Big ice crystals can mess up your popsicle’s smooth texture. Keep things cold and stable to stop these crystals. This way, every bite is smooth and tasty.
(You may also like Easy Summer Dessert Ideas, Fresh Blueberry Recipes You Need To Make and Strawberry Desserts For Kids)
Techniques for Removing Popsicles from Molds

Getting your popsicles out right makes them look as good as they taste. It’s important to know how to do it without messing them up. With the right steps, you can handle all kinds of molds without trouble.
The Warm Water Bath Method
The best way to get a popsicle out is with warm water. Just put the mold in a bowl of warm water for 10 to 15 seconds. This softens the edges so the popsicle comes out easily.
But don’t leave it in too long. If the water is too hot or you leave it in too long, the popsicle will melt. You just want to soften it enough to break the seal.
Using Silicone Molds for Easy Release
Using silicone molds makes things easier. You can just push the bottom of the mold to get the popsicle out. It’s a big help for anyone who wants to get popsicles out fast.
Silicone molds are also easy to clean and don’t stick. This makes it simple to keep your popsicles looking good, even if they have fancy designs.
Patience and Timing for Perfect Extraction
Being patient is key when serving your popsicles. If you pull the stick too soon, it might break. Always wait a bit after the water bath to make sure it comes out right.
Getting the timing right is important. If it doesn’t come out easily, don’t force it. Just put it back in the warm water for a few more seconds until it slides out smoothly.
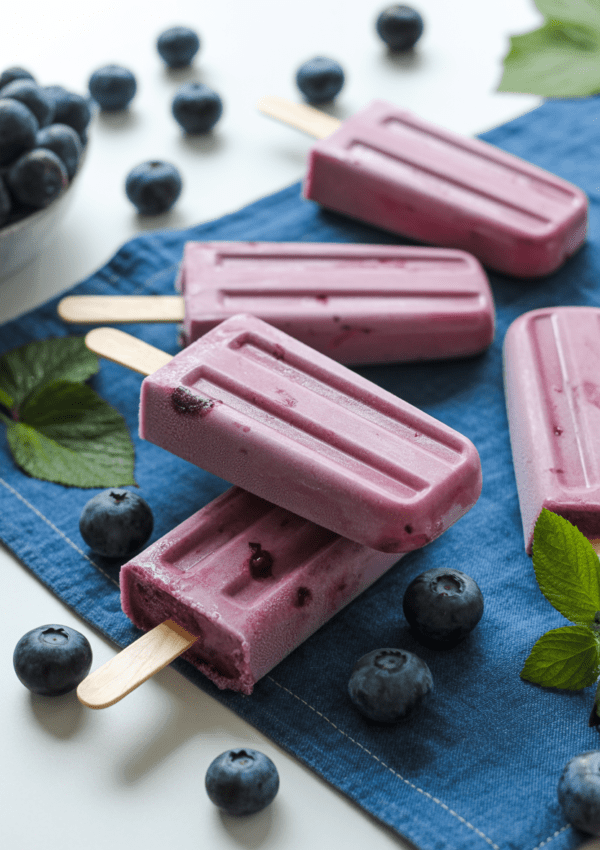
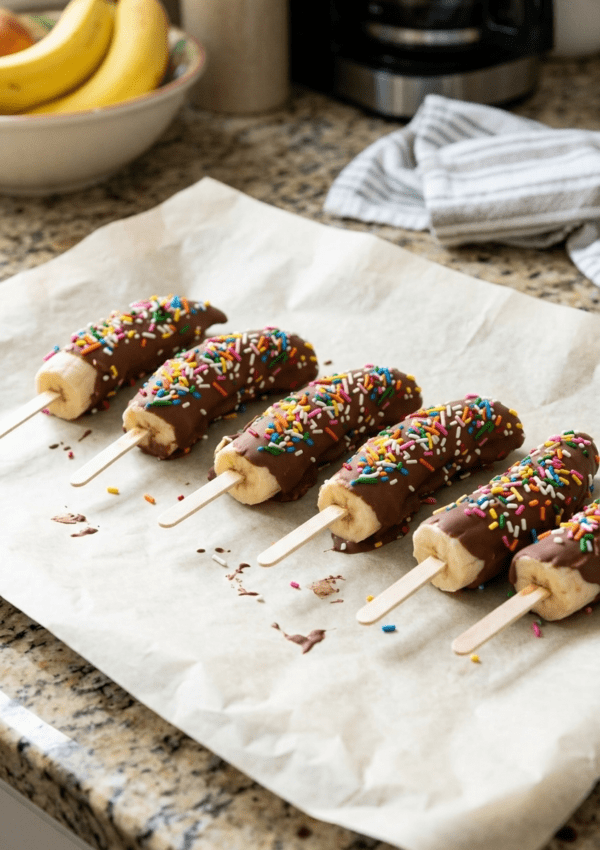
Creative Flavor Variations to Try at Home
Make your summer snacks exciting with new flavors. You can make fancy frozen treats at home. It’s fun to make popsicles your own way.
Refreshing Fruit and Juice Combinations
Begin with a simple fruit popsicle recipe. Use berries or stone fruits. Mix watermelon with lime for a cool treat.
Try juice popsicles with pomegranate or pineapple juice. Add fresh fruit for extra flavor.
Fruit popsicles are light and sweet. Add mint or basil for a fancy touch. These small changes make snacks special.
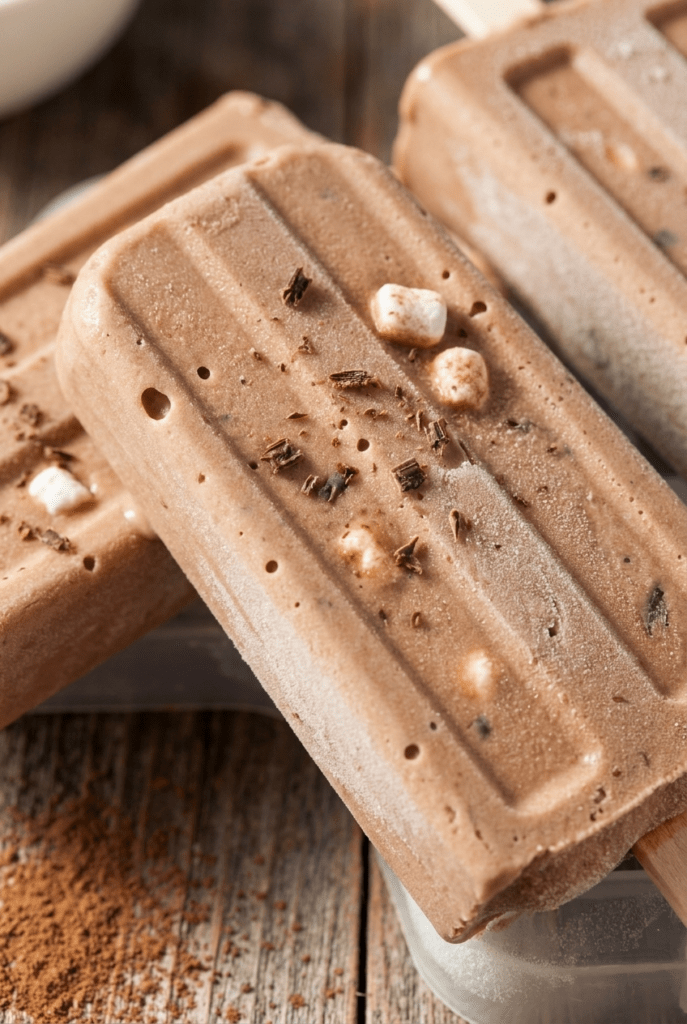
Creamy Yogurt and Coconut Milk Blends
For creamy popsicles, use Greek yogurt or coconut milk. Yogurt popsicles are tangy and sweet. Coconut milk makes dairy-free popsicles creamy.
Make vegan popsicles with almond milk and cocoa or peanut butter. These treats are sweet and healthy. Mix well for a smooth pop.
Layered Popsicles for Visual Appeal
Layered popsicles look amazing. Freeze each layer for colorful, striped popsicles. This way, you can mix different flavors and textures.
Alternate strawberry puree and vanilla yogurt for a classic look. These popsicles are great for parties. With patience, you’ll get amazing results.
Tips for Achieving Perfect Popsicle Texture
You can make amazing frozen treats with simple ingredients. Knowing the science behind them is key. This will help you get the perfect popsicle texture.
Balancing Sugar and Fat Content
Sugar and fat keep your treats soft, not icy. A good creamy popsicles recipe uses these to stay soft even when cold.
Add heavy cream, coconut milk, or honey to your mix. These lower the freezing point. This makes your popsicles smooth every time.
Achieving the Ideal Consistency with Blenders
High-speed blenders mix your ingredients well. They add air bubbles for a light, velvety feel.
Blend until it’s smooth and a bit frothy. This step is key for a professional texture.
Avoiding Air Bubbles in Your Molds
Air bubbles can make your popsicles break. To avoid this, tap your molds gently before freezing.
This pushes air bubbles to the top. By doing this, your frozen treats will impress everyone.
Storage Solutions for Long-Lasting Freshness

After making your ice pops, keeping them fresh is key. The right storage keeps them tasty and smooth for a long time.
Wrapping Popsicles for Freezer Storage
Take your popsicles out of the molds when they’re set. Wrap each one in plastic wrap or parchment paper. This stops them from sticking together.
You can also put them in a big, airtight container. This is great for easy snacks without wrappers.
Preventing Freezer Burn
Freezer burn happens when air touches your food. It makes ice crystals. Seal your containers well or use freezer bags to avoid this.
Get as much air out of bags before sealing. This keeps your popsicles fresh and stops freezer smells from getting in.
How Long Homemade Popsicles Last
People often ask how to keep popsicles fresh for a long time. They’re best eaten right away but stay good for up to two weeks in the freezer.
Knowing how long to freeze them means you always have a tasty snack. If stored right, they’ll taste as good as the day you made them.
Healthy and Kid-Friendly Popsicle Ideas
Learn to make yummy snacks with simple ingredients. Making your own popsicles is fun and healthy. It lets you pick what’s in each bite.
Nutritious Smoothie Popsicles
Blend fruits with yogurt for a tasty snack. Yogurt adds protein and calcium. Mix berries, bananas, and Greek yogurt for a healthy treat.
Smoothie popsicles are great for hot days. They keep kids hydrated. You can add spinach or kale without them noticing.
No-Sugar Added Natural Treats
Make sweet treats without added sugars. Use fresh fruit’s natural sugars. Watermelon, mango, or pineapple are great bases.
Juice popsicles are easy and healthy. Mix different fruits for a tasty mix. They’re a cool way to beat the heat.
Fun Shapes and Colorful Designs
Kids love food that looks fun. Use fun molds for colorful popsicles. Layering fruit purees makes them look like rainbows.
Try star or animal molds for fun popsicles. Bright colors and shapes make them special. They’re the best when they look as good as they taste.
Troubleshooting Common Popsicle Problems
Making the perfect popsicle is fun, but you might face some issues. Even experts have small problems. But, with these tips, you can fix them easily. This way, your popsicles will always taste great.
Fixing Popsicles That Won’t Release
Don’t pull hard on the stick if your popsicle won’t come out. Instead, warm the mold under running water for 10 to 15 seconds. This softens the outside and makes it easy to remove.
If it’s hard to get out, wait a minute at room temperature. Being patient is key when working with frozen treats. Don’t use sharp knives to avoid damaging your tools.
Correcting Icy or Grainy Textures
An icy texture happens when there’s not enough sugar or fat. For 3 ingredient popsicles, add a bit of cream or honey. This makes them smooth and tasty.
For healthy smoothie popsicles, blend until smooth. If you want no sugar, use a little fruit puree. Blending well stops graininess.
Handling Leaks and Spills During Assembly
Spills happen, but you can avoid them. Place molds on a baking sheet before filling. This catches drips and makes freezing easier.
If you see a leak, check the mold or stick. Use a silicone mold with a lid for kids’ snacks. A clean workspace keeps your time in the kitchen fun.
Conclusion
Making your own frozen treats turns your kitchen into a fun place. You can make simple things into yummy treats that make you happy.
Every time you make a batch, you get better at it. You learn how flavors mix when they’re cold. Your friends and family will love the special taste of your desserts.
Start with your favorite fruits and good molds. Try new mixes to keep your desserts interesting all year. You can make healthy snacks that are better than store-bought ones.
Share your best desserts with your loved ones. Your hard work with good ingredients means every bite is a hit. Enjoy making these treats and see the cool results of your effort.