
How to Make Perfect Ganache (3 Ways)
Chocolate ganache looks luxurious, but it’s really dessert magic made from just two ingredients. Once you learn how to make perfect ganache (3 ways)—pourable, whipped, and thick truffle-style—you can transform any dessert into something glossy, rich, and bakery-beautiful. It’s the kind of technique that instantly elevates cakes, brownies, bars, doughnuts, and even chilled favorites like this no-bake cheesecake.
Whether you want a silky glaze, a cloud-soft frosting, or a decadent spoonable filling, this guide gives you the ratios, textures, and troubleshooting you need to nail ganache every single time.
This post may contain affiliate links which helps me keep this blog alive, questions? View the privacy policy.
What Makes Ganache So Special

For something so simple, ganache delivers a shocking amount of payoff. It’s silky, glossy, rich, and endlessly adaptable—the kind of chocolate finish that makes any dessert look instantly more polished. Once you understand how to make perfect ganache (3 ways), you can decide whether you want a thin pour that drips beautifully down a cake, a thick spread for layering, or a fluffy whipped texture that feels like chocolate mousse.
Ganache is one of those foundational techniques that quietly unlocks dozens of desserts. Use it to top brownies, fill cupcakes, drizzle over ice cream, swirl into bars, or spoon generously over something chilled and creamy, like your no-bake cheesecake. It’s simple, elegant, and surprisingly forgiving—as long as you use the right ratios and treat the chocolate with a little patience.
Ingredients You Need for Perfect Ganache
Ganache only needs two ingredients, but the details matter. The type of chocolate, the fat content in your cream, and even how finely you chop the chocolate all influence the final texture. Before learning how to make perfect ganache (3 ways), start with the right building blocks so every batch turns out glossy, smooth, and stable.
Chocolate
The better the chocolate, the better the ganache. Chocolates between 55–70% cocoa melt smoothly and give the deepest flavor. Milk chocolate makes a softer, sweeter ganache, while white chocolate requires adjusted ratios because of its higher fat and sugar content.
- Dark chocolate (55–70%) for classic richness
- Milk chocolate for a softer, sweeter ganache
- White chocolate for pale, creamy ganache variations
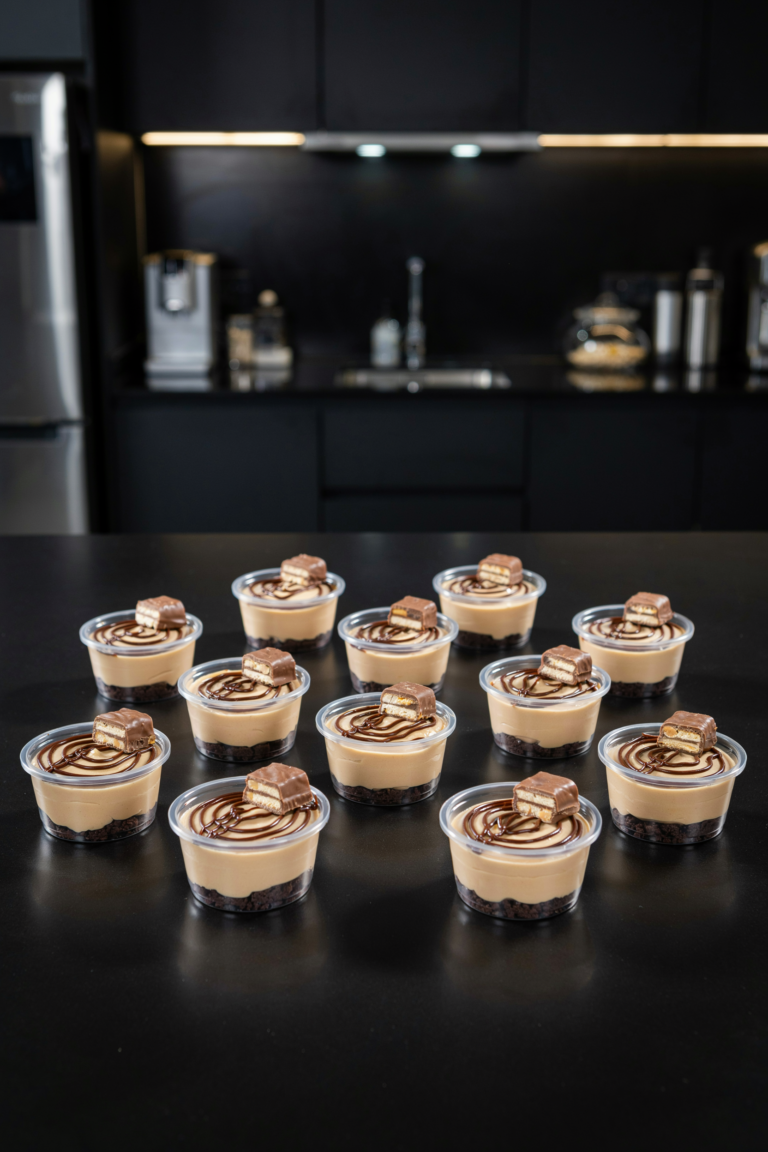
If you’re making ganache to drizzle over a chilled dessert like your no-bake cheesecake, dark chocolate offers the cleanest contrast and most stable shine.
For convenience, you can use chocolate bars or high-quality wafers. Avoid cheap chocolate chips—they’re formulated to hold their shape and often melt grainy. For premium options, check out good-quality chocolate bars that melt beautifully.
Cream
Heavy cream is non-negotiable. Its fat content allows the chocolate to emulsify into that silky, beautiful texture ganache is known for. Milk or half-and-half won’t thicken properly and often cause splitting.
- Heavy cream (33%+ fat)
- Warm, not boiling—boiling cream can scorch the chocolate
Optional Add-Ins
Once you master the basics, these add-ins elevate flavor without changing the structure. Mix them into the cream before combining it with the chocolate.
- Butter for extra gloss and richness
- Vanilla extract for warmth
- Sea salt to deepen flavor
- Espresso powder to enhance chocolate notes
- Liqueurs like Baileys, Kahlúa, or Grand Marnier
For flavor inspiration, browse your chocolate desserts or fudge recipes—many of those combinations translate seamlessly into ganache.
Tools That Make Ganache Foolproof
You don’t need a pastry chef’s kitchen to master how to make perfect ganache (3 ways), but a few reliable tools make the process smoother and the results more consistent. Ganache behaves best when the chocolate melts evenly and the cream heats gently, and these tools help you get there every single time.
- Heatproof glass bowl: Glass retains heat well, helping the chocolate melt slowly and evenly.
- Small saucepan: Ideal for warming the cream without scorching it.
- Silicone spatula: Flexible enough to fold, stir, and scrape the bowl without breaking the emulsion.
- Whisk: Ensures smooth blending, especially for pourable ganache.
- Digital scale: Ganache ratios are simple, but precision creates the silkiest texture.
- Fine mesh strainer (optional): Helpful for removing tiny bits of unmelted chocolate or flecks of spices.
For convenience, you can find affordable, durable versions of these tools online—like this silicone spatula set or a sturdy heatproof glass bowl. Once you have the basics, making flawless ganache becomes almost effortless.
How to Make Perfect Ganache (3 Ways)
Ganache is nothing more than chocolate and cream, but the technique determines whether it turns out silky and glossy—or grainy and dull. These three methods show you exactly how to make perfect ganache (3 ways), no matter what texture you’re after: pourable glaze, whipped frosting, or thick truffle-style filling.
Method 1 — Classic Pourable Ganache (1:1 Ratio)
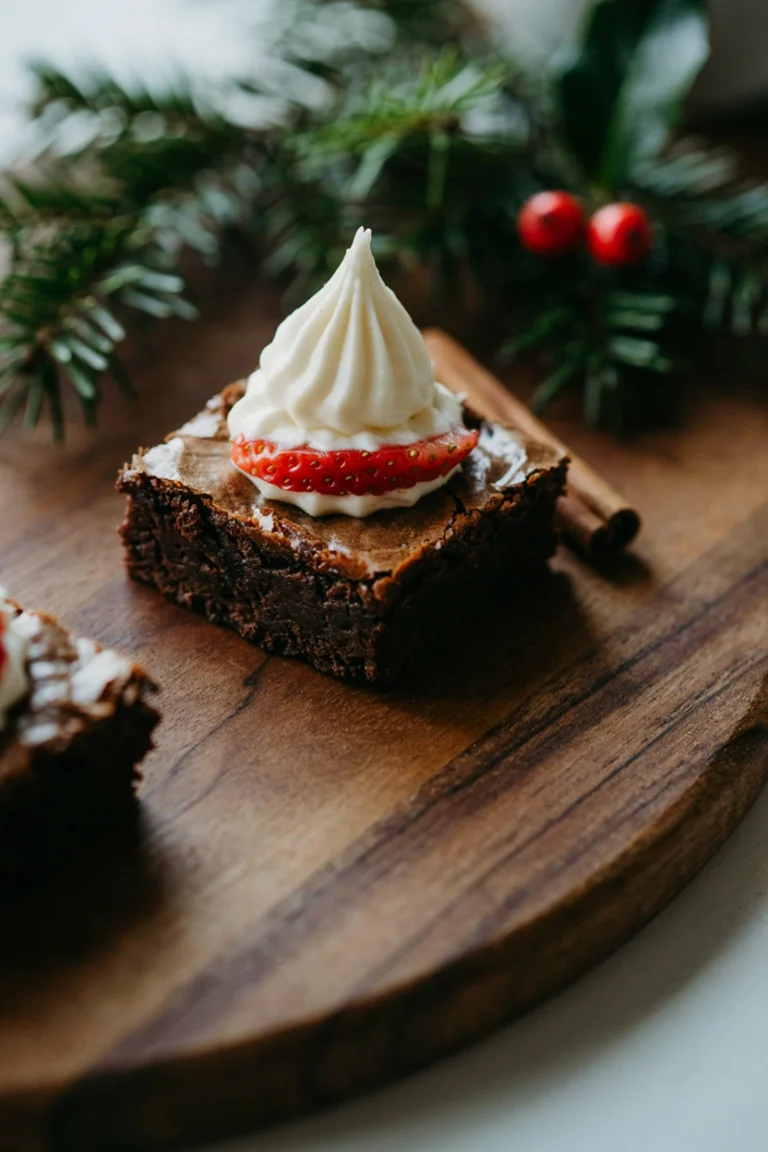
This is the iconic shiny ganache you see dripping dramatically down cakes and bars. It’s smooth, velvety, and perfect for glazing everything from brownies to chilled desserts like your no-bake cheesecake.
- Finely chop the chocolate and place it in a heatproof bowl.
- Warm the cream until steaming—not boiling.
- Pour the cream over the chocolate and let it sit for 2 minutes.
- Stir gently from the center outward until glossy and smooth.
- Adjust: add more cream to thin, or more chocolate to thicken.
This method is the foundation of understanding how to make perfect ganache (3 ways). Master it once, and every variation becomes easy.
Method 2 — Whipped Ganache
Whipped ganache is like chocolate mousse: airy, fluffy, and ideal for frosting cakes, filling sandwich cookies, or piping onto cupcakes. It starts exactly like classic ganache, but with an extra step.
- Prepare a batch of classic 1:1 ganache.
- Chill until thickened but still scoopable (about 45–60 minutes).
- Whip with a mixer on medium speed until light and fluffy.
- Use immediately—whipped ganache firms quickly.
Be careful not to overwhip; too much air can make the texture grainy instead of silky.
Method 3 — Thick Ganache (Truffle-Style, 2:1 Ratio)
This ultra-thick ganache sets into a firm, scoopable mixture perfect for truffles, decadent cake fillings, or rolling into chocolate centers. It uses twice as much chocolate as cream for a rich, dense texture.
- Combine chopped chocolate with warm cream at a 2:1 ratio.
- Let it sit 2 minutes, then stir until smooth.
- Chill completely until firm.
- Scoop for truffles, pipe into pastries, or use as a thick layer in cakes or bars.
This version is especially good paired with a lighter dessert like cheesecake, drawing contrast between dense chocolate and creamy filling. Try spooning it over your no-bake cheesecake for an instant upgrade.
How to Fix Common Ganache Problems

Even with the right ratios, ganache can be a little moody. Temperature, chocolate type, and timing all affect the texture—but every problem has an easy fix. These quick solutions will help you rescue any batch and master how to make perfect ganache (3 ways) with confidence.
- Ganache is too thin: Add more melted chocolate and stir gently. A little extra goes a long way in thickening the texture.
- Ganache is too thick: Warm a splash of cream and whisk it in slowly until you reach the consistency you want.
- Ganache split (looks oily or separated): Add 1–2 tablespoons of warm milk or cream and whisk from the center outward until it emulsifies again.
- Ganache looks grainy: It likely overheated. Warm the mixture over a double boiler and stir until smooth, or strain it through a fine mesh sieve.
- Chocolate pieces didn’t melt fully: Gently reheat the bowl over simmering water and stir until everything is melted and silky.
- Ganache turned dull: It cooled too quickly. Warm it briefly and stir until the shine returns.
Most issues come down to temperature—keep the heat gentle and the stirring slow, and your ganache will behave beautifully every time.
Flavor Variations You Need to Try
Once you’ve learned how to make perfect ganache (3 ways), you can play with flavors in endless directions. A few simple add-ins transform classic chocolate ganache into something seasonal, sophisticated, or bold—without changing the technique.
Salted Caramel Ganache
Stir warm caramel sauce into classic ganache for a deeper, buttery sweetness. A pinch of flaky sea salt makes every bite feel more luxurious.
Espresso Dark Chocolate Ganache
A spoonful of espresso powder intensifies the chocolate flavor and adds a grown-up twist. Perfect for frosting cakes or drizzling over brownies.
White Chocolate Raspberry Ganache
Fold raspberry purée into white chocolate ganache for a pale pink, berry-bright finish. It pairs beautifully with cheesecake or vanilla cakes.
Mint Chocolate Ganache
Add a drop or two of peppermint extract to classic ganache for a cool, refreshing finish. This one is gorgeous on holiday desserts or chocolate cupcakes.
Hazelnut Chocolate Ganache
Stir in a tablespoon of hazelnut liqueur or hazelnut paste for a Nutella-inspired twist. Ideal for spreading between cake layers or topping pastries.
For even more ideas, browse your chocolate desserts and fudge recipes—many of those flavor combinations can be turned straight into ganache.
How to Use Ganache

With just two ingredients and a little technique, you suddenly have a topping, filling, frosting, drizzle, dip, and glaze—ganache does it all. Once you know how to make perfect ganache (3 ways), you can take almost any dessert you love and make it richer, glossier, and far more impressive.
- Pour over brownies: A warm drizzle of pourable ganache turns simple bars into bakery-style desserts.
- Top cheesecakes: A glossy layer of dark chocolate ganache is stunning over your no-bake cheesecake.
- Fill layer cakes: Thick ganache creates a rich, truffle-like center between cake layers.
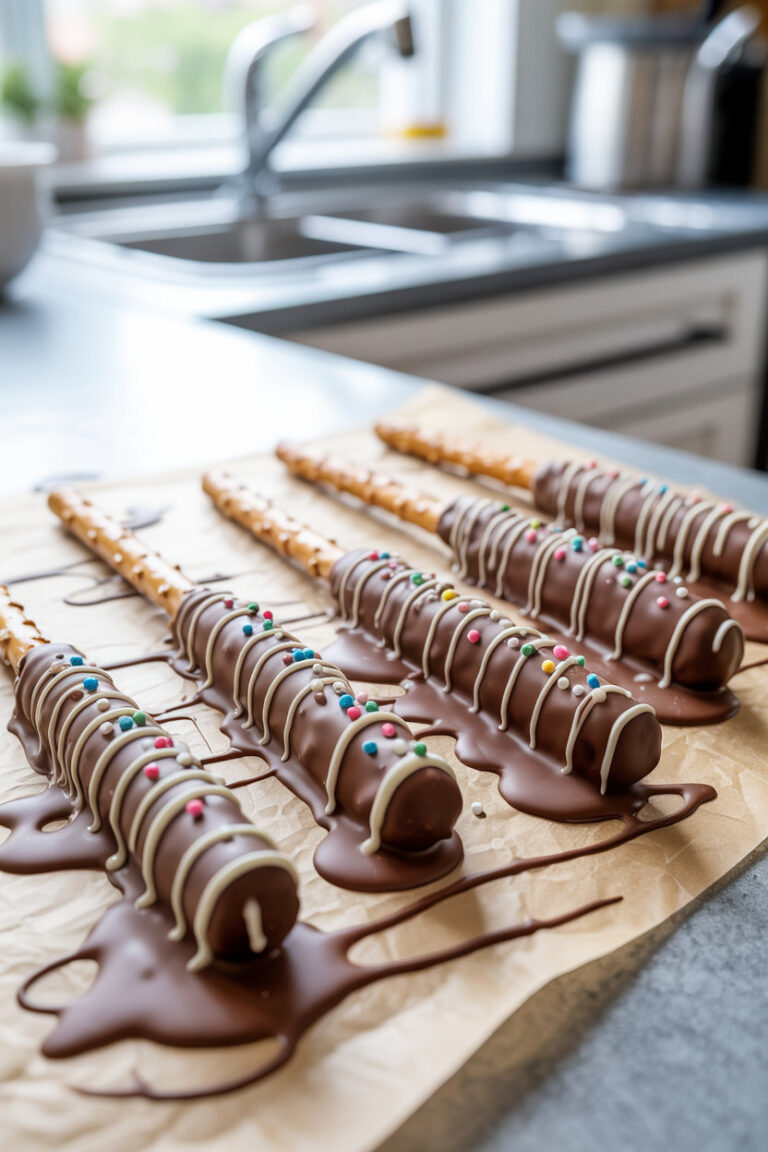
- Dip doughnuts: Warm ganache makes a beautifully smooth chocolate glaze.
- Coat truffles: Use thick ganache as the base or dip chilled centers into pourable ganache for a shiny finish.
- Spread on cookies: A thin layer of whipped ganache turns simple cookies into indulgent sandwiches.
- Glaze pound cakes: A pourable coat adds shine and richness without overpowering the cake.
- Drizzle onto ice cream: Ganache thickens into a soft-shell topping over cold scoops.
- Fill chocolate tarts: Thick ganache makes a flawless, sliceable tart filling.
If you need more dessert inspiration, your dessert bars and holiday desserts offer dozens of ideas that pair beautifully with chocolate.
Storage & Make-Ahead Tips
Ganache stores beautifully, which is part of why it’s such a powerful baking tool. Once you know how to make perfect ganache (3 ways), it becomes easy to prep ahead, chill, freeze, and reuse without losing that silky texture.
- Store in the refrigerator: Keep ganache in an airtight container for up to 1 week. It will firm as it chills—simply warm it gently before using.
- Freeze for long-term storage: Ganache freezes up to 3 months. Freeze flat in a container or silicone bag for easy thawing.
- Thaw slowly in the fridge: Sudden temperature shocks can cause splitting, so avoid countertop thawing.
- Reheat with caution: Warm in 5–10 second intervals in the microwave or over a double boiler. Overheating is the fastest way to split it.
- Whipped ganache needs immediate use: Once whipped, ganache sets quickly—frost your cakes or pipe it right away.
- For pourable ganache: Add a splash of warm cream if it thickens too much in storage.
Handled gently, ganache keeps its smooth shine and rich flavor for days, making it one of the easiest make-ahead components in dessert prep.
Frequently Asked Questions

These answers cover the most common issues bakers run into when learning how to make perfect ganache (3 ways). Keep them handy as you experiment with different chocolate types and ratios.
What ratio should I use for ganache?
For classic pourable ganache, use a 1:1 ratio of chocolate to cream. Whipped ganache also starts at 1:1, while thick, truffle-style ganache uses a 2:1 chocolate-to-cream ratio. White chocolate requires slightly less cream because it contains more fat and sugar.
Can I use milk instead of cream?
Milk won’t emulsify the same way and almost always leads to splitting. Heavy cream is essential because its fat content binds with melted chocolate to create that silky, stable texture ganache is known for.
Why did my ganache split?
Splitting usually happens when the cream is too hot or the chocolate overheats. To fix it, add 1–2 tablespoons of warm milk or cream and whisk gently from the center outward until it comes back together.
How do I make my ganache shiny?
Shine comes from a proper emulsion and slow, gentle stirring. Adding a tablespoon of butter to hot ganache can enhance gloss, but it’s not required. Cooling it at room temperature before refrigerating also helps maintain sheen.
Can I use chocolate chips?
You can, but chocolate chips contain stabilizers that prevent smooth melting. They work better for whipped ganache than pourable ganache. For the silkiest results, use chopped chocolate bars or high-quality wafers.
How do I fix grainy ganache?
Graininess usually means overheated chocolate. Reheat gently over a double boiler and stir until smooth, or strain through a fine mesh sieve to remove unmelted bits.
Can ganache sit at room temperature?
Yes, pourable ganache can sit at room temperature for several hours, especially when used as a glaze. For long-term storage, refrigerate it. Whipped ganache should always be kept chilled once prepared.
Can I make ganache in the microwave?
Yes—combine chocolate and cream in a microwave-safe bowl and heat in 10-second intervals, stirring each time until smooth. Be careful not to overheat, as microwaves can cause fast splitting if the chocolate gets too hot.
What’s the best chocolate for ganache?
High-quality chocolate bars between 55–70% cocoa will give you the smoothest texture and richest flavor. Avoid low-quality chips or baking squares, which contain stabilizers and often melt unevenly.
Once you understand how to make perfect ganache (3 ways), you unlock one of the most versatile tools in the dessert world. A single batch can become a glossy glaze, an airy whipped frosting, or a rich truffle filling—all depending on the ratio and how you treat the chocolate. It’s simple, impressive, and endlessly customizable, whether you’re dressing up brownies, layering cakes, or pouring a gorgeous dark chocolate finish over your no-bake cheesecake.
Save this guide so you always have the ratios, textures, and troubleshooting steps at your fingertips. Ganache is one of those techniques you’ll reach for again and again—pin it now and make every dessert a little more stunning.


3 Comments